👀 Turn any prompt into captivating visuals in seconds with our AI-powered design generator ✨ Try Piktochart AI!

18 Types of Diagrams You Can Use to Visualize Data (Templates Included)

Have you ever found yourself stuck while trying to explain a complex concept to someone? Or struggling to put your idea into words?
This is where diagrams come in.
While simple text is best for highlighting figures or information, diagrams are handy for conveying complex ideas and loads of information without overwhelming your audience. They can visualize almost anything, from numerical data to qualitative relationships, making them versatile tools in numerous fields.
Whether you’re in the academe or enterprise setting, this guide is for you. We’ll explore the different types of diagrams with a brief explanation for each type, the best time to use a diagram type, and how you can use them to be a better visual storyteller and communicator. You’ll also find examples and templates for each type of diagram.
Let’s get on with it.
You can also follow along by creating a free account . Select a template to get started.
What exactly is a diagram?
A diagram is a visual snapshot of information. Think of diagrams as visual representations of data or information that communicate a concept, idea, or process in a simplified and easily understandable way. You can also use them to illustrate relationships, hierarchies, cycles, or workflows.
Diagrams aren’t just used to show quantitative data, such as sales earnings or satisfaction ratings with a diagram. They’re equally helpful if you want to share qualitative data. For example, a diagram could be used to illustrate the life cycle of a butterfly, showcasing each transformation stage.

Now, let’s jump into the various types of diagrams, ranging from simple flow charts to the more complex Unified Modeling Language (UML) diagrams.
18 diagram types and when to use each type
Whether you’re doing data analysis or need a simple visual representation of data, there is a wide array of diagrams at your fingertips. If you’re having a hard time choosing the right diagram for your data visualization needs, use the list below as a quick guide.
1. Flowchart
A flowchart is a type of diagram that acts as a roadmap for a process or workflow. It uses shapes and arrows to guide you through each step, making complex procedures simple to understand.
Flowcharts are best for : Simplifying complex processes into understandable stages, making it easier for your readers to follow along and see the ‘big picture”.

2. Line graph
Line graphs , sometimes called line charts, visualizes numerical data points connected by straight lines. In a line graph or line chart, data points representing different time periods are plotted and connected by a line. This helps with easy visualization of trends and patterns.
Line graphs are best for: Representing the change of one or more quantities over time, making them excellent for tracking the progression of data points.

3. Bar chart
A bar chart , often interchangeable with bar graphs, is a type of diagram used primarily to display and compare data. For this diagram type, rectangular bars of varying lengths represent data of different categories or groups. Each bar represents a category, and the length or height of the bar corresponds to the numeric data or quantity.
Variations of bar charts include stacked bar charts, grouped bar charts, and horizontal bar charts.
Bar charts are best for : Comparing the frequency, count, or other measures (such as average) for different categories or groups. A bar chart is particularly useful if you want to display data sets that can be grouped into categories.

4. Circle diagram or pie chart
A pie chart is a circular diagram that represents data in slices. Each slice of the pie chart represents a different category and its proportion to the whole.
Pie charts are best for: Displaying categorical data where you want to highlight each category’s percentage of the total.

5.Venn diagrams
A Venn diagram compares the differences and similarities of groups of things. As a diagram based on overlapping circles, each circle in a Venn diagram represents a different set, and their overlap represents the intersection of the data sets.
Venn diagrams are best for : Visualizing the relationships between different groups of things. They are helpful when you want to show areas of overlap between elements. A good example is if you want to compare the features of different products or two overlapping concepts, like in the Ikigai Venn diagram template below. Easily create your Venn diagram with Piktochart’s online Venn diagram maker .

6. Tree diagrams
A tree diagram is a diagram that starts with one central idea and expands with branching lines to show multiple paths, all possible outcomes, decisions, or steps. Each ‘branch’ represents a possible outcome or decision in a tree diagram, moving from left to right. Tree diagrams are best for : Representing hierarchy like organizational roles, evolutionary relationships, or possible outcomes of events like when a company launches a product.

7. Organizational chart
Organizational charts are diagrams used to display the structure of an organization. In an organizational chart, each box or node represents a different role or department, and lines connecting the boxes illustrate the lines of authority, communication, and responsibility. The chart typically starts with the highest-ranking individual or body (like a CEO or Board of Directors) at the top and branches downwards to various levels of management and individual employees.
Organizational charts are best for : Showing relationships between different members and departments in a company or organization.

8. Gantt charts
Gantt charts are typically used in project management to represent the timeline of a project. They consist of horizontal bars, with each bar representing a task or activity.
For this type of diagram, each chart is represented by a horizontal bar spanning from its start date to its end date. The length of the bar corresponds to the duration of the task. Tasks are listed vertically, often in the order they need to be completed. In some projects, tasks are grouped under larger, overarching activities or phases.
Gantt charts are best for : Projects where you need to manage multiple tasks that occur over time, often in a specific sequence, and may depend on each other.

9. Unified Modeling Language (UML) diagram
Software engineers use Unified Modeling Language (UML) diagrams to create standardized diagrams that illustrate the building blocks of a software system.
UML diagrams, such as class diagrams, sequence diagrams, and state diagrams, provide different perspectives on complex systems. Class diagrams depict a system’s static structure, displaying classes, attributes, and relationships. Meanwhile, sequence diagrams illustrate interactions and communication between system entities, providing insight into system functionality.
UML diagrams are best for : Visualizing a software system’s architecture in software engineering.

10. SWOT analysis diagrams
A SWOT analysis diagram is used in business strategy for evaluating internal and external factors affecting the organization. The acronym stands for Strengths, Weaknesses, Opportunities, and Threats. Each category is represented in a quadrant chart, providing a comprehensive view of the business landscape.
SWOT diagrams are best for : Strategic planning and decision-making. They represent data that can help identify areas of competitive advantage and inform strategy development.
Piktochart offers professionally-designed templates to create diagrams , reports , presentations , brochures , and more. Sign up for a free account today to create impressive visuals within minutes.
11. Fishbone diagram
Fishbone diagrams, sometimes called cause-and-effect diagrams, are used to represent the causes of a problem. They consist of a central idea, with different diagrams or branches representing the factors contributing to the problem.
Fishbone diagrams are best for : Brainstorming and problem-solving sessions.

12. Funnel chart
A funnel chart is a type of diagram used to represent stages or progress. In a funnel chart, each stage is represented by a horizontal bar, and the length of the bar corresponds to the quantity or value at that stage. The chart is widest at the top, where the quantity or value is greatest, and narrows down to represent the decrease at each subsequent stage.
Funnel charts are best for: Visual representation of the sales pipeline or data visualization of how a broad market is narrowed down into potential leads and a select group of customers.

13. SIPOC diagrams
A SIPOC diagram is used in process improvement to represent the different components of a process. The acronym stands for Suppliers, Inputs, Process, Outputs, and Customers.
SIPOC diagrams are best for: Providing a high-level view of a process which helps visualize the sequence of events and their interconnections.

14. Swimlane diagrams
Swimlane diagrams are best for mapping out complex processes that involve multiple participants or groups.
Keep in mind that each lane (which can be either horizontal or vertical) in a swimlane diagram represents a different participant or group involved in the process. The steps or activities carried out by each participant are plotted within their respective lanes. This helps clarify roles and responsibilities as well as the sequence of events and points of interaction.
Swimlane diagrams are best for : Visualizing how different roles or departments interact and collaborate throughout a workflow or process.

15. Mind maps
A mind map starts with a central idea and expands outward to include supporting ideas, related subtopics, concepts, or tasks, which can be further subdivided as needed. The branches radiating out from the central idea represent hierarchical relationships and connections between the different pieces of information in a mind map.
Mind maps are best for : Brainstorming, taking notes, organizing information, and visualizing complex concepts in a digestible format.

16. Scatter Plots
Scatter plots are used to compare data and represent the relationship between two variables. In a scatter plot, each dot represents a data point with its position along the x and y axes representing the values of two variables.
Scatter plots are best for : Observing relationships and trends between the two variables. These scatter plots are useful for regression analysis, hypothesis testing, and data exploration in various fields such as statistics, economics, and natural sciences.

17. PERT chart
PERT (Project Evaluation Review Technique) charts are project management tools used to schedule tasks. Each node or arrow represents each task, while lines represent dependencies between tasks. The chart includes task duration and earliest/latest start/end times.
Construction project managers often use PERT charts to schedule tasks like design, site prep, construction, and inspection. Identifying the critical path helps focus resources on tasks that impact the project timeline.
PERT charts are best for : Visualizing the sequence of tasks, the time required for each task, and project timelines.

18. Network diagrams
A network diagram visually represents the relationships between elements in a system or project. In network diagrams, each node represents an element, such as a device in a computer network or a task in a project. The lines or arrows connecting the nodes represent the relationships or interactions between these elements.
Network diagrams are best for: Visually representing the relationships or connections between different elements in a system or a project. They are often used in telecommunications, computer networking, project management, and organization planning.

Choosing the right diagram starts with a good understanding of your audience
Understanding your audience’s needs, expectations, and context is necessary before designing diagrams. The best diagram is not the one that looks the most impressive but the one that communicates complex information most clearly and effectively to your intended audience.
Make professional diagrams for free with no design experience with Piktochart’s online diagram maker . Sign up for free .

Other Posts

21 Flowchart Templates for Word, PowerPoint, and Google Slides

12 Graphic Organizer Examples for Teachers and Students
- Reviews / Why join our community?
- For companies
- Frequently asked questions
Visual Representation
What is visual representation.
Visual Representation refers to the principles by which markings on a surface are made and interpreted. Designers use representations like typography and illustrations to communicate information, emotions and concepts. Color, imagery, typography and layout are crucial in this communication.
Alan Blackwell, cognition scientist and professor, gives a brief introduction to visual representation:
- Transcript loading…
We can see visual representation throughout human history, from cave drawings to data visualization :
Art uses visual representation to express emotions and abstract ideas.
Financial forecasting graphs condense data and research into a more straightforward format.
Icons on user interfaces (UI) represent different actions users can take.
The color of a notification indicates its nature and meaning.

Van Gogh's "The Starry Night" uses visuals to evoke deep emotions, representing an abstract, dreamy night sky. It exemplifies how art can communicate complex feelings and ideas.
© Public domain
Importance of Visual Representation in Design
Designers use visual representation for internal and external use throughout the design process . For example:
Storyboards are illustrations that outline users’ actions and where they perform them.
Sitemaps are diagrams that show the hierarchy and navigation structure of a website.
Wireframes are sketches that bring together elements of a user interface's structure.
Usability reports use graphs and charts to communicate data gathered from usability testing.
User interfaces visually represent information contained in applications and computerized devices.

This usability report is straightforward to understand. Yet, the data behind the visualizations could come from thousands of answered surveys.
© Interaction Design Foundation, CC BY-SA 4.0
Visual representation simplifies complex ideas and data and makes them easy to understand. Without these visual aids, designers would struggle to communicate their ideas, findings and products . For example, it would be easier to create a mockup of an e-commerce website interface than to describe it with words.

Visual representation simplifies the communication of designs. Without mockups, it would be difficult for developers to reproduce designs using words alone.
Types of Visual Representation
Below are some of the most common forms of visual representation designers use.
Text and Typography
Text represents language and ideas through written characters and symbols. Readers visually perceive and interpret these characters. Typography turns text into a visual form, influencing its perception and interpretation.
We have developed the conventions of typography over centuries , for example, in documents, newspapers and magazines. These conventions include:
Text arranged on a grid brings clarity and structure. Gridded text makes complex information easier to navigate and understand. Tables, columns and other formats help organize content logically and enhance readability.
Contrasting text sizes create a visual hierarchy and draw attention to critical areas. For example, headings use larger text while body copy uses smaller text. This contrast helps readers distinguish between primary and secondary information.
Adequate spacing and paragraphing improve the readability and appearance of the text. These conventions prevent the content from appearing cluttered. Spacing and paragraphing make it easier for the eye to follow and for the brain to process the information.
Balanced image-to-text ratios create engaging layouts. Images break the monotony of text, provide visual relief and illustrate or emphasize points made in the text. A well-planned ratio ensures neither text nor images overwhelm each other. Effective ratios make designs more effective and appealing.
Designers use these conventions because people are familiar with them and better understand text presented in this manner.

This table of funerals from the plague in London in 1665 uses typographic conventions still used today. For example, the author arranged the information in a table and used contrasting text styling to highlight information in the header.
Illustrations and Drawings
Designers use illustrations and drawings independently or alongside text. An example of illustration used to communicate information is the assembly instructions created by furniture retailer IKEA. If IKEA used text instead of illustrations in their instructions, people would find it harder to assemble the furniture.

IKEA assembly instructions use illustrations to inform customers how to build their furniture. The only text used is numeric to denote step and part numbers. IKEA communicates this information visually to: 1. Enable simple communication, 2. Ensure their instructions are easy to follow, regardless of the customer’s language.
© IKEA, Fair use
Illustrations and drawings can often convey the core message of a visual representation more effectively than a photograph. They focus on the core message , while a photograph might distract a viewer with additional details (such as who this person is, where they are from, etc.)
For example, in IKEA’s case, photographing a person building a piece of furniture might be complicated. Further, photographs may not be easy to understand in a black-and-white print, leading to higher printing costs. To be useful, the pictures would also need to be larger and would occupy more space on a printed manual, further adding to the costs.
But imagine a girl winking—this is something we can easily photograph.
Ivan Sutherland, creator of the first graphical user interface, used his computer program Sketchpad to draw a winking girl. While not realistic, Sutherland's representation effectively portrays a winking girl. The drawing's abstract, generic elements contrast with the distinct winking eye. The graphical conventions of lines and shapes represent the eyes and mouth. The simplicity of the drawing does not draw attention away from the winking.

A photo might distract from the focused message compared to Sutherland's representation. In the photo, the other aspects of the image (i.e., the particular person) distract the viewer from this message.
© Ivan Sutherland, CC BY-SA 3.0 and Amina Filkins, Pexels License
Information and Data Visualization
Designers and other stakeholders use data and information visualization across many industries.
Data visualization uses charts and graphs to show raw data in a graphic form. Information visualization goes further, including more context and complex data sets. Information visualization often uses interactive elements to share a deeper understanding.
For example, most computerized devices have a battery level indicator. This is a type of data visualization. IV takes this further by allowing you to click on the battery indicator for further insights. These insights may include the apps that use the most battery and the last time you charged your device.

macOS displays a battery icon in the menu bar that visualizes your device’s battery level. This is an example of data visualization. Meanwhile, macOS’s settings tell you battery level over time, screen-on-usage and when you last charged your device. These insights are actionable; users may notice their battery drains at a specific time. This is an example of information visualization.
© Low Battery by Jemis Mali, CC BY-NC-ND 4.0, and Apple, Fair use
Information visualization is not exclusive to numeric data. It encompasses representations like diagrams and maps. For example, Google Maps collates various types of data and information into one interface:
Data Representation: Google Maps transforms complex geographical data into an easily understandable and navigable visual map.
Interactivity: Users can interactively customize views that show traffic, satellite imagery and more in real-time.
Layered Information: Google Maps layers multiple data types (e.g., traffic, weather) over geographical maps for comprehensive visualization.
User-Centered Design : The interface is intuitive and user-friendly, with symbols and colors for straightforward data interpretation.

The volume of data contained in one screenshot of Google Maps is massive. However, this information is presented clearly to the user. Google Maps highlights different terrains with colors and local places and businesses with icons and colors. The panel on the left lists the selected location’s profile, which includes an image, rating and contact information.
© Google, Fair use
Symbolic Correspondence
Symbolic correspondence uses universally recognized symbols and signs to convey specific meanings . This method employs widely recognized visual cues for immediate understanding. Symbolic correspondence removes the need for textual explanation.
For instance, a magnifying glass icon in UI design signifies the search function. Similarly, in environmental design, symbols for restrooms, parking and amenities guide visitors effectively.

The Interaction Design Foundation (IxDF) website uses the universal magnifying glass symbol to signify the search function. Similarly, the play icon draws attention to a link to watch a video.
How Designers Create Visual Representations
Visual language.
Designers use elements like color , shape and texture to create a communicative visual experience. Designers use these 8 principles:
Size – Larger elements tend to capture users' attention readily.
Color – Users are typically drawn to bright colors over muted shades.
Contrast – Colors with stark contrasts catch the eye more effectively.
Alignment – Unaligned elements are more noticeable than those aligned ones.
Repetition – Similar styles repeated imply a relationship in content.
Proximity – Elements placed near each other appear to be connected.
Whitespace – Elements surrounded by ample space attract the eye.
Texture and Style – Users often notice richer textures before flat designs.
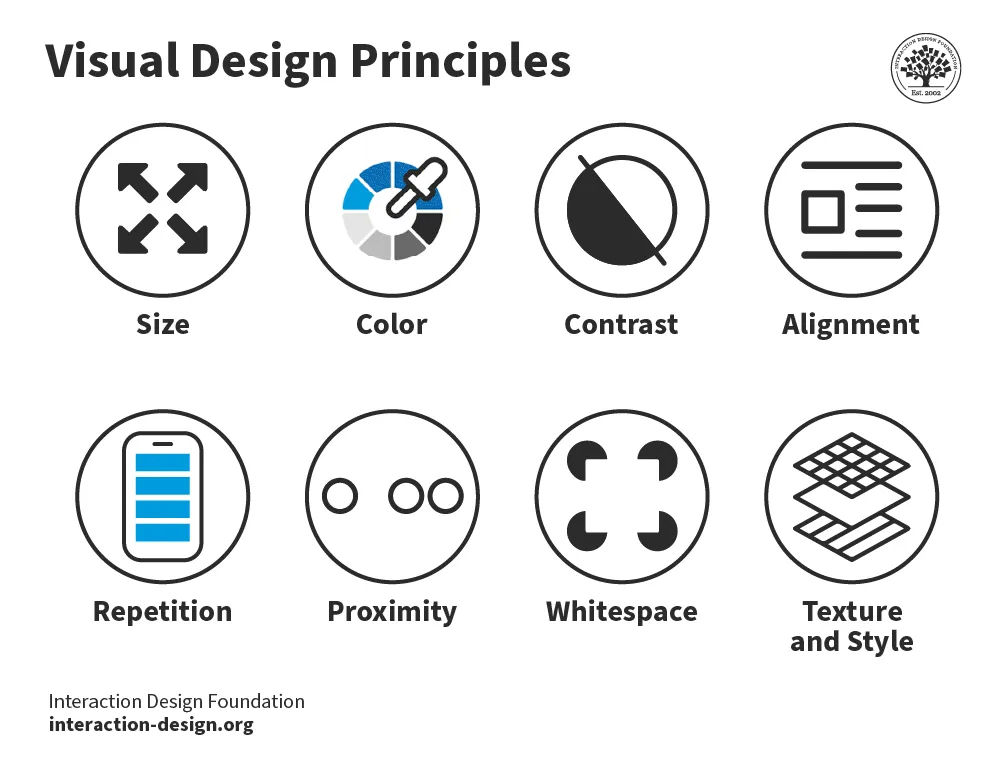
The 8 visual design principles.
In web design , visual hierarchy uses color and repetition to direct the user's attention. Color choice is crucial as it creates contrast between different elements. Repetition helps to organize the design—it uses recurring elements to establish consistency and familiarity.
In this video, Alan Dix, Professor and Expert in Human-Computer Interaction, explains how visual alignment affects how we read and absorb information:
Correspondence Techniques
Designers use correspondence techniques to align visual elements with their conceptual meanings. These techniques include color coding, spatial arrangement and specific imagery. In information visualization, different colors can represent various data sets. This correspondence aids users in quickly identifying trends and relationships .

Color coding enables the stakeholder to see the relationship and trend between the two pie charts easily.
In user interface design, correspondence techniques link elements with meaning. An example is color-coding notifications to state their nature. For instance, red for warnings and green for confirmation. These techniques are informative and intuitive and enhance the user experience.

The IxDF website uses blue for call-to-actions (CTAs) and red for warnings. These colors inform the user of the nature of the action of buttons and other interactive elements.
Perception and Interpretation
If visual language is how designers create representations, then visual perception and interpretation are how users receive those representations. Consider a painting—the viewer’s eyes take in colors, shapes and lines, and the brain perceives these visual elements as a painting.
In this video, Alan Dix explains how the interplay of sensation, perception and culture is crucial to understanding visual experiences in design:
Copyright holder: Michael Murphy _ Appearance time: 07:19 - 07:37 _ Link: https://www.youtube.com/watch?v=C67JuZnBBDc
Visual perception principles are essential for creating compelling, engaging visual representations. For example, Gestalt principles explain how we perceive visual information. These rules describe how we group similar items, spot patterns and simplify complex images. Designers apply Gestalt principles to arrange content on websites and other interfaces. This application creates visually appealing and easily understood designs.
In this video, design expert and teacher Mia Cinelli discusses the significance of Gestalt principles in visual design . She introduces fundamental principles, like figure/ground relationships, similarity and proximity.
Interpretation
Everyone's experiences, culture and physical abilities dictate how they interpret visual representations. For this reason, designers carefully consider how users interpret their visual representations. They employ user research and testing to ensure their designs are attractive and functional.

Leonardo da Vinci's "Mona Lisa", is one of the most famous paintings in the world. The piece is renowned for its subject's enigmatic expression. Some interpret her smile as content and serene, while others see it as sad or mischievous. Not everyone interprets this visual representation in the same way.
Color is an excellent example of how one person, compared to another, may interpret a visual element. Take the color red:
In Chinese culture, red symbolizes luck, while in some parts of Africa, it can mean death or illness.
A personal experience may mean a user has a negative or positive connotation with red.
People with protanopia and deuteranopia color blindness cannot distinguish between red and green.
In this video, Joann and Arielle Eckstut, leading color consultants and authors, explain how many factors influence how we perceive and interpret color:
Learn More about Visual Representation
Read Alan Blackwell’s chapter on visual representation from The Encyclopedia of Human-Computer Interaction.
Learn about the F-Shaped Pattern For Reading Web Content from Jakob Nielsen.
Read Smashing Magazine’s article, Visual Design Language: The Building Blocks Of Design .
Take the IxDF’s course, Perception and Memory in HCI and UX .
Questions related to Visual Representation
Some highly cited research on visual representation and related topics includes:
Roland, P. E., & Gulyás, B. (1994). Visual imagery and visual representation. Trends in Neurosciences, 17(7), 281-287. Roland and Gulyás' study explores how the brain creates visual imagination. They look at whether imagining things like objects and scenes uses the same parts of the brain as seeing them does. Their research shows the brain uses certain areas specifically for imagination. These areas are different from the areas used for seeing. This research is essential for understanding how our brain works with vision.
Lurie, N. H., & Mason, C. H. (2007). Visual Representation: Implications for Decision Making. Journal of Marketing, 71(1), 160-177.
This article looks at how visualization tools help in understanding complicated marketing data. It discusses how these tools affect decision-making in marketing. The article gives a detailed method to assess the impact of visuals on the study and combination of vast quantities of marketing data. It explores the benefits and possible biases visuals can bring to marketing choices. These factors make the article an essential resource for researchers and marketing experts. The article suggests using visual tools and detailed analysis together for the best results.
Lohse, G. L., Biolsi, K., Walker, N., & Rueter, H. H. (1994, December). A classification of visual representations. Communications of the ACM, 37(12), 36+.
This publication looks at how visuals help communicate and make information easier to understand. It divides these visuals into six types: graphs, tables, maps, diagrams, networks and icons. The article also looks at different ways these visuals share information effectively.
If you’d like to cite content from the IxDF website , click the ‘cite this article’ button near the top of your screen.
Some recommended books on visual representation and related topics include:
Chaplin, E. (1994). Sociology and Visual Representation (1st ed.) . Routledge.
Chaplin's book describes how visual art analysis has changed from ancient times to today. It shows how photography, post-modernism and feminism have changed how we see art. The book combines words and images in its analysis and looks into real-life social sciences studies.
Mitchell, W. J. T. (1994). Picture Theory. The University of Chicago Press.
Mitchell's book explores the important role and meaning of pictures in the late twentieth century. It discusses the change from focusing on language to focusing on images in cultural studies. The book deeply examines the interaction between images and text in different cultural forms like literature, art and media. This detailed study of how we see and read visual representations has become an essential reference for scholars and professionals.
Koffka, K. (1935). Principles of Gestalt Psychology. Harcourt, Brace & World.
"Principles of Gestalt Psychology" by Koffka, released in 1935, is a critical book in its field. It's known as a foundational work in Gestalt psychology, laying out the basic ideas of the theory and how they apply to how we see and think. Koffka's thorough study of Gestalt psychology's principles has profoundly influenced how we understand human perception. This book has been a significant reference in later research and writings.
A visual representation, like an infographic or chart, uses visual elements to show information or data. These types of visuals make complicated information easier to understand and more user-friendly.
Designers harness visual representations in design and communication. Infographics and charts, for instance, distill data for easier audience comprehension and retention.
For an introduction to designing basic information visualizations, take our course, Information Visualization .
Text is a crucial design and communication element, transforming language visually. Designers use font style, size, color and layout to convey emotions and messages effectively.
Designers utilize text for both literal communication and aesthetic enhancement. Their typography choices significantly impact design aesthetics, user experience and readability.
Designers should always consider text's visual impact in their designs. This consideration includes font choice, placement, color and interaction with other design elements.
In this video, design expert and teacher Mia Cinelli teaches how Gestalt principles apply to typography:
Designers use visual elements in projects to convey information, ideas, and messages. Designers use images, colors, shapes and typography for impactful designs.
In UI/UX design, visual representation is vital. Icons, buttons and colors provide contrast for intuitive, user-friendly website and app interfaces.
Graphic design leverages visual representation to create attention-grabbing marketing materials. Careful color, imagery and layout choices create an emotional connection.
Product design relies on visual representation for prototyping and idea presentation. Designers and stakeholders use visual representations to envision functional, aesthetically pleasing products.
Our brains process visuals 60,000 times faster than text. This fact highlights the crucial role of visual representation in design.
Our course, Visual Design: The Ultimate Guide , teaches you how to use visual design elements and principles in your work effectively.
Visual representation, crucial in UX, facilitates interaction, comprehension and emotion. It combines elements like images and typography for better interfaces.
Effective visuals guide users, highlight features and improve navigation. Icons and color schemes communicate functions and set interaction tones.
UX design research shows visual elements significantly impact emotions. 90% of brain-transmitted information is visual.
To create functional, accessible visuals, designers use color contrast and consistent iconography. These elements improve readability and inclusivity.
An excellent example of visual representation in UX is Apple's iOS interface. iOS combines a clean, minimalist design with intuitive navigation. As a result, the operating system is both visually appealing and user-friendly.
Michal Malewicz, Creative Director and CEO at Hype4, explains why visual skills are important in design:
Learn more about UI design from Michal in our Master Class, Beyond Interfaces: The UI Design Skills You Need to Know .
The fundamental principles of effective visual representation are:
Clarity : Designers convey messages clearly, avoiding clutter.
Simplicity : Embrace simple designs for ease and recall.
Emphasis : Designers highlight key elements distinctively.
Balance : Balance ensures design stability and structure.
Alignment : Designers enhance coherence through alignment.
Contrast : Use contrast for dynamic, distinct designs.
Repetition : Repeating elements unify and guide designs.
Designers practice these principles in their projects. They also analyze successful designs and seek feedback to improve their skills.
Read our topic description of Gestalt principles to learn more about creating effective visual designs. The Gestalt principles explain how humans group elements, recognize patterns and simplify object perception.
Color theory is vital in design, helping designers craft visually appealing and compelling works. Designers understand color interactions, psychological impacts and symbolism. These elements help designers enhance communication and guide attention.
Designers use complementary , analogous and triadic colors for contrast, harmony and balance. Understanding color temperature also plays a crucial role in design perception.
Color symbolism is crucial, as different colors can represent specific emotions and messages. For instance, blue can symbolize trust and calmness, while red can indicate energy and urgency.
Cultural variations significantly influence color perception and symbolism. Designers consider these differences to ensure their designs resonate with diverse audiences.
For actionable insights, designers should:
Experiment with color schemes for effective messaging.
Assess colors' psychological impact on the audience.
Use color contrast to highlight critical elements.
Ensure color choices are accessible to all.
In this video, Joann and Arielle Eckstut, leading color consultants and authors, give their six tips for choosing color:
Learn more about color from Joann and Arielle in our Master Class, How To Use Color Theory To Enhance Your Designs .
Typography and font choice are crucial in design, impacting readability and mood. Designers utilize them for effective communication and expression.
Designers' perception of information varies with font type. Serif fonts can imply formality, while sans-serifs can give a more modern look.
Typography choices by designers influence readability and user experience. Well-spaced, distinct fonts enhance readability, whereas decorative fonts may hinder it.
Designers use typography to evoke emotions and set a design's tone. Choices in font size, style and color affect the emotional impact and message clarity.
Designers use typography to direct attention, create hierarchy and establish rhythm. These benefits help with brand recognition and consistency across mediums.
Read our article to learn how web fonts are critical to the online user experience .
Designers create a balance between simplicity and complexity in their work. They focus on the main messages and highlight important parts. Designers use the principles of visual hierarchy, like size, color and spacing. They also use empty space to make their designs clear and understandable.
The Gestalt law of Prägnanz suggests people naturally simplify complex images. This principle aids in making even intricate information accessible and engaging.
Through iteration and feedback, designers refine visuals. They remove extraneous elements and highlight vital information. Testing with the target audience ensures the design resonates and is comprehensible.
Michal Malewicz explains how to master hierarchy in UI design using the Gestalt rule of proximity:
Answer a Short Quiz to Earn a Gift
Why do designers use visual representation?
- To guarantee only a specific audience can understand the information
- To replace the need for any form of written communication
- To simplify complex information and make it understandable
Which type of visual representation helps to compare data?
- Article images
- Line charts
- Text paragraphs
What is the main purpose of visual hierarchy in design?
- To decorate the design with more colors
- To guide the viewer’s attention to the most important elements first
- To provide complex text for high-level readers
How does color impact visual representation?
- It has no impact on the design at all.
- It helps to distinguish different elements and set the mood.
- It makes the design less engaging for a serious mood.
Why is consistency important in visual representation?
- It limits creativity, but allows variation in design.
- It makes sure the visual elements are cohesive and easy to understand.
- It makes the design unpredictable yet interesting.
Better luck next time!
Do you want to improve your UX / UI Design skills? Join us now
Congratulations! You did amazing
You earned your gift with a perfect score! Let us send it to you.
Check Your Inbox
We’ve emailed your gift to [email protected] .
Literature on Visual Representation
Here’s the entire UX literature on Visual Representation by the Interaction Design Foundation, collated in one place:
Learn more about Visual Representation
Take a deep dive into Visual Representation with our course Perception and Memory in HCI and UX .
How does all of this fit with interaction design and user experience? The simple answer is that most of our understanding of human experience comes from our own experiences and just being ourselves. That might extend to people like us, but it gives us no real grasp of the whole range of human experience and abilities. By considering more closely how humans perceive and interact with our world, we can gain real insights into what designs will work for a broader audience: those younger or older than us, more or less capable, more or less skilled and so on.
“You can design for all the people some of the time, and some of the people all the time, but you cannot design for all the people all the time.“ – William Hudson (with apologies to Abraham Lincoln)
While “design for all of the people all of the time” is an impossible goal, understanding how the human machine operates is essential to getting ever closer. And of course, building solutions for people with a wide range of abilities, including those with accessibility issues, involves knowing how and why some human faculties fail. As our course tutor, Professor Alan Dix, points out, this is not only a moral duty but, in most countries, also a legal obligation.
Portfolio Project
In the “ Build Your Portfolio: Perception and Memory Project ”, you’ll find a series of practical exercises that will give you first-hand experience in applying what we’ll cover. If you want to complete these optional exercises, you’ll create a series of case studies for your portfolio which you can show your future employer or freelance customers.
This in-depth, video-based course is created with the amazing Alan Dix , the co-author of the internationally best-selling textbook Human-Computer Interaction and a superstar in the field of Human-Computer Interaction . Alan is currently a professor and Director of the Computational Foundry at Swansea University.
Gain an Industry-Recognized UX Course Certificate
Use your industry-recognized Course Certificate on your resume , CV , LinkedIn profile or your website.
All open-source articles on Visual Representation
Data visualization for human perception.

The Key Elements & Principles of Visual Design

- 1.1k shares
Guidelines for Good Visual Information Representations

- 4 years ago
Philosophy of Interaction
Information visualization – an introduction to multivariate analysis.

- 8 years ago
Aesthetic Computing
How to represent linear data visually for information visualization.

- 5 years ago
Open Access—Link to us!
We believe in Open Access and the democratization of knowledge . Unfortunately, world-class educational materials such as this page are normally hidden behind paywalls or in expensive textbooks.
If you want this to change , cite this page , link to us, or join us to help us democratize design knowledge !
Privacy Settings
Our digital services use necessary tracking technologies, including third-party cookies, for security, functionality, and to uphold user rights. Optional cookies offer enhanced features, and analytics.
Experience the full potential of our site that remembers your preferences and supports secure sign-in.
Governs the storage of data necessary for maintaining website security, user authentication, and fraud prevention mechanisms.
Enhanced Functionality
Saves your settings and preferences, like your location, for a more personalized experience.
Referral Program
We use cookies to enable our referral program, giving you and your friends discounts.
Error Reporting
We share user ID with Bugsnag and NewRelic to help us track errors and fix issues.
Optimize your experience by allowing us to monitor site usage. You’ll enjoy a smoother, more personalized journey without compromising your privacy.
Analytics Storage
Collects anonymous data on how you navigate and interact, helping us make informed improvements.
Differentiates real visitors from automated bots, ensuring accurate usage data and improving your website experience.
Lets us tailor your digital ads to match your interests, making them more relevant and useful to you.
Advertising Storage
Stores information for better-targeted advertising, enhancing your online ad experience.
Personalization Storage
Permits storing data to personalize content and ads across Google services based on user behavior, enhancing overall user experience.
Advertising Personalization
Allows for content and ad personalization across Google services based on user behavior. This consent enhances user experiences.
Enables personalizing ads based on user data and interactions, allowing for more relevant advertising experiences across Google services.
Receive more relevant advertisements by sharing your interests and behavior with our trusted advertising partners.
Enables better ad targeting and measurement on Meta platforms, making ads you see more relevant.
Allows for improved ad effectiveness and measurement through Meta’s Conversions API, ensuring privacy-compliant data sharing.
LinkedIn Insights
Tracks conversions, retargeting, and web analytics for LinkedIn ad campaigns, enhancing ad relevance and performance.
LinkedIn CAPI
Enhances LinkedIn advertising through server-side event tracking, offering more accurate measurement and personalization.
Google Ads Tag
Tracks ad performance and user engagement, helping deliver ads that are most useful to you.
Share Knowledge, Get Respect!
or copy link
Cite according to academic standards
Simply copy and paste the text below into your bibliographic reference list, onto your blog, or anywhere else. You can also just hyperlink to this page.
New to UX Design? We’re Giving You a Free ebook!

Download our free ebook The Basics of User Experience Design to learn about core concepts of UX design.
In 9 chapters, we’ll cover: conducting user interviews, design thinking, interaction design, mobile UX design, usability, UX research, and many more!
We use essential cookies to make Venngage work. By clicking “Accept All Cookies”, you agree to the storing of cookies on your device to enhance site navigation, analyze site usage, and assist in our marketing efforts.
Manage Cookies
Cookies and similar technologies collect certain information about how you’re using our website. Some of them are essential, and without them you wouldn’t be able to use Venngage. But others are optional, and you get to choose whether we use them or not.
Strictly Necessary Cookies
These cookies are always on, as they’re essential for making Venngage work, and making it safe. Without these cookies, services you’ve asked for can’t be provided.
Show cookie providers
- Google Login
Functionality Cookies
These cookies help us provide enhanced functionality and personalisation, and remember your settings. They may be set by us or by third party providers.
Performance Cookies
These cookies help us analyze how many people are using Venngage, where they come from and how they're using it. If you opt out of these cookies, we can’t get feedback to make Venngage better for you and all our users.
- Google Analytics
Targeting Cookies
These cookies are set by our advertising partners to track your activity and show you relevant Venngage ads on other sites as you browse the internet.
- Google Tag Manager
- Infographics
- Daily Infographics
- Popular Templates
- Accessibility
- Graphic Design
- Graphs and Charts
- Data Visualization
- Human Resources
- Beginner Guides
Blog Graphic Design Visual Presentation: Tips, Types and Examples
Visual Presentation: Tips, Types and Examples
Written by: Krystle Wong Sep 28, 2023

So, you’re gearing up for that big presentation and you want it to be more than just another snooze-fest with slides. You want it to be engaging, memorable and downright impressive.
Well, you’ve come to the right place — I’ve got some slick tips on how to create a visual presentation that’ll take your presentation game up a notch.
Packed with presentation templates that are easily customizable, keep reading this blog post to learn the secret sauce behind crafting presentations that captivate, inform and remain etched in the memory of your audience.
Click to jump ahead:
What is a visual presentation
15 effective tips to make your visual presentations more engaging, 6 major types of visual presentation you should know , what are some common mistakes to avoid in visual presentations, visual presentation faqs, 5 steps to create a visual presentation with venngage.
A visual presentation is a communication method that utilizes visual elements such as images, graphics, charts, slides and other visual aids to convey information, ideas or messages to an audience.
Visual presentations aim to enhance comprehension engagement and the overall impact of the message through the strategic use of visuals. People remember what they see, making your point last longer in their heads.
Without further ado, let’s jump right into some great visual presentation examples that would do a great job in keeping your audience interested and getting your point across.
In today’s fast-paced world, where information is constantly bombarding our senses, creating engaging visual presentations has never been more crucial. To help you design a presentation that’ll leave a lasting impression, I’ve compiled these examples of visual presentations that will elevate your game.
1. Use the rule of thirds for layout
Ever heard of the rule of thirds? It’s a presentation layout trick that can instantly up your slide game. Imagine dividing your slide into a 3×3 grid and then placing your text and visuals at the intersection points or along the lines. This simple tweak creates a balanced and seriously pleasing layout that’ll draw everyone’s eyes.
2. Get creative with visual metaphors
Got a complex idea to explain? Skip the jargon and use visual metaphors. Throw in images that symbolize your point – for example, using a road map to show your journey towards a goal or using metaphors to represent answer choices or progress indicators in an interactive quiz or poll.
3. Engage with storytelling through data
Use storytelling magic to bring your data to life. Don’t just throw numbers at your audience—explain what they mean, why they matter and add a bit of human touch. Turn those stats into relatable tales and watch your audience’s eyes light up with understanding.

4. Visualize your data with charts and graphs
The right data visualization tools not only make content more appealing but also aid comprehension and retention. Choosing the right visual presentation for your data is all about finding a good match.
For ordinal data, where things have a clear order, consider using ordered bar charts or dot plots. When it comes to nominal data, where categories are on an equal footing, stick with the classics like bar charts, pie charts or simple frequency tables. And for interval-ratio data, where there’s a meaningful order, go for histograms, line graphs, scatterplots or box plots to help your data shine.
In an increasingly visual world, effective visual communication is a valuable skill for conveying messages. Here’s a guide on how to use visual communication to engage your audience while avoiding information overload.

5. Employ the power of contrast
Want your important stuff to pop? That’s where contrast comes in. Mix things up with contrasting colors, fonts or shapes. It’s like highlighting your key points with a neon marker – an instant attention grabber.
6. End with a powerful visual punch
Your presentation closing should be a showstopper. Think a stunning clip art that wraps up your message with a visual bow, a killer quote that lingers in minds or a call to action that gets hearts racing.

7. Tell a visual story
Structure your slides like a storybook and create a visual narrative by arranging your slides in a way that tells a story. Each slide should flow into the next, creating a visual narrative that keeps your audience hooked till the very end.
Icons and images are essential for adding visual appeal and clarity to your presentation. Venngage provides a vast library of icons and images, allowing you to choose visuals that resonate with your audience and complement your message.

8. Show the “before and after” magic
Want to drive home the impact of your message or solution? Whip out the “before and after” technique. Show the current state (before) and the desired state (after) in a visual way. It’s like showing a makeover transformation, but for your ideas.
9. Add fun with visual quizzes and polls
To break the monotony and see if your audience is still with you, throw in some quick quizzes or polls. It’s like a mini-game break in your presentation — your audience gets involved and it makes your presentation way more dynamic and memorable.
10. Use visuals wisely
Your visuals are the secret sauce of a great presentation. Cherry-pick high-quality images, graphics, charts and videos that not only look good but also align with your message’s vibe. Each visual should have a purpose – they’re not just there for decoration.
11. Utilize visual hierarchy
Employ design principles like contrast, alignment and proximity to make your key info stand out. Play around with fonts, colors and placement to make sure your audience can’t miss the important stuff.
12. Engage with multimedia
Static slides are so last year. Give your presentation some sizzle by tossing in multimedia elements. Think short video clips, animations, or a touch of sound when it makes sense, including an animated logo . But remember, these are sidekicks, not the main act, so use them smartly.
13. Interact with your audience
Turn your presentation into a two-way street. Start your presentation by encouraging your audience to join in with thought-provoking questions, quick polls or using interactive tools. Get them chatting and watch your presentation come alive.

When it comes to delivering a group presentation, it’s important to have everyone on the team on the same page. Venngage’s real-time collaboration tools enable you and your team to work together seamlessly, regardless of geographical locations. Collaborators can provide input, make edits and offer suggestions in real time.
14. Incorporate stories and examples
Weave in relatable stories, personal anecdotes or real-life examples to illustrate your points. It’s like adding a dash of spice to your content – it becomes more memorable and relatable.
15. Nail that delivery
Don’t just stand there and recite facts like a robot — be a confident and engaging presenter. Lock eyes with your audience, mix up your tone and pace and use some gestures to drive your points home. Practice and brush up your presentation skills until you’ve got it down pat for a persuasive presentation that flows like a pro.
Venngage offers a wide selection of professionally designed presentation templates, each tailored for different purposes and styles. By choosing a template that aligns with your content and goals, you can create a visually cohesive and polished presentation that captivates your audience.
Looking for more presentation ideas ? Why not try using a presentation software that will take your presentations to the next level with a combination of user-friendly interfaces, stunning visuals, collaboration features and innovative functionalities that will take your presentations to the next level.
Visual presentations come in various formats, each uniquely suited to convey information and engage audiences effectively. Here are six major types of visual presentations that you should be familiar with:
1. Slideshows or PowerPoint presentations
Slideshows are one of the most common forms of visual presentations. They typically consist of a series of slides containing text, images, charts, graphs and other visual elements. Slideshows are used for various purposes, including business presentations, educational lectures and conference talks.

2. Infographics
Infographics are visual representations of information, data or knowledge. They combine text, images and graphics to convey complex concepts or data in a concise and visually appealing manner. Infographics are often used in marketing, reporting and educational materials.
Don’t worry, they are also super easy to create thanks to Venngage’s fully customizable infographics templates that are professionally designed to bring your information to life. Be sure to try it out for your next visual presentation!

3. Video presentation
Videos are your dynamic storytellers. Whether it’s pre-recorded or happening in real-time, videos are the showstoppers. You can have interviews, demos, animations or even your own mini-documentary. Video presentations are highly engaging and can be shared in both in-person and virtual presentations .
4. Charts and graphs
Charts and graphs are visual representations of data that make it easier to understand and analyze numerical information. Common types include bar charts, line graphs, pie charts and scatterplots. They are commonly used in scientific research, business reports and academic presentations.
Effective data visualizations are crucial for simplifying complex information and Venngage has got you covered. Venngage’s chart templates enable you to create engaging charts, graphs,and infographics that enhance audience understanding and retention, leaving a lasting impression in your presentation.

5. Interactive presentations
Interactive presentations involve audience participation and engagement. These can include interactive polls, quizzes, games and multimedia elements that allow the audience to actively participate in the presentation. Interactive presentations are often used in workshops, training sessions and webinars.
Venngage’s interactive presentation tools enable you to create immersive experiences that leave a lasting impact and enhance audience retention. By incorporating features like clickable elements, quizzes and embedded multimedia, you can captivate your audience’s attention and encourage active participation.
6. Poster presentations
Poster presentations are the stars of the academic and research scene. They consist of a large poster that includes text, images and graphics to communicate research findings or project details and are usually used at conferences and exhibitions. For more poster ideas, browse through Venngage’s gallery of poster templates to inspire your next presentation.
Different visual presentations aside, different presentation methods also serve a unique purpose, tailored to specific objectives and audiences. Find out which type of presentation works best for the message you are sending across to better capture attention, maintain interest and leave a lasting impression.
To make a good presentation , it’s crucial to be aware of common mistakes and how to avoid them. Without further ado, let’s explore some of these pitfalls along with valuable insights on how to sidestep them.
Overloading slides with text
Text heavy slides can be like trying to swallow a whole sandwich in one bite – overwhelming and unappetizing. Instead, opt for concise sentences and bullet points to keep your slides simple. Visuals can help convey your message in a more engaging way.
Using low-quality visuals
Grainy images and pixelated charts are the equivalent of a scratchy vinyl record at a DJ party. High-resolution visuals are your ticket to professionalism. Ensure that the images, charts and graphics you use are clear, relevant and sharp.
Choosing the right visuals for presentations is important. To find great visuals for your visual presentation, Browse Venngage’s extensive library of high-quality stock photos. These images can help you convey your message effectively, evoke emotions and create a visually pleasing narrative.
Ignoring design consistency
Imagine a book with every chapter in a different font and color – it’s a visual mess. Consistency in fonts, colors and formatting throughout your presentation is key to a polished and professional look.
Reading directly from slides
Reading your slides word-for-word is like inviting your audience to a one-person audiobook session. Slides should complement your speech, not replace it. Use them as visual aids, offering key points and visuals to support your narrative.
Lack of visual hierarchy
Neglecting visual hierarchy is like trying to find Waldo in a crowd of clones. Use size, color and positioning to emphasize what’s most important. Guide your audience’s attention to key points so they don’t miss the forest for the trees.
Ignoring accessibility
Accessibility isn’t an option these days; it’s a must. Forgetting alt text for images, color contrast and closed captions for videos can exclude individuals with disabilities from understanding your presentation.
Relying too heavily on animation
While animations can add pizzazz and draw attention, overdoing it can overshadow your message. Use animations sparingly and with purpose to enhance, not detract from your content.
Using jargon and complex language
Keep it simple. Use plain language and explain terms when needed. You want your message to resonate, not leave people scratching their heads.
Not testing interactive elements
Interactive elements can be the life of your whole presentation, but not testing them beforehand is like jumping into a pool without checking if there’s water. Ensure that all interactive features, from live polls to multimedia content, work seamlessly. A smooth experience keeps your audience engaged and avoids those awkward technical hiccups.
Presenting complex data and information in a clear and visually appealing way has never been easier with Venngage. Build professional-looking designs with our free visual chart slide templates for your next presentation.
What is a visual presentation?
A visual presentation is a method of presenting information through visual aids such as slides, images, charts and videos. It enhances understanding and retention by illustrating key points and data visually. Visual presentations are commonly used in meetings, lectures, and conferences to engage and inform the audience effectively.
What is the role of storytelling in visual presentations?
Storytelling plays a crucial role in visual presentations by providing a narrative structure that engages the audience, helps them relate to the content and makes the information more memorable.
What software or tools can I use to create visual presentations?
You can use various software and tools to create visual presentations, including Microsoft PowerPoint, Google Slides, Adobe Illustrator, Canva, Prezi and Venngage, among others.
What is the difference between a visual presentation and a written report?
The main difference between a visual presentation and a written report is the medium of communication. Visual presentations rely on visuals, such as slides, charts and images to convey information quickly, while written reports use text to provide detailed information in a linear format.
How do I effectively communicate data through visual presentations?
To effectively communicate data through visual presentations, simplify complex data into easily digestible charts and graphs, use clear labels and titles and ensure that your visuals support the key messages you want to convey.
Are there any accessibility considerations for visual presentations?
Accessibility considerations for visual presentations include providing alt text for images, ensuring good color contrast, using readable fonts and providing transcripts or captions for multimedia content to make the presentation inclusive.
Most design tools today make accessibility hard but Venngage’s Accessibility Design Tool comes with accessibility features baked in, including accessible-friendly and inclusive icons.
How do I choose the right visuals for my presentation?
Choose visuals that align with your content and message. Use charts for data, images for illustrating concepts, icons for emphasis and color to evoke emotions or convey themes.
How can I adapt my visual presentations for online or virtual audiences?
To adapt visual presentations for online or virtual audiences, focus on concise content, use engaging visuals, ensure clear audio, encourage audience interaction through chat or polls and rehearse for a smooth online delivery.
What is the role of data visualization in visual presentations?
Data visualization in visual presentations simplifies complex data by using charts, graphs and diagrams, making it easier for the audience to understand and interpret information.
How do I choose the right color scheme and fonts for my visual presentation?
Choose a color scheme that aligns with your content and brand and select fonts that are readable and appropriate for the message you want to convey.
How can I measure the effectiveness of my visual presentation?
Measure the effectiveness of your visual presentation by collecting feedback from the audience, tracking engagement metrics (e.g., click-through rates for online presentations) and evaluating whether the presentation achieved its intended objectives.
Follow the 5 simple steps below to make your entire presentation visually appealing and impactful:
1. Sign up and log In: Log in to your Venngage account or sign up for free and gain access to Venngage’s templates and design tools.
2. Choose a template: Browse through Venngage’s presentation template library and select one that best suits your presentation’s purpose and style. Venngage offers a variety of pre-designed templates for different types of visual presentations, including infographics, reports, posters and more.
3. Edit and customize your template: Replace the placeholder text, image and graphics with your own content and customize the colors, fonts and visual elements to align with your presentation’s theme or your organization’s branding.
4. Add visual elements: Venngage offers a wide range of visual elements, such as icons, illustrations, charts, graphs and images, that you can easily add to your presentation with the user-friendly drag-and-drop editor.
5. Save and export your presentation: Export your presentation in a format that suits your needs and then share it with your audience via email, social media or by embedding it on your website or blog .
So, as you gear up for your next presentation, whether it’s for business, education or pure creative expression, don’t forget to keep these visual presentation ideas in your back pocket.
Feel free to experiment and fine-tune your approach and let your passion and expertise shine through in your presentation. With practice, you’ll not only build presentations but also leave a lasting impact on your audience – one slide at a time.
Discover popular designs

Infographic maker

Brochure maker

White paper online

Newsletter creator

Flyer maker

Timeline maker

Letterhead maker

Mind map maker

Ebook maker
- Presentations
- Most Recent
- Infographics
- Data Visualizations
- Forms and Surveys
- Video & Animation
- Case Studies
- Design for Business
- Digital Marketing
- Design Inspiration
- Visual Thinking
- Product Updates
- Visme Webinars
- Artificial Intelligence
105+ Creative Presentation Ideas to Engage Your Audience

Written by: Orana Velarde
With most people tuning out of a PowerPoint presentation within the first 10 minutes , developing engaging slide show presentation ideas that keep your audience hooked till the end can be a challenge.
This is why we've created this post with 105+ creative presentation ideas to help you put together exciting presentations that don't put your audience to sleep. You can use these presentation ideas for business meetings, webinars, classrooms, online courses, pitch decks and more.
Here are some of the ideas we’re covering:
- Use neon colors and duotones
- Unify transitions horizontally
- Use a monochrome palette
- Tell a personal story
- Use isometric illustrations
In this article, you'll find unique slide examples, templates, designs and more. Put these slide show presentation ideas to practice using our presentation maker and create your own presentation in minutes.
Here's a short selection of 8 easy-to-edit Presentation templates you can edit, share and download with Visme. View more below:

- Add bright and bold colors to make your presentation stand out and grab your audience's attention. Create a vibrant and dynamic look by using neon colors and duotones.
- Instead of using different transitions for each slide, use the same transition horizontally throughout your presentation. This creates a cohesive and visually pleasing flow.
- To create a sophisticated, minimalist look, limit your color choices to shades of a single color.
- Connect with your audience and make your message more relatable by incorporating personal anecdotes or stories into your presentation.
- Add depth and dimension to your presentation with isometric illustrations, which can be a fun and engaging way to present complex information.
- Sign up for Visme’s presentation software to start applying these creative presentation ideas.
105+ Creative Presentation Ideas
The ideas we've shared cut across various design concepts, industries and use cases. We've also sprinkled presentation design ideas from Visme's template library. If you're running out of creative steam, you can use these templates to jumpstart your designs.
And if you're running out of time, consider using Visme's AI presentation maker to bring these 100 creative presentation ideas to life. It's a user-friendly tool that effortlessly transforms your ideas into visually stunning presentations.
Now, let's jump into the creative presentation design ideas.
1 Use Neon Colors
Neon colors will give your presentation enough color kick to keep the viewer’s attention. Use neon colors either as the background, as specific elements or as details inside the slides. The trick with neon is to not go overboard with the contrasts. Instead of using a neon rainbow, think more along the lines of neon accents.

2 Be Minimal
Using a minimal design composition is one of the unique presentation ideas. The trick is to have just enough information and visual details for the viewer to feel comfortable seeing the slides. A minimal design can instill calm and awe in your audience when done right. The trick with minimalism is to know when enough is enough, you wouldn’t want to be boring instead of minimal.

RELATED: 20+ Examples of Minimalist Design to Inspire Your Own Creations
3 Use all caps
Another creative presentation idea is using all caps when you feel like the topic of your presentation can be delivered with few words. Using all capitals in your slides will give the message importance. This design might not be suited for a text-heavy presentation but maybe one with an audio narrative that goes along with it or bullet points.
Also, this kind of presentation design is suitable for captivating introduction slide ideas.

Image Source
4 Go vertical
Rectangular presentations are definitely the norm, but with the rise of Instagram Stories, this might be starting to change. This shift introduces a unique opportunity for those looking for ideas for presentation styles that stand out. Now that we can put archived stories into Highlights, why not publish vertical presentations there? Going vertical is just one idea. Along with that, you can add any other design technique.

5 Use duotones
Duotone doesn’t exactly mean “two colors,” it actually means “two tones.” The idea behind this design angle is to use two contrasting tonalities which can have different shades. The difference between duotone and two colors is that it has a more edgy look. Depending on what two tonalities you choose, it can be subtle or very powerful. The photos used in the design also need to be customized to the duotone color you chose.

6 Add a video in different shapes or snippets
Videos can be a powerful tool in your arsenal for engaging your audience during a presentation. Not only do they help to break up the monotony of a lecture-style presentation, but they can also help to explain complex concepts, add visual interest, and evoke emotions.
One way to make your videos stand out is by using different shapes or snippets. Rather than presenting a standard rectangular video, consider incorporating shapes such as circles, triangles or diamonds. These shapes can add a unique and visually appealing element to your presentation.
Another way to incorporate video snippets is by breaking up a longer video into smaller, bite-sized pieces. This can be particularly useful if you have a lengthy video that you want to show but don't want to lose your audience's attention. By breaking it up into smaller segments, you can keep your audience engaged and prevent them from losing interest.
Don’t worry about the design complexity. If you create your presentation in Visme, you can resize your videos instantly and turn them into any shape you want.
Hey marketers! Need to create scroll-stopping visual content fast?
- Transform your visual content with Visme’s easy-to-use content creation platform
- Produce beautiful, effective marketing content quickly even without an extensive design skillset
- Inspire your sales team to create their own content with branded templates for easy customization
Sign up. It’s free.

7 Unify transitions horizontally
Unifying the transitions between slides is always a great idea, but doing it horizontally is especially effective. By keeping all the movements going in one direction, it's both easy to follow and will look great. You don’t need to just apply horizontal transitions to the switch between slides, you can also apply animation to the titles and images. As long as they all go in the same direction, you are gold.
Create a slide deck like this in minutes.
- Search for the exact slides you need from a library of 900+ layouts
- Choose a classic or modern style
- Create automatically animated presentations
8 Black and white + spot of bright color
This presentation design idea is highly effective if you're looking for a creative way to present information.
Adding a bright color to a black and white scheme can add just the right amount of attention-grabbing detail to your presentation. Try choosing a powerful color so that it’s really noticeable and pops visually. You can use the color in small amounts or in large sections. Up to you, just remember to maintain a balance throughout.
9 Use a color theme
A cohesive color theme throughout your presentation can engage your audience and create a more visually appealing experience.
To start, consider the overall tone of your presentation and what emotions you want to evoke in your audience. Are you presenting on a serious topic, such as healthcare or finance, where a more subdued color palette may be appropriate?
Or are you presenting on a more lighthearted topic, such as creativity or innovation, where bright and bold colors can help to capture your audience's attention?
Once you have a general idea of your color palette, try to use it consistently throughout your slides. This means using the same background, font and accent colors for headings and graphics– like the presentation template below.

Visme's presentation templates offer a wide range of professionally designed themes with 300+ slides in 20+ different categories, making it the best choice for exploring creative presentation ideas without PowerPoint. You can create visually stunning slides with our carefully curated color schemes and stylish designs.
Read this article about 25 free presentation themes in Visme and find the perfect one.
Visme's presentation maker and branded presentation templates have been helping businesses create impactful presentations while saving them time and money. That's why many businesses choose Visme over other tools.
But don't just take it for word. Here's what one of our satisfied customers has to say about Visme.
"Previously we were using PowerPoint, which is fine, but the interactivity you can get with Visme is so much more robust that we've all steered away from PowerPoint."
"PowerPoint templates are plain and boring, and we want to create more fun and engaging content. Visme has multiple slide templates to choose from, which makes this so much easier."
"I just made a deck recently and it took me about 15-20 minutes. I found a template I really liked and tweaked it and put it in our brand colors. In PowerPoint, it would take anywhere from an hour to an hour and a half."
- Kendra Bradley, Graphic Content Developer at WOW!
10 Add full-screen videos
The use of full-screen video in your slides can have a big impact on your storytelling. There’s a catch though. The wrong video will be detrimental to your message, be mindful of the videos you chose to grace the background of your slides. The video should either tell your story without words or be a complement that won’t interfere. The wrong video will confuse your viewers and it will be hard to get their undivided attention back.
If you’re looking for quick idea inspiration, check out our YouTube video where Mike shares 30 of our favorite presentation ideas at a glance.

11 Use an 80’s visual style
If looking for a unique design style, why not try an 80’s style for a change. Neon graffiti writing, disco balls, and brightly colored shapes might go well with your presentation’s topic. You can use 80’s visuals as small complementary elements or as the entirety of the presentation style. Nevertheless, if your presentation is about something quite serious then maybe you should try another style.

All you have to do is provide a text prompt, choose your preferred template style and the tool will generate text, images and icons and prepare a ready-to-use presentation within seconds.
The flexibility to customize these presentations in the Visme editor adds the perfect finishing touches to your visual storytelling journey.
12 Go vintage
Another creative presentation idea is the vintage look. This could work really well with a history-themed presentation or anything to do with recuperating old traditions. When we say “vintage” we mean sepia-toned photos, intricate picture frames, bold fonts which look like they came out of old posters.

A vintage color palette is usually pastel turquoise green, ochre yellow and washed out blue and orange. You could consider using vintage mockup sets to create scenes for your slides, or use vintage style fonts, and old photographs as backgrounds.

13 Use a monochrome palette
A monochrome palette is one that maintains a single tonality in different strengths. For example, you can create a presentation in shades of blue, or in shades of orange. Use the palest shade for the background and a stronger shade for the titles and decorative shapes. Try doing it the opposite way as well. You can even use photos with a bit of a filter effect in the chosen color by adding a color filter.

14 Tell a personal story
Telling stories from your own life—whether those stories are deeply moving, humorous tales, or just little snippets that allow someone to look into your history—can be a great way to make a presentation more meaningful.
Colin Stokes uses this to his advantage in his TED talk. He begins by talking about the movies he watches with his daughter and what she likes, and then moving into watching a movie with his son, and wondering how it has affected him, allowing him to move seamlessly into his actual points.
Watch the video below to learn how Colin Stokes did it

Choose a relevant story from your past, and tell it with all the honesty that you can. Your audience will feel that, sympathize, and therefore connect more with your message.
15 Creative photo crops
The photos in your presentations can be cropped hundreds of different ways. From simple circles or rectangles to more elaborate triangles, polygons, letter shapes or even a brushstroke. Analyze the message of your presentation to know which shape to use for the cropping of your photos. You can also create a collage with the shapes as long as they don’t distract from the information being presented.

16 Add fun illustrations
Adding fun illustrations is a great idea to engage your audience during a presentation. They can help break up text-heavy slides, make your presentation more visually attractive and reinforce your message, making it one of the best fun presentation ideas.
Hand-drawn doodles, icons and graphics and animated GIFs are all illustrations you can use. To maximize the visual impact of your illustrations, you can use them in 3D.
With Visme, you can enhance your presentation by adding 3D objects that allow you to customize their colors, size and alignment. Additionally, you can add 3D animated graphics to take things to the next level.
When using illustrations, it's important to remember to use them sparingly to avoid overwhelming your audience. Less is more when it comes to adding graphics to your slides. Remember to match the illustrations with your theme and color scheme to keep things consistent.

17 Thick and bold fonts
Huge chunky fonts are a great way to call attention to titles on slides. You could even try making the letters bleed over the edges or place the words vertical along the side. The best thick and bold fonts are the ones with minimal decorations. Try using fonts that have strong corners or the opposite, extreme rounded terminals. It will also work best if the title is short and sweet.

18 Go with nature
Freshen up your presentation with some natural elements around the edges or as a background. You could use full-screen background photos of leaves or palm fronds coming in from the sides of the slides.
Another presentation idea would be to use nature-related photography along with other design ideas like interesting photo crops. This technique could be used for presentations that relate to nature or natural topics, but also for a home decor proposal or creative direction pitch for a TV ad.
Integrating nature into your slides is a beautiful presentation example of how to connect with your audience on a different level. This technique could be used for presentations about environmental topics or even about home decoration.

19 Use circles
Circles represent wholeness and a natural sense of completion. They can signify eternity and constant movement. They can also make your presentation more friendly and emotionally accessible. You can try using circles as decorative elements or as the shape for cropping images and as backgrounds for illustrations.

20 Add some sparkle (glitter backgrounds)
Give your presentations a little bit of a festive feel with some glittery details. This PowerPoint idea can work great if you are presenting a creative proposal for a fashion label or clothing catalog. It can even work really well for holiday-themed pitches or products. There are different types of glittery graphics you can use, like a glitter texture, a glittering rain or even just a dash of glitter. You can find some great glitter backgrounds and textures over at Freepik .

21 Get crafty (ripped paper details)
Sometimes to tell a story, visual details can really help get a mood across. Ripped paper shapes and edges can give a presentation a special feel, almost as if it was done by hand. This visual technique works for any type of presentation except maybe in a corporate setting. Ripped paper can be found on creative graphics resource sites or you can do it yourself and take a photo.

22 Cut-out paper illustrations
Another crafty idea to design your slides is by using cut paper illustrations. This technique could look really crafty or quite elegant if done well. Cut paper can be used as an elaborate background, as the letters in titles or as decorative elements. There are some great cut paper bundles online to use as PNG files which can be uploaded to the Visme editor.

23 Pathway transitions
Create interesting transitions by designing scenes or pathways instead of just sliding them in one unified direction. By doing this, you can use a storytelling technique that will keep the audience’s attention throughout the presentation and information relay. You can find out how to do it in our free guide to creating captivating presentations .
Create an automatically animated presentation in minutes.
24 use isometric illustrations.
If you are looking for a different way to illustrate your slides, why not consider using isometric illustrations? This style of illustration is great for explaining things that can be separated into parts. The parts can be animated as well. An isometric illustration can work for any kind of presentation, from technology to corporate. It will give your presentation a modern edge and a professional look.

25 Use motion graphics
Motion graphics are a great way to illustrate an idea with animated objects . They don’t tell stories on their own, they support the context and illustrate the content.
For example, if your presentation is about travel, you could have flying airplanes across the slides or bags on a luggage conveyor belt. For something more abstract, you can use moving shapes and add effects to the titles. Your Visme editor has a variety of design tools to help you create all sorts of content with motion graphics.
Here’s what one of Visme’s satisfied customers Jessica L. | Small-Business Owner, has to say about Visme’s presentation tool:
"No need to go back to PowerPoint. Visme makes project presentations easy and fast. Lots of useful templates and excellent graphics. I enjoy the features they continue to add and update often. They make project work easy".
26 Add GIFs to your slides
GIFs can be fun, entertaining and humorous. They can also be informational. GIFs be sourced from sites like Giphy , where you can also create your own! Choosing to include a GIF in your presentation slide or a few different GIFs will depend on what message you want to send with your story. The theme and topic of your presentation will help you decide if you need a clip from a blockbuster movie or a quick representation of the process of your systems.
RELATED: Everything You Need to Know About Using Cool GIFs in Your Marketing
27 Use quotes between slides
Quotes can be good breathers between a bunch of informative slides. You can either use them to separate ideas inside your presentation or to start new sections of information. It’s important that your quotes represent the topic of your presentation so that they make sense and not confuse the viewer.

28 Start with “once upon a time”
One of the most effective and engaging ways to present a presentation is by incorporating creative storytelling techniques.
If a presentation can be created as a story, then why not go all the way and start the presentation with a classic story opening? Using the “once upon a time” phrase will instantly grab the viewer’s attention because it will be out of the ordinary. Make a slide especially for it with a visual that matches the topic of your presentation.

29 Turn the slides into a scrolling infographic instead of a presentation
To showcase your content in a unique and engaging way, consider using creative slide ideas that break away from the traditional slide-by-slide approach. For instance, you can arrange your slides vertically to create a scrolling infographic instead of a classic slide-by-slide transition presentation.
This innovative format expands the types of presentations you can create, offering a fresh perspective on information delivery.
An added bonus to this presentation style is to add parallax scrolling or interaction animation. As the viewer scrolls down, the information fills each slide progressively. It doesn’t continue until the viewer scrolls again. This technique is best for displaying online slide show presentation ideas.
Create a scrolling presentation in minutes.
30 engage your audience.
What’s one of the best ways to make your presentations more interesting? Make the audience a part of them.
Regardless if you’re presenting in person to a room full of people or via Zoom to viewers around the world, there are a number of techniques to engage your audience with both your content and yourself. The trick is to make them feel connected somehow, like they can relate. You can achieve this with humor, storytelling, asking questions and inviting them to leave comments in the webinar chat window.
Take this speech by Donovan Livingston. He delivers a commencement speech in spoken word poetry, and specifically encourages the audience to take part, saying they should clap, throw their hands in the air, or otherwise participate if they feel so moved. While not seen, several people are heard cheering and clapping throughout the video.
Participation can also be accomplished through things such as games, posing questions or something as simple as asking participants to raise their hands.
31 Use a scrunched paper background
Give your presentation a laid-back and grunge feel by designing it with a scrunched paper background. It can be any kind of paper really, depending on your topic. It could be notebook paper, or printer paper, it could even be recycled paper. Try a few different types of paper until you find the one that suits your story.

32 Add interactive pop-ups
Adding interactive pop-ups is a game-changer when it comes to creative ways of presenting. These pop-ups allow you to go beyond the traditional approach, giving your audience a more dynamic and engaging experience.
Interactive pop-ups can take many forms, from quizzes and polls to clickable infographics and interactive timelines. With Visme, you can access various interactive features that can help you create engaging and effective presentations.
For example, you can create clickable icons or buttons that allow your audience to explore additional information or resources. You can also create interactive timelines that enable your audience to explore different events or milestones.
One of the most powerful interactive features of Visme is the ability to create quizzes and polls. You can make interactive questions and answer options that allow your audience to engage with your presentation on a deeper level.
You can also use this feature to gather feedback from your audience, allowing you to tailor your presentation to their needs and interests.
Watch the video below or read this article to learn how to create an interactive presentation .

33 Use a back-to-school theme
A back-to-school theme can make your presentation look like a lot of fun. This is a great technique for teachers and educators welcoming their students back to a new school year. The background can be a sheet of notebook paper, an open notebook, or a blackboard. The edges could be decorated with pencils and paperclips, maybe an eraser or sharpener. The back-to-school theme has lots of possibilities.

34 Use a billboard-inspired theme
Use billboard mockups to create slides which look like billboards. This could look interesting and quite unique. You could use the same billboard for all the slides, or different ones for a more varied approach. This technique would work great with a pitch for an election or a local spot in a government office.

35 Use black-and-white photography
Black and white photography is a classic design technique. They import elegance and sophistication to any design by providing a minimalistic approach to the visuals. The photos can either be desaturated from color photos or given an artistic flair with extra contrast and fewer grey tones.

36 Explain your reasons
What people really want to know is why you’re giving the presentation you’re giving. This is especially true if you’re pitching to investors or potential new clients. When you share your why with the audience using storytelling and body language, you make meaningful connections and lasting relationships
Simon Sinek explains quite well why this is so important—the greatest leaders, the ones who inspire the most people, understand why they do the things they do, rather than just what or how.
When it comes to explaining your reasons, one tool that can significantly improve your presentations is Visme's AI writer . This advanced feature helps you write your presentation copy, break down complex ideas and edit or improve your existing words. With Visme's AI writer, you can make sure your "why" is clear and easy to understand alongside your visuals.
37 Add an audio narrative
Your presentation doesn’t need to be silent, especially if you won’t be standing by it to tell the story yourself. Adding an audio narrative can turn a viewable presentation into an experience. You can either set it up as a video that runs on its own and the viewer looks and listens, or it can be triggered by arrows that are clicked on.
RELATED: How to Create a Narrated Presentation With Voice Over Using Visme
38 Follow a space theme with photography
Most of the photos from Nasa are labeled as public domain. Meaning that you can give your presentation a space theme quite easily. Choose images of astronauts in space or more abstract and colorful images like distant galaxies and nebulas. The latter can make great backgrounds behind content without the topic necessarily being about space.

39 Do a space theme with illustration
An illustrated space theme can be either colorful and whimsical or sober and elegant. By choosing the style of illustration you use, you can either use this technique for presentations related to children or scientists. Cartoon astronauts can be lots of fun, line illustration planets can be educational and data-driven drawings can be informational.

40 Include music
Sometimes, when listening to someone talk for long periods of time, it helps to have something else to draw your attention. While images are great, including music can really help stimulate an audience and set the mood.
Dean Burnett talks about why this happens: “[Music] provides non-invasive noise and pleasurable feelings, to effectively neutralize the unconscious attention system’s ability to distract us.” Essentially, music is entertaining enough that, when in the background, can keep us focused on otherwise un-entertaining things.
Take, for example, this valedictorian’s speech. While peppered with humor and stories of his time through high school, he uses background music to help keep people’s attention—in fact, this is specifically stated to be his reason for including music, humorously quipping about giving the audience something to listen to while they “zone out” of his speech.
Whether incorporated into individual slides, in a video, done live, or with a music-playing device nearby, this creative presentation idea can be a great way to enhance the quality of your speech or talk.
41 Graffiti photography backgrounds and details
Using colorful backgrounds like photos of urban graffiti can give your presentation a bit of an edge. There are lots of free photographs of graffiti on sites like Unsplash which you can use straight away. Apart from graffiti murals, you can also incorporate graffiti letterings in your titles and quotes. You can find graffiti style fonts online quite easily.

42 Stop-motion
The stop-motion technique can take time but it can also make your presentation unforgettable. There are lots of ways to use stop-motion, either with characters doing actions or objects that move around and create a scene. Stop-motion can also be used to create titles that move into place. What the title is written with can be anything, from toys to plants. The theme and topic of your presentation will ultimately be the driving point to what kind of stop-motion can be used. But be sure that it works from educational to promotional to corporate.
43 Claymation
Very similar to stop-motion, claymation is the animation of things created with clay or play-doh. Anything can be created with clay, so the possibilities really are endless about what can be achieved. This technique really does take a lot of time, you can source it out to a professional or buy some already created footage. The claymation can be just a decorative element in the background or it could also be the center of the presentation.
44 Color blocking
The color blocking technique is another creative presentation idea that entails using color in large sections and in contrasting tones. The idea is that the color blocks will be strong and colorful. The color blocks can either be the shapes that determine where the information goes or just a way to separate the slides in specific sections.
Any type of presentation can benefit from color blocking. Just make sure you use colors that go together and don’t clash. Explore this technique for different presentation slide ideas, especially when aiming for a bold and visually striking effect.

45 Get surreal
Surrealism is an avant-garde movement from the 20th century which was meant to tap into subconscious creativity. This might not be the kind of design technique for any sort of presentation but it can work for one that is about art, or literature or other creative outlets. There are plenty of surrealist artworks in the public domain sector or the Metropolitan Museum of Art. These can be used as subtle backgrounds or visual complements to the text.

Designing a presentation for an organization requires input from different stakeholders. However, when collaborating with others on a presentation design, keeping track of all the moving parts can be difficult.
That's where Visme's workflow management feature comes in. It helps organize roles, tasks, progress, deadlines and corrections all in one place to make your presentation design process efficient and smooth.
46 Polaroids
Polaroids, often a photography favorite, can inspire creative photography presentation ideas. The original Polaroids from the 70’s could be used as vintage polaroids that have been kept in a box for years. The newest Instamatic photographs, which are the new kind of polaroids, can be used for a fun way to show photos and visuals in presentation slides. You could either use one polaroid per slide or a collection of polaroids on a table or corkboard.
There are many topics that can work with Polaroid photography backgrounds and details in your slide show presentation ideas.

47 Use a Handwriting Font
Fonts come in all shapes and sizes, including lots of handwriting fonts. Handwritten fonts can be used for any type of presentation as long as the style matches the topic of the information. There are kid-style handwriting, calligraphy style handwriting, hand lettering, and novelty fonts as well. The options are wide and varied for this design technique. Creative Bloq has a great collection of handwritten fonts.

48 Use a geometric background
A geometric background can look really nice on any presentation. Geometric backgrounds can be tiled polygons or more abstract compositions of different size polygons. The decision to choose between tiled shapes and more creative compositions will depend on your creative angle and disposition. You can use these types of designs with any colors, so you can match the theme or your brand.

49 Coffee style design
Using a coffee-style design can work for any PowerPoint presentation idea, from office-related topics to digital nomads to anything or anyone who loves coffee. If the background is subtle, it can fit a more serious topic or data report. It can make a boring presentation just a bit more visually entertaining than the rest. Of course, it can also be perfect for a small coffee brewer pitching their company to investors.

50 Include memes
You’ve seen them everywhere by this point. You might be pretty sick of them. However, that doesn’t mean memes can’t be useful—in fact, using a couple strategically can surprise the audience and make them laugh.
The presentation " Memes, Memes Everywhere" focuses on, unsurprisingly, memes, and explains their purpose while using examples on every slide, which help support their points and add some humor to a very text-heavy presentation.
Choosing relevant memes and using them sparingly can really help add some personality to your presentation, without distracting from the work.
RELATED: 85+ Best Free Presentation Templates
51 Polka dots
Using a polka-dot background is suitable for various types of presentations. It can give your presentation a whimsical look or simply give it a subtle texture. The polka dots could be small and soft or big and punchy. A strong polka-dot background can work great in a creative setting or even boring data analysis. The style of polka dots will depend on the general topic of your presentation. You can use the polka-dot design as a full background or as a decorative section on the slide.

52 Metaphors
Visual metaphors can be useful in a similar manner; they can spice up your presentation, illustrate your point, and make your work far more entertaining. James Geary speaks about just how important metaphors are.
His presentation provides several examples of metaphors--such as the phrase “some jobs are jails”--and explains just how hard it is to ignore the lasting power of a well-used metaphor. Because of the connotations a metaphor can bring to the table, their use is an excellent way to imbue added meaning to your words.
53 Use timelines in your slides
Timelines can be used in lots of different ways inside a PowerPoint presentation, and the ideas are limitless. A timeline can either be inside one slide, or it can be connected between various slides. You can make a timeline with icons, connected shapes, or an inclined line. The timeline can be a visual way of explaining a chronological event or a plan of action that needs to be taken care of. Make sure the timeline fits the rest of the theme.

54 Use a comic book style
Comic books are a source of inspiration for many people. The visual aspect of a comic style composition can really make your presentation shine. There are a few ways you can use this technique. You could set up the slides as if they were snippets of a comic book, place the text in speech and thought bubbles and apply a background with a pointillist texture. If using characters, make sure the characters fit the theme of your presentation. For a perfect fit, hire a designer to create a comic book presentation just for your company.

55 Use a manga style
Looking for creative PowerPoint slide ideas that stand out? Consider taking inspiration from the Japanese art of Manga. Manga can give your presentation a distinct and eye-catching look, much like comic books.
It isn’t as versatile as a comic book because it has a more specific look, so it might not work for all topics. It can work for more creative outlets like fashion, art, and photography. Manga has a specific style for the atmosphere around the unique characters as well. They are more common in black and white and look very photographic.

56 Use psychedelic visuals
Psychedelia was a big part of the design world in the 60’s and 70’s. Music and creative event posters were so intricate and colorful that they took an important place in the design history books. This design style can be used for a unique visual approach in your presentations. Just like many other techniques we have mentioned, they can be used as a background in slides or as decorative elements. The swirly shapes and contrasting colors can call attention to the viewer in a positive way.

Create professional and engaging presentations online!
- Choose from hundreds of fully designed templates
- Align colors, fonts and images with your brand
- Add custom charts, timelines, icons, animations and more
57 Use neon lights
Neon lights are a great way to give your presentation some life when it’s otherwise visually bland. There are plenty of neon light fonts available online to choose from, from classic style neon tubing on a wall to a neon style given to a font to make it look like neon. Presentations of any topic can be given an additional visual with a bit of neon brightness.

58 Cinemagraph backgrounds
A cinemagraph is like a GIF loaded with elegance. The idea behind a cinemagraph is a photo with a moving section which makes it look cinematic. This kind of background can keep your viewers happily hypnotized while listening to your audio narrative or keep them on the slide longer to truly grasp the information being given. There are cinemagraphs available for all sorts of themes and topics. You can definitely find one that suits your needs.
59 Full-screen video backgrounds
A full-screen background can be really appealing. But just like other design ideas, the video you choose needs to match the theme and topic of your presentation. Your best bet is to have a video which is directly related to what your presentation is about. Videos can be created especially for your purpose, sourced with permission from YouTube or bought from a stock video site.
60 Visualize data
Staring at a large amount of numbers on screen can be overwhelming for most people, even if the realities of those numbers enforce your point. What’s the best way to avoid scaring your crowd? Put the data into easily understandable visualizations.
If you want to take this a step further, you can use illustrations or create infographics to make these data visualizations even more engaging.

61 Use a wild west theme
The wild west is not a very versatile theme but can work for a history project or a proposal for a wild west themed party or event. What entails a wild west theme? Brown sandy tones, horses, cowboys, and tumbleweeds. If the full-on wild west theme is too much, you can also take a cue from the era and be inspired by the color scheme. Another approach would be to use photography from the actual west of the United States, mountains and deserts and so on.

62 Use mind maps
Mind maps are great visual tools for explaining concepts easily. By including mind maps in your slides, you can relay complicated information visually and creatively. There are eight types of mind maps, the most common being bubble maps, the tree map, and flow map. Each one has a different purpose and you can learn all about this in our guide about mind maps in the Visual Learning Center.

63 Use interactive geographic maps
The difference between a static map and an interactive map will define how much attention your slides get. Regions can switch colors according to a change in data over time, making the map more into a chart. With Visme, you can make your maps interactive with live data . All you need to do is sync your data from a Google Sheets file and when your presentation is published online, your map will always be synchronized to that data.
Want to create your own interactive map?
- Create a color-coded map to visualize geographical data
- Choose either the entire world map, a continent or a country
- Enable feature to have data values appear on hover
64 Color contrasts
Using contrasting colors in your slides will make the information pop out of the screen in a positive way. The trick to using contrasting colors is to know how colors match together. Contrasting doesn’t mean they need to clash. Try using a color palette generator like Adobe Color to find great palettes that will make this technique your new best friend. You can learn more about how color works in our guide about color perception in the Visme Learning Center.

65 Live data graphs
Adding live data to a presentation can turn your slides into evergreen content in a flash. You can use any type of chart and populate it with live data such as bar graphs, line graphs, pie graphs, and more. You can add live data graphs to one or two slides in your presentation or have a series of them. Creating a live data graph is easy with the Visme editor.
66 Color fade transitions
Transitions come in lots of different styles. We have mentioned horizontal transitions, animated transitions, and pathway transitions. This particular technique involves color as the ruling factor.
A color-fade transition makes each slide connected to each other through color. This can be achieved with gradients, color blocks, or colored photo filters. Make your PowerPoint presentation ideas stand out with color fade transitions.
67 “Grow” your presentation so it looks like one animated slide
This creative PowerPoint idea is quite interesting as it really only uses one slide that grows upon itself. The practical way to do this is to create the final slide with all the parts and information set up like a finished puzzle. Once you have the completed slide, duplicate it as many times as you need and systematically take off a bit of information until you’ve reached the first title slide. Once you have all the slides, make sure they are in order before downloading the entire thing.
RELATED: A Non-Designer’s Guide to Creating Memorable Visual Presentations [Free E-Book]
68 Use humor
Want a great way to connect with your audience and make a memorable, more engaging presentation? Be funny. When used strategically, this is a great way to capture attention. In fact, infusing humor into your talk is one of the most effective fun presentation ideas you can use.
Morgan Spurlock makes wonderful use of this in his TED talk. For example, in one of his earliest statements, he offered individuals the opportunity to buy the rights to name his TED talk—which he refers to again at the end, where he reveals the title. He peppers the entire presentation with humorous commentary that nonetheless supports his point.
Create relevant jokes or find a way to bring out the humor in your subject, and your audience will be much more engaged and more likely to remember your words.
69 Tree diagram transitions
A tree diagram is one of the eight thinking maps which help visualize idea and concepts. The purpose of a tree diagram is to classify and organize information. This map can help build a presentation by making sure each slide is a continuation of the one before. They might need to be grouped into sections so that all the information is relayed easily.

Want to create your own tree diagram?
- Get a head start with pre-made flowchart blocks
- Easily snap lines and objects together
- Dozens of shapes and lines styles to choose from
70 Journal style (with hand-drawn illustrations on the margins)
One creative presentation idea is to make your talk just a little bit different than the rest is to use a journal style. The general visual idea for this technique is to make your slides look like the pages of a journal. The style of the journal will depend on what your presentation topic is. It can be a whimsical bullet journal or an intricate botany journal. You could even consider handwriting on paper as a background.

71 Ink splatters
Use ink splatters to decorate your slides any way you like. They can be big and impressive behind the content, or they can be small and subtle like drops from a pen. An ink splatter can give your presentation a bit of an artistic flair and if done right, can make your slides look elegant and clean. Any style of presentation can benefit from some ink splatters as a decorative element.
If you're looking for fresh presentation slide ideas, why not experiment with ink splatters and see how they can enhance your next presentation?

72 Passport with stamps
Using travel stamps as a decorative element can work for a presentation with a travel-theme or a creative design proposal for a department store or airport mall. The stamps can be used as a background on a passport page or on their own around the content. A photo of a real passport page can be used for this technique but there are plenty of graphics available in this style on sites like Freepik .

73 Express your emotions
We can sometimes be afraid of expressing how we feel, even to those we’re close to, much less in front of a crowd. However, showing them makes your words more authentic and can generate compassion or excitement in your audience.
Take this TED talk by Thordis Elva and Tom Stranger , for example. While the two talk about their experiences, their voices break and crack. The emotional turmoil they went through is clearly heard, and viewers can clearly understand their pain.
This can take some getting used to, and some courage. However, the results are well worth the effort.
74 Use a video game theme
Video games come in all shapes and sizes. From kids' games to arcade games to car games. Each one has their own style, just like presentations do. If you think a video game visual style is good for your project, consider all the different kinds until you find the one that fits best. You can use game screenshots as backgrounds or infuse the entire design of the presentation with the video game style you chose.

75 Use postcards
One of the least-used creative presentation ideas is to turn your content inside slides into postcards which have been sent from around the world. They can be new postcards which could be used from either front or back sides. The back part would make a great text block for the content you need to display, the photo side can be on the sides or as a background. This design technique can work for presentations about literature, family connections, history or travel. There are postcard templates available on sites like Creative Market .

76 Incorporate robots in the design
Using robots in your slides can be a creative approach to visually elevate your presentation. There are different styles of robots you can add to your presentation design; realistic photography of anamorphic robots, cute illustrated robots, or robotic parts from factories. These visuals might only apply for technology-themed presentations or about robots themselves. Cute illustrations of robots can be great backgrounds for whimsical topics or other styles of storytelling presentations.

77 Chalk on blackboard
Looking for creative slides presentation ideas? Consider using a chalkboard design to add a unique and nostalgic touch to your presentation.
Writing on a chalkboard is not limited to a school setting or a bar menu. These two might be the most common yet they are not the only possibilities for using chalk on a blackboard. A good handwriting font is the best companion to a chalkboard design. Some of these fonts are already available with a chalky texture and others might need some professional tweaking to get the right texture.

78 Get inspired by a specific location
Even if the PowerPoint presentation ideas you are designing are not about a specific place in the world, you can be inspired by one to set up the color scheme and feel of the slides. For example, if you get inspired by Greece, you can use white and light blue hues or even photos of Greek islands. If you get inspired by Brazil, you can use photos of the beach, the texture of the boardwalk tiles or green, blue, and yellow color schemes.

79 Use props
Using props can quickly turn a run-of-the-mill presentation into a unique, interactive experience. Kenny Nguyen demonstrates this well. In his talk he often refers to the “sword of yes” and “shield of no.” Naturally he picks up a sword and shield from the table to help demonstrate his points.
Choosing similar props can help you really illustrate your points—and make it that much more entertaining, too.
80 Use hashtags as titles
In the age of social media, hashtags are used every day. They appear regularly on social media, in spoken and written conversations, and of course in content marketing. Why not include some hashtags as titles? This technique will work great in a presentation for a social media content management pitch, or an in an influencer marketing strategy. On another note, hashtag titles can even be used for any type of presentation geared at the digital generation.

81 Black background, white letters, and color accents
When you use a black background, the colors that you place on top will usually look brighter than if they were on a white background. When creating this kind of color palette, make sure the colors you use don’t clash with each other or with the black. Along with the bright colors, make sure you use white to make the composition pop! Neon colors or pastel tones are what will work best.

82 Vintage film edges
Even though we are used to taking photos with our phones, the classic nostalgia of film is still prevalent in the world of visuals and design. The graphic representation of a film negative is as recognizable as an envelope representing an email. Use a vintage film edge along the horizontal edges of your slides to give your visuals a cinematic feel. Even better if you make the edges animated so that it looks like it’s rolling along on a projector.

83 Adult coloring book inspired design
Using a coloring book design can be really creative. Practically anything can be turned into a coloring book style illustration. A great way to use this technique is to have the first slide with the un-colored illustration and then progressively color in the illustration as the slides progress. Furthermore, if the illustration is depictive of the information, the visuals can be even more engaging.

84 Stripes
A stripes design is as classic as it gets. From pinstripes to artistic colorful lines, you can use them as a subtle background or a powerful striped theme intertwined with text boxes. Stripes are the kind of design technique that can work for any type of presentation, from corporate to educational.

85 Make each slide look like a social media post
Just like postcards and polaroids, you could try a creative approach and use social media templates to put the content in. The most notorious social media visual channel is Instagram. It has been known to inspire offline events as well. Make your slides look like social media posts or social media pages. For this technique, you can either use screenshots or templates.

86 Ink in water
Dropping ink in water creates beautiful colorful bubbly designs which can be photographed at high speed. These images can be used as backgrounds for any type of creative theme presentations. Choose the color and thickness of the ink design to match the theme of your presentation. There are also animated versions of this effect which can be bought like video stock.

87 Lego bricks
Use lego bricks as inspiration to fill your presentation slides with color and fun. Use the bricks to create slide frames, letters or even charts. The best approach to a lego inspired presentation is to be creative. There are lots of things you can do with lego, you could go as far as using the legos to write the titles of the slides. Don’t use the Lego logo though unless you are specifically designing a presentation about lego.

88 Use classic storytelling techniques
A presentation is, in a way, like a story—you’re talking about your chosen subject and leading viewers on a journey to discover what that subject means. Moreover, stories hold an intrinsic interest for us. Therefore, you can easily use several storytelling techniques to help improve your presentation.
Alex Blinkoff goes into this in great detail, examining things such as “The Hero’s Journey” and provides several examples of ways to use storytelling techniques in your presentations. Check them out, and decide what might work best for your subject.

Click on image to view interactive slide show created with Visme
89 Jigsaw puzzles
Pieces of a jigsaw puzzle can be used to make charts, infographic diagrams, or interlocking frames. The idea behind puzzle pieces is that things come together to form a whole and this concept can be used for any slide and any kind of presentation. Make sure to use a suitable color palette that matches your theme and the rest of the presentation.

90 Headlines coming in animated on boats/trains/airplane
Headlines or titles can be given a life of their own inside the slides. One interesting and creative approach would be to make the titles enter the slide on top of some kind of vehicle. The vehicle could be anything, from a train to a boat, to an airplane. Depending on the type of vehicle, this animated technique can be used for child-themed topics, transportation themes, travel ideas, or even about a corporate sales report.
91 Use a camouflage design
Camo doesn’t necessarily need to convey a sense of military, although it does carry a strong connection. Thankfully, camouflage comes in different styles, from jungle greens to desert browns. Other out of the box camouflage styles are the ones where the colors are completely off the charts, like pinks and blues. Camouflage designs are better used as backgrounds or small subtle sections.

92 Use unique novelty fonts for headers
There are so many novelty fonts to choose from out there these days! Using a unique novelty font for the titles and headers is a great way to add some visual pizzazz to your slides. Try looking for some really special fonts that carry personality. Once you have selected the font, add some color and texture to make it look even better.

93 Use a city skyline
Using a background of a city skyline can work great for a presentation related to business or corporate topics. It can also be perfect for an urban travel related theme or educational presentation. You can choose to use photography as a background or with the buildings cut out from the sky. Another choice is to find an illustrated city skyline and use it as a border on the slides.

94 Use a connected dots background
One of the design trends of the last few years is the connected dots visual. It’s used on websites and on printed flyers. It’s so versatile that it can be added to any kind of presentation in a heartbeat. The lines can be short or long between the dots and the composition can be tight or spread out. You can find connected dot visuals easily on sites like Freepik, in lots of different colors. If you can manage vector graphics , you can also change the composition of the dots quite easily yourself.

95 Use a bokeh background
Bokeh is a photography and light technique which turns dots of light into bright shiny spheres. With a bit of creativity, the lights can be turned into shapes, like hearts or stars. This design style is great for backgrounds since it’s mostly abstract. It works best as a complement to the content instead of an important visual aspect. You can find bokeh backgrounds in stock photo sites or make it yourself.

96 Use watercolor designs
The use of watercolor designs is an easy way of infusing some lively color into a presentation. Watercolors can be a splash on the background, shapes around the content, or colorful strokes intertwined with text boxes. Depending on the color of the paint used, the watercolor technique can be used for any type of presentation. A soft watercolor brushed background can work for a feminine theme and a deep intense splash can add visual creativity to an otherwise boring corporate presentation.

Just like watercolor graphics, paint can add a dose of creativity to any presentation. Different to watercolors though, paint is more intense. Paint based graphics come in all shapes and sizes, from thick brush strokes to paint drips. Digital paint compositions can also make great backgrounds for colorful and creative presentations.

98 Use bright fun colors
Why create a bland presentation when you can make it fun and colorful instead? Creative color palettes can include up to six different colors which look great together. Use shapes, cut-outs, color blocks, swashes, anything your heart desires. This technique is for letting go and being creatively free with color. Just make sure the colors go together by trying out some palettes first.

99 Use arrow graphics
Arrows symbolize direction. They can be a great addition to your charts, infographic visuals and slide sections. You could even do the entire presentation using arrows. According to their size, color, and thickness, they have different temperaments. Look for different styles of arrows and see if they fit your topic and theme. Freepik has some great arrow visuals and the Visme editor also has arrow icons and infographic visuals.
100 Use electronic visuals
Another great idea for a background visual is the inside of a computer system. The intricate details of a motherboard or a close up of a memory chip can make a great visual impact. Apart from using an electronic background image, little pieces of electronic devices can be placed around the slide as decoration. This technique is generally limited to electronic or computer theme topics.

101 Metaphors
Visual metaphors can be useful in a similar manner. They can spice up your presentation, illustrate your point, and make your work far more entertaining. James Geary speaks about just how important metaphors are.
102 Keep it feminine
A feminine style design can work for your presentation if your company makes products for women or if your targeted audience is women. By feminine design, we mean light and soft colors, subtle shapes and a general airy feeling to the composition. Feminine design can be minimal but it can also be decadent and full of style. Whichever you chose, make sure it fits with your audience.

103 Go futuristic
A futuristic style can fit any theme as long as the concept of the future depicted, fits the topic of the presentation. Futuristic design can be of many different styles; from spaceship driving controls to cosmos related atmospheres, to flying cars, and artificial intelligence. Even color palettes can look futuristic if you add some metallic tones.

104 Add a music background
A music soundtrack can be added to any presentation that doesn’t have any other sort of audio already. The best music for a presentation is one without lyrics, in other words, an instrumental track. A good track will accompany the content in a positive way and not interfere with the message. You can find audio tracks easily online.
105 Communicate with images
A picture can speak a thousand words. Naturally, they can be used to communicate concepts that, for the sake of space or time, you might not be able to include in the presentation itself. This slide deck uses this strategy to its advantage.
The presentation includes many images as backgrounds and minimal text. The images used always either enhance what’s being said or, in some cases, provide the answer for viewers. For example, the second slide states “The Landscape Today,” and includes a bleak background with a broken, tilted picture frame, emphasizing the idea that the following slides (which describe the landscape) offer some pretty disheartening information.
Using images in a related fashion can help express your views and emphasize your message.
Harness the power of Visme's AI image edit tools in your toolkit. These advanced yet easy-to-use tools let you effortlessly edit, touch up, unblur and upscale your images using simple prompts. It's an incredibly convenient way to add extra polish and clarity to your pictures to make your presentations more impactful.
106 Include artsy data visualization
Data visualization is a way of showing data and information in a way that is visually expressive. Creative data analysts can make some really beautiful creations and you can hire them to make them for you. If you haven’t seen any creative data visualizations, take a look at our collection of the best of 2018 and get inspired. You can either make the whole presentation into a data viz or add them to some of the slides.
By Beyond Words Studio
RELATED: The 25 Best Data Visualizations of 2018
107 Stay branded
This creative tip is a simple yet effective way to spark good presentation ideas. When creating your presentation, do your best to stay on brand. This, of course, will work only if you are creating a presentation for your own brand. If creating one for a client, then you should stay on brand with their own brand style guide. This means only use the brand colors and fonts, use photos, textures, and shapes that match the brand.

Use Visme's brand design tool to ensure your presentations perfectly reflect your brand personality. Just copy and paste your website URL, and the tool will automatically extract your branding assets, such as brand colors, brand fonts and company logo.
108 Ask questions
A great tip to make your PowerPoint presentations ideas more interactive is to ask questions from your audience. Like the example below, you can display only your question on the slide. Once the audience has pitched in their opinions and answers, you can click to reveal the actual answer. You can enable this type of interactivity on click when making a presentation in Visme .

109 Replace boring bullet points with visuals
While adding bullet points in your slides might be better than adding walls of text, they're still not the most effective way to get your message across and engage your audience. Take things up a notch and replace boring bullets with visuals, such as photos and even icons. Here's an example of how you can use icons to add a creative twist to the plain ol' bullet points.

110 Share your slide deck
Downloading your slide deck and presenting in front of an audience is not the only way to use your presentation. Make the most of your slides by sharing your presentation online.
Add interactive elements, such as clickable buttons, links, hover effects, popups, embedded videos and more so your audience can view and engage with your slides on their own.
If you've created your presentation in Visme, you can share your presentation publicly or privately using a link, or embed it anywhere you like.
Start Using These Creative Presentation Ideas
Ready to start creating your own presentation after over 100 pieces of inspiration? Choose your favorite creative presentation ideas and incorporate them into your own presentation.
You can add interactivity, animation, visuals and all kinds of creative elements to your presentations when you design them in Visme's online presentation maker. With our Dynamic Field feature , you can automatically update key information in real-time across all your slides or multiple projects. Customize existing dynamic fields or create new ones and format them to maintain design consistency.
Create a free account with Visme to start building a presentation your audience will love.
Design a beautiful and engaging presentation with Visme

Trusted by leading brands
Recommended content for you:
![15 Best AI Presentation Makers in 2024 [Free & Paid]](https://visme.co/blog/wp-content/uploads/2023/11/Best-AI-Presentation-Makers-in-2024-Thumbnail-500x280.jpg "visual representation ideas")
Create Stunning Content!
Design visual brand experiences for your business whether you are a seasoned designer or a total novice.
About the Author
Orana is a multi-faceted creative. She is a content writer, artist, and designer. She travels the world with her family and is currently in Istanbul. Find out more about her work at oranavelarde.com
- Hand-Illustrated Explainer Videos
- Illustrated Conversation
- Infographics
- Strategy & Ideas
- Training Design & Development
- Event Communications
- Video Production
- Scripting & Script Assistance
- llustration
- Our Method: Scribology
- Our Process
- Our Guarantee
- What We Care About
- General Contact Info
- Book a Consult
- Book a Quote
- Schedule an Artist
Art of Presentation: A Guide to Captivate Your Audience with Visuals
Andrew Herkert
April 17th, 2023
Whiteboard Video

Presenting a complex topic often results in an audience with glazed -over expressions, or hours of agonizing preparation to avoid those blank stares. Preparation is essential and can be simplified when you know how to use visuals to engage, explain and boost retention.
There is no definitive answer to whether drawn images are better than photos, videos, charts, or graphs. The choice largely depends on the type of information being presented and the presentation objectives. Each type of visual has strengths and weaknesses.
Charts and Graphs
Charts and graphs often simplify presenting complex data sets in a concise manner that summarizes a state or condition. They are effective because visual representation transforms numbers and abstract concepts, revealing the most important aspects of the information. Charts and graphs, however, are limited in their ability to tell a story or convey the nuances behind the numbers.
Photos and Vide os
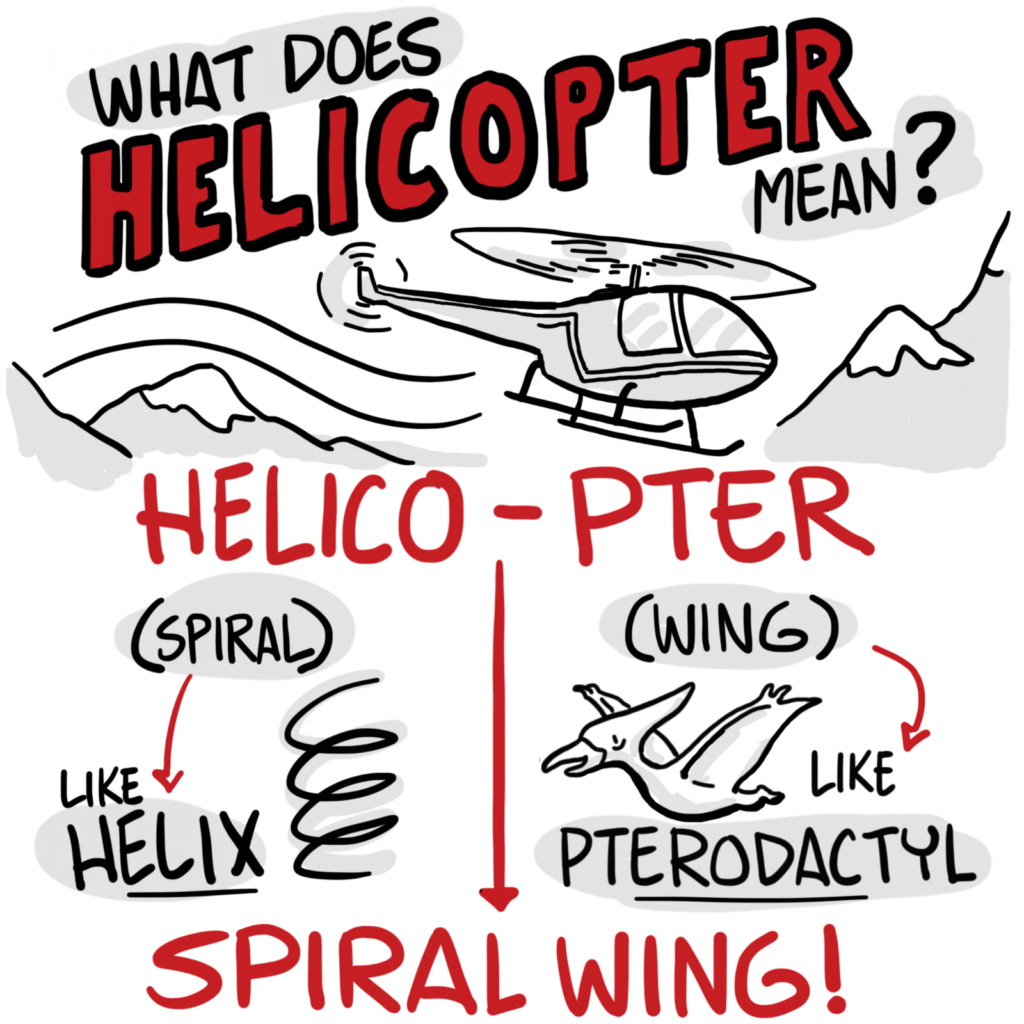
Photos and videos, on the other hand, can provide a more realistic and immersive audience experience. They are particularly effective for demonstrating real-life situations and processes, conditions, procedures, or actions. Photos and videos can also convey emotion and social cues, making them suitable for presenting social science topics. The challenge is often finding or capturing the exact best image(s) to support the message. Searching or producing what’s required can involve considerable time and expense to capture quality images.
Drawn Images

Drawn images offer unique flexibility and broader application than any other single visual approach. The ability to create, re-create, conceptualize, and summarize with imagery checks a lot of application boxes. Ultimately drawn images allow the audience to focus immediately on the most important aspects of the information. When verbal delivery and images are synchronized, it enhances the clarity and understanding of the story. The images also provide visual cues and details that support the message, making it easier for the audience to follow along and recall. Images can also convey emotions that may be difficult to express through dialogue alone.
The choice between static drawn images or animation also depends on the presentation objectives and the type of information being presented. Animation can provide an interactive learning experience by demonstrating processes and procedures in real-time, illustrating cause-and-effect relationships or conveying emotions and social cues.
However, the detail and motion of animation can distract the viewer from important aspects of your message. It can also be more complex and time-consuming to create compared to drawn images. It requires additional resources, like software and premade stock images. Stock images aren’t custom made for your message so they may not fully connect with your audience. Custom animations require expertise in animation design to produce high-quality content. Regardless of quality, animation can lack authenticity, or a feeling of human connection.
A compelling solution is hand-drawn whiteboard video where an artist’s hand is filmed as it creates the drawings. This form of drawing is particularly excellent in providing a framework for understanding complex topics. Moreover, the neuroscience behind it explains its power to engage audiences and boost retention.
Things to Consider When Planning Your Visuals
Ultimately, the choice of presentation visuals depends on the presentation objectives and the audience. Visuals make it easier to absorb information by enabling the brain to process information quickly and retain it for longer periods. Here are some considerations in planning presentation visuals:
To take your presentations to the next level, consider using hand-drawn whiteboard video. This powerful medium will illustrate complex ideas and engage your audience in a dynamic and interactive way. To learn more about how hand-drawn whiteboard video can enhance your presentation, contact us today . Let us help you deliver presentations that leave a lasting impression on your audience.
- Understand the purpose: Before creating visuals, understand the role they will play. What is the goal of using visuals? Are they meant to explain a concept, highlight important points, or provide a summary? Knowing the purpose will help you to create relevant and effective visuals.
- Choose appropriate visuals : The choice of visuals should be guided by the content being presented. Are you explaining a process? Are you presenting data or are you interpreting it? Choose visuals that are easy to understand and support the presentation objectives.
- Consider relationships: How do your visuals connect with your message points? How much space/time should a visual have in your presentation? It will help your audience understand better and remember longer if the visuals sync with what is being said. Present your visuals in manageable chunks that directly support your message.
- Keep it simple : Visuals should be simple and easy to understand. Avoid cluttering the visual with too much information or using complicated graphics. Use colors sparingly and fonts that are easy to read. Create a visual hierarchy that guides the eye.
- Make it accessible : Ensure visuals are accessible to everyone in your audience, including those with visual impairments. Use alternative text, captions, and audio to make visual content accessible.
Incorporating visuals into your presentation is a powerful way to engage and communicate complex information. By understanding the purpose of your visuals, choosing appropriate visuals, organizing the information, keeping it simple, and making it accessible, you can create effective presentations that will stick with your audience long after your presentation is over.
- X (Twitter)
Painting Pictures with Data: The Power of Visual Representations

Picture this. A chaotic world of abstract concepts and complex data, like a thousand-piece jigsaw puzzle. Each piece, a different variable, a unique detail.
Alone, they’re baffling, nearly indecipherable.
But together? They’re a masterpiece of visual information, a detailed illustration.
American data pioneer Edward Tufte , a notable figure in the graphics press, believed that the art of seeing is not limited to the physical objects around us. He stated, “The commonality between science and art is in trying to see profoundly – to develop strategies of seeing and showing.”
It’s in this context that we delve into the world of data visualization. This is a process where you create visual representations that foster understanding and enhance decision making.
It’s the transformation of data into visual formats. The information could be anything from theoretical frameworks and research findings to word problems. Or anything in-between. And it has the power to change the way you learn, work, and more.
And with the help of modern technology, you can take advantage of data visualization easier than ever today.
What are Visual Representations?
Think of visuals, a smorgasbord of graphical representation, images, pictures, and drawings. Now blend these with ideas, abstract concepts, and data.
You get visual representations . A powerful, potent blend of communication and learning.
As a more formal definition, visual representation is the use of images to represent different types of data and ideas.
They’re more than simply a picture. Visual representations organize information visually , creating a deeper understanding and fostering conceptual understanding. These can be concrete objects or abstract symbols or forms, each telling a unique story. And they can be used to improve understanding everywhere, from a job site to an online article. University professors can even use them to improve their teaching.
But this only scratches the surface of what can be created via visual representation.
Types of Visual Representation for Improving Conceptual Understanding
Graphs, spider diagrams, cluster diagrams – the list is endless!
Each type of visual representation has its specific uses. A mind map template can help you create a detailed illustration of your thought process. It illustrates your ideas or data in an engaging way and reveals how they connect.
Here are a handful of different types of data visualization tools that you can begin using right now.
1. Spider Diagrams

Spider diagrams , or mind maps, are the master web-weavers of visual representation.
They originate from a central concept and extend outwards like a spider’s web. Different ideas or concepts branch out from the center area, providing a holistic view of the topic.
This form of representation is brilliant for showcasing relationships between concepts, fostering a deeper understanding of the subject at hand.
2. Cluster Diagrams

As champions of grouping and classifying information, cluster diagrams are your go-to tools for usability testing or decision making. They help you group similar ideas together, making it easier to digest and understand information.
They’re great for exploring product features, brainstorming solutions, or sorting out ideas.
3. Pie Charts

Pie charts are the quintessential representatives of quantitative information.
They are a type of visual diagrams that transform complex data and word problems into simple symbols. Each slice of the pie is a story, a visual display of the part-to-whole relationship.
Whether you’re presenting survey results, market share data, or budget allocation, a pie chart offers a straightforward, easily digestible visual representation.
4. Bar Charts

If you’re dealing with comparative data or need a visual for data analysis, bar charts or graphs come to the rescue.
Bar graphs represent different variables or categories against a quantity, making them perfect for representing quantitative information. The vertical or horizontal bars bring the data to life, translating numbers into visual elements that provide context and insights at a glance.
Visual Representations Benefits
1. deeper understanding via visual perception.
Visual representations aren’t just a feast for the eyes; they’re food for thought. They offer a quick way to dig down into more detail when examining an issue.
They mold abstract concepts into concrete objects, breathing life into the raw, quantitative information. As you glimpse into the world of data through these visualization techniques , your perception deepens.
You no longer just see the data; you comprehend it, you understand its story. Complex data sheds its mystifying cloak, revealing itself in a visual format that your mind grasps instantly. It’s like going from a two dimensional to a three dimensional picture of the world.
2. Enhanced Decision Making
Navigating through different variables and relationships can feel like walking through a labyrinth. But visualize these with a spider diagram or cluster diagram, and the path becomes clear. Visual representation is one of the most efficient decision making techniques .
Visual representations illuminate the links and connections, presenting a fuller picture. It’s like having a compass in your decision-making journey, guiding you toward the correct answer.
3. Professional Development
Whether you’re presenting research findings, sharing theoretical frameworks, or revealing historical examples, visual representations are your ace. They equip you with a new language, empowering you to convey your message compellingly.
From the conference room to the university lecture hall, they enhance your communication and teaching skills, propelling your professional development. Try to create a research mind map and compare it to a plain text document full of research documentation and see the difference.
4. Bridging the Gap in Data Analysis
What is data visualization if not the mediator between data analysis and understanding? It’s more than an actual process; it’s a bridge.
It takes you from the shores of raw, complex data to the lands of comprehension and insights. With visualization techniques, such as the use of simple symbols or detailed illustrations, you can navigate through this bridge effortlessly.
5. Enriching Learning Environments
Imagine a teaching setting where concepts are not just told but shown. Where students don’t just listen to word problems but see them represented in charts and graphs. This is what visual representations bring to learning environments.
They transform traditional methods into interactive learning experiences, enabling students to grasp complex ideas and understand relationships more clearly. The result? An enriched learning experience that fosters conceptual understanding.
6. Making Abstract Concepts Understandable
In a world brimming with abstract concepts, visual representations are our saving grace. They serve as translators, decoding these concepts into a language we can understand.
Let’s say you’re trying to grasp a theoretical framework. Reading about it might leave you puzzled. But see it laid out in a spider diagram or a concept map, and the fog lifts. With its different variables clearly represented, the concept becomes tangible.
Visual representations simplify the complex, convert the abstract into concrete, making the inscrutable suddenly crystal clear. It’s the power of transforming word problems into visual displays, a method that doesn’t just provide the correct answer. It also offers a deeper understanding.
How to Make a Cluster Diagram?
Ready to get creative? Let’s make a cluster diagram.
First, choose your central idea or problem. This goes in the center area of your diagram. Next, think about related topics or subtopics. Draw lines from the central idea to these topics. Each line represents a relationship.

While you can create a picture like this by drawing, there’s a better way.
Mindomo is a mind mapping tool that will enable you to create visuals that represent data quickly and easily. It provides a wide range of templates to kick-start your diagramming process. And since it’s an online site, you can access it from anywhere.
With a mind map template, creating a cluster diagram becomes an effortless process. This is especially the case since you can edit its style, colors, and more to your heart’s content. And when you’re done, sharing is as simple as clicking a button.
A Few Final Words About Information Visualization
To wrap it up, visual representations are not just about presenting data or information. They are about creating a shared understanding, facilitating learning, and promoting effective communication. Whether it’s about defining a complex process or representing an abstract concept, visual representations have it all covered. And with tools like Mindomo , creating these visuals is as easy as pie.
In the end, visual representation isn’t just about viewing data, it’s about seeing, understanding, and interacting with it. It’s about immersing yourself in the world of abstract concepts, transforming them into tangible visual elements. It’s about seeing relationships between ideas in full color. It’s a whole new language that opens doors to a world of possibilities.
The correct answer to ‘what is data visualization?’ is simple. It’s the future of learning, teaching, and decision-making.
Keep it smart, simple, and creative! The Mindomo Team
Related Posts

Top 5 Fishbone Diagram Templates You Need To Know About!

Mastering Your Mind: Exploring Effective Visualization Techniques

The Power of an Idea Map: Your Guide to Creative Thinking & Organizing Ideas

Innovation Unleashed: Mind Mapping vs Brainstorming in the Generation of Game-Changing Ideas

The Key to Success with Ingredients for a Fulfilling Life

Cracking the Code to Creative Thinking: Ignite Your Brain and Unleash Your Ideas
Write a comment cancel reply.
Save my name, email, and website in this browser for the next time I comment.
Initial Thoughts
Perspectives & resources, what is high-quality mathematics instruction and why is it important.
- Page 1: The Importance of High-Quality Mathematics Instruction
- Page 2: A Standards-Based Mathematics Curriculum
- Page 3: Evidence-Based Mathematics Practices
What evidence-based mathematics practices can teachers employ?
- Page 4: Explicit, Systematic Instruction
Page 5: Visual Representations
- Page 6: Schema Instruction
- Page 7: Metacognitive Strategies
- Page 8: Effective Classroom Practices
- Page 9: References & Additional Resources
- Page 10: Credits

Research Shows
- Students who use accurate visual representations are six times more likely to correctly solve mathematics problems than are students who do not use them. However, students who use inaccurate visual representations are less likely to correctly solve mathematics problems than those who do not use visual representations at all. (Boonen, van Wesel, Jolles, & van der Schoot, 2014)
- Students with a learning disability (LD) often do not create accurate visual representations or use them strategically to solve problems. Teaching students to systematically use a visual representation to solve word problems has led to substantial improvements in math achievement for students with learning disabilities. (van Garderen, Scheuermann, & Jackson, 2012; van Garderen, Scheuermann, & Poch, 2014)
- Students who use visual representations to solve word problems are more likely to solve the problems accurately. This was equally true for students who had LD, were low-achieving, or were average-achieving. (Krawec, 2014)
Visual representations are flexible; they can be used across grade levels and types of math problems. They can be used by teachers to teach mathematics facts and by students to learn mathematics content. Visual representations can take a number of forms. Click on the links below to view some of the visual representations most commonly used by teachers and students.
How does this practice align?
High-leverage practice (hlp).
- HLP15 : Provide scaffolded supports
CCSSM: Standards for Mathematical Practice
- MP1 : Make sense of problems and persevere in solving them.
Number Lines
Definition : A straight line that shows the order of and the relation between numbers.
Common Uses : addition, subtraction, counting

Strip Diagrams
Definition : A bar divided into rectangles that accurately represent quantities noted in the problem.
Common Uses : addition, fractions, proportions, ratios

Definition : Simple drawings of concrete or real items (e.g., marbles, trucks).
Common Uses : counting, addition, subtraction, multiplication, division

Graphs/Charts
Definition : Drawings that depict information using lines, shapes, and colors.
Common Uses : comparing numbers, statistics, ratios, algebra

Graphic Organizers
Definition : Visual that assists students in remembering and organizing information, as well as depicting the relationships between ideas (e.g., word webs, tables, Venn diagrams).
Common Uses : algebra, geometry
| Triangles | ||
|---|---|---|
| equilateral | – all sides are same length – all angles 60° | |
| isosceles | – two sides are same length – two angles are the same | |
| scalene | – no sides are the same length – no angles are the same | |
| right | – one angle is 90°(right angle) – opposite side of right angle is longest side (hypotenuse) | |
| obtuse | – one angle is greater than 90° | |
| acute | – all angles are less than 90° | |
Before they can solve problems, however, students must first know what type of visual representation to create and use for a given mathematics problem. Some students—specifically, high-achieving students, gifted students—do this automatically, whereas others need to be explicitly taught how. This is especially the case for students who struggle with mathematics and those with mathematics learning disabilities. Without explicit, systematic instruction on how to create and use visual representations, these students often create visual representations that are disorganized or contain incorrect or partial information. Consider the examples below.
Elementary Example
Mrs. Aldridge ask her first-grade students to add 2 + 4 by drawing dots.
Notice that Talia gets the correct answer. However, because Colby draws his dots in haphazard fashion, he fails to count all of them and consequently arrives at the wrong solution.
High School Example
Mr. Huang asks his students to solve the following word problem:
The flagpole needs to be replaced. The school would like to replace it with the same size pole. When Juan stands 11 feet from the base of the pole, the angle of elevation from Juan’s feet to the top of the pole is 70 degrees. How tall is the pole?
Compare the drawings below created by Brody and Zoe to represent this problem. Notice that Brody drew an accurate representation and applied the correct strategy. In contrast, Zoe drew a picture with partially correct information. The 11 is in the correct place, but the 70° is not. As a result of her inaccurate representation, Zoe is unable to move forward and solve the problem. However, given an accurate representation developed by someone else, Zoe is more likely to solve the problem correctly.

Manipulatives
Some students will not be able to grasp mathematics skills and concepts using only the types of visual representations noted in the table above. Very young children and students who struggle with mathematics often require different types of visual representations known as manipulatives. These concrete, hands-on materials and objects—for example, an abacus or coins—help students to represent the mathematical idea they are trying to learn or the problem they are attempting to solve. Manipulatives can help students develop a conceptual understanding of mathematical topics. (For the purpose of this module, the term concrete objects refers to manipulatives and the term visual representations refers to schematic diagrams.)
It is important that the teacher make explicit the connection between the concrete object and the abstract concept being taught. The goal is for the student to eventually understand the concepts and procedures without the use of manipulatives. For secondary students who struggle with mathematics, teachers should show the abstract along with the concrete or visual representation and explicitly make the connection between them.
A move from concrete objects or visual representations to using abstract equations can be difficult for some students. One strategy teachers can use to help students systematically transition among concrete objects, visual representations, and abstract equations is the Concrete-Representational-Abstract (CRA) framework.
If you would like to learn more about this framework, click here.
Concrete-Representational-Abstract Framework

- Concrete —Students interact and manipulate three-dimensional objects, for example algebra tiles or other algebra manipulatives with representations of variables and units.
- Representational — Students use two-dimensional drawings to represent problems. These pictures may be presented to them by the teacher, or through the curriculum used in the class, or students may draw their own representation of the problem.
- Abstract — Students solve problems with numbers, symbols, and words without any concrete or representational assistance.
CRA is effective across all age levels and can assist students in learning concepts, procedures, and applications. When implementing each component, teachers should use explicit, systematic instruction and continually monitor student work to assess their understanding, asking them questions about their thinking and providing clarification as needed. Concrete and representational activities must reflect the actual process of solving the problem so that students are able to generalize the process to solve an abstract equation. The illustration below highlights each of these components.

For Your Information
One promising practice for moving secondary students with mathematics difficulties or disabilities from the use of manipulatives and visual representations to the abstract equation quickly is the CRA-I strategy . In this modified version of CRA, the teacher simultaneously presents the content using concrete objects, visual representations of the concrete objects, and the abstract equation. Studies have shown that this framework is effective for teaching algebra to this population of students (Strickland & Maccini, 2012; Strickland & Maccini, 2013; Strickland, 2017).
Kim Paulsen discusses the benefits of manipulatives and a number of things to keep in mind when using them (time: 2:35).
Kim Paulsen, EdD Associate Professor, Special Education Vanderbilt University
View Transcript

Transcript: Kim Paulsen, EdD
Manipulatives are a great way of helping kids understand conceptually. The use of manipulatives really helps students see that conceptually, and it clicks a little more with them. Some of the things, though, that we need to remember when we’re using manipulatives is that it is important to give students a little bit of free time when you’re using a new manipulative so that they can just explore with them. We need to have specific rules for how to use manipulatives, that they aren’t toys, that they really are learning materials, and how students pick them up, how they put them away, the right time to use them, and making sure that they’re not distracters while we’re actually doing the presentation part of the lesson. One of the important things is that we don’t want students to memorize the algorithm or the procedures while they’re using the manipulatives. It really is just to help them understand conceptually. That doesn’t mean that kids are automatically going to understand conceptually or be able to make that bridge between using the concrete manipulatives into them being able to solve the problems. For some kids, it is difficult to use the manipulatives. That’s not how they learn, and so we don’t want to force kids to have to use manipulatives if it’s not something that is helpful for them. So we have to remember that manipulatives are one way to think about teaching math.
I think part of the reason that some teachers don’t use them is because it takes a lot of time, it takes a lot of organization, and they also feel that students get too reliant on using manipulatives. One way to think about using manipulatives is that you do it a couple of lessons when you’re teaching a new concept, and then take those away so that students are able to do just the computation part of it. It is true we can’t walk around life with manipulatives in our hands. And I think one of the other reasons that a lot of schools or teachers don’t use manipulatives is because they’re very expensive. And so it’s very helpful if all of the teachers in the school can pool resources and have a manipulative room where teachers can go check out manipulatives so that it’s not so expensive. Teachers have to know how to use them, and that takes a lot of practice.

Daily Progress, Extraordinary Results
100+ Vision Board Ideas: Unlocking the Power of Visualization
A vision board, often regarded as a visual representation of one’s aspirations, dreams, and goals, has gained immense popularity over the years. By combining images, words, and symbols that resonate with your desires, a vision board serves as a constant reminder of what you aim to achieve. But what makes a vision board effective, and how can you create one that truly reflects your aspirations? Let’s delve into the world of vision boards and explore some creative ideas to get you started.
Key Takeaways:
- Vision boards are powerful visualization tools that help manifest your dreams .
- They serve as daily reminders of your goals and aspirations.
- Incorporating a mix of images, words, and symbols can enhance the effectiveness of your board.
- Regularly updating and reviewing your vision board can keep your goals aligned and fresh.
Why Create a Vision Board?
A vision board, at its core, is a tangible representation of one’s intangible desires, goals, and aspirations. It serves as a bridge between one’s current reality and desired future. Here are some compelling reasons to create a vision board:
1. Clarity of Purpose
- Defining Goals: A vision board forces you to sit down and think about what you genuinely want out of life. It’s an opportunity to define and refine your goals, both big and small.
- Visualization: By visualizing your goals, you can gain a clearer understanding of what steps you need to take to achieve them. It’s a roadmap to your desired destination.
2. Motivation and Inspiration
- Daily Reminder: A vision board serves as a daily reminder of why you’re working hard and what you’re working towards. On days when motivation wanes, a glance at your board can reignite your drive.
- Emotional Connection: The images and words you choose for your board evoke emotions. These emotions can be powerful motivators, pushing you to take action even when faced with challenges.
3. Boosts Self-Confidence
- Affirmation of Belief: By creating a vision board, you’re affirming your belief in your dreams and your ability to achieve them.
- Celebrating Achievements: As you reach milestones, your vision board serves as a testament to your capabilities, boosting your self-confidence.
4. Enhances Focus
- Eliminates Distractions: In a world filled with distractions, a vision board helps you stay focused on what truly matters to you.
- Prioritization: By visualizing your goals, you can prioritize them, ensuring that you direct your energy and resources towards what’s most important.
5. Manifestation and the Law of Attraction
- Attracting Opportunities: Many proponents of vision boards believe in the Law of Attraction – the idea that by focusing on positive or negative thoughts, one can bring about positive or negative results. By focusing on your goals, you’re more likely to recognize and seize opportunities that align with them.
- Positive Mindset: A vision board encourages a positive mindset, which in turn attracts positive experiences and outcomes.
6. Encourages Creativity
- Artistic Expression: The process of creating a vision board is inherently creative. You’re selecting images, arranging them, adding words, and making it uniquely yours.
- Problem Solving: As you visualize your goals, you might also start thinking of creative ways to overcome potential obstacles.
7. Accountability
- Commitment: By creating a vision board and placing it where you can see it, you’re making a commitment to your goals. It’s a public declaration (even if only to yourself) of your intentions.
- Tracking Progress: Over time, you can see how far you’ve come by comparing your current reality to the aspirations on your board. It’s a way to hold yourself accountable for taking steps towards your dreams.
In essence, a vision board is more than just a collection of images and words. It’s a powerful tool that aligns your mind with your heart’s desires, propelling you towards your dreams with clarity, focus, and determination.
Starting with the Basics
Creating a vision board is an exciting journey of self-discovery and goal-setting. But before you embark on this creative endeavor, it’s essential to understand the foundational elements that go into crafting an effective and meaningful board.
1. Setting Clear Intentions
- Purpose of the Board: Before you begin, ask yourself why you’re creating a vision board. Is it to manifest a specific goal, visualize a life change, or perhaps to gain clarity on a particular aspect of your life?
- Visualization Exercise: Spend some quiet time visualizing your ideal future. This mental imagery will guide your selection of images and words for the board.
2. Choosing the Right Board
- Size Matters: Depending on the number of goals and the level of detail you want, choose a board size that suits your needs. A larger board can accommodate more aspirations, while a smaller one can focus on a specific theme or goal.
- Type of Board: While corkboards and poster boards are popular choices, you can also consider magnetic boards, canvas, or even a section of your wall.
3. Gathering Materials
- Images & Words: Start collecting magazines, newspapers, and printouts that resonate with your goals. Look for images, quotes, and words that align with your vision.
- Adhesives: Depending on your board type, you’ll need glue, pins, tape, or magnets to attach your materials.
- Decorative Items: Personalize your board with stickers, washi tape, markers, ribbons, and other embellishments. These add a touch of creativity and make your board visually appealing.
4. Selecting a Theme or Focus
- General vs. Themed: While a general vision board encompasses various aspects of your life, a themed board zeroes in on a specific area, such as career, relationships, personal growth, or travel.
- Time-Bound Boards: Some people create vision boards with a specific timeframe in mind, like a yearly board or a five-year plan.
5. Organizing Your Board
- Layout: Before you start pasting, lay out your images and words on the board to get a feel for the design. Decide whether you want a structured layout with clear sections or a more free-flowing, collage-style arrangement.
- Central Image: Consider placing a central image or quote that encapsulates the essence of your board. This can serve as a focal point and anchor for the rest of your materials.
6. Creating the Right Ambiance
- Dedicated Space: Choose a quiet and comfortable space for creating your vision board. This should be a place where you feel relaxed and inspired.
- Mood Enhancers: Play some calming music, light a candle, or even invite a friend over for a vision board party. Creating the right ambiance can make the process more enjoyable and meaningful.
7. Digital Alternatives
- Virtual Vision Boards: If you’re tech-savvy or prefer a digital approach, there are several apps and tools available for creating virtual vision boards. These can be easily updated, shared, and set as wallpapers on your devices.
- Inspiration Sources: Websites like Pinterest and Instagram can be goldmines for images and quotes that resonate with your goals.
Starting with the basics ensures that your vision board is not only visually appealing but also deeply personal and aligned with your aspirations. By laying a strong foundation, you set the stage for a board that truly resonates with your heart’s desires and serves as a daily source of inspiration and motivation.
Creative Vision Board Ideas
A vision board is a personal canvas of dreams, goals, and inspirations. While the traditional method involves pasting images and quotes on a board, there are countless creative ways to represent your visions. Here are some imaginative ideas to consider:
1. Themed Vision Boards
- Travel Board: If wanderlust runs in your veins, create a board dedicated to all the places you want to visit. Incorporate maps, postcards, and travel quotes.
- Career Aspirations: Dedicate a board to your professional goals. Include images of your dream office, influential figures in your field, and milestones you aim to achieve.
- Wellness and Health: Craft a board focusing on your health goals, be it physical fitness, mental well-being, or dietary changes.
2. Interactive Vision Boards
- Pockets of Dreams: Attach small pockets or envelopes to your board. Inside, place notes, daily affirmations, or even tiny trinkets that resonate with specific goals.
- Rotating Images: Use clips or pins to attach images, allowing you to rotate them based on changing priorities or achieved goals.
3. Vision Board Journal
- Daily Entries: Instead of a static board, use a journal. Dedicate each page or spread to a specific goal, adding daily reflections or steps taken towards that goal.
- Collage Style: Mix and match images, stickers, and doodles. This format offers the flexibility to expand upon ideas over time.
4. Digital Vision Boards
- Apps and Tools: Utilize apps like Pinterest or Trello to create digital boards. These platforms allow for easy updating and can be accessed on the go.
- Animated Boards: Use GIFs or short video clips to bring your board to life, adding a dynamic element to your visions.
5. 3D Vision Boards
- Pop-Up Elements: Add a tactile dimension to your board by incorporating pop-up images or 3D elements like small figurines or origami.
- Shadow Boxes: Use a shadow box frame to create a deeper, more immersive vision board. This format allows for the inclusion of bulkier items, like souvenirs or keepsakes.
6. Vision Board Wheel
- Life Segments: Visualize your life as a wheel divided into segments like health, career, relationships, and personal growth. Decorate each segment with images and words representing goals for that area.
- Central Focus: In the center of the wheel, place an image or quote that encapsulates your overarching life goal or theme for the year.
7. Vision Board Calendar
- Monthly Goals: Transform a wall calendar into a vision board by dedicating each month to a specific goal or theme. As the month progresses, add notes or stickers marking achievements or reflections.
- Yearly Overview: At the end of the calendar, have a page that provides an overview of the year’s goals and aspirations.
8. Vision Board Mural
- Wall-Sized Dreams: If you’re feeling particularly ambitious, dedicate an entire wall in your room or workspace to your vision board. Paint, draw, or paste your dreams, creating a large-scale mural of aspirations.
9. Modular Vision Boards
- Magnetic or Velcro Boards: Use magnetic sheets or Velcro to create a board where images and words can be easily moved, added, or removed. This offers flexibility as your goals evolve.
10. Vision Board Kits
- Goal-Based Kits: Create small kits or boxes for specific goals. For instance, if you have a goal to read more, have a box with a book list, reading glasses, and bookmarks.
In essence, a vision board is a reflection of your innermost desires, and there’s no limit to how creatively you can represent them. Whether you choose a traditional format or decide to think outside the box, the key is to make it personal, meaningful, and aligned with your aspirations.
Incorporating the Right Elements
A vision board is more than just a collage; it’s a visual representation of your innermost desires and goals. To ensure it serves its purpose, it’s crucial to incorporate elements that truly resonate with you.
Images are the heart of any vision board. They provide a visual cue to your aspirations and evoke emotions.
- Personal Photos: Use pictures from moments when you felt proud, happy, or inspired. These serve as reminders of past achievements and motivators for future ones.
- Dream Destinations: If you aspire to travel, include images of places you wish to visit. It could be serene beaches, bustling cities, or serene mountains.
- Role Models: Pictures of individuals who inspire you, whether they’re celebrities, historical figures, or even people from your personal life, can serve as powerful motivators.
2. Words and Quotes
While images appeal to our visual senses, words resonate with our thoughts and beliefs.
- Affirmations: These are positive statements that can help you overcome self-sabotaging beliefs. Phrases like “I am capable,” “I am deserving,” or “I am resilient” can be powerful additions.
- Power Words: Single words that encapsulate your goals or desired state can be impactful. Words like “Thrive,” “Grow,” “Achieve,” or “Believe” can serve as daily mantras.
- Inspirational Quotes: Find quotes that resonate with your aspirations. These can be from famous personalities, books, or even personal anecdotes.
3. Symbols and Icons
Symbols can represent complex ideas or emotions in a simple form, making them perfect for vision boards.
- Personal Symbols: Maybe a particular shape, like a circle representing wholeness, or an infinity symbol representing limitless possibilities, resonates with you.
- Cultural or Universal Symbols: Icons like the peace sign, a heart, or a star can convey specific meanings or aspirations.
4. Textures and Fabrics
Adding tactile elements can make your vision board more interactive and engaging.
- Fabric Swatches: If you’re a fashion enthusiast or have goals related to interior design, adding fabric swatches can be both meaningful and visually appealing.
- Natural Elements: Incorporate dried leaves, flowers, or even sand to add a touch of nature to your board, especially if you have goals related to nature or the environment.
5. Interactive Elements
Making your vision board interactive can enhance its impact.
- Pockets: Attach small pockets to store notes, letters to your future self, or even tiny objects that resonate with specific goals.
- Flaps: Use flaps to hide messages or images that you can reveal over time or as you achieve specific milestones.
Colors evoke emotions and can set the mood for your vision board.
- Color Psychology: Different colors can evoke different emotions. For instance, blue can be calming, red can signify passion, and green can represent growth.
- Consistent Palette: If you have a specific mood in mind for your board, stick to a consistent color palette that reflects that emotion.
7. Empty Spaces
While it’s tempting to fill every inch of your board, leaving some empty spaces can be symbolic.
- Openness to Opportunities: Empty spaces can represent being open to new experiences, opportunities, or changes that you might not have envisioned yet.
- Room for Growth: As you evolve, so will your goals. Leaving some space allows you to add new elements as your aspirations change or grow.
The elements you incorporate into your vision board should be a true reflection of your aspirations, emotions, and beliefs. They should resonate with you on a deep level, serving as daily reminders and motivators to pursue your dreams.
Maximizing the Impact of Your Vision Board
Creating a vision board is just the beginning. To truly harness its power, you need to interact with it regularly and use it as a tool for inspiration, motivation, and reflection. Here are some strategies to maximize its impact:
1. Strategic Placement
- Visibility is Key: Place your vision board in a location where you’ll see it multiple times a day. This could be by your bedside, above your workspace, or even as a screensaver on your computer or phone.
- Personal Spaces: Positioning your board in personal spaces, like your bedroom or personal office, can create a more intimate connection with your goals.
For more inspiration on how to design your board, check out these Vision Board Samples ideas .
2. Daily Interaction
- Morning Ritual: Start your day by spending a few minutes looking at your board. Visualize each goal as if you’ve already achieved it, and set your intentions for the day.
- Evening Reflection: Before bed, reflect on the steps you took towards your goals that day. This can reinforce positive behaviors and motivate you for the next day.
3. Visualization Techniques
- Emotional Connection: Don’t just look at the images and words; try to feel the emotions associated with achieving each goal. The stronger the emotional connection, the more motivated you’ll be.
- Sensory Experience: Engage all your senses when visualizing. Imagine the sounds, smells, and feelings associated with each goal.
For a deeper dive into visualization techniques, Color Made Happy offers some fantastic insights.
4. Regular Updates
- Stay Relevant: As you grow and evolve, so will your goals. Regularly update your board to ensure it remains aligned with your current aspirations.
- Celebrate Achievements: When you achieve a goal, celebrate it. You can add a sticker, a gold star, or even a new image representing the achievement.
5. Combine with Other Tools
- Goal-Setting Techniques: Pair your vision board with other goal-setting techniques, such as journaling, to-do lists, or digital goal-tracking apps.
- Affirmations: Complement the visual cues on your board with spoken affirmations. Repeating positive statements can reinforce beliefs and boost confidence.
6. Share and Discuss
- Accountability Partners: Share your vision board with a trusted friend or family member. Discussing your goals can provide external motivation and accountability.
- Vision Board Parties: Organize or attend vision board parties. Creating boards in a group setting can be inspiring, and you can gain new ideas from others.
7. Stay Open to the Journey
- Flexibility: While your vision board represents your desired outcomes, stay open to the journey. Sometimes, the path to a goal might look different than you initially imagined.
- Embrace Change: If you feel a shift in your aspirations or priorities, embrace it. Your vision board is a dynamic tool that should grow with you.
8. Combine with Action
- Active Pursuit: A vision board is a tool for inspiration, but achieving your goals requires action. Use your board as a daily reminder to take proactive steps towards your dreams.
- Break Down Goals: For larger goals, break them down into smaller, actionable steps. This makes them more manageable and less overwhelming.
A vision board is not just a collection of images and words; it’s a living representation of your dreams and aspirations. By actively engaging with it, updating it, and using it as a daily source of inspiration, you can maximize its impact and bring your visions to life.
Vision Board Ideas to Inspire You
- Self-love affirmations
- Meditation practices
- Personal development books
- Quotes from role models
- Fitness goals (e.g., run a marathon)
- Healthy recipes
- Mental health practices
- Dream job description
- Professional courses or certifications
- Inspirational workspaces
- Networking events
- Dream destinations
- Adventure activities (e.g., skydiving)
- Cultural experiences
- Travel quotes
- Ideal partner traits
- Friendship goals
- Family time activities
- Social events or gatherings
- Art projects
- Musical instruments to learn
- Writing or journaling prompts
- Dream home visuals
- Interior design styles
- Garden or balcony ideas
- Sustainable living practices
- Savings targets
- Investment opportunities
- Debt-free journey
- Budgeting methods
- Spiritual practices or rituals
- Sacred places to visit
- Mindfulness exercises
- Inspirational spiritual leaders
- Entertainment & Leisure – Life needs its moments of joy and relaxation. From engrossing books to soul-stirring music, entertainment offers an escape from the mundane.
- Books to read
- Movies to watch
- Music festivals or concerts
- Theater or dance performances
- Fashion & Style – Personal style is a reflection of one’s identity. It’s about embracing individuality, taking inspiration, and making a statement through fashion.
- Wardrobe goals
- Personal style inspirations
- Fashion icons
- DIY fashion projects
- Community & Giving Back – Being part of a community means contributing and making a difference. Volunteering and supporting causes reflect the spirit of giving and compassion.
- Volunteer opportunities
- Charities to support
- Community events
- Acts of kindness ideas
- Personal Milestones – Life is a series of milestones, each marking significant moments and achievements. Celebrating these moments adds depth and meaning to our journey.
- Life events (e.g., marriage, parenthood)
- Personal achievements
- Anniversaries or celebrations
- Personal growth markers
- Nature & Environment – The wonders of nature inspire and rejuvenate. Embracing eco-friendly practices and cherishing wildlife are ways to give back to Mother Earth.
- Wildlife encounters
- Eco-friendly practices
- Nature retreats
- Environmental causes
- Skills & Learning – The pursuit of knowledge is endless. From languages to culinary arts, every new skill adds a feather to the cap of life’s experiences.
- New languages to learn
- Cooking or baking skills
- Digital skills (e.g., coding)
- Dance or movement classes
- Entrepreneurship & Business – The entrepreneurial spirit is about innovation and vision. It’s the drive to create, lead, and inspire in the world of business.
- Business ideas
- Branding inspirations
- Successful entrepreneurs
- Business growth strategies
- Technology & Innovation – In an ever-evolving world, technology and innovation are at the forefront. Staying updated and embracing change can lead to limitless possibilities.
- Gadgets to own
- Tech trends to follow
- Innovative solutions
- Future tech predictions
- Sports & Activities – The thrill of the game and the joy of movement define sports and activities. It’s about challenging oneself and relishing the spirit of competition.
- Sports to try
- Athletic achievements
- Team sports
- Fitness challenges
- Culture & History – Delving into the past and exploring diverse cultures enriches our understanding of the world. It’s a tribute to traditions and historical legacies.
- Historical places to visit
- Cultural festivals
- Traditional crafts
- Historical figures
- Personal Values & Beliefs – Core values and beliefs shape our decisions and actions. They are the guiding principles that define one’s character and worldview.
- Core values
- Belief systems
- Moral compass visuals
- Ethical practices
Feel free to customize these ideas based on your personal preferences and aspirations. A vision board is a personal reflection of your dreams and goals, so make it as unique as you are!
Related Posts
- Cost-Effective Ways to Revamp Your Bathroom
- Embracing Minimalism: Essential Tips for a Simpler Lifestyle
- How Can I Straighten My Hair Naturally at Home? 5 Effective Ways
- Unlock Your Potential: February Habit Trackers for Focused Goals and Motivation
- Crafting Your Path to Wellness: Strategies to Break Bad Habits and Embrace a Healthier Life
- The Best Desk Treadmill You Health and Body Needs
- Lawn Renovation 101: A Step-by-Step Approach to Restoring Your Lawn’s Beauty
- Lighting for Mood: Creating the Perfect Ambiance in Your Home
About The Author

OnePercentTeam

Find Your Focus: Regaining Motivation After Time Away

Unlock Peak Performance: Master the Art of Flow State
Leave a comment cancel reply.
Your email address will not be published. Required fields are marked *
Save my name, email, and website in this browser for the next time I comment.
Click below to consent to the use of the cookie technology provided by vi (video intelligence AG) to personalize content and advertising. For more info please access vi's website .
Here’s How to Make a Vision Board for Manifestation
Turn your goals into a “crafternoon.”

Our editors handpick the products that we feature. We may earn commission from the links on this page.
Manifestation and achieving your dreams aren’t magic, though—and they don’t happen overnight. Successful manifestation starts with setting your intention, believing that it will become a reality, then taking active steps toward making that abstract idea come to fruition. And that’s where vision boards come in. Whatever goal you have ( strengthening your relationship , finding a new job , or traveling more), a vision board is a great tool to have during your journey.
So what exactly is a vision board? It’s a visual representation of your goals, says media and life coach Zakiya Larry . These typically poster-size visuals contain all kinds of images and text that represent something you’re trying to accomplish. A vision board relates to your life direction, says Larry.
There are really no rules when it comes to vision boards, since it’s about crafting something that will inspire you to realize your dreams and goals on a daily basis. Some vision boards focus on a singular idea, while others look at the bigger picture of what you want your future to look like.
Does a vision board really work?
Yes, putting your goals on paper in this type of visual format can actually help you achieve them. It’s a notion that Oprah and other celebrities, like Reese Witherspoon , have touted (though Oprah says she doesn’t use a vision board anymore because she’s a “powerful manifestor”). And there is plenty of research to back it up.
In one study , researchers found that, in athletes, visualization was almost as effective as physical practice.
It’s also a fun arts-and-crafts project that allows you to see what your goals would look like once you achieve them, says Larry. So if, for example, you’re hoping to be more comfortable with your body , you might put pictures of happy, healthy women coupled with empowering words like confidence on your vision board.
First, consider what matters most to you
Take a moment of self-reflection and figure out what’s most important to you, says Larry. Think about the one or two areas of your life you really want to change, and focus on the words they elicit. Then, decide if your vision board should represent short-term or long-term change. Larry says using yearly benchmarks is most digestible and easiest to track progress.
Then, gather your inspiration
Hunt through your old stashes of magazines or scour Instagram and Pinterest for visual representations of your goal. If you want to make improvements to your kitchen, for example, clip a picture of a home that inspires you. Dying to finally take a vacay day? Find yourself a palm tree pic. Once you have enough, secure everything to a poster board or inside a page of your journal. (Might we suggest the vision board page in our lovely guided journal ?)
If you prefer to go the digital route, there are plenty of free ways to go. For simplicity, you could create a board on Pinterest . But if you want your digital vision board to more closely resemble a physical one, use an app like Canva , which can be used on your phone, tablet, or computer. You don’t need to be a graphic design expert—this program is free (you can pay a premium for added functionality and graphics) and extremely beginner-friendly. Simply import your inspiration photos and arrange them into a collage on your blank digital canvas.
To make your vision board work, put it somewhere you can see it
The trick is to make sure any words you use are short and the images you choose are vivid, attractive, and glossy so your vision board regularly catches your eye, says Larry. Once you’re done, put the vision board in a place that’s within your regular line of sight—your nightstand, your home office, or even by your television—because the key is to look at it as often as possible.
If you’re not comfortable making such a statement with your vision board, Larry suggests creating a smaller version. You can cut your poster board in half or use the largest photo frame you have on hand. Alternatively, you can use your digital vision board as your laptop’s backdrop or your phone’s home screen.
And don’t be afraid to make updates
Though a vision board is a wonderful tool to help you achieve your goals, you can’t just sit back and expect it to magically make things a reality.
Think of your vision board as a living thing—rip pictures off, add new items, or start from scratch if you’re so inclined, says Larry. And be open to variations of what you want to achieve. For example, if your goal is to go vegan, don’t beat yourself up if you’re more of a vegetarian after six months or so.
“Sometimes we miss the fact that we’ve achieved something great because it doesn’t look exactly like we thought,” says Larry.
For more tips on creating a vision board, watch a workshop with Adam Glassman, Gayle King, and Gabby Bernstein here .
Shop Our Vision Board Essentials

Lamare Vision Board Book

OWLKELA Dry Erase Cork Board

Mindmellow Vision Board Kit “Dear Future Self”

Bold Tuesday Vision Board Kit for Women

Oprah's The Life You Want™ Finding Your Purpose Journal

AMUSIGHT Linen Boards with Pushpins
Brigitt is a writer, editor and craft stylist with nearly 15 years of experience. She specializes in lifestyle topics, including home, health, parenting, beauty, style, food, entertaining, travel and weddings. She has written for Glamour, People, Good Housekeeping, Women's Health, Real Simple, Martha Stewart, Apartment Therapy, The Spruce, and more.

Oprah Daily Insider Exclusive Previews

11 Summer Travel Hacks That Will Save You Money

The Day I Became Friends with My Ex’s Ex

Why Elin Hilderbrand Is Quitting at 54
Lessons I Learned Ridingin My Dad’s Nissan

Why Setting Goals Around New Year's Doesn’t Actual

Why You Keep Waking Up at 3 A.M.

How to Save Enough Money for Retirement

Hot Flash Help for Women Who Can’t Do HT

This Is Your Brain on Podcasts

Why It Might Be Time for a Menopause Makeover

Why You Should Be Very Afraid of Menopausal Women
- SUGGESTED TOPICS
- The Magazine
- Newsletters
- Managing Yourself
- Managing Teams
- Work-life Balance
- The Big Idea
- Data & Visuals
- Reading Lists
- Case Selections
- HBR Learning
- Topic Feeds
- Account Settings
- Email Preferences
Visualizations That Really Work
- Scott Berinato

Not long ago, the ability to create smart data visualizations (or dataviz) was a nice-to-have skill for design- and data-minded managers. But now it’s a must-have skill for all managers, because it’s often the only way to make sense of the work they do. Decision making increasingly relies on data, which arrives with such overwhelming velocity, and in such volume, that some level of abstraction is crucial. Thanks to the internet and a growing number of affordable tools, visualization is accessible for everyone—but that convenience can lead to charts that are merely adequate or even ineffective.
By answering just two questions, Berinato writes, you can set yourself up to succeed: Is the information conceptual or data-driven? and Am I declaring something or exploring something? He leads readers through a simple process of identifying which of the four types of visualization they might use to achieve their goals most effectively: idea illustration, idea generation, visual discovery, or everyday dataviz.
This article is adapted from the author’s just-published book, Good Charts: The HBR Guide to Making Smarter, More Persuasive Data Visualizations.
Know what message you’re trying to communicate before you get down in the weeds.
Idea in Brief
Knowledge workers need greater visual literacy than they used to, because so much data—and so many ideas—are now presented graphically. But few of us have been taught data-visualization skills.
Tools Are Fine…
Inexpensive tools allow anyone to perform simple tasks such as importing spreadsheet data into a bar chart. But that means it’s easy to create terrible charts. Visualization can be so much more: It’s an agile, powerful way to explore ideas and communicate information.
…But Strategy Is Key
Don’t jump straight to execution. Instead, first think about what you’re representing—ideas or data? Then consider your purpose: Do you want to inform, persuade, or explore? The answers will suggest what tools and resources you need.
Not long ago, the ability to create smart data visualizations, or dataviz, was a nice-to-have skill. For the most part, it benefited design- and data-minded managers who made a deliberate decision to invest in acquiring it. That’s changed. Now visual communication is a must-have skill for all managers, because more and more often, it’s the only way to make sense of the work they do.
- Scott Berinato is a senior editor at Harvard Business Review and the author of Good Charts Workbook: Tips Tools, and Exercises for Making Better Data Visualizations and Good Charts: The HBR Guide to Making Smarter, More Persuasive Data Visualizations .
Partner Center

Goal Getting
Vision board ideas that work (and how to make a vision board).

When you start talking about goals, one method that comes up in some conversations is vision boards.
You might be wondering: What are vision boards?
A vision board is a visual representation of what we want to achieve. We can use it to show our end goal and where we see ourselves being in the future. Not only this, but a vision board will also help you show the process of how you envisage getting to these end goals.
However, while there is a lot of support for vision boards, there’s also a lot against organizing ideas in this way.
Because of the varying opinions on the topic, we can uncover how to make a vision board properly. We can explore why many often fail and the various drawbacks, and how you can make a vision board properly to achieve your goals and visions.
Table of Contents
Why do vision boards fail, when do vision boards work, 1. think about what you’ve achieved recently, 2. look at the direction of your life, 3. consider what you want to change, 4. don’t overstuff your vision board with goals, 5. make your visions emotional, 3. self-affirmations, 4. going digital with vision boards, 5. pictures, 6. souvenirs, 7. art or doodles, 1. reflect and write out your dreams and goals, 2. collect relevant images to your goals, 3. make a collage from your collections, 4. personalize your vision board, 5. display your vision board, final thoughts.
Before you learn how to make a vision board, it’s important to cover why many fail in this area. After all, this method is talked about a lot, and there are lessons to be learned from both success and failure.
Overall, the reason vision boards fail often comes down to your mindset . For example, say you’re checking Facebook and see some of your friends taking vacations, and you feel that urge to add that to your vision board.
While that’s great, that may not be the best desire for you to have. Even though a vacation is nice, it doesn’t always mean this is what you want out of life.
In other cases, it might be you’re not putting in enough effort to achieve your goals. Or perhaps deep down, you don’t think you can achieve what you’re putting on your board in the first place.
These are all similar aspects to setting goals and writing them down. However, that similarity is where you’ll be able to thrive when making a vision board now and in the future.
With a vision board, you will be able to see what it is that you want in the future and identify how you can get there.
When you can see it, there, in front of you, then you are going to want to get there, and you are going to feel much more motivated to work towards these goals.
Not only this, but the process of making a vision board is more fun than you may realize. This means that you can look forward to doing it rather than ignoring those goals and stopping yourself from achieving what you want in the future.
Using a vision board means following some key steps that’ll allow you to manifest from it. Here are the simple ways how it’ll help you
- Understand how manifestation works: These steps are asking, believing, and finally, receiving.
- Visualize your ask: Getting back to asking, you’ll have an easier time asking by visualizing. Your vision board should clarify that you’ll be able to ask for exactly what you’d like.
- Instill belief through goals: The third step is to instill belief in yourself. Merely thinking about it won’t help you to achieve your vision. You’ll need to set goals and use the vision board to reinforce that belief.
- Be present in your life: Many people fail at this step because they’re worried about the past or the future. This step is to remind yourself to keep working at it so that one day you’ll be ready to receive it. Furthermore, this step will help you to realize what you’ve received already and what you can use as you grow.
- Appreciate the now: The last thing is to show appreciation for things right now. Working towards goals is tough, but there is satisfaction at the end when completing it.
Making Vision Boards Work for You
While making a vision board is simple, what matters is ensuring that it works. If you’re sinking an hour or two into this, you want to make sure that it was worth your time and effort. With this in mind, I would encourage you to consider these pieces of advice before and after you make a vision board.
The first piece of advice is to consider everything that you have achieved over the past few years. Even though days and years are going by quickly, you’d be surprised what you have achieved over the course of a year.
Make sure you pause and consider what you have accomplished thus far in your life. Remember the things that made you proud.
Going in with this sort of mindset allows you to focus on what you can improve in your life moving forward. That way, you won’t focus on adding desires you’ve seen from other people but rather focus on your own.
The next piece of advice will add another layer to this.
It’s the dreaded question, “Where do you see yourself in five years?”
However, outside of an interview, this is a good question to be asking yourself. Look at the direction that you’re facing in your life and ask yourself if you are happy with it. This is important because we all can change our lives. So often, we forget that we can gain control of our lives at any time.
Keep in mind that you do not want to constantly change goals with a vision board. However, asking this question can influence how you build your vision board.
Again, you’re putting your desires and goals on the board rather than letting other actions or opinions seep into your goal setting.
Goals should be a stage that fulfills something that we lack in life. Maybe you struggle with moving around much. Or maybe you’ve got a business idea you’ve been sitting on for a long time. From desires to improve your marriage to having more vacations, you want to look at what you lack and how to make that abundant in your life.
The previous pieces of advice allow you to narrow down precisely what your vision is and what sort of change you want to see in your life.
When paired with this, you can focus on what you want to change right now in your life.
Now that you have an idea of what goals you have , the next thing is turning them into visions. While you may be excited to place all of these goals on your board, it might not be the best idea.
Unless you are someone who can focus on one goal at a time, most people will find the influx of goals to be overwhelming. While we all feel excited about it, much of that stems from our dopamine high.
It’s a feel-good drug, and it’s an addictive one. It also clouds our judgment so much that we tend to feel stressed or overwhelmed once reality sinks back in.
So while you are making your vision board, try to consider alternatives. Here are some ideas:
- Introduce quotes or phrases that excite you and energize you.
- Consider post-it notes and writing down the steps to take to achieve a particular vision.
- Consider having a smaller board or increasing the size of the pictures you’re posting on the board. This forces you to put fewer things and focus on the visions that matter more to you.
There has been an emphasis on caring about these goals and working on your overall mindset, and it’s there for a reason. When working on goals in any way, there is always a mental component to it.
To place more emphasis on it, you want to ensure that every action you do has emotion attached to it. After you’ve set up your vision board and are looking for it over, it pays to ask some questions to draw those emotions out. [1] .
There are many great questions to consider, but one to ask yourself is:
Why do I want to achieve this goal? The idea of this question is to look for a deeply personal reason. Some examples could include:
- You want to spend time with your partner because you love them, and recently you’ve been drifting apart.
- You want to lose weight and improve your posture because of back pain.
- You want to build a business because you lacked the ambition to start it when you were younger.
You must find a reason why you are working towards this goal. Not only that, but you want to use it as a reminder for your work.
This is so important because it gives us an overall purpose. When you have a purpose, you will begin to care more about the process and hone your skills.
Vision Board Ideas and Examples
Let’s look at some great examples of vision boards that can help us capture our dreams.

Words are a great place to start when thinking up vision board ideas. Words have a mysterious way of impacting us and helping us feel good when used correctly. Whether the words describe feelings or echo states of being, they all evoke experiences we have had or wish to have [2] .
Look at magazines to cut out words that describe how you want to be or what you want to feel. You can even write them in big, bold, colorful letters.

Quotes are great sources of mindset formation and effectively express an idea or experience in its entirety, making them one of the great examples of vision boards. No matter what the context in which the words were originally said, the impact of a good quote is timeless. [3]
Choose quotes that give rise to intense and accurate thoughts that match the state or experience you wish to arrive at. These can be from your role models, favorite authors, teachers, or even something out of a song. You can even add poems if they speak to you and your future goals.

Self-affirmations are different from quotes since you write these on your own, for yourself. They are aimed at changing one’s worldview and undoing limiting beliefs.
Research suggests that they can minimize anxiety, stress, and defensiveness associated with threats to our sense of self while having positive neuro-psychological effects and keeping us open to improvement. [4]
Create affirmations that start with “I am” and challenge beliefs about money, success, ability, and skill [5] . Write affirmations that go beyond what you think is possible and change the “cannot” to “can.”
Here are some affirmations you might find useful: 10 Positive Affirmations for Success that will Change your Life

Making vision boards for different areas of your life might require space and time that you might not have. However, with digital vision boards, you can create as many as you like and access them on the go on your computer and mobile devices.
To create a digital vision board, you can use online tools like Pinterest, Canva , or the tools available on your computer such as Paint to make a collage. To cut and save pictures online, use the Snipping Tool.
Once you have made your vision board, you can then set it as your home screen, or screen saver, or put it on a slideshow to display when your computer is idle.

Pictures are a wonderful alternative to doodles since they can snap you out of any hesitancy you might feel towards drawing. You can pin them to a corkboard, glue them to a poster board, or simply tuck them into a bulletin board.
Depending on the vision you are working at fulfilling through your vision board ideas, you can put up images of associated people who are successful, and images that evoke feelings you wish to experience (gratitude, joy, love, success, etc.). If you’re inspired to use pictures, you may try creating a digital vision board. [6] .
You can also find pictures that are similar to those you see in your imagination. If you wish to increase the challenge, you can have pictures representing different actions you will take.

Souvenirs, as sources of inspiration, are highly potent. They can serve as reminders of your strengths, uniqueness, achievements, successful relationships, and positive associations. [7] .
If there are souvenirs you associate with the birth of a specific vision, those are the ones that must go on the board. You can have anything from name tags, appreciation notes, trinkets, key chains, dry leaves, buttons, magnets, string lights, etc. The possibilities are endless.

When you’re coming up with vision board ideas, art or doodles are great ways to strengthen your desired states. Since you are representing your vision through imagery, there is no better way of owning it.
You don’t have to be skilled in the art to create doodles. You just have to be willing to play!
You can doodle your life map, or just use colors to intuitively express your feelings without form. [8] Draw your future successful self in your dream job or take your dream vacation. You can also doodle your favorite quote or your affirmation.
5 Steps to Creating a Vision Board
To create a vision board that will resonate with your dreams and vision and drives you toward their accomplishment, you can take the following steps:
What are the things that are most important to you? What are the big goals of your life? What would you like to accomplish in the next year, three years, or five years? What are those things you wish to accomplish in your lifetime?
Think about these things and write them down.
After writing down your goals, it’s time to visualize them.
Begin to collect relevant images of people, places, objects, texts, quotes, and even your pictures representing your mind’s images. You can cut out some magazine sections or find images on the internet.
Type a search query on platforms like Pinterest, it will return loads of images that are relevant to your search.
Assemble what you’ve got and then make a collage from them. Arrange them in a way that each of the items can be seen easily. You can place them on plane papers, cardboard, poster boards, etc.
Add your own words to your vision board, you can use markers, paints, stickers, quote cards, your computer, etc., to add words to those images in a way that will inspire you.
Display your vision board where you can get to see it every day. Place it in your bedroom, office space, or any other conspicuous place.
How to Create a Vision Board
As you develop your vision board ideas, don’t forget to let your creativity rule. This isn’t something you’ll be publishing for everyone to see; it’s something that is meant to inspire you every day. Use some of the suggestions to help inspire you to create your goal board and then make it your own.
Featured photo credit: Estée Janssens via unsplash.com
| [1] | ^ | Cleverism: |
| [2] | ^ | Altered Mind Waves: |
| [3] | ^ | Who’s Your HR?: |
| [4] | ^ | Positive Psychology: |
| [5] | ^ | Bella Inspired Grace: |
| [6] | ^ | Design Wizard: |
| [7] | ^ | Brit+Co: |
| [8] | ^ | Diary of a Journal Planner: |

How to Use a Planner Effectively

How to Be a Better Planner: Avoid the Planning Fallacy

5 Best Apps to Help You Delegate Tasks Easily

Delegating Leadership Style: What Is It & When To Use It?

The Fear of Delegating Work To Others

Why Is Delegation Important in Leadership?

7 Best Tools for Prioritizing Work

How to Deal with Competing Priorities Effectively

What Is the RICE Prioritization Model And How Does It Work?

4 Exercises to Improve Your Focus

What Is Chronic Procrastination and How To Deal with It

How to Snap Out of Procrastination With ADHD

Are Depression And Procrastination Connected?

Procrastination And Laziness: Their Differences & Connections

Bedtime Procrastination: Why You Do It And How To Break It

15 Books on Procrastination To Help You Start Taking Action

Productive Procrastination: Is It Good or Bad?

The Impact of Procrastination on Productivity

How to Cope With Anxiety-Induced Procrastination

How to Break the Perfectionism-Procrastination Loop

15 Work-Life Balance Books to Help You Take Control of Life

Work Life Balance for Women: What It Means & How to Find It

6 Essential Mindsets For Continuous Career Growth

How to Discover Your Next Career Move Amid the Great Resignation

The Key to Creating a Vibrant (And Magical Life) by Lee Cockerell

9 Tips on How To Disconnect From Work And Stay Present

Work-Life Integration vs Work-Life Balance: Is One Better Than the Other?

How To Practice Self-Advocacy in the Workplace (Go-to Guide)

How to Boost Your Focus And Attention Span

What Are Distractions in a Nutshell?

What Is Procrastination And How To End It

Prioritization — Using Your Time & Energy Effectively

Delegation — Leveraging Your Time & Resources

Your Guide to Effective Planning & Scheduling

The Ultimate Guide to Achieving Goals

How to Find Lasting Motivation

Complete Guide to Getting Back Your Energy

How to Have a Good Life Balance
Explore the time flow system.

About the Time Flow System

Key Philosophy I: Fluid Progress, Like Water

Key Philosophy II: Pragmatic Priorities

Key Philosophy III: Sustainable Momentum

Key Philosophy IV: Three Goal Focus

How the Time Flow System Works
Concepts is an infinite, flexible creative tool for all your good ideas. Available on iOS, Windows and Android.
Visually Minded: Drawing and Presenting Ideas as Sketchnotes
Visual thinker and Sketchnoter Jonny Daenen shares techniques for drawing and organizing graphic presentations and sketchnotes for ideas you are passionate about.

"Pouring your information into a visual representation has the benefit of making ideas tangible. It motivates people to have a conversation or discussion about it. It's also a lot easier to spread information this way, as pictures have the power to create a lasting impression within an instant."
Jonny Daenen - My background lies in Big Data. I got my Ph.D. in Computer Science in 2016, after focusing on big data systems for several years. Currently, I am a Cloud data engineer at a marketing automation company. It's incredible to think about the vast amounts of data we generate daily and all the things we can do with it. I see myself as someone who designs and builds solutions for creating value from this enormous pool of data.
I love learning about technology and then applying or spreading the knowledge. The latter is something I've picked up during my time as a teaching assistant. It's a great feeling when you are able to teach new concepts to people who are eager to learn. At the same time, when you explain an idea to someone else, you'd better make sure you understand it thoroughly first! During my career, I've discovered that visualizations are a key component in teaching, discussing, and pitching ideas. It helps me to understand what's going on and transfer information to someone else.
How did you get into visual thinking and sketchnoting?
Great question! I've been fond of doodling for a long time, and I think this is where my urge to draw comes from. I remember a history course in high school, where we had to memorize quite some information, for example, about agriculture in historical times. As I was not keen on learning by heart, I decided to draw logical pictures containing all the elements. A doodle with cows and crops made it so much easier to understand and remember.
Fast forward to my Ph.D., and I'm still drawing and doodling. Only this time, I'm using the blackboard to pass on ideas to students. At some point, during a TEDx event, I also saw people making sketchnotes live on stage and followed an introduction to sketchnoting. Packed with quite some ideas, I gradually started to adopt them into my daily routines.
During my career, I noticed that I liked capturing information, and started leveraging these visual techniques more and more. Today, I am applying them to create presentations, technical diagrams, and summaries of Apple product presentations. I've also decided to go fully digital.

One of my first attempts to draw a high level diagram, created in Papers.
Can you please share what visual thinking and sketchnoting are? How does visualization help you to remember and share ideas?
In my mind, visual thinking is about capturing the essence of "things" - systems, products, technologies, ideas, etc. - in a visual image. It helps us to understand problems, enabling a zooming out to abstract concepts, and a zooming in on all the nitty-gritty details when needed.
Sketchnoting is the art of visual note taking. A keynote, presentation, event, manual, technology, etc. can all be summarized visually. This helps to make topics more approachable and digestible.
My main purposes for sketchnoting are to capture information for later reference, evangelize ideas, and learn more about a topic. While I draw, my mind focuses on the matter at hand, helping me understand things better and allowing me to easily remember them. People have responded quite well when I share my sketchnote summaries or when they see drawings appear in a slide deck. It seems to be a very powerful method to get a message across.

One of the first drawings I did in Concepts that shows the basic components in marketing. This was used in multiple presentations.
Pouring your information into a visual representation has the benefit of making ideas tangible. It motivates people to have a conversation or discussion about it. It's also a lot easier to spread information this way, as pictures have the power to create a lasting impression within an instant.
In software engineering, for example, I find it really helpful to have a diagram of what I'm working on. It helps me navigate code and allows easy communication with other people. It is vital to have a bird's eye view of what you are working on while still understanding the details of the code in front of you. Especially when you get confronted with bugs, visual thinking is helpful and allows you to more quickly approach the problems at hand in a structural fashion.
And whether it helps me remember things? Well, yes and no. On the contrary, it helps me free my mind. While I draw, I think about the structure and properties of what I'm drawing. I'm comparing similar technologies, zooming in and out in my mind while I pinch on the screen, and discovering logical concepts as I progress. This process helps me better understand whatever I'm sketchnoting about.
Still, at the same time, my brain will also know that all the details are in my sketchnote for reference, and it seems it will forget about unnecessary details and instead store a pointer to the sketchnote. Next time I need to recall the price of the iPad Pro in 2020? Or the technology that Spotify talked about to manage their data quality? My brain will know that I noted that down in a specific sketchnote and present me with a vague layout of what my drawing looked like.
You have very informative sketchnotes with a clear presentation style. How do you go about visualizing ideas and data? What creates a clear presentation?
Thank you! Visual representations should capture the essence of an idea, product, technology, etc. as much as possible. When sketchnoting an event, I start from the bottom up: starting with the details, clustering them into bigger ideas, and attaching these to a bigger topic. It's a hierarchical approach, which should help viewers quickly identify relevant information while also allowing for fast zooming from specific details to the more abstract topic.
For slide decks, this is a bit different. Here I start working around the main takeaway, outline a structure in a mindmap and translate individual slides into drawings during the process.
Presentations or sketchnotes should provide a logical flow of information; they should guide the viewer. In presentations, you get a linear flow, which can sometimes feel quite restrictive but at the same time also more reassuring. In sketchnotes, you get a lot more freedom, but the challenging part is in the overall flow of your drawing to make sure people can find their way in it.
One big difference between presentations and sketchnotes: in presentations, the visuals support the story; in sketchnotes, the visuals are the story.

A sketchnote for a live show of the Dutch-Belgian podcast Tech45 , to celebrate their 10 year anniversary.
Once you have your key ideas down, how do you organize your information on the page?
I try to group information into clusters that belong together. If I'm making a sketchnote of an Apple keynote about a new iPhone, Apple Watch, and health services, I will cluster the information accordingly. Many presentations and events already have an implicit or explicit structure that is quite usable as a guiding structure.
When you are creating larger sketchnotes that span multiple presentations or many topics, I'd recommend collecting information first and then choosing what your focus will be. This is a lot more challenging but can be even more rewarding as you will learn a lot by creating this structure yourself. Whenever I'm stuck, I always resort to creating a mindmap of the structure. This will be my guide and help me make decisions about what content goes where.

My latest Apple sketchnote: WWDC 2021. Heaps of new products and features were announced, I tried to combine it all in this gigantic sketchnote.
What are your favorite tools and apps for sketchnoting?
Concepts, of course! I do have some real-world Copic markers that I use for decorating Christmas or birthday cards, but in the digital world, Concepts is my tool of choice. My current setup consists of:
- Apple iPad Pro 10.5"
- Apple Pencil (1st gen)
- Concepts App
When my girlfriend introduced me to Concepts, I was immediately sold. The gesture system and the fact that the app is vector-based were ideal for me. I've never considered myself great at drawing, as I always had difficulties getting what's in my head on paper. And even when I did, I managed to add that one final detail that messed it all up. By using Concepts, those limitations in my drawing process were immediately removed. I can now draw joyfully, use quick gestures to rearrange my drawing, and perform the "undo" gesture whenever I need to.

A mindmap of all aspects I use Concepts for.
How does Concepts fit into your visual thinking workflow?
My workflow is a bit different depending on when I'm creating a presentation with hand-drawn slides or when I'm making a sketchnote.
In the case of a presentation, I start out with a mindmap. I use the MindNode app to brainstorm, group, and structure my story. When roughly 70% of my story and content ideas are there, I pour this mindmap into slides with textual content. Next, the most essential and complex slides get their own drawing (drawn in Concepts); the text is reduced to a minimum, as I will talk over it anyway, but the essence remains. Finally, I start doing dry-runs, and I iterate over the slides and drawings until it feels good.
For this process, I love working with the combination of an iPad and a Mac: I simply copy-paste a part of my drawing from Concepts on my iPad directly into Keynote on my Mac (using Universal Clipboard).

When I create a new sketchnote of a presentation or event, I always follow it live. It forces me to stay focused and capture essential information fast. I will note down text and make some quick doodles; the result looks a bit like a messy shopping list. The big thing here is that Concepts allows me to quickly switch tools and make fast adjustments (select, rearrange, zoom, scale) without interfering with my flow of thought.
At first, this is where I stopped. While sketchnoting often focuses on getting your drawing done at the moment (especially when it's on paper, you cannot edit easily), I noticed that I needed a bit more freedom and time.

0.1 Apple Spring Loaded Event - first rough version after the live event. 0.2 I added core elements of the most important announcements. 0.3 More visual elements are added to guide the viewer. 0.4 All sections now have a heading to make them stand out, basic highlights were added in orange and spacing has been improved.
So, after the initial rough phase, I start grouping related information together and drawing larger images showing a central topic. For example, I capture all details from a new iPhone camera system live, then I group this together; this is then grouped again with other topics around the iPhone, which is then grouped with maybe another iPhone Model. This is how a specific section in the sketchnote comes to life.
In my sketchnotes, I try to follow a hierarchical format so that people can quickly get the information they want. Compared to a presentation, which is linear, sketchnotes allow you to create your own flow. When people want information only on that iPhone camera system, they are attracted by the iPhone illustration and can then zoom in on the camera cluster right next to it.
After capturing the overall structure, I fix weird-looking icons and redo some unreadable handwriting. It turns out I still need to work on my 1's, apparently, there seems to be quite a difference across continents on how to write the ideal number one. Next, larger illustrations are added to clusters to make them stand out.
Whenever possible, I try to fit into the event theme. Apple, for example, always has a specific theme in their events, which I try to adopt and mix with my own style.
Now that I've got all the content, I can focus on the overall layout to end up with a balanced image. I move the bigger groups around and try to create an implicit flow in the picture. Then, I let some key terms stand out using colors, and I add shadows to bring the illustrations alive. Finally, some things I've been dragging along since the beginning get cut. When they just don't fit, they need to go, even if I thought it was a great idea. Kill your darlings, I guess...
When it's done, I export my work at different DPI settings and publish it online. As you can see, as opposed to presentations, all of the work on the sketchnotes happens within Concepts itself.

Final version of Apple's Spring Loaded Event.
You mentioned you do a lot of visual communication work with clients. What is your workflow like with them?
When communicating with clients, it's crucial to have a common understanding. Visuals can help a lot; whether you're using a whiteboard, a presentation, or a diagram, it will almost always make conversations easier and more to the point.
For live discussions, I prefer to use a whiteboard whenever possible; it encourages people to think together and to be part of new ideas from the start.
When I'm preparing a slide deck, my goal is to tell a story that supports the main idea of the presentation. When I explain a technical solution, I try to avoid bombarding the client with too many specifics and instead focus on the value the solution will create for them. This can often be expressed using simple images and icons. In contrast to text, these will often emphasize your point and support your story to a greater extent. Of course, my backup slides will have some more detailed diagrams for the Q&A part.
After meetings with clients or stakeholders, I do not go as far as creating a summary sketchnote for that meeting, but instead, I make a summary mindmap. Again, a very powerful visual tool that allows people to quickly find what they are looking for. I've even found these mindmaps to be a potential replacement for slide decks in some instances: it takes way less time to put them together and immediately shows structure and content in a digestible form when done right.
Do you have any tips or techniques you can share about visualizing information?
The sketchnotes I create have changed over time. I learned a lot by starting with the Concepts sketchnote tutorial and still using some of the presets today. I've also been inspired by seeing other people create illustrations on my iPad and borrowed some of their techniques.
I recommend experimenting with colors, quick shadows, smoothing, and nudging. Also, just trying out different tools in the app really helps! But the technique that works best for me is iterating. The sketchnotes I create are refined over several days (sometimes weeks) until I get them into a presentable form.

Sketchnote I created when I got certified for Google Cloud, to indicate all important parts included in the certification.
When choosing what to draw, I try to utilize simple illustrations. A battery gets a power icon, performance gets a rocket, and so on. The key is to find something recognizable for most people and keep it clean and simple. When you don't know what could represent an idea, try to think of a few emoji that would capture it.
Sometimes it's tempting to let the visuals distract the viewer too much, hence I believe it is important to try and keep information central to your visual. A good example on how to use a minimalistic approach to emphasize your point visually can be found here: https://www.darkhorseanalytics.com/blog/data-looks-better-naked/
What are some best practices you can recommend for getting into a visual workflow and improving your skillset?
The first step is finding something you're passionate about. I am passionate about technology, I've been following Apple keynotes for quite some time before I started sketchnoting. The same holds for my new, more technical Google Cloud sketchnotes. After seeing Google's keynotes, I always want to make sure other people have a low-friction way to accessing this content I find so interesting myself.

Google Cloud's Data Cloud Summit: summary from a series of presentations, which introduced the latest advancements in Google Cloud Platform w.r.t. data technology.
That is the second step: finding your motivation. Why should you draw? As I said, I love to capture information for later reference, evangelize ideas, and learn more about a topic; drawing helps me achieve these goals. If you can find the thing to motivate you - which can be anything - you're all set!
Once you've found the right topic and motivation, I'd recommend doing the Concepts sketchnoting tutorial . Whether it is for a full sketchnote, a slide in your presentation, or a technical diagram, you'll be ready to go in no time! And remember, when you're not happy with your first result, this is all digital: just iterate over it tomorrow!

Jonny Daenen is a computer scientist specialized in Big Data. He is interested in understanding the inner workings of both existing and new technologies, and loves to make them accessible to a broad audience. He's passionate about data engineering and data science, Cloud computing, visual thinking, and Apple products.
- Twitter: @JonnyDaenen
- LinkedIn: https://www.linkedin.com/in/jonnydaenen/
- Website: https://connectingdots.xyz
Cover photos by Michelle Gybels Interview by Erica Christensen
Recommended
The Concepts Sketchnoting Toolbox - Learn sketchnoting tips so you can sketch ideas and take notes visually, and use this guide to set up your infinite canvas and pens in Concepts.
5 Tools for Visual Thinking on Your iPad - Five great tools to help you take notes, think visually and communicate on your iPad with Concepts.
Sketchnoting Tools and Techniques - Graphic Recorder Tobey Busch shares tips for creating simple visual images and sketchnotes.
Teaching Strategic Thinking Skills to Airforce Pilots - Major John Webb of the U.S. Air Force teaches strategic thinking to pilot students with Concepts and his iPad.
- Alternatives
2024's Must-See Visual Presentation Examples to Power Up Your Deck
Anh Vu • 05 April, 2024 • 8 min read
Keep on reading because these visual presentation examples will blow your boring decks away! For many people, delivering a presentation is a daunting project, even before it turns to hybrid and virtual displays due to the pandemic. To avoid the Death By PowerPoint phenomenon, it is time to adopt new techniques to make your presentations more visual and impressive.
This article tries to encourage you to think outside of the slide by providing essential elements of a successful visual presentation, especially for the new presenter and those who want to save time, money, and effort for the upcoming presentation deadline.
Table of Contents
What is a visual presentation.
- Types of Visual Presentation Examples
How to Create a Visual Presentation
- What Makes a Good Presentation Visual?
Frequently Asked Questions
How ahaslides supports a good visual presentation.
As mentioned before, you need a presentation tool to make your presentation more visual and engaging. The art of leveraging visual elements is all intended visual aids make sense and kick off audiences' imagination, curiosity, and interest from the entire presentation.
The easiest way to create interaction between the presenter and the audience is by asking for rhetorical and thought-provoking quizzes and quick surveys during the presentation. AhaSlides , with a range of live polls , live Q&A , word clouds , interactive questions, image questions, creative fonts, and integration with streaming platforms can help you to make a good visual presentation in just a second.
- Types of Presentation
- College Presentation
- Creative Presentation Ideas
- AhaSlides Free Public Templates

Start in seconds.
Get free templates for your next interactive presentation. Sign up for free and take what you want from the template library!
| What are visual presentation examples? | Infographics, photographs, videos, diagrams, graphs, and charts. |
| Why do presenters use presentation aids? | Presentation aids allow the audience to understand clearly and easily the information. |
So, what are the visual presentation examples? When providing as much information as possible, many presenters think that text-heavy slides may help, but by contrast, they may lead to distraction. As we explore the characteristics of good presentations, illustrations and graphics play an important role in delivering compelling content and turning complex concepts more clearly, precisely, and instantly to understand. A visual presentation is the adoption of a range of visual aids on presentation to ensure information is easier to understand and memorize.
In addition, visual aids can also help to keep presenters on track, which can be used as a cue for reviving a train of thought. They build better interaction and communication between presenters and the audience, making them notice more deeply what you are saying.
Types of Visual Presentation Examples
Some possible visual presentations include infographics , charts, diagrams, posters, flipcharts, idea board , whiteboards, and video presentation examples.
An infographic is a collection of different graphic visual presentations to represent information, data, or knowledge intended more visually quickly and clearly to grab the audience's attention.
To illustrate quantitative data effectively, it is important to make use of graphs and charts. For both business use and research use, graphs and charts can show multiple and complex data in a way that is easy to understand and memory.
When it comes to presenting information systematically and logically, you can use diagrams. A diagram is a powerful tool for effective communication and brainstorming processes. It also is time-saving for people to read and collect information.
A poster, especially a research project poster, provides brief and concrete information about a research paper straightforwardly. The audiences can grab all important data knowledge and findings through posters.
A flipchart and whiteboard are the most basic presentation aids and work best to supplement lecture slides. Excellent whiteboard and flipchart composite of well-chosen words, and clear diagram will help to explain complex concepts.
A video presentation is not a new concept, it is a great way to spread ideas lively and quickly attract the audience's attention. The advantages of a video presentation lie in its animation and illustration concepts, fascinating sound effects, and user-friendliness.
In addition, we can add many types of visual aids in the presentations as long as they can give shapes and form words or thoughts into visual content. Most popular visual aids include graphs, statistics, charts, and diagrams that should be noted in your mind. These elements combined with verbal are a great way to engage the listeners’ imagination and also emphasize vital points more memorable.

It is simply to create more visual presentations than you think. With the development of technology and the internet, you can find visual presentation examples and templates for a second. PowerPoint is a good start, but there are a variety of quality alternatives, such as AhaSlides , Keynote, and Prezi.
When it comes to designing an effective visual presentation, you may identify some key steps beforehand:
Visual Presentation Examples - Focus on Your Topic
Firstly, you need to determine your purpose and understand your audience's needs. If you are going to present in a seminar with your audience of scientists, engineers, business owners… They are likely to care about data under simple charts and graphs, which explain the results or trends. Or if you are going to give a lecture for secondary students, your slides should be something fun and interesting, with more colourful pictures and interactive questions.
Visual Presentation Examples - Animation and Transition
When you want to add a bit of excitement to a slideshow and help to keep the listener more engaged, you use animation and transition. These functions help to shift the focus of audiences between elements on slides. When the transition style and setting are set right, it can help to give fluidity and professionalism to a slideshow.
Visual Presentation Examples - Devices for Interactivity
One of the approaches that improve communication between audiences and the use of visual aids is using technology assistance. You don’t want to take too much time to create well-designed visual aids while ensuring your presentation is impressive, so why not leverage a presentation app like AhaSlides ? It properly encourages participant engagement with interactive visual features and templates and is time-saving. With its help, you can design your presentation either formally or informally depending on your interest.
Visual Presentation Examples - Give an Eye-catching Title
Believe it or not, the title is essential to attracting audiences at first sight. Though don’t “read the book by its cover”, you still can put your thoughts into a unique title that conveys the topic while piquing the viewer’s interest.
Visual Presentation Examples - Play a Short Video
Creative video presentation ideas are always important. “Videos evoke emotional responses”, it will be a mistake if you don’t leverage short videos with sound to reel in and captivate the audience's attention. You can put the video at the beginning of the presentation as a brief introduction to your topic, or you can play it as a supplement to explain difficult concepts.
Visual Presentation Examples - Use a Prop or Creative Visual Aid to Inject Humour
It is challenging to keep your audience interested and engaged with your audience from the whole presentation. It is why to add a prop or creative visual aid to pull your audience's focus on what you say. Here are some ideas to cover it:
- Use neon colour and duotones
- Tell a personal story
- Show a shocking heading
- Use isometric illustrations
- Go vertical
Visual Presentation Examples - Rehearsal and Get Feedback
It is an important step to make your visual presentation really work out. You won’t know any unexpected mirrors may come out on D-day if you don’t make the rehearsal and get feedback from a reliable source. If they say that your visual image is in bad-quality, the data is overwhelming, or the pictures are misunderstood, you can have an alternative plan in advance.

What Makes a Good Visual Presentation?
Incorporate visual or audio media appropriately. Ensure you arrange and integrate suitable data presentation in your slides or videos. You can read the guidelines for visual aids applications in the following:
- Choose a readable text size about the slide room and text spacing in about 5-7 doubted-spaced.
- Use consistent colour for overall presentation, visual aids work better in white yellow and blue backgrounds.
- Take care of data presentation, and avoid oversimplification or too much detail.
- Keep the data shown minimum and highlight really important data points only.
- Choose font carefully, keep in mind that lowercase is easier to read than uppercase
- Don’t mix fonts.
- Printed text is easier to read than handwritten text.
- Use the visual to emphasize punctuation in your verbal presentation.
- Say no to poor-quality images or videos.
- Visual elements need to be strategic and relevant.
What well-designed visual aids should have?
To make an effective visual aid, you must follow principles of design, including contrast, alignment, repetition, and proximity.
Why is it important to keep visual aids simple?
Simple ads help to keep things clear and understandable, so the message can be communicated effectively.
What is the purpose of visual aids in the classroom?
To encourage the learning process and make it easier and more interesting so students would want to engage in lessons more.

Tips to Engage with Polls & Trivia
More from AhaSlides

- Open access
- Published: 19 July 2015
The role of visual representations in scientific practices: from conceptual understanding and knowledge generation to ‘seeing’ how science works
- Maria Evagorou 1 ,
- Sibel Erduran 2 &
- Terhi Mäntylä 3
International Journal of STEM Education volume 2 , Article number: 11 ( 2015 ) Cite this article
75k Accesses
13 Altmetric
Metrics details
The use of visual representations (i.e., photographs, diagrams, models) has been part of science, and their use makes it possible for scientists to interact with and represent complex phenomena, not observable in other ways. Despite a wealth of research in science education on visual representations, the emphasis of such research has mainly been on the conceptual understanding when using visual representations and less on visual representations as epistemic objects. In this paper, we argue that by positioning visual representations as epistemic objects of scientific practices, science education can bring a renewed focus on how visualization contributes to knowledge formation in science from the learners’ perspective.
This is a theoretical paper, and in order to argue about the role of visualization, we first present a case study, that of the discovery of the structure of DNA that highlights the epistemic components of visual information in science. The second case study focuses on Faraday’s use of the lines of magnetic force. Faraday is known of his exploratory, creative, and yet systemic way of experimenting, and the visual reasoning leading to theoretical development was an inherent part of the experimentation. Third, we trace a contemporary account from science focusing on the experimental practices and how reproducibility of experimental procedures can be reinforced through video data.
Conclusions
Our conclusions suggest that in teaching science, the emphasis in visualization should shift from cognitive understanding—using the products of science to understand the content—to engaging in the processes of visualization. Furthermore, we suggest that is it essential to design curriculum materials and learning environments that create a social and epistemic context and invite students to engage in the practice of visualization as evidence, reasoning, experimental procedure, or a means of communication and reflect on these practices. Implications for teacher education include the need for teacher professional development programs to problematize the use of visual representations as epistemic objects that are part of scientific practices.
During the last decades, research and reform documents in science education across the world have been calling for an emphasis not only on the content but also on the processes of science (Bybee 2014 ; Eurydice 2012 ; Duschl and Bybee 2014 ; Osborne 2014 ; Schwartz et al. 2012 ), in order to make science accessible to the students and enable them to understand the epistemic foundation of science. Scientific practices, part of the process of science, are the cognitive and discursive activities that are targeted in science education to develop epistemic understanding and appreciation of the nature of science (Duschl et al. 2008 ) and have been the emphasis of recent reform documents in science education across the world (Achieve 2013 ; Eurydice 2012 ). With the term scientific practices, we refer to the processes that take place during scientific discoveries and include among others: asking questions, developing and using models, engaging in arguments, and constructing and communicating explanations (National Research Council 2012 ). The emphasis on scientific practices aims to move the teaching of science from knowledge to the understanding of the processes and the epistemic aspects of science. Additionally, by placing an emphasis on engaging students in scientific practices, we aim to help students acquire scientific knowledge in meaningful contexts that resemble the reality of scientific discoveries.
Despite a wealth of research in science education on visual representations, the emphasis of such research has mainly been on the conceptual understanding when using visual representations and less on visual representations as epistemic objects. In this paper, we argue that by positioning visual representations as epistemic objects, science education can bring a renewed focus on how visualization contributes to knowledge formation in science from the learners’ perspective. Specifically, the use of visual representations (i.e., photographs, diagrams, tables, charts) has been part of science and over the years has evolved with the new technologies (i.e., from drawings to advanced digital images and three dimensional models). Visualization makes it possible for scientists to interact with complex phenomena (Richards 2003 ), and they might convey important evidence not observable in other ways. Visual representations as a tool to support cognitive understanding in science have been studied extensively (i.e., Gilbert 2010 ; Wu and Shah 2004 ). Studies in science education have explored the use of images in science textbooks (i.e., Dimopoulos et al. 2003 ; Bungum 2008 ), students’ representations or models when doing science (i.e., Gilbert et al. 2008 ; Dori et al. 2003 ; Lehrer and Schauble 2012 ; Schwarz et al. 2009 ), and students’ images of science and scientists (i.e., Chambers 1983 ). Therefore, studies in the field of science education have been using the term visualization as “the formation of an internal representation from an external representation” (Gilbert et al. 2008 , p. 4) or as a tool for conceptual understanding for students.
In this paper, we do not refer to visualization as mental image, model, or presentation only (Gilbert et al. 2008 ; Philips et al. 2010 ) but instead focus on visual representations or visualization as epistemic objects. Specifically, we refer to visualization as a process for knowledge production and growth in science. In this respect, modeling is an aspect of visualization, but what we are focusing on with visualization is not on the use of model as a tool for cognitive understanding (Gilbert 2010 ; Wu and Shah 2004 ) but the on the process of modeling as a scientific practice which includes the construction and use of models, the use of other representations, the communication in the groups with the use of the visual representation, and the appreciation of the difficulties that the science phase in this process. Therefore, the purpose of this paper is to present through the history of science how visualization can be considered not only as a cognitive tool in science education but also as an epistemic object that can potentially support students to understand aspects of the nature of science.
Scientific practices and science education
According to the New Generation Science Standards (Achieve 2013 ), scientific practices refer to: asking questions and defining problems; developing and using models; planning and carrying out investigations; analyzing and interpreting data; using mathematical and computational thinking; constructing explanations and designing solutions; engaging in argument from evidence; and obtaining, evaluating, and communicating information. A significant aspect of scientific practices is that science learning is more than just about learning facts, concepts, theories, and laws. A fuller appreciation of science necessitates the understanding of the science relative to its epistemological grounding and the process that are involved in the production of knowledge (Hogan and Maglienti 2001 ; Wickman 2004 ).
The New Generation Science Standards is, among other changes, shifting away from science inquiry and towards the inclusion of scientific practices (Duschl and Bybee 2014 ; Osborne 2014 ). By comparing the abilities to do scientific inquiry (National Research Council 2000 ) with the set of scientific practices, it is evident that the latter is about engaging in the processes of doing science and experiencing in that way science in a more authentic way. Engaging in scientific practices according to Osborne ( 2014 ) “presents a more authentic picture of the endeavor that is science” (p.183) and also helps the students to develop a deeper understanding of the epistemic aspects of science. Furthermore, as Bybee ( 2014 ) argues, by engaging students in scientific practices, we involve them in an understanding of the nature of science and an understanding on the nature of scientific knowledge.
Science as a practice and scientific practices as a term emerged by the philosopher of science, Kuhn (Osborne 2014 ), refers to the processes in which the scientists engage during knowledge production and communication. The work that is followed by historians, philosophers, and sociologists of science (Latour 2011 ; Longino 2002 ; Nersessian 2008 ) revealed the scientific practices in which the scientists engage in and include among others theory development and specific ways of talking, modeling, and communicating the outcomes of science.
Visualization as an epistemic object
Schematic, pictorial symbols in the design of scientific instruments and analysis of the perceptual and functional information that is being stored in those images have been areas of investigation in philosophy of scientific experimentation (Gooding et al. 1993 ). The nature of visual perception, the relationship between thought and vision, and the role of reproducibility as a norm for experimental research form a central aspect of this domain of research in philosophy of science. For instance, Rothbart ( 1997 ) has argued that visualizations are commonplace in the theoretical sciences even if every scientific theory may not be defined by visualized models.
Visual representations (i.e., photographs, diagrams, tables, charts, models) have been used in science over the years to enable scientists to interact with complex phenomena (Richards 2003 ) and might convey important evidence not observable in other ways (Barber et al. 2006 ). Some authors (e.g., Ruivenkamp and Rip 2010 ) have argued that visualization is as a core activity of some scientific communities of practice (e.g., nanotechnology) while others (e.g., Lynch and Edgerton 1988 ) have differentiated the role of particular visualization techniques (e.g., of digital image processing in astronomy). Visualization in science includes the complex process through which scientists develop or produce imagery, schemes, and graphical representation, and therefore, what is of importance in this process is not only the result but also the methodology employed by the scientists, namely, how this result was produced. Visual representations in science may refer to objects that are believed to have some kind of material or physical existence but equally might refer to purely mental, conceptual, and abstract constructs (Pauwels 2006 ). More specifically, visual representations can be found for: (a) phenomena that are not observable with the eye (i.e., microscopic or macroscopic); (b) phenomena that do not exist as visual representations but can be translated as such (i.e., sound); and (c) in experimental settings to provide visual data representations (i.e., graphs presenting velocity of moving objects). Additionally, since science is not only about replicating reality but also about making it more understandable to people (either to the public or other scientists), visual representations are not only about reproducing the nature but also about: (a) functioning in helping solving a problem, (b) filling gaps in our knowledge, and (c) facilitating knowledge building or transfer (Lynch 2006 ).
Using or developing visual representations in the scientific practice can range from a straightforward to a complicated situation. More specifically, scientists can observe a phenomenon (i.e., mitosis) and represent it visually using a picture or diagram, which is quite straightforward. But they can also use a variety of complicated techniques (i.e., crystallography in the case of DNA studies) that are either available or need to be developed or refined in order to acquire the visual information that can be used in the process of theory development (i.e., Latour and Woolgar 1979 ). Furthermore, some visual representations need decoding, and the scientists need to learn how to read these images (i.e., radiologists); therefore, using visual representations in the process of science requires learning a new language that is specific to the medium/methods that is used (i.e., understanding an X-ray picture is different from understanding an MRI scan) and then communicating that language to other scientists and the public.
There are much intent and purposes of visual representations in scientific practices, as for example to make a diagnosis, compare, describe, and preserve for future study, verify and explore new territory, generate new data (Pauwels 2006 ), or present new methodologies. According to Latour and Woolgar ( 1979 ) and Knorr Cetina ( 1999 ), visual representations can be used either as primary data (i.e., image from a microscope). or can be used to help in concept development (i.e., models of DNA used by Watson and Crick), to uncover relationships and to make the abstract more concrete (graphs of sound waves). Therefore, visual representations and visual practices, in all forms, are an important aspect of the scientific practices in developing, clarifying, and transmitting scientific knowledge (Pauwels 2006 ).
Methods and Results: Merging Visualization and scientific practices in science
In this paper, we present three case studies that embody the working practices of scientists in an effort to present visualization as a scientific practice and present our argument about how visualization is a complex process that could include among others modeling and use of representation but is not only limited to that. The first case study explores the role of visualization in the construction of knowledge about the structure of DNA, using visuals as evidence. The second case study focuses on Faraday’s use of the lines of magnetic force and the visual reasoning leading to the theoretical development that was an inherent part of the experimentation. The third case study focuses on the current practices of scientists in the context of a peer-reviewed journal called the Journal of Visualized Experiments where the methodology is communicated through videotaped procedures. The three case studies represent the research interests of the three authors of this paper and were chosen to present how visualization as a practice can be involved in all stages of doing science, from hypothesizing and evaluating evidence (case study 1) to experimenting and reasoning (case study 2) to communicating the findings and methodology with the research community (case study 3), and represent in this way the three functions of visualization as presented by Lynch ( 2006 ). Furthermore, the last case study showcases how the development of visualization technologies has contributed to the communication of findings and methodologies in science and present in that way an aspect of current scientific practices. In all three cases, our approach is guided by the observation that the visual information is an integral part of scientific practices at the least and furthermore that they are particularly central in the scientific practices of science.
Case study 1: use visual representations as evidence in the discovery of DNA
The focus of the first case study is the discovery of the structure of DNA. The DNA was first isolated in 1869 by Friedrich Miescher, and by the late 1940s, it was known that it contained phosphate, sugar, and four nitrogen-containing chemical bases. However, no one had figured the structure of the DNA until Watson and Crick presented their model of DNA in 1953. Other than the social aspects of the discovery of the DNA, another important aspect was the role of visual evidence that led to knowledge development in the area. More specifically, by studying the personal accounts of Watson ( 1968 ) and Crick ( 1988 ) about the discovery of the structure of the DNA, the following main ideas regarding the role of visual representations in the production of knowledge can be identified: (a) The use of visual representations was an important part of knowledge growth and was often dependent upon the discovery of new technologies (i.e., better microscopes or better techniques in crystallography that would provide better visual representations as evidence of the helical structure of the DNA); and (b) Models (three-dimensional) were used as a way to represent the visual images (X-ray images) and connect them to the evidence provided by other sources to see whether the theory can be supported. Therefore, the model of DNA was built based on the combination of visual evidence and experimental data.
An example showcasing the importance of visual representations in the process of knowledge production in this case is provided by Watson, in his book The Double Helix (1968):
…since the middle of the summer Rosy [Rosalind Franklin] had had evidence for a new three-dimensional form of DNA. It occurred when the DNA 2molecules were surrounded by a large amount of water. When I asked what the pattern was like, Maurice went into the adjacent room to pick up a print of the new form they called the “B” structure. The instant I saw the picture, my mouth fell open and my pulse began to race. The pattern was unbelievably simpler than those previously obtained (A form). Moreover, the black cross of reflections which dominated the picture could arise only from a helical structure. With the A form the argument for the helix was never straightforward, and considerable ambiguity existed as to exactly which type of helical symmetry was present. With the B form however, mere inspection of its X-ray picture gave several of the vital helical parameters. (p. 167-169)
As suggested by Watson’s personal account of the discovery of the DNA, the photo taken by Rosalind Franklin (Fig. 1 ) convinced him that the DNA molecule must consist of two chains arranged in a paired helix, which resembles a spiral staircase or ladder, and on March 7, 1953, Watson and Crick finished and presented their model of the structure of DNA (Watson and Berry 2004 ; Watson 1968 ) which was based on the visual information provided by the X-ray image and their knowledge of chemistry.
X-ray chrystallography of DNA
In analyzing the visualization practice in this case study, we observe the following instances that highlight how the visual information played a role:
Asking questions and defining problems: The real world in the model of science can at some points only be observed through visual representations or representations, i.e., if we are using DNA as an example, the structure of DNA was only observable through the crystallography images produced by Rosalind Franklin in the laboratory. There was no other way to observe the structure of DNA, therefore the real world.
Analyzing and interpreting data: The images that resulted from crystallography as well as their interpretations served as the data for the scientists studying the structure of DNA.
Experimenting: The data in the form of visual information were used to predict the possible structure of the DNA.
Modeling: Based on the prediction, an actual three-dimensional model was prepared by Watson and Crick. The first model did not fit with the real world (refuted by Rosalind Franklin and her research group from King’s College) and Watson and Crick had to go through the same process again to find better visual evidence (better crystallography images) and create an improved visual model.
Example excerpts from Watson’s biography provide further evidence for how visualization practices were applied in the context of the discovery of DNA (Table 1 ).
In summary, by examining the history of the discovery of DNA, we showcased how visual data is used as scientific evidence in science, identifying in that way an aspect of the nature of science that is still unexplored in the history of science and an aspect that has been ignored in the teaching of science. Visual representations are used in many ways: as images, as models, as evidence to support or rebut a model, and as interpretations of reality.
Case study 2: applying visual reasoning in knowledge production, the example of the lines of magnetic force
The focus of this case study is on Faraday’s use of the lines of magnetic force. Faraday is known of his exploratory, creative, and yet systemic way of experimenting, and the visual reasoning leading to theoretical development was an inherent part of this experimentation (Gooding 2006 ). Faraday’s articles or notebooks do not include mathematical formulations; instead, they include images and illustrations from experimental devices and setups to the recapping of his theoretical ideas (Nersessian 2008 ). According to Gooding ( 2006 ), “Faraday’s visual method was designed not to copy apparent features of the world, but to analyse and replicate them” (2006, p. 46).
The lines of force played a central role in Faraday’s research on electricity and magnetism and in the development of his “field theory” (Faraday 1852a ; Nersessian 1984 ). Before Faraday, the experiments with iron filings around magnets were known and the term “magnetic curves” was used for the iron filing patterns and also for the geometrical constructs derived from the mathematical theory of magnetism (Gooding et al. 1993 ). However, Faraday used the lines of force for explaining his experimental observations and in constructing the theory of forces in magnetism and electricity. Examples of Faraday’s different illustrations of lines of magnetic force are given in Fig. 2 . Faraday gave the following experiment-based definition for the lines of magnetic forces:
a Iron filing pattern in case of bar magnet drawn by Faraday (Faraday 1852b , Plate IX, p. 158, Fig. 1), b Faraday’s drawing of lines of magnetic force in case of cylinder magnet, where the experimental procedure, knife blade showing the direction of lines, is combined into drawing (Faraday, 1855, vol. 1, plate 1)
A line of magnetic force may be defined as that line which is described by a very small magnetic needle, when it is so moved in either direction correspondent to its length, that the needle is constantly a tangent to the line of motion; or it is that line along which, if a transverse wire be moved in either direction, there is no tendency to the formation of any current in the wire, whilst if moved in any other direction there is such a tendency; or it is that line which coincides with the direction of the magnecrystallic axis of a crystal of bismuth, which is carried in either direction along it. The direction of these lines about and amongst magnets and electric currents, is easily represented and understood, in a general manner, by the ordinary use of iron filings. (Faraday 1852a , p. 25 (3071))
The definition describes the connection between the experiments and the visual representation of the results. Initially, the lines of force were just geometric representations, but later, Faraday treated them as physical objects (Nersessian 1984 ; Pocovi and Finlay 2002 ):
I have sometimes used the term lines of force so vaguely, as to leave the reader doubtful whether I intended it as a merely representative idea of the forces, or as the description of the path along which the power was continuously exerted. … wherever the expression line of force is taken simply to represent the disposition of forces, it shall have the fullness of that meaning; but that wherever it may seem to represent the idea of the physical mode of transmission of the force, it expresses in that respect the opinion to which I incline at present. The opinion may be erroneous, and yet all that relates or refers to the disposition of the force will remain the same. (Faraday, 1852a , p. 55-56 (3075))
He also felt that the lines of force had greater explanatory power than the dominant theory of action-at-a-distance:
Now it appears to me that these lines may be employed with great advantage to represent nature, condition, direction and comparative amount of the magnetic forces; and that in many cases they have, to the physical reasoned at least, a superiority over that method which represents the forces as concentrated in centres of action… (Faraday, 1852a , p. 26 (3074))
For giving some insight to Faraday’s visual reasoning as an epistemic practice, the following examples of Faraday’s studies of the lines of magnetic force (Faraday 1852a , 1852b ) are presented:
(a) Asking questions and defining problems: The iron filing patterns formed the empirical basis for the visual model: 2D visualization of lines of magnetic force as presented in Fig. 2 . According to Faraday, these iron filing patterns were suitable for illustrating the direction and form of the magnetic lines of force (emphasis added):
It must be well understood that these forms give no indication by their appearance of the relative strength of the magnetic force at different places, inasmuch as the appearance of the lines depends greatly upon the quantity of filings and the amount of tapping; but the direction and forms of these lines are well given, and these indicate, in a considerable degree, the direction in which the forces increase and diminish . (Faraday 1852b , p.158 (3237))
Despite being static and two dimensional on paper, the lines of magnetic force were dynamical (Nersessian 1992 , 2008 ) and three dimensional for Faraday (see Fig. 2 b). For instance, Faraday described the lines of force “expanding”, “bending,” and “being cut” (Nersessian 1992 ). In Fig. 2 b, Faraday has summarized his experiment (bar magnet and knife blade) and its results (lines of force) in one picture.
(b) Analyzing and interpreting data: The model was so powerful for Faraday that he ended up thinking them as physical objects (e.g., Nersessian 1984 ), i.e., making interpretations of the way forces act. Of course, he made a lot of experiments for showing the physical existence of the lines of force, but he did not succeed in it (Nersessian 1984 ). The following quote illuminates Faraday’s use of the lines of force in different situations:
The study of these lines has, at different times, been greatly influential in leading me to various results, which I think prove their utility as well as fertility. Thus, the law of magneto-electric induction; the earth’s inductive action; the relation of magnetism and light; diamagnetic action and its law, and magnetocrystallic action, are the cases of this kind… (Faraday 1852a , p. 55 (3174))
(c) Experimenting: In Faraday's case, he used a lot of exploratory experiments; in case of lines of magnetic force, he used, e.g., iron filings, magnetic needles, or current carrying wires (see the quote above). The magnetic field is not directly observable and the representation of lines of force was a visual model, which includes the direction, form, and magnitude of field.
(d) Modeling: There is no denying that the lines of magnetic force are visual by nature. Faraday’s views of lines of force developed gradually during the years, and he applied and developed them in different contexts such as electromagnetic, electrostatic, and magnetic induction (Nersessian 1984 ). An example of Faraday’s explanation of the effect of the wire b’s position to experiment is given in Fig. 3 . In Fig. 3 , few magnetic lines of force are drawn, and in the quote below, Faraday is explaining the effect using these magnetic lines of force (emphasis added):
Picture of an experiment with different arrangements of wires ( a , b’ , b” ), magnet, and galvanometer. Note the lines of force drawn around the magnet. (Faraday 1852a , p. 34)
It will be evident by inspection of Fig. 3 , that, however the wires are carried away, the general result will, according to the assumed principles of action, be the same; for if a be the axial wire, and b’, b”, b”’ the equatorial wire, represented in three different positions, whatever magnetic lines of force pass across the latter wire in one position, will also pass it in the other, or in any other position which can be given to it. The distance of the wire at the place of intersection with the lines of force, has been shown, by the experiments (3093.), to be unimportant. (Faraday 1852a , p. 34 (3099))
In summary, by examining the history of Faraday’s use of lines of force, we showed how visual imagery and reasoning played an important part in Faraday’s construction and representation of his “field theory”. As Gooding has stated, “many of Faraday’s sketches are far more that depictions of observation, they are tools for reasoning with and about phenomena” (2006, p. 59).
Case study 3: visualizing scientific methods, the case of a journal
The focus of the third case study is the Journal of Visualized Experiments (JoVE) , a peer-reviewed publication indexed in PubMed. The journal devoted to the publication of biological, medical, chemical, and physical research in a video format. The journal describes its history as follows:
JoVE was established as a new tool in life science publication and communication, with participation of scientists from leading research institutions. JoVE takes advantage of video technology to capture and transmit the multiple facets and intricacies of life science research. Visualization greatly facilitates the understanding and efficient reproduction of both basic and complex experimental techniques, thereby addressing two of the biggest challenges faced by today's life science research community: i) low transparency and poor reproducibility of biological experiments and ii) time and labor-intensive nature of learning new experimental techniques. ( http://www.jove.com/ )
By examining the journal content, we generate a set of categories that can be considered as indicators of relevance and significance in terms of epistemic practices of science that have relevance for science education. For example, the quote above illustrates how scientists view some norms of scientific practice including the norms of “transparency” and “reproducibility” of experimental methods and results, and how the visual format of the journal facilitates the implementation of these norms. “Reproducibility” can be considered as an epistemic criterion that sits at the heart of what counts as an experimental procedure in science:
Investigating what should be reproducible and by whom leads to different types of experimental reproducibility, which can be observed to play different roles in experimental practice. A successful application of the strategy of reproducing an experiment is an achievement that may depend on certain isiosyncratic aspects of a local situation. Yet a purely local experiment that cannot be carried out by other experimenters and in other experimental contexts will, in the end be unproductive in science. (Sarkar and Pfeifer 2006 , p.270)
We now turn to an article on “Elevated Plus Maze for Mice” that is available for free on the journal website ( http://www.jove.com/video/1088/elevated-plus-maze-for-mice ). The purpose of this experiment was to investigate anxiety levels in mice through behavioral analysis. The journal article consists of a 9-min video accompanied by text. The video illustrates the handling of the mice in soundproof location with less light, worksheets with characteristics of mice, computer software, apparatus, resources, setting up the computer software, and the video recording of mouse behavior on the computer. The authors describe the apparatus that is used in the experiment and state how procedural differences exist between research groups that lead to difficulties in the interpretation of results:
The apparatus consists of open arms and closed arms, crossed in the middle perpendicularly to each other, and a center area. Mice are given access to all of the arms and are allowed to move freely between them. The number of entries into the open arms and the time spent in the open arms are used as indices of open space-induced anxiety in mice. Unfortunately, the procedural differences that exist between laboratories make it difficult to duplicate and compare results among laboratories.
The authors’ emphasis on the particularity of procedural context echoes in the observations of some philosophers of science:
It is not just the knowledge of experimental objects and phenomena but also their actual existence and occurrence that prove to be dependent on specific, productive interventions by the experimenters” (Sarkar and Pfeifer 2006 , pp. 270-271)
The inclusion of a video of the experimental procedure specifies what the apparatus looks like (Fig. 4 ) and how the behavior of the mice is captured through video recording that feeds into a computer (Fig. 5 ). Subsequently, a computer software which captures different variables such as the distance traveled, the number of entries, and the time spent on each arm of the apparatus. Here, there is visual information at different levels of representation ranging from reconfiguration of raw video data to representations that analyze the data around the variables in question (Fig. 6 ). The practice of levels of visual representations is not particular to the biological sciences. For instance, they are commonplace in nanotechnological practices:
Visual illustration of apparatus
Video processing of experimental set-up
Computer software for video input and variable recording
In the visualization processes, instruments are needed that can register the nanoscale and provide raw data, which needs to be transformed into images. Some Imaging Techniques have software incorporated already where this transformation automatically takes place, providing raw images. Raw data must be translated through the use of Graphic Software and software is also used for the further manipulation of images to highlight what is of interest to capture the (inferred) phenomena -- and to capture the reader. There are two levels of choice: Scientists have to choose which imaging technique and embedded software to use for the job at hand, and they will then have to follow the structure of the software. Within such software, there are explicit choices for the scientists, e.g. about colour coding, and ways of sharpening images. (Ruivenkamp and Rip 2010 , pp.14–15)
On the text that accompanies the video, the authors highlight the role of visualization in their experiment:
Visualization of the protocol will promote better understanding of the details of the entire experimental procedure, allowing for standardization of the protocols used in different laboratories and comparisons of the behavioral phenotypes of various strains of mutant mice assessed using this test.
The software that takes the video data and transforms it into various representations allows the researchers to collect data on mouse behavior more reliably. For instance, the distance traveled across the arms of the apparatus or the time spent on each arm would have been difficult to observe and record precisely. A further aspect to note is how the visualization of the experiment facilitates control of bias. The authors illustrate how the olfactory bias between experimental procedures carried on mice in sequence is avoided by cleaning the equipment.
Our discussion highlights the role of visualization in science, particularly with respect to presenting visualization as part of the scientific practices. We have used case studies from the history of science highlighting a scientist’s account of how visualization played a role in the discovery of DNA and the magnetic field and from a contemporary illustration of a science journal’s practices in incorporating visualization as a way to communicate new findings and methodologies. Our implicit aim in drawing from these case studies was the need to align science education with scientific practices, particularly in terms of how visual representations, stable or dynamic, can engage students in the processes of science and not only to be used as tools for cognitive development in science. Our approach was guided by the notion of “knowledge-as-practice” as advanced by Knorr Cetina ( 1999 ) who studied scientists and characterized their knowledge as practice, a characterization which shifts focus away from ideas inside scientists’ minds to practices that are cultural and deeply contextualized within fields of science. She suggests that people working together can be examined as epistemic cultures whose collective knowledge exists as practice.
It is important to stress, however, that visual representations are not used in isolation, but are supported by other types of evidence as well, or other theories (i.e., in order to understand the helical form of DNA, or the structure, chemistry knowledge was needed). More importantly, this finding can also have implications when teaching science as argument (e.g., Erduran and Jimenez-Aleixandre 2008 ), since the verbal evidence used in the science classroom to maintain an argument could be supported by visual evidence (either a model, representation, image, graph, etc.). For example, in a group of students discussing the outcomes of an introduced species in an ecosystem, pictures of the species and the ecosystem over time, and videos showing the changes in the ecosystem, and the special characteristics of the different species could serve as visual evidence to help the students support their arguments (Evagorou et al. 2012 ). Therefore, an important implication for the teaching of science is the use of visual representations as evidence in the science curriculum as part of knowledge production. Even though studies in the area of science education have focused on the use of models and modeling as a way to support students in the learning of science (Dori et al. 2003 ; Lehrer and Schauble 2012 ; Mendonça and Justi 2013 ; Papaevripidou et al. 2007 ) or on the use of images (i.e., Korfiatis et al. 2003 ), with the term using visuals as evidence, we refer to the collection of all forms of visuals and the processes involved.
Another aspect that was identified through the case studies is that of the visual reasoning (an integral part of Faraday’s investigations). Both the verbalization and visualization were part of the process of generating new knowledge (Gooding 2006 ). Even today, most of the textbooks use the lines of force (or just field lines) as a geometrical representation of field, and the number of field lines is connected to the quantity of flux. Often, the textbooks use the same kind of visual imagery than in what is used by scientists. However, when using images, only certain aspects or features of the phenomena or data are captured or highlighted, and often in tacit ways. Especially in textbooks, the process of producing the image is not presented and instead only the product—image—is left. This could easily lead to an idea of images (i.e., photos, graphs, visual model) being just representations of knowledge and, in the worse case, misinterpreted representations of knowledge as the results of Pocovi and Finlay ( 2002 ) in case of electric field lines show. In order to avoid this, the teachers should be able to explain how the images are produced (what features of phenomena or data the images captures, on what ground the features are chosen to that image, and what features are omitted); in this way, the role of visualization in knowledge production can be made “visible” to students by engaging them in the process of visualization.
The implication of these norms for science teaching and learning is numerous. The classroom contexts can model the generation, sharing and evaluation of evidence, and experimental procedures carried out by students, thereby promoting not only some contemporary cultural norms in scientific practice but also enabling the learning of criteria, standards, and heuristics that scientists use in making decisions on scientific methods. As we have demonstrated with the three case studies, visual representations are part of the process of knowledge growth and communication in science, as demonstrated with two examples from the history of science and an example from current scientific practices. Additionally, visual information, especially with the use of technology is a part of students’ everyday lives. Therefore, we suggest making use of students’ knowledge and technological skills (i.e., how to produce their own videos showing their experimental method or how to identify or provide appropriate visual evidence for a given topic), in order to teach them the aspects of the nature of science that are often neglected both in the history of science and the design of curriculum. Specifically, what we suggest in this paper is that students should actively engage in visualization processes in order to appreciate the diverse nature of doing science and engage in authentic scientific practices.
However, as a word of caution, we need to distinguish the products and processes involved in visualization practices in science:
If one considers scientific representations and the ways in which they can foster or thwart our understanding, it is clear that a mere object approach, which would devote all attention to the representation as a free-standing product of scientific labor, is inadequate. What is needed is a process approach: each visual representation should be linked with its context of production (Pauwels 2006 , p.21).
The aforementioned suggests that the emphasis in visualization should shift from cognitive understanding—using the products of science to understand the content—to engaging in the processes of visualization. Therefore, an implication for the teaching of science includes designing curriculum materials and learning environments that create a social and epistemic context and invite students to engage in the practice of visualization as evidence, reasoning, experimental procedure, or a means of communication (as presented in the three case studies) and reflect on these practices (Ryu et al. 2015 ).
Finally, a question that arises from including visualization in science education, as well as from including scientific practices in science education is whether teachers themselves are prepared to include them as part of their teaching (Bybee 2014 ). Teacher preparation programs and teacher education have been critiqued, studied, and rethought since the time they emerged (Cochran-Smith 2004 ). Despite the years of history in teacher training and teacher education, the debate about initial teacher training and its content still pertains in our community and in policy circles (Cochran-Smith 2004 ; Conway et al. 2009 ). In the last decades, the debate has shifted from a behavioral view of learning and teaching to a learning problem—focusing on that way not only on teachers’ knowledge, skills, and beliefs but also on making the connection of the aforementioned with how and if pupils learn (Cochran-Smith 2004 ). The Science Education in Europe report recommended that “Good quality teachers, with up-to-date knowledge and skills, are the foundation of any system of formal science education” (Osborne and Dillon 2008 , p.9).
However, questions such as what should be the emphasis on pre-service and in-service science teacher training, especially with the new emphasis on scientific practices, still remain unanswered. As Bybee ( 2014 ) argues, starting from the new emphasis on scientific practices in the NGSS, we should consider teacher preparation programs “that would provide undergraduates opportunities to learn the science content and practices in contexts that would be aligned with their future work as teachers” (p.218). Therefore, engaging pre- and in-service teachers in visualization as a scientific practice should be one of the purposes of teacher preparation programs.
Achieve. (2013). The next generation science standards (pp. 1–3). Retrieved from http://www.nextgenscience.org/ .
Google Scholar
Barber, J, Pearson, D, & Cervetti, G. (2006). Seeds of science/roots of reading . California: The Regents of the University of California.
Bungum, B. (2008). Images of physics: an explorative study of the changing character of visual images in Norwegian physics textbooks. NorDiNa, 4 (2), 132–141.
Bybee, RW. (2014). NGSS and the next generation of science teachers. Journal of Science Teacher Education, 25 (2), 211–221. doi: 10.1007/s10972-014-9381-4 .
Article Google Scholar
Chambers, D. (1983). Stereotypic images of the scientist: the draw-a-scientist test. Science Education, 67 (2), 255–265.
Cochran-Smith, M. (2004). The problem of teacher education. Journal of Teacher Education, 55 (4), 295–299. doi: 10.1177/0022487104268057 .
Conway, PF, Murphy, R, & Rath, A. (2009). Learning to teach and its implications for the continuum of teacher education: a nine-country cross-national study .
Crick, F. (1988). What a mad pursuit . USA: Basic Books.
Dimopoulos, K, Koulaidis, V, & Sklaveniti, S. (2003). Towards an analysis of visual images in school science textbooks and press articles about science and technology. Research in Science Education, 33 , 189–216.
Dori, YJ, Tal, RT, & Tsaushu, M. (2003). Teaching biotechnology through case studies—can we improve higher order thinking skills of nonscience majors? Science Education, 87 (6), 767–793. doi: 10.1002/sce.10081 .
Duschl, RA, & Bybee, RW. (2014). Planning and carrying out investigations: an entry to learning and to teacher professional development around NGSS science and engineering practices. International Journal of STEM Education, 1 (1), 12. doi: 10.1186/s40594-014-0012-6 .
Duschl, R., Schweingruber, H. A., & Shouse, A. (2008). Taking science to school . Washington DC: National Academies Press.
Erduran, S, & Jimenez-Aleixandre, MP (Eds.). (2008). Argumentation in science education: perspectives from classroom-based research . Dordrecht: Springer.
Eurydice. (2012). Developing key competencies at school in Europe: challenges and opportunities for policy – 2011/12 (pp. 1–72).
Evagorou, M, Jimenez-Aleixandre, MP, & Osborne, J. (2012). “Should we kill the grey squirrels?” A study exploring students’ justifications and decision-making. International Journal of Science Education, 34 (3), 401–428. doi: 10.1080/09500693.2011.619211 .
Faraday, M. (1852a). Experimental researches in electricity. – Twenty-eighth series. Philosophical Transactions of the Royal Society of London, 142 , 25–56.
Faraday, M. (1852b). Experimental researches in electricity. – Twenty-ninth series. Philosophical Transactions of the Royal Society of London, 142 , 137–159.
Gilbert, JK. (2010). The role of visual representations in the learning and teaching of science: an introduction (pp. 1–19).
Gilbert, J., Reiner, M. & Nakhleh, M. (2008). Visualization: theory and practice in science education . Dordrecht, The Netherlands: Springer.
Gooding, D. (2006). From phenomenology to field theory: Faraday’s visual reasoning. Perspectives on Science, 14 (1), 40–65.
Gooding, D, Pinch, T, & Schaffer, S (Eds.). (1993). The uses of experiment: studies in the natural sciences . Cambridge: Cambridge University Press.
Hogan, K, & Maglienti, M. (2001). Comparing the epistemological underpinnings of students’ and scientists’ reasoning about conclusions. Journal of Research in Science Teaching, 38 (6), 663–687.
Knorr Cetina, K. (1999). Epistemic cultures: how the sciences make knowledge . Cambridge: Harvard University Press.
Korfiatis, KJ, Stamou, AG, & Paraskevopoulos, S. (2003). Images of nature in Greek primary school textbooks. Science Education, 88 (1), 72–89. doi: 10.1002/sce.10133 .
Latour, B. (2011). Visualisation and cognition: drawing things together (pp. 1–32).
Latour, B, & Woolgar, S. (1979). Laboratory life: the construction of scientific facts . Princeton: Princeton University Press.
Lehrer, R, & Schauble, L. (2012). Seeding evolutionary thinking by engaging children in modeling its foundations. Science Education, 96 (4), 701–724. doi: 10.1002/sce.20475 .
Longino, H. E. (2002). The fate of knowledge . Princeton: Princeton University Press.
Lynch, M. (2006). The production of scientific images: vision and re-vision in the history, philosophy, and sociology of science. In L Pauwels (Ed.), Visual cultures of science: rethinking representational practices in knowledge building and science communication (pp. 26–40). Lebanon, NH: Darthmouth College Press.
Lynch, M. & S. Y. Edgerton Jr. (1988). ‘Aesthetic and digital image processing representational craft in contemporary astronomy’, in G. Fyfe & J. Law (eds), Picturing Power; Visual Depictions and Social Relations (London, Routledge): 184 – 220.
Mendonça, PCC, & Justi, R. (2013). An instrument for analyzing arguments produced in modeling-based chemistry lessons. Journal of Research in Science Teaching, 51 (2), 192–218. doi: 10.1002/tea.21133 .
National Research Council (2000). Inquiry and the national science education standards . Washington DC: National Academies Press.
National Research Council (2012). A framework for K-12 science education . Washington DC: National Academies Press.
Nersessian, NJ. (1984). Faraday to Einstein: constructing meaning in scientific theories . Dordrecht: Martinus Nijhoff Publishers.
Book Google Scholar
Nersessian, NJ. (1992). How do scientists think? Capturing the dynamics of conceptual change in science. In RN Giere (Ed.), Cognitive Models of Science (pp. 3–45). Minneapolis: University of Minnesota Press.
Nersessian, NJ. (2008). Creating scientific concepts . Cambridge: The MIT Press.
Osborne, J. (2014). Teaching scientific practices: meeting the challenge of change. Journal of Science Teacher Education, 25 (2), 177–196. doi: 10.1007/s10972-014-9384-1 .
Osborne, J. & Dillon, J. (2008). Science education in Europe: critical reflections . London: Nuffield Foundation.
Papaevripidou, M, Constantinou, CP, & Zacharia, ZC. (2007). Modeling complex marine ecosystems: an investigation of two teaching approaches with fifth graders. Journal of Computer Assisted Learning, 23 (2), 145–157. doi: 10.1111/j.1365-2729.2006.00217.x .
Pauwels, L. (2006). A theoretical framework for assessing visual representational practices in knowledge building and science communications. In L Pauwels (Ed.), Visual cultures of science: rethinking representational practices in knowledge building and science communication (pp. 1–25). Lebanon, NH: Darthmouth College Press.
Philips, L., Norris, S. & McNab, J. (2010). Visualization in mathematics, reading and science education . Dordrecht, The Netherlands: Springer.
Pocovi, MC, & Finlay, F. (2002). Lines of force: Faraday’s and students’ views. Science & Education, 11 , 459–474.
Richards, A. (2003). Argument and authority in the visual representations of science. Technical Communication Quarterly, 12 (2), 183–206. doi: 10.1207/s15427625tcq1202_3 .
Rothbart, D. (1997). Explaining the growth of scientific knowledge: metaphors, models and meaning . Lewiston, NY: Mellen Press.
Ruivenkamp, M, & Rip, A. (2010). Visualizing the invisible nanoscale study: visualization practices in nanotechnology community of practice. Science Studies, 23 (1), 3–36.
Ryu, S, Han, Y, & Paik, S-H. (2015). Understanding co-development of conceptual and epistemic understanding through modeling practices with mobile internet. Journal of Science Education and Technology, 24 (2-3), 330–355. doi: 10.1007/s10956-014-9545-1 .
Sarkar, S, & Pfeifer, J. (2006). The philosophy of science, chapter on experimentation (Vol. 1, A-M). New York: Taylor & Francis.
Schwartz, RS, Lederman, NG, & Abd-el-Khalick, F. (2012). A series of misrepresentations: a response to Allchin’s whole approach to assessing nature of science understandings. Science Education, 96 (4), 685–692. doi: 10.1002/sce.21013 .
Schwarz, CV, Reiser, BJ, Davis, EA, Kenyon, L, Achér, A, Fortus, D, et al. (2009). Developing a learning progression for scientific modeling: making scientific modeling accessible and meaningful for learners. Journal of Research in Science Teaching, 46 (6), 632–654. doi: 10.1002/tea.20311 .
Watson, J. (1968). The Double Helix: a personal account of the discovery of the structure of DNA . New York: Scribner.
Watson, J, & Berry, A. (2004). DNA: the secret of life . New York: Alfred A. Knopf.
Wickman, PO. (2004). The practical epistemologies of the classroom: a study of laboratory work. Science Education, 88 , 325–344.
Wu, HK, & Shah, P. (2004). Exploring visuospatial thinking in chemistry learning. Science Education, 88 (3), 465–492. doi: 10.1002/sce.10126 .
Download references
Acknowledgements
The authors would like to acknowledge all reviewers for their valuable comments that have helped us improve the manuscript.
Author information
Authors and affiliations.
University of Nicosia, 46, Makedonitissa Avenue, Egkomi, 1700, Nicosia, Cyprus
Maria Evagorou
University of Limerick, Limerick, Ireland
Sibel Erduran
University of Tampere, Tampere, Finland
Terhi Mäntylä
You can also search for this author in PubMed Google Scholar
Corresponding author
Correspondence to Maria Evagorou .
Additional information
Competing interests.
The authors declare that they have no competing interests.
Authors’ contributions
ME carried out the introductory literature review, the analysis of the first case study, and drafted the manuscript. SE carried out the analysis of the third case study and contributed towards the “Conclusions” section of the manuscript. TM carried out the second case study. All authors read and approved the final manuscript.
Rights and permissions
Open Access This article is distributed under the terms of the Creative Commons Attribution 4.0 International License ( https://creativecommons.org/licenses/by/4.0 ), which permits use, duplication, adaptation, distribution, and reproduction in any medium or format, as long as you give appropriate credit to the original author(s) and the source, provide a link to the Creative Commons license, and indicate if changes were made.
Reprints and permissions
About this article
Cite this article.
Evagorou, M., Erduran, S. & Mäntylä, T. The role of visual representations in scientific practices: from conceptual understanding and knowledge generation to ‘seeing’ how science works. IJ STEM Ed 2 , 11 (2015). https://doi.org/10.1186/s40594-015-0024-x
Download citation
Received : 29 September 2014
Accepted : 16 May 2015
Published : 19 July 2015
DOI : https://doi.org/10.1186/s40594-015-0024-x
Share this article
Anyone you share the following link with will be able to read this content:
Sorry, a shareable link is not currently available for this article.
Provided by the Springer Nature SharedIt content-sharing initiative
- Visual representations
- Epistemic practices
- Science learning
New! Schedule Threads! Threads scheduling has arrived! Threads scheduling has arrived on Buffer! Find your community now. Threads scheduling has arrived on Buffer! Find your community and keep the conversation going. Learn more
- Content Marketing
A Complete Guide to Visual Content: The Science, Tools and Strategy of Creating Killer Images

Former VP of Marketing @ Buffer
We love setting goals for improvement here at the Buffer blog , and one of our most recent challenges has been this: Every post gets an original image.
This might not sound like such a tall task until you consider that Courtney and I are journalism majors whose skills lie in painting pictures with words and not so much in painting pictures with Photoshop. We try our best, in the name of visual content.
You’ve perhaps heard of visual content? The term seems to be everywhere these days. We come across it all the time as we’re curating content , and it seems that social media strategies now consider visuals as required elements.
As visual content on social networks has grown, so too has the emphasis on storytelling with pictures. Indelible, craveable, relatable images have become a high currency in the world of content marketing , and the push for visual content seems to only be getting stronger.
So what are you to do with this new focus on visuals? I’m happy to share with you some of our favorite ideas, tips, and tools.
First off: Why visual content is so important
Here are some telling stats on just how big visual content has become and how it’s changing the way we all approach marketing.
Sixty-three percent of social media is made up of images. That means nearly two-thirds of the updates you see on social media are visual content , according to a Citrix report from January.
Nearly half of all Internet users have reposted a photo or video they have found online. An equally intriguing stat from the same 2013 Pew Research Study is that 54 percent of all Internet users have posted an original photo or video that they personally have created.

Content with relevant images gets 94 percent more views than content without . This oft-cited visual content stat is evidence that visuals have been vital to online success for some time. >The original study from content platform Skyword came out in 2011.
Ninety-four percent equates to almost double the views, and the boost is noticed across all topics and categories.

Tweets with images receive 150 percent more retweets. We ran the numbers on this ourselves, comparing tweets from our Buffer account to see exactly what difference images made. The results are striking! Retweets, replies, and clicks all benefit from images. We first ran this analysis back in November, and we continue to see these stats bear out in our tweets today.
Images are the No. 1 most important factor in optimal social media content. This according to an ongoing research survey conducted by Software Advice and Adobe . More than 80 percent of survey respondents pointed to images being “Very Important” or “Important” for their marketing optimization on social. The runners up in terms of importance were hashtags and usernames.

The brain processes visuals 60,000 times faster than it does text. We are wired to take in visual content faster and more effectively than we are words. Ninety percent of the information sent to our brains is visual ; we’ve been trained to consume visual content as quickly as we can.
Here’s a great visual representation of this data from >the Optimal Targeting blog :

To recap, many of the big, important stats on visual content are summed up nicely in>this infographic from Matter’s Studio-C . The stats below paint a strong picture of how vital visuals are for marketers.

4 lessons on the psychology and science of visual content
We love breaking down topics into the origins of why something works (or doesn’t work), and these deep dives often lead us into psychology and science . I found the same to be true for visual content. There’s a lot of neat psychological and scientific explanations for why visuals can be so powerful and what goes into creating an awesome image. Here are four of my favorite learnings.
1. Visceral reactions to visual content
Have you ever fallen in love with a design but couldn’t explain why?
These visceral reactions are some of the strongest connections we can make to visual content . When we feel a visceral reaction, we are responding from the part of the brain responsible for survival instincts and fight-or-flight responses. The response is subconscious. It originates from the central nervous system whenever we’re stimulated by vital factors like food, shelter, danger, or reproduction. We might not be able to explain why we love a beautiful design because our conscious thought hasn’t yet caught up with our subconscious.
The trick with making visceral reactions work in visual content is being aware of the feelings that your images and video evoke. If you can elicit a survival-type response—pictures that hint at safety by showing a home or a field, for instance—you may be able to tap into a visceral reaction.
Here’s a photo that earned a visceral reaction from me, possibly due to the feeling of security with a key and the calming colors.

2. Rule of Thirds
The Rule of Thirds is a method for composing the elements of an image to be visually pleasing and to be in sync with the way our eyes prefer to scan an image. Photographers know the Rule of Thirds well; it is a foundational piece of photography.
The way it works is by dividing an image into a grid of thirds both horizontally and vertically. Basically, put a tic-tac-toe board on an image.
The tic-tac-toe board creates intersections of lines, and according to Rule of Thirds, these intersections are where the eye is most likely to be drawn.
The design lesson here is to place your key elements along these intersections . Avoid placing a key element right in the center.
3. Golden Ratio
The Golden Ratio is where the ratio of a smaller segment to a larger segment is the same as the ratio of a larger segment to the sum of both. Confusing? It’s quite a bit easier to see this one explained in a graphic , like this one from Vanseo Design:

This ratio could appear in terms of width and height of an image or in the way that a blog page is composed with the main content and sidebar. (There’s even a handy tool for figuring out the Golden Ratio for web typography .)
For images, this ratio creates a Golden Rectangle. The Golden Rectangle, when you dissect it into smaller and smaller Golden Rectangles, forms a spiral shape that is often present in nature, architecture, and art.

To find the Golden Ratio for an image you’re creating, you can apply a little algebra to the height and width . For example, if you know that the height of your image will be 400 pixels, you can multiply 400 x 1.618 to find the width: 647 pixels.
To check if your image is “golden,” you can divide the width by the height. Depending on how you divide, the golden answer will be either 1.618 or 0.618.
4. Fibonacci Sequence
The Fibonacci Sequence is a series of numbers where the next number in the series is the sum of the previous two numbers. Here’s how the sequence starts:
0, 1, 1, 2, 3, 5, 8, 13, 21, 34, 55, 89, 144 …
These numbers are found commonly in classical creative works and in nature, and they have a neat tie-in with the Golden Ratio. Dividing any number in the Fibonacci Sequence by the previous number will result in an approximation of the golden number 1.618—the basis for the Golden Ratio.
The grid below is shows the marriage between Golden Rectangles and Fibonacci Sequence numbers.
Ross Johnson of 3.7 Designs has a lot of neat tips on how science can inform design. Here’s his take on the Fibonacci Sequenece:
Patterns based on the sequence are intrinsically aesthetic and therefore should be used in the composition of our designs. This sequence can be used to create visual patterns, create shapes, organic figures, build grids or dictate sizing and ratios.
9 major types of visual content
What are we specifically talking about when we talk about visual content? I sometimes lose track of this myself. There will eventually be an end product to a visual content strategy. Here are the most common ways that marketers create visual content.
- Eye-catching, creative photography — think stock photos or Instagram pics
- Video — YouTube, Vimeo, or Wistia embedded right into a post or shared directly to social media
- Screenshots — helpful images of your product or workflow
- Infographics — visual information, either super long and meaty or bite-sized and informative
- Data visualization — standalone charts and graphs ( example )
- Comics — relevant comic strips or cartoons ( example )
- Memes — popular memes customized to fit the context of your post or update ( example )
- Visual note-taking — casually-designed layout of ideas, typically text-heavy ( example )
- Miscellaneous graphics — images that complement the content, e.g. the images in the above section on Golden Ratio and Fibonacci Sequence
While thinking about the ways to fulfill a visual content strategy, you’ll also want to beware some of the common pitfalls of visual content. Kathryn Aragon does a great job summarizing the trouble spots to an unfocused visual strategy.
Images should not be: Inserted willy-nilly, just to have an image. Trite or overused stock photos. Thought of only as share-bait. Boring or irrelevant.
It may also be helpful to keep in mind how your visual content will be displayed across various social networks. Take Twitter’s inline images for instance. The default viewable portion of an inline image is 440 pixels wide by 220 pixels tall. Images outside this 2:1 ratio will risk getting cropped at inopportune places, like this example the St. Louis Cardinals’ timeline.

Media Bistro has a great collection of all the sizes you need to know for visuals on all the major networks : Twitter, Facebook, Google+, LinkedIn, Pinterest, Instagram, and YouTube. Here’s a peek at what they suggest for a Facebook sponsored post. (Click through for a complete view of all the helpful image dimensions for all networks.)

6 best tools for creating visual content
As a non-designer, I am quite dependent on the amazing tools at Canva to get a lot of my design work done. The setup with Canva is super easy. You can choose from a number of premade templates or design your own from scratch. The drag-and-drop interface makes it quite intuitive to add different elements, and each of the elements has advanced options for editing as well.
One of my favorite features is that the elements align to grids automatically. You can line up a series of elements with relative ease.

Bonus tip: For super fast image adjustments like cropping or scaling, I’ve found BeFunky to be an indispensable tool. You can upload, edit, and save an image without even signing in.
A go-to tool for many amateur designers is presentation software like PowerPoint. If you think of slides as images, it’s easy to see how this tool could be useful for building out visual content. You can set images as backgrounds, add text and typography, and place icons and graphics.
When you save in PowerPoint, choose to save as an image , and you’ll be set.
Bonus tip: For a cloud version of PowerPoint, you might be interested to try Google’s Presentation tool found in Google Drive.

Screenshots are perhaps the easiest way of adding visual content, provided you have a reliable screenshot tool. We use Skitch , a product of Evernote, for our screengrabs. Skitch has some helpful annotation features that look good and are easy to implement.

Bonus tip: If you’d rather run things lean, you can use keyboard shortcuts to do simple screengrabs:
- Windows: Print Screen places a screengrab onto your clipboard
- Windows: Print Screen+Windows key saves a screengrab into a photo folder
- Mac: Command+Shift+4 lets you choose the area you’d like to grab for your screenshot
- Mac: The above command followed by Spacebar lets you take a screenshot of an active window
Of course I couldn’t help but mention the most popular image creation tool out there: Photoshop . If you have the time, skills, and resources to use Photoshop for your visual content, then you’re likely to find a lot of helpful features and tools to building pretty much anything you could want.
Bonus tip: If you’re after a free version, you might want to try Gimp , which has a lot of similar features and tools but is completely free.
With Place It , you can create some really striking visuals for promotional content of new tools and services. You can add your product’s screenshots right into awesome-looking stock photos and even interactive backgrounds. Here’s what the Buffer Blog would look like when added to a Place It graphic:
Tips on making visual content that people will love
I’ve come to rely on a lot of little tips for making visual content for Buffer blog posts. It’s great to have a few tricks in your pocket when it comes to design. Here are a few of my favorites.

Design with grids
The Rule of Thirds highlights the importance of grids when it comes to framing a photo. Grids can also play a big role in creating images that look great. In this sense, you could look at creating a collage with many images in a grid or placing a frame around a photo. Grid techniques give order and professionalism to your images .

Bonus tip : It’s much easier to overlay text onto a grid of images. The text really pops when it rests on top of solid lines.
Find a good photo filter and use it consistently
Why might a filter come in handy? When you’re pulling images from a wide variety of sources for your blog, filters can provide a sense of consistency across the visuals. A consistent filter could even make your posts more recognizable in social media , which becomes especially important as timelines fill with visuals.
Take a look at the following two pictures, before filter and after filter:

Set a color palette and determine your brand fonts
If your brand doesn’t have a set palette of colors or two to three go-to fonts, then now might be the time to find some. Consider how the colors and fonts that you choose portray your brand . One thing to keep in mind might be the psychology of color: Colors trigger different feelings for us . This image>from PowerText shows how different colors (and different logos) tend to make us feel.

Bonus tip : When you’re designing with color, keep in mind the concept of semantic resonance . This basically means that, when possible, use colors that fit the topic you’re talking about. In infographics, this would mean displaying data about Google+ with a red bar and data about Twitter with light blue.
Choose a striking stock photo
We’ve come across a huge number of free stock photo sites in our search for visuals for the blog. It’s often difficult to decide what exactly makes for a good photo. When we’re searching at Buffer, we tend to think abstract: If we’re doing a post on Facebook followers, we might try a search for “lines” or “queues” rather than a search for the Facebook logo. When choosing the right picture, you can keep in mind many of the lessons relayed from the psychology and science of visuals: Search for visceral reactions, go with bright bold colors, look for the Rule of Thirds and the Golden Ratio .
Bonus tip : Social media agency Laundry Service found that Instagram photos make for more effective advertising imagery than stock photos . Might be worth experimenting with for your next campaign.
Build a helpful, humorous infographic
Writing on the Harvard Business Review blog , Gareth Cook of The Best American Infographics mentioned a few key areas of the most successful infographics. Cook believes that the key is to distill lots of information into an easy-to-read, intuitive layout:
Give people a sense of all the data that’s out there, and enough context, without overwhelming them.
And being humorous doesn’t hurt either. Some of his favorite infographics are heavy on the whimsy. Here’s an example:

What is most important for you when creating visual content?
As we’ve pushed forward with visual content for the Buffer blog, we’ve learned a lot and continue to experiment with new tips and tools. We’d love to hear what you’ve discovered, too!
What types of visual content do you most enjoy? Which are the ones that work best for you? It’d be awesome to hear your thoughts on the topic. Share any and all ideas here in the comments.
P.S. If you liked this post, you might enjoy our ">Buffer Blog newsletter . Receive each new post delivered right to your inbox, plus our can’t-miss weekly email of the Internet’s best reads. ">Sign up here .
Image credits: Dave Chapman , 3.7 Designs , Pew , >Skyword , The Next Web , Vanseo Design , Hong Kiat , Dan Farrelly , Wikipedia , PowerText , Chang-JJ , Mighty Hive , Death to the Stock Photo .
Try Buffer for free
140,000+ small businesses like yours use Buffer to build their brand on social media every month
Related Articles

Learn exactly how this founder used Reddit to build his profile as a thought leader and gain new customers.
Without a solid distribution strategy, even the best creative can get lost in this vast universe of content. Here's everything you need to know about building yours.
In this article, you’ll learn about ten copywriting formulas that can help you package your social media content in a more engaging way.
140,000+ people like you use Buffer to build their brand on social media every month
Copyright © 2024 Buffer | Privacy | Terms | Security
- Social Media Marketing
- Instagram Marketing
- Social Analytics
- News and Trends
- Best apps and tools
- Inside Buffer
- Remote Work
- Transparency
- Blog & podcasts
- Best Time to Post on Social Media
- Social Media Blog
- Social Media Glossary
- About Buffer
- Our culture
What is a Concept Map Diagram?
A concept map or conceptual diagram is a diagram that depicts suggested relationships between concepts that represent ideas and information as boxes and circles with labeled arrows in a downward-branching hierarchical structure. It is a graphical tool that instructional designers, engineers, technical writers, and others use to organize and structure knowledge.

Original of Concept Map
Concept mapping was developed by Joseph D. Novak in the 1970s as a means of representing the emerging science knowledge of students. It has subsequently been used as a tool to increase meaningful learning in the sciences and other subjects as well as to represent the expert knowledge of individuals and teams in education, government and business. Concept maps have their origin in the learning movement called constructivism. In particular, constructivists hold that learners actively construct knowledge.
When to Use Concept Map
Concept maps are used to stimulate the generation of ideas and are believed to aid creativity. Such mapping is also sometimes used for brain-storming. Although they are often personalized and idiosyncratic, concept maps can be used to communicate complex ideas and we can use it for wide variety of areas, to just name a few:
- A road map represents the locations of highways and towns
- A circuit diagram represents the workings of an electrical appliance
- New knowledge creation: e.g., transforming tacit knowledge into an organizational resource, mapping team knowledge
- Note-taking and summarizing gleaning key concepts, their relationships, and hierarchy from documents and source materials
- Collaborative knowledge modeling and the transfer of expert knowledge
- Facilitating the creation of shared vision and shared understanding within a team or organization
Concept Map vs Topic Map vs Mind Map
Concept map can be a map, a system view, of a real (abstract) system or set of concepts. Concept maps are more free form, as multiple hubs and clusters can be created, unlike mind maps, which typically emerge from a single center.
Topic map – Concept maps are rather similar to topic maps in that both allow to connect concepts or topics via graphs.
Mind map reflects what you think about a single topic, which can focus on group brainstorming.
Create and Share Ideas with Concept Mapping?
Concept maps are visual representations of information that are especially useful for those who learn better visually. They are a powerful brainstorming strategy by starting with higher-level concepts and also help you chunk information based on meaningful connections. In other words, knowing the big picture makes details more significant and easier to remember. Concept maps work very well when it is important to see and understand the relationships between different things. They can also be used to analyze, compare and contract information.
Making and using concept maps
Making one is very simple and there is no right or wrong way to make a concept map. The one key step is to focus on the ways ideas are linked to each other. You try following the steps listed below:
- Starting from memory is an excellent way to assess what you already understand and what you need to review.
- Focus on how concepts are related to each other.
- Elaborate each part of the map add annotations or callout to clarify ideas in detail.
- List related examples, where applicable, for sections of the map.

Edit this Concept Map Template
Mapping your Ideas and innovation with Concept Maps
A Concept Map is a visual representation that shows the relationship between ideas, concepts, images, and other related information. It is a popular method used by brainstorming new ideas and innovation as it makes it easy for people to organize, structure and display the knowledge they have gained on a particular subject. Concept maps are often used as a way to develop logical thinking by revealing connections among these concepts to form a larger whole in an easy-to-understand and easy-to-remember structure.
How to Create a Concept Map
- Step 1: List key concepts/terms related to the topic
- Step 2: Elaborate and expand key concepts
- Step 3: Identify links between concepts
Elements of a Concept Map
- Nodes correspond to the concepts or important terms related to your topic(s).
- Labeled Link Lines identify the type of relationship. The line between a pair of concepts denotes a relationship, and the label on the line tells how the two concepts are related.
- Callouts or annotations and be used to elaborate your ideas in future details.
5 Steps for Creating a Concept Map
A concept map is a visual organization and representation of knowledge. It shows concepts and ideas and the relationships among them. You create a concept map by writing keywords (sometimes enclosed in shapes such as circles, boxes, triangles, etc.) and then drawing arrows between the ideas that are related. Then you add a short explanation by the arrow to explain how the concepts are related. You can follow the steps listed below for creating a concept map:
- Identify the general/broad topic that you are interested in.
- Brainstorm on the general topic and list all the concepts and themes that are related to the topic on a large piece of paper. Keep the concepts as concise as possible.
- Give a title for the main theme of the map.
- Identify the relationship between the concepts. You can use other organizational patterns such as branches, arrows or groups
- After the map has been created, look at the organizational patterns to see if the pieces fit together and make sense and if anything is missing.
Online Concept Mapping Software
Visual Paradigm Online allows you to visually depict a system of relationships by creating a map in which nodes represent ideas or facts, and lines or connectors between nodes represent relationships (for example, cause-and-effect relationships, category and sub-category relationships, and so on).
VP Online comes with a simple drag-and-drop editor that lets you build beautiful Concept Maps effortlessly. It is so intuitive that allows you to pay more attention to the design itself without spending a lot of time learning the software.

©2024 by Visual Paradigm. All rights reserved.
- Terms of Service
- Privacy Policy
- Security Overview

- Tips & Tricks
- PowerPoint Templates
- Training Programs
- Free E-Courses
Visual Representation Ideas From Physics
Home > Presentation Ideas > Presentation Graphics > Visual Representation Ideas
Here are some visual ways to represent business ideas inspired by my son’s Physics text book. Visual ideas are all around us, if only we have the mind to look for them.
Sources for visual representation of business ideas:
One of the common questions we get in our ‘Visual presentations workshops’ is – “Where can we get the inspiration for visualizing business ideas?”
Our answer has always been – “Look around – you will find your inspiration”. We practice the philosophy all the time.
One day, as I was browsing through my son’s physics text book – I found a wealth of wonderful concepts that I could apply directly to a business situation. This article is a result of that inspiration.
Example 1: Property of a bi-convex lens
A simple bi-convex lens focuses light rays to a specific point. I am sure you’ve done experiments, like focusing sun’s rays on a piece of cotton using a magnifying glass (a biconvex lens). The power of focus is such that cotton burns in a few moments.
That simple scientific fact led us to create this useful diagram template:
The diagram can be used to explain the power of collective vision. When different departments in a company work together under a collective vision, no target is unachievable.
Just by including the visual of a target, we converted a ray diagram in physics to a business diagram template.
Related: 3D target diagram tutorial
Example 2: Property of a prism
The next subject in the text book was about prisms. A prism is used to split light into its components.
I found the idea quite suited to a corporate environment and we created this diagram template:
The diagram helps you explain the role of a leader in assigning tasks to a team. Instead of assigning tasks arbitrarily, let your ‘team goal’ be the guiding prism to determine the tasks that need to be assigned to accomplish the goal.
Related: Using Visual Metaphor in PowerPoint
Example 3: The power of pulleys
A pulley is a wheel on an axle. When used in tandem, pulleys can help you lift astonishing amount of weights with minimum effort.
This seemed a perfect concept to showcase the power of team work in an organization. So, we created this useful diagram template:
Just as pulleys lift astonishing weights by working in tandem and distributing the load equally, a good team can achieve the impossible by working in synergy.
Related: More Concept Ideas from PowerPoint CEO Pack
Inference about visual representation:
We have all read so many scientific concepts and principles in our schools. We never bothered to see their application in a corporate environment.
When you spend a little time to think, you would be amazed to find the number of principles that help you visualize your business ideas and concepts in a presentation.
Inspiration for business presenters:
Sometimes, it is not easy to get enough inspiration to visualize innovative concepts for your business presentations. Do go through the articles in this visual presentations section to find more ideas for your next presentation.
Related: Useful PowerPoint Concepts: Lock and Key Diagram
Related: Using Visual Metaphors for Business Concepts
Return to Top of Visual Representation Ideas Page
Share these tips & tutorials
Get 25 creative powerpoint ideas mini course & members-only tips & offers. sign up for free below:.
- Concept Map Note Taking
- Types of Concept Maps
- Visual Tools for Brainstorming
- Brainstorming Content Ideas
- Brainstorming in Business
- Brainstorming Questions
- Brainstorming Rules
- Brainstorming Techniques
- Brainstorming Workshop
- Design Thinking and Brainstorming
- Divergent vs Convergent Thinking
- Group Brainstorming Strategies
- Group Creativity
- How to Make Virtual Brainstorming Fun and Effective
- Ideation Techniques
- Improving Brainstorming
- Marketing Brainstorming
- Plot Diagrams
- Rapid Brainstorming
- Reverse Brainstorming Challenges
- Reverse vs. Traditional Brainstorming
- What Comes After Brainstorming
- Flowchart Guide
- Spider Diagram Guide
- 5 Whys Template
- Assumption Grid Template
- Brainstorming Templates
- Brainwriting Template
- Innovation Techniques
- 50 Business Diagrams
- Business Model Canvas
- Certainities, Suppositions & Doubts
- Change Control Process
- Change Management Process
- Cynefin Framework
- DACI Framework
- Decision Making Framework
- Decision Making Model
- Decision Making Techniques
- Decision Matrix
- Digital Customer Journey
- Macro Environmental Analysis
- NOISE Analysis
- Product Portfolio
- Profit & Loss Templates
- RAPID Framework
- Scenario Planning
- Second Order Thinking
- SPACE Analysis
- Stakeholder Communication Plan
- Strategic Vs Tactical Planning
- Strategy vs Plan
- What are Tree Diagrams
- Winning Brand Strategy
- Work Management Systems
- Balanced Scorecard
- Developing Action Plans
- Guide to setting OKRS
- How to Write a Memo
- Improve Productivity & Efficiency
- Mastering Task Analysis
- Mastering Task Batching
- Monthly Budget Templates
- Program Planning
- Top Down Vs. Bottom Up
- Weekly Schedule Templates
- Cash Cow Matrix
- Decision Tree Guide
- Kaizen Principles
- Opportunity Mapping
- Strategic-Goals
- Strategy Mapping
- Strategy vs Tactics
- T Chart Guide
- Business Continuity Plan
- Developing Your MVP
- Experience Mapping Guide
- Incident Management
- Needs Assessment Process
- Perceptual Maps
- Position Maps
- Product Development From Ideation to Launch
- Value-Proposition-Canvas
- Visualizing Competitive Landscape
- Communication Plan
- Graphic Organizer Creator
- Fault Tree Software
- Bowman's Strategy Clock Template
- Decision Matrix Template
- Communities of Practice
- Goal Setting for 2024
- Meeting Templates
- Meetings Participation
- Microsoft Teams Brainstorming
- Retrospective Guide
- Skip Level Meetings
- Visual Documentation Guide
- Visual Note Taking
- Weekly Meetings
- Affinity Diagrams
- Business Plan Presentation
- Post-Mortem Meetings
- Team Building Activities
- WBS Templates
- Online Whiteboard Tool
- Communications Plan Template
- Idea Board Online
- Meeting Minutes Template
- Genograms in Social Work Practice
- Conceptual Framework
- How to Conduct a Genogram Interview
- How to Make a Genogram
- Genogram Questions
- Genograms in Client Counseling
- Phylogenetic Trees
- Understanding Ecomaps
- Visual Research Data Analysis Methods
- House of Quality Template
- Customer Problem Statement Template
- Competitive Analysis Template
- Creating Operations Manual
- Knowledge Base
- Folder Structure Diagram
- Online Checklist Maker
- Lean Canvas Template
- Instructional Design Examples
- Genogram Maker
- Work From Home Guide
- Strategic Planning
- Employee Engagement Action Plan
- Huddle Board
- One-on-One Meeting Template
- Story Map Graphic Organizers
- Introduction to Your Workspace
- Managing Workspaces and Folders
- Adding Text
- Collaborative Content Management
- Creating and Editing Tables
- Adding Notes
- Introduction to Diagramming
- Using Shapes
- Using Freehand Tool
- Adding Images to the Canvas
- Accessing the Contextual Toolbar
- Using Connectors
- Working with Tables
- Working with Templates
- Working with Frames
- Using Notes
- Access Controls
- Exporting a Workspace
- Real-Time Collaboration
- Notifications
- Using Creately VIZ
- Meet Creately VIZ
- Unleashing the Power of Collaborative Brainstorming
- Uncovering the potential of Retros for all teams
- Collaborative Apps in Microsoft Teams
- Hiring a Great Fit for Your Team
- Project Management Made Easy
- Cross-Corporate Information Radiators
- Creately 4.0 - Product Walkthrough
- What's New
How to Use Visual Collaboration Tools to Generate Creative Ideas

Brainstorming is a popular technique used by teams looking to come up with a large number of new and innovative ideas quickly and easily. But doing it effectively can be a challenge, especially for remote teams. Visual collaboration tools can make brainstorming easier by providing a shared space where team members can contribute and share their ideas visually. These tools can help to break down barriers, spark new ideas, and facilitate better communication and collaboration.
In this blog post, we will explore how to use visual collaboration tools to brainstorm:
Benefits of Using Visual Collaboration Tools for Brainstorming
Mind mapping, mood boards.
Visual collaboration tools are essential for generating creative ideas. They boost creativity, improve communication, and enable easy sharing, organizing and documenting.
Increased Creativity Visual collaboration tools encourage participants to think visually, fostering creativity by enabling them to explore concepts in different ways. With an infinite canvas like the one offered by Creately, teams have the freedom to expand their creative boundaries further. This dynamic canvas allows for limitless brainstorming possibilities, including visual aids like images, diagrams, and more structured methods such as mind maps, providing a vast and unbounded space for creative thinking.
Pre-Designed Templates Templates offered in a visual collaboration tool can be really helpful in brainstorming and problem-solving processes. These pre-designed frameworks offer a clear starting point, save time and guide the users in a structured process for generating ideas. The visual representation of ideas can help with organizing generated ideas, as well as the thought process during brainstorming. Creately offers a range of brainstorming templates such as Mind Mapping, SWOT Analysis, Affinity diagramming, and more.
Improved Communication and Collaboration Visual collaboration tools go beyond geographical boundaries, enabling teams to collaborate seamlessly, regardless of their physical locations. In a tool like Creately, features like real-time editing, commenting, and spotlighting makes it easier to communicate during brainstorming sessions. This creates a more interactive and collaborative environment, where team members can build on each other’s ideas, leading to more creative solutions.
Sharing and Access Controls Visual collaboration tools provide various sharing options, making it easier to share brainstorming content, and also ensure that the right people have access to the information. Whether it’s sharing a link, inviting specific collaborators, or setting viewing permissions, these tools offer control over who can participate and contribute. In Creately, you can define the sharing capabilities to your team and guests. This promotes information security and accessibility to authorized team members only.
Organizing and Documenting Ideas One of the key advantages of visual collaboration tools like Creately is they serve as a great platform to effectively organize and document ideas generated during brainstorming sessions. Creately’s collaborative whiteboards allow teams to capture ideas in real-time, and with features like sticky notes, shapes, and connectors help document ideas. Creately also provides a folder management system to organize your workspaces with custom sharing permissions.
Types of Visual Collaboration Tools for Brainstorming
There are several types of visual collaboration tools that can be used for brainstorming and idea generation. These tools cater to different needs and preferences, allowing teams to choose the one that best suits their workflows and objectives. Some common types include:
Mind mapping tools help create hierarchical diagrams that represent ideas and concepts in a structured way. These tools are excellent for organizing and visualizing complex ideas during brainstorming sessions.
Mind Mapping using a Visual Collaboration Tool:
- Create a Central Idea: Start by placing a central idea or topic at the center of your digital canvas within the visual collaboration tool. This idea serves as the focal point for your brainstorming session.
- Branch Out: Create branches going outward from the central idea. These branches represent major categories or themes related to your topic. For example, if your central idea is “New Product Development,” your branches might include “Features,” “Market Research,” “Budget,” and so on.
- Add Subtopics: From each major branch, add sub-branches to break down the ideas further. Subtopics can represent specific concepts, tasks, or considerations within each major category. Use text, icons, colors, and shapes to differentiate and highlight different elements.
- Interconnect Ideas: Use lines or arrows to connect and illustrate relationships or dependencies between different ideas. This helps you visualize how various concepts are interconnected and interdependent.
- Rearrange and Organize: Visual collaboration tools often provide drag-and-drop functionality, allowing you to easily rearrange and reorganize ideas. This flexibility helps refine and evolve your mind map as the brainstorming session progresses.
- Add Visuals: Many collaboration tools allow you to incorporate multimedia elements such as images and links into your mind map. This feature can be valuable when brainstorming ideas that involve visuals, references, or external resources.
- Feedback and Discussion: Use the visual collaboration tool’s communication features, such as comments and spotlight to engage in real-time discussions with team members. This promotes idea refinement and sparks further creativity.
- Export and Share: Once your mind map is complete, export it in various formats (ex: PDF, image, etc.) and share it with team members or stakeholders. This ensures that everyone has access to the brainstorming outcomes for reference or further development.
- Revisit & Iterate: Mind mapping is often an iterative process. You can revisit and expand upon your mind map as new ideas emerge or as the project evolves, keeping your brainstorming sessions dynamic and adaptable.
For more information, read how Creately facilitates problem solving with Mind Mapping: Visual Problem Solving .
Flowcharts are a type of diagram that can be used to visually represent the steps in a process. They can be a valuable tool for brainstorming, as Flowcharts help team members to identify the different steps involved in a process and to see how they are interconnected.
Brainstorming with Flowcharts on a Visual Collaboration Tool:
- Map the Process: Start with a blank canvas and create a flowchart that represents the steps involved in a particular project, idea, or problem. This provides a clear visual representation of the brainstorming subject.
- Hierarchical Organization: Flowcharts use symbols and connectors to illustrate the sequence and relationships between different steps or components of a process. In a collaborative setting, team members can contribute their insights and ideas by adding new steps or modifying existing ones, creating an organized and dynamic representation.
- Visualize Decision Points: Include decision points and conditional branches, making them suitable for exploring various options and scenarios during brainstorming. Team members can discuss different decision pathways and collaborate on determining the best course of action.
- Parallel Processing: Some brainstorming sessions involve multiple parallel activities or ideas. Flowcharts can depict parallel processes or ideas within the same chart, making it easy to compare and contrast different approaches.
- Real-time Collaboration: Visual collaboration tools allow real-time collaboration. Team members can simultaneously work on the same flowchart, adding their insights, suggestions, or modifications. Version Control: Ensure that previous iterations of the flowchart are saved, making it easy to track the evolution of ideas and revert to earlier versions if needed.
- Export and Share : Once the flowchart is complete, it can be exported in various formats (ex: PDF, image, etc.) and shared with team members or stakeholders. This enables widespread access to the brainstorming outcomes.
- Revisit & Iterate: Flowcharts can be continuously refined and improved as new ideas emerge or as the brainstorming session progresses.
For more information, see how Creately helps teams to visually represent their ideas, processes, and decisions using Flowcharts.
Mood boards are visual collages that can be used to communicate a particular style, feeling, or atmosphere. Mood boards can also be used to brainstorm solutions to problems. For example, a team could use a mood board to brainstorm design ideas for a new product or a new marketing campaign.
Brainstorming using Mood Boards on a visual collaboration tool:
- Visual Inspiration: Mood boards are a collage of images, colors, textures, and other visual elements that convey a particular mood or theme. Within a visual collaboration tool, you can create a digital mood board by uploading or collecting images, icons, and stickers that inspire or relate to your brainstorming topic. This visual inspiration can stimulate creativity and set the tone for the session.
- Exploring Themes and Styles: Mood boards help with exploring different themes, styles, or design directions. In a collaborative environment, team members can contribute their own images and ideas to the mood board, providing diverse perspectives and design options.
- Capturing Ideas Visually: Capture and communicate abstract ideas or emotions using images, colors, and textures to represent concepts or feelings that are challenging to express in words alone. This makes brainstorming more accessible and inclusive.
- Fostering Visual Consensus: During brainstorming, it’s common for team members to have different interpretations of concepts or design directions. Mood boards provide a visual reference that helps team members align their understanding and preferences, reducing misunderstandings and conflicts.
- Interactive Collaboration: Visual collaboration tools allow for real-time collaboration, which team members can use to collectively curate and arrange images, add annotations, and comment on specific elements.
- Presenting to Stakeholders: Easily present the mood board to stakeholders or clients.
- Iterative Design: Mood boards can evolve over time. Team members can continuously update and refine the mood board as the brainstorming session progresses, adding new ideas and feedback.
- Export and Sharing: Mood boards can be exported and shared with others in various formats, such as PDF or image files. This ensures that the brainstorming ideas and design directions are easily accessible for all stakeholders.
For more information on how Creately can be used in Mood Boards, see Mood Board Examples .
Visual collaboration tools offer a dynamic and flexible solution for teams and individuals seeking to foster innovation and creativity. These tools provide a collaborative canvas where ideas can flow freely, transcending geographical boundaries and facilitating effective communication and collaboration. With a range of options available, it’s crucial to align the choice of tool with specific project needs, whether it’s complex product development or rapid idea generation. By embracing visual collaboration tools and techniques, individuals and teams can elevate their brainstorming sessions and unlock many innovative possibilities.
Join over thousands of organizations that use Creately to brainstorm, plan, analyze, and execute their projects successfully.
More Related Articles

Paramee is a technical writer who thrives in bridging the gap between complex technical subjects and accessible, engaging prose. Outside of her professional pursuits, she finds solace in the exploration of oceans and jungles.
5 Essential & Easy Ways to Represent Math Ideas
- Differentiation , Math , Planning
Every day, you present new math ideas to students. From strategies to solutions to entirely new concepts, your kiddos can’t escape learning about math ideas on the daily… Not that they would want to, right? 😉
Joking aside, the truth of the matter is just that: some students would prefer to avoid learning new math ideas as much as possible. Math is quick to be branded in their little minds as “too hard” or “too confusing.” Even the most math-happy students can still experience burnout. Unfortunately, our modern-day classrooms don’t always allow much time to slow down, either–as educators, we’re pushed to get through the curriculum in a strict timetable with little opportunity to dwell on a topic if students are struggling.
In that case, it seems as though we’re better off if we preemptively head off problems before they begin. But how, exactly, can we do that?
Differentiation . You know, my all-time favorite word. I’ve only written, oh… Over a hundred blog posts about it!
Differentiation in math is a given, but how do we differentiate material when we first introduce a new math idea? After all, during the introduction phase, we don’t even know which students will struggle and how we can help quite yet. Well, as I mentioned earlier, we’re going to be preemptive about it! If we combine what we know about different learning strategies and the various ways to introduce new topics, then we can come up with several diverse methods to represent math ideas.
Let’s get started!

1. Physical Representation of Math Ideas

First and foremost, we’ll talk about my favorite method: physical representation of math ideas. Or, in other words, hands-on math! Anyone who knows me knows that I’m a huge advocate for hands-on learning, and for good reason–it works. It’s been shown time and time again that hands-on learning promotes a deeper understanding of math ideas by allowing students to actively engage with the concepts at hand, developing number sense and critical thinking skills.
At its core, physical representation in math refers to using tangible objects (manipulatives, base-ten blocks, etc.) to represent and explore concepts. When students use base-ten blocks to explore place value, or use fraction strips for fraction operations, the math ideas become “real” for them rather than an abstract notion that is difficult to comprehend.
In this way, physical interaction helps cement these concepts beyond rote memorization. We want students to truly understand math ideas–why strategies work and why they don’t, why a solution makes sense, and so on rather than simply memorizing numbers for the exam.
Most educators will have basic resources in their classrooms already for physical representation, such as base-ten blocks or pattern blocks. Others, such as fraction strips, can be created yourself with a little elbow grease. Even more resources are available online, such as my Place Value Sliders manipulative, and there are plenty more out there! You can find or create a physical representation for nearly all math ideas if creative enough.

2. Visual Representation of Math Ideas

While I adore physical representation in math, visual representation is certainly a worthwhile backup for those math ideas that are tricky to convey physically. Visual representation refers to the practice of using pictures, including graphs, charts, and diagrams, to represent a concept.
One of the most common examples of visual representation in the classroom is through number lines. For example, when teaching multiplication strategies , number lines are used as the foundation for skip counting. Another common example of visual representation is during your measurement unit–if your kiddos are anything like mine, they’re always engaged and captivated by all the colorful bar graphs!
As a baseline rule, when all else fails, I draw a picture, and I encourage my students to do the same. Providing students with something definite to picture when thinking over a math problem is invaluable. Similar to physical representations, visual representations of math ideas help make abstract concepts more concrete by providing students with a deeper understanding and, of course, developing number sense.
3. Symbolic Representation of Math Ideas
Symbolic representation is a natural part of the math-teaching process. Whenever you draw symbols on the whiteboard or include them on your worksheets, you’re using symbolic representation for math ideas. Symbolic representation is simply that–using symbols, such as numbers, plus signs, parentheses, and so on to represent an idea. When we write 2 + 2, our minds automatically translate the symbols to mean “two added to two.”
However, our students don’t have the decades of math knowledge like we do. When they first see these symbols, they look like a foreign language–because they are! Only through repeated experience can they learn this mathematical language of symbols.
Symbolic representation is vastly significant to laying a strong foundation for our elementary students. As they become fluent in mathematical symbols, students develop algebraic thinking–a much-needed tool for success in their later educational careers–and further their understanding of mathematical language as a whole. Due to its importance, it is essential to help young students understand symbols in math. If you’re interested in learning more, check out my blog post on the CRA (concrete, representational, and abstract) method.
A common strategy for teaching symbolic representation is to teach math ideas concretely at first, using visual and physical representations as mentioned previously. Once students have a sufficient understanding of the concept, then you may introduce symbols.
Keep in mind, however, that symbols are abstract. This means that students may struggle with comprehending them as well as they do concrete symbols. It helps to continue to remind students of concrete representations while moving through symbolic representation. Don’t be afraid to move back to physical and visual representations to clear up any confusion!
4. Linguistic Representation of Math Ideas

Similarly to symbolic representation, linguistic representation (sometimes referred to as “verbal representation”) is another facet of math ideas that we tend to implement naturally throughout our math lessons. Using phrases such as “greater than” to represent inequality and “sum” to represent the result of addition are all examples of linguistic representation of math ideas, and they go to show how common linguistic representation can be in our classrooms–certainly you’ve used these phrases at least once!
So how can we implement linguistic representation intentionally and in a manner that is most beneficial to our students? I think it bears repeating that, just like with the symbols of symbolic representation, the language of math is just that–an entirely new language to your students. Be conscious of the fact that your students are learning this new language!
In everything, repetition is key. While you shouldn’t necessarily start throwing huge words at your students, you also shouldn’t shy away from speaking this mathematical language altogether. At the risk of sounding like a broken record, you know your classroom best! Try to strike an even balance between challenging your students but not overwhelming them.
The significance of linguistic representation of math ideas stems from the fact that students should be able to verbally explain not only the math problem and solution, but also clearly communicate their thought process as they work through it. This is why I am a huge supporter of think-pair-share , especially in math! Just about every single math workshop unit of mine uses think-pair-share at some point, and for good reason. Verbally working through a problem with their peers helps to clarify students’ thinking processes and strategies. Regular use of think-pair-share is an excellent way to take advantage of linguistic representation.
Another easy way to implement linguistic representation in your classroom is to make it a habit to think out loud. When you are writing a problem on the whiteboard, drawing a picture, showing a strategy, or anything else, explain what you’re doing and why you know you’re doing it correctly. Alternatively, you can make mistakes on purpose, and ask students to share with a partner why they know you’re incorrect. Encourage students to use appropriate “math language!”
5. Contextual Representation of Math Ideas

Contextual representation of math ideas is the answer to the age-old question: “ When are we ever going to use this in real life? ” By providing real-world context to your math ideas, you can head off that question before it even pops up! In addition, including context helps students understand the importance of math ideas as well as making them more meaningful.
Some common examples of real-world context include connecting money to decimals, or connecting recipes to fractions. While there are plenty of examples of context you can provide for your students, it is also beneficial to have your classroom brainstorm their own examples. Encourage them to make their own contextual connections as a class–the more examples, the better, as students will be able to see how versatile and important math is in nearly every facet of life.
One of my favorite ways to provide contextual representation of math ideas is through project-based learning. From fraction feasts to building a town using area and perimeter, project-based learning provides real-world context to math ideas by showing students just how abundant math is! Like it or not, math is everywhere… So you may as well pay attention in class, right? 😉
By using a variety of these representations and forging connections between them, we as teachers can help students understand math ideas in multiple ways and support diverse learning styles. Differentiation is always the name of the game: students who struggle with one type of representation may be able to understand the concept more readily when presented with another type of representation.
Having a diverse learning environment is essential to enriching your students’ education and setting a strong foundation for their scholarly careers. Get students involved and engaged, and they’ll learn more than ever before.
That being said… Get out there and teach some math!

- Differentiation , Math , Strategies
FIND IT NOW!
Check me out on tpt.

CHECK THESE OUT

5th Grade Math Workshop Growing Bundle- 9 Units
Three Types of Rocks and Minerals with Rock Cycle Circle Book
Want to save time?
COPYRIGHT © 2016-2024. The Owl Teacher | Privacy page | Disclosure Page | Shipping | Returns/Refunds
BOGO on EVERYTHING!
IMAGES
VIDEO
COMMENTS
Tools for creating simple infographics and data visualizations. 1. Piktochart. Piktochart is a web-based tool that has six decent free themes ( and a whole bunch more for the paid version) for creating simple visualizations. You can drag and drop different shapes and images, and there is quite a bit of customization available.
Think of diagrams as visual representations of data or information that communicate a concept, idea, or process in a simplified and easily understandable way. ... A mind map starts with a central idea and expands outward to include supporting ideas, related subtopics, concepts, or tasks, which can be further subdivided as needed. The branches ...
Visual representation simplifies complex ideas and data and makes them easy to understand. Without these visual aids, designers would struggle to communicate their ideas, findings and products. For example, it would be easier to create a mockup of an e-commerce website interface than to describe it with words.
4. Charts and graphs. Charts and graphs are visual representations of data that make it easier to understand and analyze numerical information. Common types include bar charts, line graphs, pie charts and scatterplots. They are commonly used in scientific research, business reports and academic presentations.
2 Be Minimal. Using a minimal design composition is one of the unique presentation ideas. The trick is to have just enough information and visual details for the viewer to feel comfortable seeing the slides. A minimal design can instill calm and awe in your audience when done right.
The people over at Funders & Founders shared this interesting infographic recently, with 33 different ways to visualize your ideas. Unleash your inner creative and challenge yourself to try one of ...
Each type of visual has strengths and weaknesses. Charts and Graphs. Charts and graphs often simplify presenting complex data sets in a concise manner that summarizes a state or condition. They are effective because visual representation transforms numbers and abstract concepts, revealing the most important aspects of the information.
7. Express yourself visually to get your point across in an engaging way. You don't need any artistic abilities to create great visuals (I'm one of those people who can only draw stick figures ...
Types of Visual Representation for Improving Conceptual Understanding. Graphs, spider diagrams, cluster diagrams - the list is endless! Each type of visual representation has its specific uses. A mind map template can help you create a detailed illustration of your thought process. It illustrates your ideas or data in an engaging way and ...
Page 5: Visual Representations. Yet another evidence-based strategy to help students learn abstract mathematics concepts and solve problems is the use of visual representations. More than simply a picture or detailed illustration, a visual representation—often referred to as a schematic representation or schematic diagram— is an accurate ...
Here are some imaginative ideas to consider: 1. Themed Vision Boards. Travel Board: If wanderlust runs in your veins, create a board dedicated to all the places you want to visit. Incorporate maps, postcards, and travel quotes. Career Aspirations: Dedicate a board to your professional goals.
First, consider what matters most to you. Take a moment of self-reflection and figure out what's most important to you, says Larry. Think about the one or two areas of your life you really want to change, and focus on the words they elicit. Then, decide if your vision board should represent short-term or long-term change.
Summary. Not long ago, the ability to create smart data visualizations (or dataviz) was a nice-to-have skill for design- and data-minded managers. But now it's a must-have skill for all managers ...
Consider post-it notes and writing down the steps to take to achieve a particular vision. Consider having a smaller board or increasing the size of the pictures you're posting on the board. This forces you to put fewer things and focus on the visions that matter more to you. 5. Make Your Visions Emotional.
"Pouring your information into a visual representation has the benefit of making ideas tangible. It motivates people to have a conversation or discussion about it. It's also a lot easier to spread information this way, as pictures have the power to create a lasting impression within an instant." Jonny Daenen - My background lies in Big Data. I ...
Apr 30, 2020 - Explore Melinda Scheetz's board "Visual Representation Examples", followed by 119 people on Pinterest. See more ideas about visual representation, visual, representation.
Some possible visual presentations include infographics, charts, diagrams, posters, flipcharts, idea board, whiteboards, and video presentation examples. An infographic is a collection of different graphic visual presentations to represent information, data, or knowledge intended more visually quickly and clearly to grab the audience's attention.
The use of visual representations (i.e., photographs, diagrams, models) has been part of science, and their use makes it possible for scientists to interact with and represent complex phenomena, not observable in other ways. Despite a wealth of research in science education on visual representations, the emphasis of such research has mainly been on the conceptual understanding when using ...
Here's a great visual representation of this data from >the Optimal Targeting blog: To recap, many of the big, important stats on visual content are summed up nicely in>this infographic from Matter's Studio-C. The stats below paint a strong picture of how vital visuals are for marketers. 4 lessons on the psychology and science of visual content
A Concept Map is a visual representation that shows the relationship between ideas, concepts, images, and other related information. It is a popular method used by brainstorming new ideas and innovation as it makes it easy for people to organize, structure and display the knowledge they have gained on a particular subject.
The diagram helps you explain the role of a leader in assigning tasks to a team. Instead of assigning tasks arbitrarily, let your 'team goal' be the guiding prism to determine the tasks that need to be assigned to accomplish the goal. Using Visual Metaphor in PowerPoint. Example 3: The power of pulleys. A pulley is a wheel on an axle.
Mind Mapping using a Visual Collaboration Tool: Create a Central Idea: Start by placing a central idea or topic at the center of your digital canvas within the visual collaboration tool. This idea serves as the focal point for your brainstorming session. Branch Out: Create branches going outward from the central idea.
You can find or create a physical representation for nearly all math ideas if creative enough. 2. Visual Representation of Math Ideas. While I adore physical representation in math, visual representation is certainly a worthwhile backup for those math ideas that are tricky to convey physically.