- Slidesgo School
- PowerPoint Tutorials

How to Add Animations and Transitions in PowerPoint

In this tutorial, you’ll learn the basics of adding animations and transitions to your presentations in Microsoft PowerPoint. These visual effects will help you make your slides more dynamic and will keep your audience engage.
Adding an Animation to a Text, an Image, a Shape or Other Elements of a Presentation
Adding transitions to a slide.
- Select the object that you want to animate.
- Click the Animations tab.
- Select the animation that you want from the list.
- If you want to see which animations are applied to an object, click Animation Pane. You can also rearrange the animations as you see fit.
- Use the timing options to set the timing of the animation. You can choose when you want the animation to start: on click, with previous or after previous. You can also set the duration and even set a delay before the animation begins.

- Select the slide you want to apply a transition to.
- Click the Transitions tab.
- After you select any transition from the list, you’ll see a preview of the resulting effect.
- If you want to adjust the direction of the effect, among other settings, click the Effect Options drop-down arrow.

- To remove a transition, on the Transitions tab, click None.

- You can change the animations or transitions at any time. To do so, select the animated object or the slide with a transition applied to it and choose a different option from the list.
Do you find this article useful?
Related tutorials.

How to Insert Embed GIFs in a PowerPoint Presentation
Do you want to boost your presentation? One of the best ways of doing so is using GIFs! They are fun, easy to add and provide an amusing way of supporting your own information. Would you like to learn more about how to add a GIF in to your slides in PowerPoint? Keep reading!

How to Insert GIFs in a Google Slides Presentation
There are many and varied ways of captivating your audience with your presentation. One of them is using visually appealing materials so people cannot take their eyes off the slides. In fact, a clever use of GIFs and other images will help you when defining concepts in a cool and modern way. In this post we’ll teach you how to add GIFs to Google Slides themes easily.

Storyset by Freepik: Awesome illustrations for creative presentations
With inspiration and the adequate resources, a PowerPoint or Google Slides presentation can be the most creative slide deck your audience has ever been, regardless of topic. In this Slidesgo School article, we’re going to introduce Storyset, a new Freepik project where you’ll find illustrated concepts to visually reinforce the message you want to convey, turning your work into a memorable experience.

How to Add Animations and Transitions in Google Slides
In this new Slidesgo School tutorial, you’ll learn how to apply animations to the elements of a slide and how to add transitions between slides. This way, your presentation will be more dynamic and you’ll be able to impress your audience.
Home Blog PowerPoint Tutorials PowerPoint Animations: Animate Text, Objects, and Slides in Your Presentations
PowerPoint Animations: Animate Text, Objects, and Slides in Your Presentations

Working with graphic assets can bring a degree of expectancy when delivering a presentation, such as in the case of PowerPoint animations. They can help add emphasis to slide content and reveal parts of the slide gradually to help presenters discuss topics sequentially.
As a presenting software, PowerPoint provides all kinds of animations for emphasis, entrance, exit, and to create a set motion. Join us today to learn all about animations in PowerPoint and unleash your creative potential.
Table of Contents
How PowerPoint Animations Can Benefit Presentation Design
Understanding powerpoint animation basics, types of animations in powerpoint, how to animate text on powerpoint, animating objects for visual impact, crafting seamless slide transitions in powerpoint, mastering advanced animation techniques in powerpoint, dos and don’ts of powerpoint animations, real-world use cases of animated presentation slides, recommended animated powerpoint templates, enhanced engagement and understanding through animations.
Dynamic presentations can have many benefits. The importance of such animations is often only realized by people familiar with PowerPoint. As we’ve seen in our guide on visual communication , graphical elements can make concepts more understandable. In the case of animations, we can use the transitions between slides or elements to split concepts and make them clearer.
Audience engagement is another factor, as eye-catching slides often include surprise elements hidden behind animations. These elements attract the audience’s interest and increase retention rate. In this case, animations serve as powerful presentation aids for the speaker.
Capturing Audience Attention
PowerPoint animations are more likely to capture the audience’s attention than static slides. The moving objects on-screen are the type of visuals people are likely to find attention-grabbing instead of trying to read through static slides or looking at static images. On this behalf, storytelling techniques boost their efficacy in connecting with the audience by implementing animations and transitions rather than sticking to static slides.
Emphasizing Relationships Between Elements
Whenever we work with contrasting values, like pros and cons slides , animations help the presenter highlight areas of interest or disclose the opposite values section by section. This, in turn, structures the speech for real-time interaction with the graphical assets rather than having the audience read the slide and lose focus on the speech.
Interactive Presentations
As mentioned before, presenters can craft compelling stories through the careful use of animations in PPT. What is often overlooked is the link between interactive presentations and animations. For instance, a speaker can deliver different outcomes of the presentation by selecting one path whose outcome is revealed through an animation. This “wow” factor induces surprise and creatively presents case scenarios.
Another option is when introducing your team in presentations. Rather than using static slides, incorporating animations gives more rhythm to the presentation and invites the public to interact with the speaker.
Getting Started with Animation in PowerPoint
To start with animations in PowerPoint, select an object you wish to animate and go to the Animations tab to choose an animation to add to the slide element. When adding animations to multiple objects in a slide, you should consider the sequence you wish to use to animate objects.

Accessing Animation Features
When accessing animation features, you will come across various animation types. By expanding the Animations menu, you can select animations for entrance, exit, emphasis, and motion paths to create a path for your animated sequence. You can also click to instantly preview an animation for the selected object or switch to slideshow mode to see how the animation will appear.

Adding Animations to Text and Objects
Once an animation is added to a text or object, a number is assigned. This number shows the sequence in which the object will be presented. For example, the object will be the first to be animated on screen, followed by two, three, and so on.

You can adjust the sequence of animations, triggers, and other settings from the Animation Pane in PowerPoint.

Timing and Sequence in Animations
The Timing menu in the Animations pane provides options to set the duration of the animation, the time to delay the animation on the screen (if necessary), and to assess if the animation starts on click, with the previous or after the last animation. How you select these animations will help you adjust the time and sequence of the animations. For example, you can use ‘ with previous’ option to show two animated objects simultaneously.

Entrance, Exit, and Emphasis Animations
Some of the most commonly used animation types fall under three categories: entrance, exit, and emphasis animations.
Entrance Animations
The Entrance Animations are meant to start or introduce objects. You can explore all entrance-related animations by going to Animations -> Animation (menu) -> More Entrance Effects . This will reveal all entrance animations you can click to preview for a selected object. These often consist of basic animations with effects like appear, fly-in, float-in, strips, wheel, circle, box, dissolve-in, split, wedge, wipe, plus, diamond, checkerboard, blinds, etc. The animations can be divided into three categories: basic, subtle, and moderate. These categories help identify the type of effects in each category according to how prominent they might be on screen.

Exit Animations
The Exit Animations are meant to help exit a slide or animated sequence to close a topic or subtopic, or to conclude the on-screen animations for a slide. These animations are similar to the Entrance Animations with the same effects. You can use these animation types for an exit sequence using effects like blinds, circles, checkerboard, box, plus, split, wedge, wipe, diamond, dissolve out, contract, swivel, fade, zoom, basic zoom, collapse, float up, etc.
Like the Entrance Animations, you can go to Animations -> Animation (menu) -> More Exit Effects to preview the animations and to see the three categories for basic, subtle, or moderate animations.

Emphasis Animations
Other than basic, subtle, and moderate, the Emphasis Animations come with an additional category, ‘exciting.’ Emphasis animations in PowerPoint provide visual aids for emphasizing content within slides. The effects for these animation types in PowerPoint are also quite different from the entrance and exit-themed effects. Effects like fill color, grow/shrink, transparency, line color, teeter, color pulse, object color, desaturate, darken, lighten, blink, wave, and others can help emphasize an object within a slide to make it pop out before the audience.

Exploring Motion Path Animations
If primary effects aren’t what you want, it’s time to switch to Motion Paths . These are animated effects in PowerPoint that showcase objects across a specific path. In other words, these are elaborate animations that drag objects on the screen based on a particular shape or path, such as a 4,5, 6, or 8-point star, crescent moon, circle, diamond, football, heart, octagon, pentagon, square, trapezoid, teardrop, right triangle, arc (down, right, left, up), curvy right, bounce right, etc.
Motion Paths are divided into four categories. The basic effects consist of shapes, whereas, Line Curves provide lines and curves to animated objects. Similarly, the special category contains more elaborate effects such as inverted square, loop de loop, peanut, bean, curved square, etc.

Choosing Appropriate Animation Styles
When choosing animation styles, picking a style that best resonates with your presentation slides is important. The animations’ names and categories can help you identify what might work for you. Furthermore, after adding an animation, you can go to Effect Options to view the various directions and options used to refine the animation to build your sequence further. Depending on the animation type, you can pick variations of the animation, directions, colors, transparency, points to edit or lock, or other options for selected effects. The image below shows the variations for the Wheel animation in PowerPoint via Effect Options .

Similarly, if you select Transparency from Emphasis Effects, you can choose how transparent the object will appear on the screen. Likewise, many color-themed effects enable picking a custom color to animate an object.

Since Motion Paths are unique, you will get options to edit points, lock paths, reverse the direction of the default animated sequence, etc.

Now that you know how to animate in PowerPoint, it’s time to explore making written content more interesting using animations.
Start by opening a blank PPT file and adding a placeholder text. The idea is to learn how text interacts with animation effects without working with complex graphic layouts.

Select the text and switch to the Animations tab. In there, pick an animation effect of your preference. You will get a preview of the effect applied – which will show the number of the animation order once completed.

Animations for text, like any other animation, can be controlled in terms of behavior by accessing the panel at the right-most section of the Ribbon.

Additionally, we can expand the animations panel to select from the different effects offered by PowerPoint.

Animating Text Elements on PPT Templates
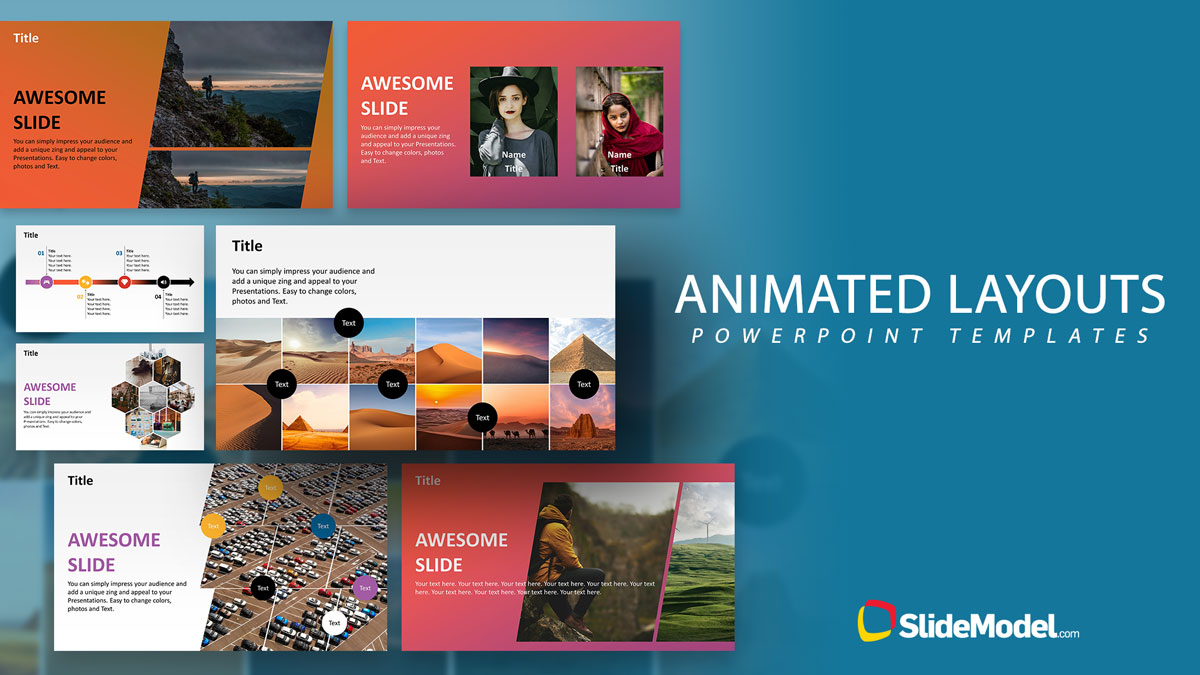
Animating text elements to highlight key aspects of your slides can be a great way to create engaging presentations. The Animated 3D 4 Steps & Core PowerPoint Template shown below are among the Animated PowerPoint templates at SlideModel that animate objects and text elements for emphasis while retaining a clear layout.
As visible from the animated sequence from the Animation Pane in the image below, the slide deck uses animated text boxes with a mix of other slide elements to create a sequence where a four-step diagram is highlighted with supported text to help elaborate each part of the diagram in an animated sequence. We can add, remove, or modify the included effects via the Animation Pane.

Balancing Text Animations for Impact
By balancing text animations, you can have maximum impact when highlighting content for your slides. The animations can be triggered to start simultaneously to reveal all the text after a sequence of objects, before objects appear, or one by one to reveal the diagram contents gradually.

Animating Images, Shapes, and Charts
When animating shapes and images, you can use a variety of animation types for entrance, exit, and emphasis, and to make the content pop out. However, charts require subtle animations, and it’s best to use basic effects to reveal charts, such as Appear and Disappear .
The Animated Network Diagram PowerPoint Template is an example of how to animate shapes.

The template’s title slide reveals shapes and icons in the form of a diagram in an animated sequence.
You can also include images in such a template to customize the given diagram and animate it to reveal the image simultaneously or after a set of objects has already been revealed.

If you are including a chart in your slide that is to be animated, make sure the animation corresponds to other elements that might also be animated. For example, you can trigger the chart to be revealed after the slide title with a simple Appear effect. In such a case, the chart can be displayed altogether or gradually, in animated form.

Applying Object Animations Strategically
When placing slide objects, you must apply the animations strategically to avoid revealing information out of sequence. Furthermore, it is also worth considering how your effects appear. For example, in the image of the diagram below, would you prefer the diagram to appear floating upward or downward? Such considerations and other vital elements, such as your branding needs, are important to ponder when setting your animated sequence.

Enhancing Presentation Flow with Transitions
While Animations for PowerPoint are one way of making your slides engaging, PowerPoint Transitions is another. You can access them via the Transitions tab in PowerPoint and apply transitions between slides.

While many legacy transitions provide basic effects when switching between slides, some of the more recent additions to this menu, such as Morph Transition , enable the creation of elaborate animations by using Transitions to animate your slides. The below example shows a slide with the Morph transition, giving an animated effect to the diagram.

Maintaining Coherence Between Slides
When applying Transitions, it is essential to maintain coherence between slides by ensuring they don’t overlap with any added Animations. To do this, you should preview your slide deck to see how it might appear once all the animated effects have been included in your slides. Like PowerPoint Animations, you can also use Effect Options for Transitions to set a sequence or direction that best suits your needs.

Layering for Complex Animation Effects
Using layers of multiple objects and slides can easily create advanced animation effects. This can be done using not only PowerPoint animations but also transitions. The Animated Pendulum Swing PowerPoint Templates from the SlideModel archive of animated templates use Transitions like Morph to create animated sequences. The below example shows a swinging pendulum created using Morph.

Combining and Triggering Animations
Depending on the number of elements within a slide and the animations used, you can use triggers to customize and set sequences for slide elements to animate. The example below shows the selected pendulum’s various linking options for the on-click trigger. By placing your slide objects to be connected and triggered with different parts of your slide, you can create and customize animated sequences that can be pretty attention-grabbing.

PowerPoint Animation Painter
If you thought you had to start from scratch to animate each slide of your presentation, you are sorely mistaken. Much like the Format Painter option in PowerPoint, we can find Animation Painter , which is accessible via the Ribbon under the Advanced Animation control options.

This tool helps us duplicate animations between elements of the same slide or copy animation effects from one slide to another. As a format copying tool, it requires at least one animation effect to be placed otherwise the option is grayed out.
Creative Experimentation
Experimenting with Animations in PowerPoint can be pretty helpful to avoid making monotonous presentations. Experimentation does not necessarily require making slides from scratch, but you can also use ready-made templates such as the 3D animation PowerPoint Templates at SlideModel. Alternatively, some slide deck templates offer a considerable range of animation effects intended for maximum audience engagement, which users can quickly customize by editing placeholder areas for text, images, and logos.
Below is a list of do’s and don’ts of PowerPoint Animations for making presentations that best use animated effects.
Maintain Animation Moderation
It is essential to maintain moderation when using animations, as the use of too many animations on a single slide or presentation can make the content confusing.
Use of Appropriate Animations
Try to use appropriate animations for slide objects. The animation should suitably show if the object is to enter, exit, be emphasized, or be highlighted using a motion path.
Avoid Animation Overload
Avoid flashy animated sequences unless your presentation is meant for an audience that might find engaging, such as children in a classroom session.
Subtle can be Just as Engaging
Sometimes, subtle animations can be just as engaging as an animation with an elaborate effect. This can, in fact, be a better option than using animations that might be visually overpowering or difficult to follow due to elaborate effects.
Ensure Visual Consistency
As discussed earlier, it is vital to maintain consistency in using animated effects. Be it Animations or Transitions, using flashy effects or too many diverse effects can hurt how the audience perceives your content, as it might become confusing, visually overpowering, or unprofessional. In such a case, the audience might quickly lose interest in the presentation, leading to Death by PowerPoint.
Less is More
The design language of visual designs over the past decade or more has been intended to use fewer effects and graphical elements with ample space to make the interface look clean. Be it Modern UI or Material design apps, this design language has been evident across desktop and mobile UIs. Using the same concept, you can design your slides with fewer animations and graphical elements to make your content more visually appealing.
Turning PowerPoints into Millions
Courtney Allen, a professional PowerPoint designer who came out of a BFA in graphic design from Boise State University, had all but PowerPoint as a part of her portfolio. She started her freelancing career via Upwork, making over a thousand PowerPoints for clients, bringing in as many as $2 million. She suggests using simple designs and animations to make the most out of PowerPoint presentations.
Guy Kawasaki Pitch Deck
Guy Kawasaki, a former Apple employee, whose famous 10-slide pitch deck has inspired a variety of PowerPoint templates. This rule was designed for startups and business presentations, focusing on pitching a concept to investors. While this isn’t directly related to using animations in presentations, it is an example of making the best use of minimalist content in a few slides. You can learn more about the Guy Kawasaki pitch deck from our article about the 10/20/30 rule for PowerPoint presentations .
How not to use an Animated PowerPoint Presentation in Court!
Presentations with animations aren’t always a great idea. In 2014, a court in the United States criticized a PowerPoint presentation by the prosecutor, which led to the court throwing the case out. The presentation was made with sound effects and animations, with flashy elements like the bullseye. Some of the significant mistakes made by the prosecutor included ‘visual advocacy,’ where the defendant was marked with the word ‘guilt’ in the slide deck. Not to mention, the animated presentation seemed to be aimed at influencing the court using visual aids. Something that did not sit well with the court.
Use of PowerPoint by the US Military
The US Military has often been accused of Death by PowerPoint for preparing what some call the worst PowerPoint slides ever created. The issue became so profound that in 2011, it was revealed that an executive communications manager at Microsoft, Dave Karle, was tasked with ensuring that the US military could finally start using the software properly. After discussions with top military officials, an updated military presentation method was created, consisting of a number of presentation templates, tips, and graphics and more than 6000 map symbols.
In this section, you can check some ready-made templates that can be easily customized for your presentation’s purposes. All these templates feature professionally made animation effects with native PowerPoint tools.
1. Multi-Purpose Animated PowerPoint Slide Deck
Those looking for how to animate in PowerPoint now have a ready-made solution to create mind-blowing presentations in a couple of minutes. This slide deck contains 26 slides in a broad selection of topics. We can present facts, introduce our team, our company, display charts with animated effects, and so much more. Check it out now!
Use This Template
2. Animated 8-Step Social Media Carousel PowerPoint Template
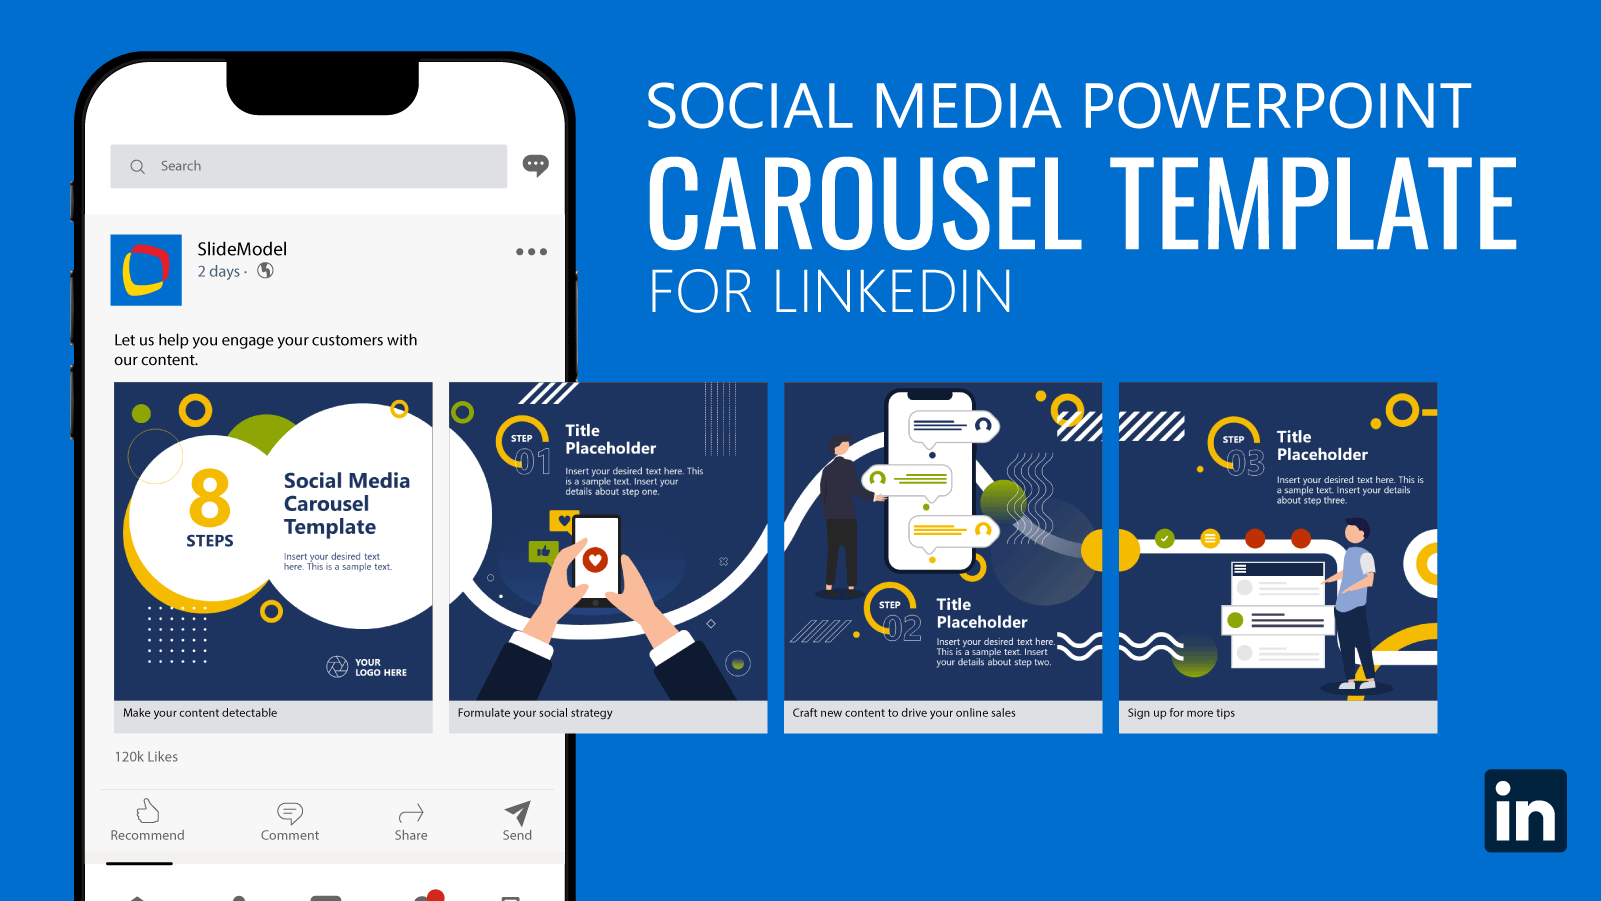
Bring dynamism to your social media posts by implementing this vivid social media carousel template. With eye-catching animated effects, this template emulates the typical carousel posts we can find on platforms like LinkedIn or Instagram.
3. Problem Solving Animated PowerPoint Template
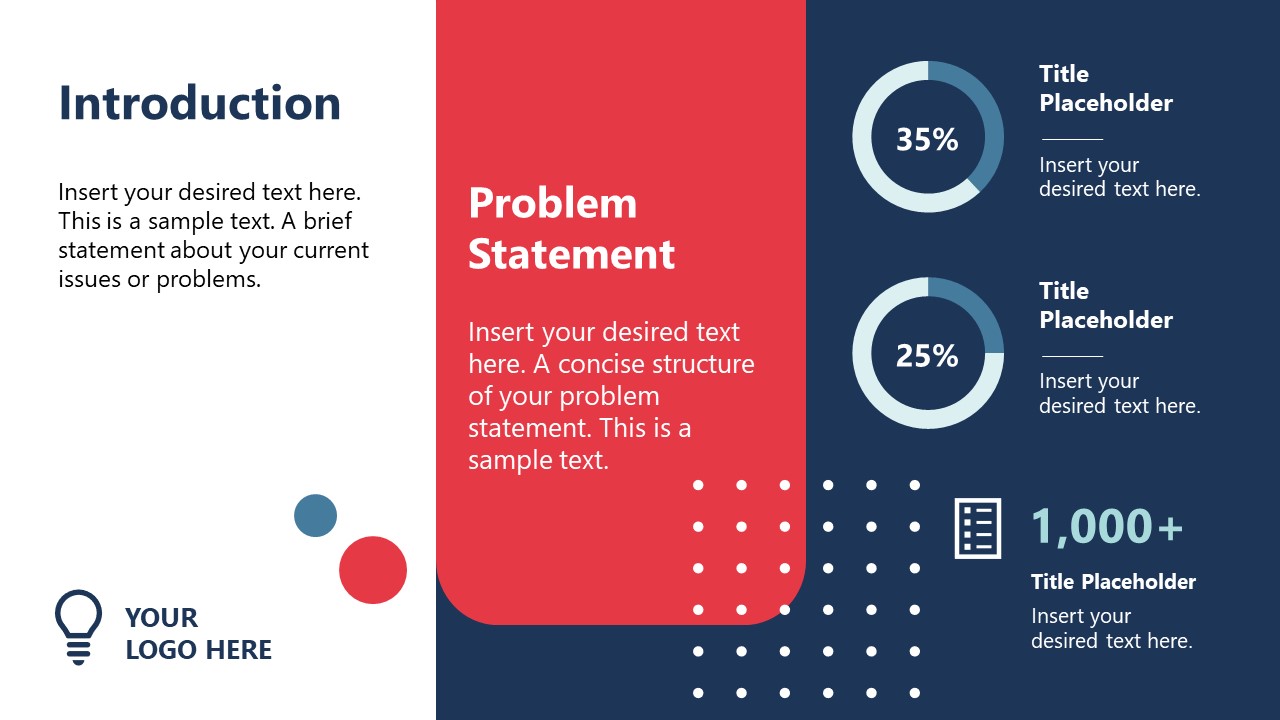
Bring professional graphics to troubleshooting sessions with your team. This template, filled with PowerPoint animations, offers a user-friendly approach to conventional problem-solving situations in which the team has to observe the Issue Matrix, suggest possible solutions, and prepare an implementation plan and its corresponding process flow diagram. Thanks to its high-quality animation effects, the speaker can introduce the facts individually, without diverting attention from the speech.
4. Animated Company Profile Presentation Template for PowerPoint
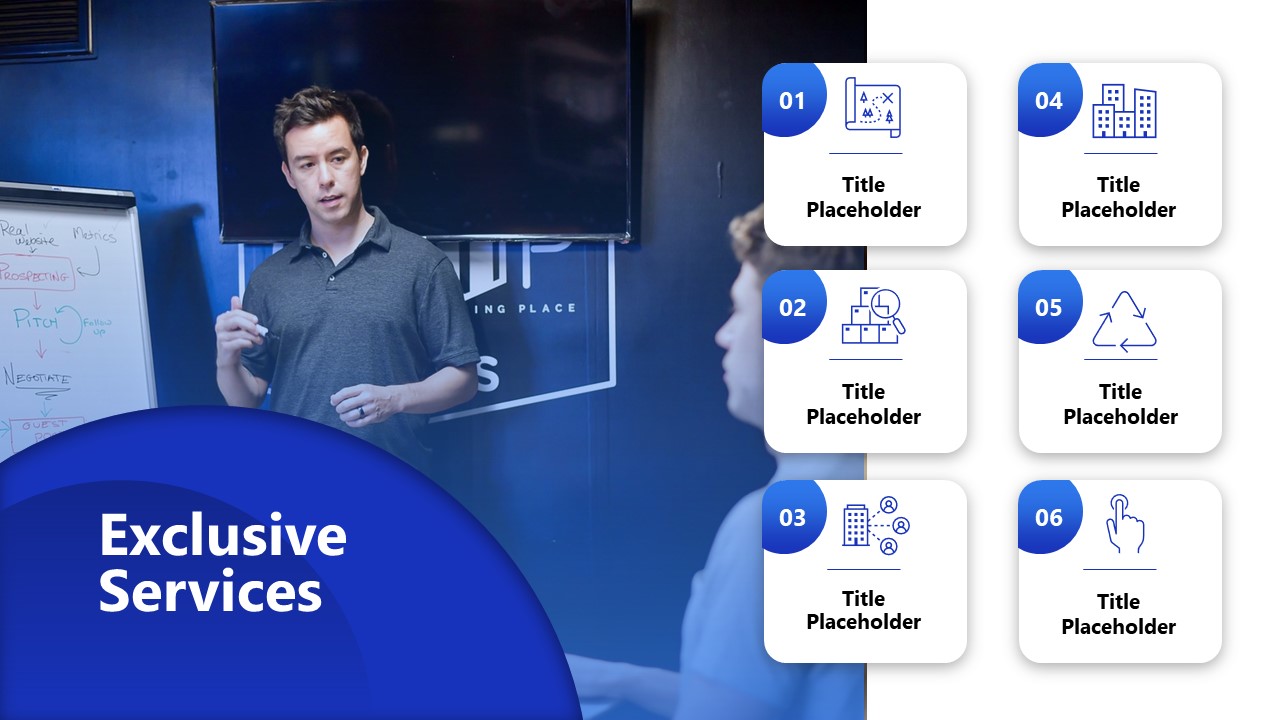
We’ve seen this template as one of the examples of animations for PowerPoint. It is a 21-slide solution offering all the tools required for a corporate-styled company profile presentation, specifically tailored for service businesses.
5. Corporate Company Profile Animated PowerPoint Template

An alternative option for company profile presentations, featuring a minimalistic graphic layout with a broad variety of animation effects. Check these 12 slides and customize them with information relevant to your organization – we bring complex animation effects in a ready-made format. Colors and placeholder images can also be replaced.
6. Animated Roadmap PowerPoint Template
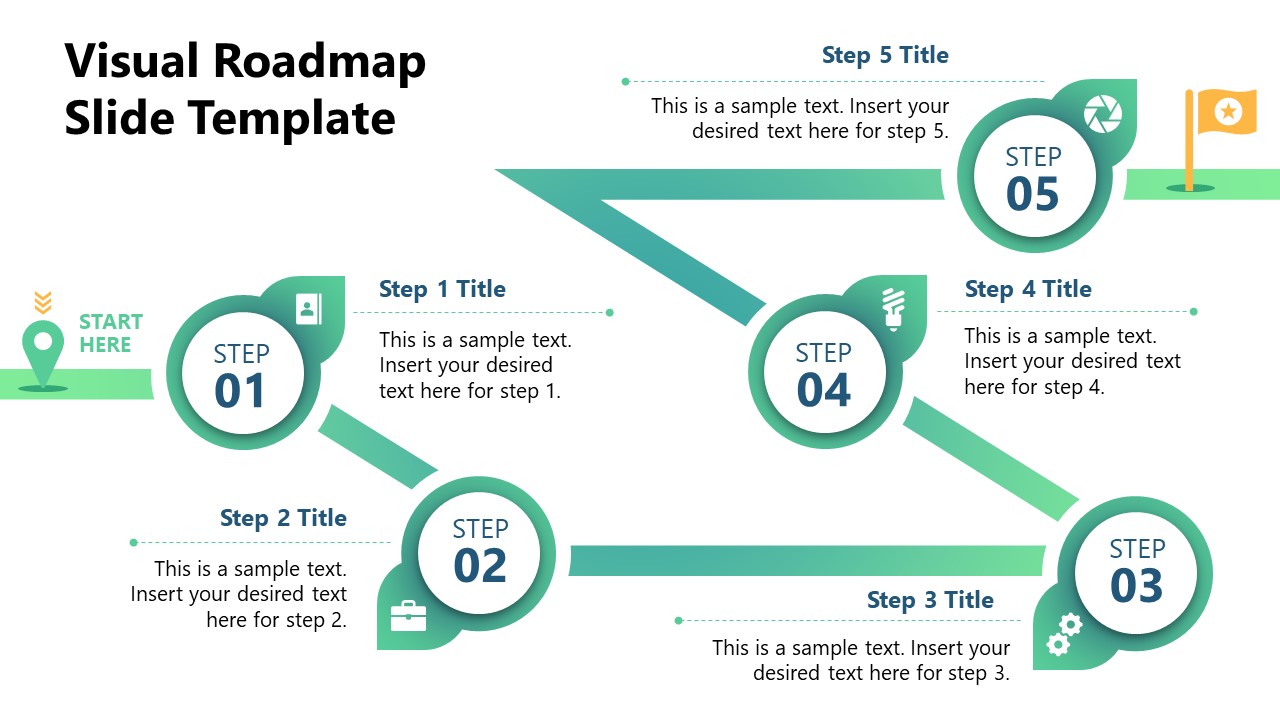
Bring more action to any planning meeting using this animated PowerPoint roadmap template. After a clear path overview, each milestone slide contains animation effects to introduce relevant information to the topic. It is a new take on traditional roadmap presentations that allows the speaker to pace themselves regarding how to disclose the information about the strategy to embark on.
7. Animated Pros & Cons Comparison Slide Template for PowerPoint

We mentioned the advantages of using PowerPoint animations to discuss contrasting values of a situation. Well, this animated Pros & Cons slide is the ideal tool for that purpose, offering a generalist view, then two accompanying slides for Pros & Cons, respectively, with animated effects to introduce additional information per point.
Using animations to make visually appealing and engaging presentations requires ensuring that your content corresponds with your added animated effects. It is always best to use animations in moderation and to keep your slides minimalist while unleashing your creativity as a presenter. Using ready-made PowerPoint templates can also help give you a good starting point to begin experimenting with animations and effects. This can also be useful for people new to PowerPoint Animations to explore what is doable with an animated slide deck, using animated sequences tailored for customization.
Whether you’re using an animated template or making one from scratch, a preview in slideshow mode can save you a lot of trouble with potential issues tied to animated effects. Last but not least, using animations in PowerPoint isn’t always necessary, and you can even go for a simple slide deck with a handful of slides. What matters is that you should be aware of the information being presented, and the visual aids should be just to aid your slides and not meant to be the whole package on their own.

Like this article? Please share
Animations, Microsoft PowerPoint, PowerPoint Tools Filed under PowerPoint Tutorials
Related Articles

Filed under PowerPoint Tutorials • June 28th, 2024
How to Represent Branching Scenarios in PowerPoint
Do you have a situation to expose with multiple possible outcomes? If so, check our guide on branching scenarios in PowerPoint.

Filed under PowerPoint Tutorials • June 21st, 2024
How to Make PowerPoint Full Screen
Experience your presentation design as in the day of the event. Learn how to make a PowerPoint go Full Screen with this tutorial.

Filed under PowerPoint Tutorials • June 18th, 2024
How to Create a Funnel in PowerPoint
Learn how to create a funnel in PowerPoint from SmartArt graphics and PowerPoint Shapes. Recommendations for Funnel PPT Templates included.
Leave a Reply
- Getting Started
- Best Practices
PowerPoint Animation Tutorial (2022) – Step-by-Step
July 27, 2022
Introduction
Animation in your slide deck is a great way to add visual interest. And when done well it can WOW your audience. This in-depth, step-by-step tutorial covers how to animate in PowerPoint showing the fundamentals of adding and modifying animations and then demonstrates advanced strategies like customizing timings, adding triggers, using morph, and creating animations with 3D objects.
Types of Animation Effects
Before you begin applying animation in PowerPoint, it helps to know how they are categorized and how these categories affect the function of the animation. These categories or types are also referred to as effects.
The first effect category is Enter. With this animation objects are not visible initially and appear based on a specific action by the presenter like a click of a mouse.
The second effect category is Emphasis. Here an object is visible on the slide and will animate to draw attention to it such as pulse.
The third effect category is Exit. Here an object is visible on the slide and then will exit from view based on an action like a mouse click.
Adding an animation
To apply an animation on a slide you need at least one object on the slide. An object is any type of content that can be added to a slide such as a shape, text, icon, picture, etc. In this example, I’ll use a shape on blank slide. The location of the object will be where the animation either ends or begins. You want to select the object. Click the Animations tab and click the animation you want to apply. You can scroll through the gallery or click the small drop-down arrow to display more options all at once. When you select an animation, the object will show what the animation looks like. You can also use the Preview button on the Animations tab to see what the animation looks like. You will notice that the object now has a small box with a number next to it. That is a visual indicator noting an animation has been applied to the object. The number indicates the order the animations occur if you have more than one object animating on the slide. In Windows if you select a new animation from the gallery, it will override the previous selection. For instance, if I apply an Emphasis animation the Enter fly-in is replaced. The same with applying an Exit Fly-out the Emphasis effect is replaced. To remove an animation, just choose None in the Gallery.
Some animations like the Fly In are pre-set to animate from a specific direction. To change the direction, click the Effects Option button after applying the animation. From the drop-down options choose the direction you want. If the Effects Option isn’t active, then that effect you selected can’t be changed in any way.
Motion Path animation
The next effect I want to touch on is the Motion Path option. You can choose a basic effect like moving in a straight line. Or something highly custom like drawing your own path. With the Motion Path, the small green dot is the starting point, and the red dot is the ending location. To extend the path, you can drag and drop the red dot to a new spot on the slide. With motion path the animation possibilities are quite extensive, especially if you use it with other effects.
Applying an animation to similar objects
If you have several objects that you want to add animation to, here are some strategies I use to save time. If you want to animation multiples of the same object in the same way first add the shape then add the animation to that shape and then press Control D to duplicate that shape.
Rearrange as needed and you will notice that all of the objects have a number indicator next to them. The different numbers indicate the order the objects will animate. Let's click the Preview button to see what it looks like.
Copying the shape and pasting is another option Either on the same slide or another slide. To copy either use Control C, Right-click and copy, or click the Copy button on the Home tab. Then paste either using Control V, Right-click and paste, or click the Paste button on the Home tab. Just like with Duplicate, there is an indication number.
If you want the same object to animation on a different slide, you can duplicate the slide Select the slide in the Thumbnail Pressing Control D or Right-click and choose Duplicate
Looking at the second slide, you can see the object has an animation indicator I will change the object's color so you can see what it looks like. I'll go into Presentation Mode and here is what the animation looks like.
If you have several different objects and you want them all to have the same animation, you have a couple of options. You can select them all. And click the animation type in the Animations tab. You will see they all have the same animation indicator next to them. As the Preview shows, this option sets the animation for all objects to start at the same time.
You can also use the Animation Painter. Once you’ve added an animation to an object, select it. Click the Animation Painter button. Then click on the object you want to apply the animation to.
With this option, it sets the animations to start one after the other. If you double click the Painter option, you can apply the animation to multiple objects without having to click the Painter button for each object.
Adjusting Start, Duration, and Delay
Once you’ve added an animation to an object, often the next step is modifying the timing of the animation. To the far right on the animation tab, there are three timing settings: Start, Duration, and Delay.
Modifying Start
The Start timing determines how the animation will start. The default is On Click. So when you click your mouse the animation begins.
The next option is With Previous. The object with this setting will animate at the same time as the previous animation. In this example the Triangle animates with the circle.
The third start setting is After Previous. Here an object animates after the previous animation is complete. In this example the triangle animates once the circle animation is done.
Changing Duration
The next timing is the Duration or speed of the animation. The default setting is typically Very Fast at half a second (0.5). You can use the up and down arrows to speed up or slow down the animation by quarter intervals. Or you can type in the duration.
In this example, you can see the Triangle fly in is much slower than the previous examples. As a side note, the duration can’t be changed for some animations.
Adding Delay
The last timing is Delay. This a slightly more advanced setting and this setting delays the start of an animation. The default setting is zero. Meaning there is no delay. In the example, the Triangle is set to start after previous with a one second delay.
Applying Multiple Animations
Now that you know how to modify a single animation, we can move on to apply multiple animations to one object. As I mentioned in Video 1 of this 3-part series, clicking a different animation in the gallery replaces the previous animation.
In this example, I will set the object to fly-in, pulse, and then fly-out. Do do this, I select the object. I choose the Fly in animation. Then I click the Add Animation button. Choose Pulse as an emphasis. I'll add the third animation, clicking the Add animation button and then choosing Fly-out. And the Preview shows what that will look like.
In Video 1 of this series, I demonstrated the Animation Painter, when you have multiple animations, this option comes in handy.
Using the Animation Pane
Once you start adding multiple animations to objects, using the Animation Pane can help you keep track. To display the pane either click the Animations Pane button or click one of the animation indicators by an object.
From the animation pane, you can see the order of the animations. They are listed from beginning to end. A mouse means it is an On Click start animation. No icon means that it is set to With Previous. And a clock indicates that the Start is After Previous.
The color of the star indicates the type of effect: green for enter, yellow for emphasis, and red for exit. If you can’t see color very well, the lines Indicate whether it is an Enter, an Emphasis, or an Exit.
If you want to change the order of the animations, you can use the up and down arrows. Or just drag and drop. You can select more than one by holding down the Shift key and then moving them all at the same time.
Deleting animations from the Animation Pane is quite easy. Select the animation and press the Delete key.
The animation pane also shows the timeline of the animations. The placement of the bar on the timeline indicates when the animation begins and end. You can drag and drop the bar to change the delay. You can resize the bar to change the duration of the animation.
Effects and Timing Dialog Box
When you mouse over or select an animation, To the far right of each animation is a small down arrow. Clicking the arrow provides options to show more settings for the effects and timings. Let’s take a look.
You will notice there are three tabs Effect, Timing, and Text Animation The added options in the Effects tab, is that you can add a Dim after animation setting. I usually apply this to content that I have as part of a list. So, when I am done discussing one bullet point, I dim that option and then display the next option.
If you don’t want to apply an exit animation, you can also make content disappear right after the animation or hide on the next mouse click.
The Timing tab, provides the same options as on the Animation tab for Start, Duration, and Delay.
You can also add a repeat loop. You can set specific times or until the next animation or until the end of the slide show. The speed of the animation will determine how the effect looks such as a rapid pulse or slow flash.
The trigger setting lets you set an On Click to a specific object. When you click the object with your mouse, it activates the animation for a different object. This differs from a typical On Click animation because the object itself must be clicked for the animation to work.
To do this, apply each animation to the specific object Then select the animation in animation pane Click the trigger button in the Animations tab and choose the object from the menu options Repeat this process for each object.
Renaming objects in the Selection Pane helps if you have several objects to trigger. One reason I like this option, is because it allows me to animate in any order.
Text Animation Strategies
With all of the examples so far, I’ve worked with shapes and other objects. Text can be animated just like any other object on the slide. But here are some things to keep in mind.
Selecting the text box will animate each line separately Selecting all of the text in the text box will animate all of the text at once. To change the setting, highlight the line or lines and change the Start to On Click. Selecting each paragraph or line in a bullet and then choosing your effect, will animate each line separately.
Morph Transition
A more advanced animation people like to use is called morphing. Within PowerPoint, morphing is a transition and not an animation. That means you apply the effect to the entire slide and not an individual object. Morphing as its name implies is an object that is changed into something different. This can be a simple effect like moving and changing in color.
For this effect, I will duplicate the slide with the circle. On the second slide I’ll move the circle to the right side and changed the color fill. With the second slide selected in the thumbnail pane, I click the Transitions tab and select Morph.
The Preview shows you what it'll look like. As you can see, unlike a fly in type of animation, the object appears to be changing with a slight fade.
Advanced Morph Transition
An advanced morph transition can be used to make an object change into a different object. Like this example of a circle morphing into a star. To apply an advanced morph, create the two slides with the different objects.
Before applying the transition to the second slide, open the Selection Pane. Select the object on the first slide, then click the Selection Pane button either on the Home tab or in the Shape Format tab.
Within the Selection Pane, you can rename objects to help keep track of multiple objects. For this animation to work, the objects on each slide need to have the same name starting with 2 exclamation points. I will rename this object to !!morph1. And copy the name. And then press Enter to set the new name of the object.
Now I need to select the second slide. In the Selection Pane, double click in the name of the star object. And paste in the name of the first object. Then I will press Enter to set the new name.
Now with the second slide selected, I can apply the Morph transition. And it will show what the morph will looks like. This is one of my favorite tricks to add some pizazz to a slide deck.
Animating 3D objects
The last animation I want to show you is animating a 3D object, like this example. Many people aren’t aware that they have access to 3D objects within their 365 subscription.
To add a 3D object, click the Insert tab. Then click the 3D object button and choose from Stock 3D Models. Or if you have a model on your device, choose that option. Search and select the object you want. In this example, I will insert a Monarch Butterfly.
To view the different sides of the model, click the center button with the multiple arrows. And then just drag your mouse to view the object. With the model selected, click the Animations Tab. And you'll notice that the Gallery now has 3D animations added.
These will be cubes with arrows around them. For this example, I will use the turntable effect. With the Effects option button, I can make some adjustments like the direction and amount of spine as well as the spin axis.
Using the Morph transition with a 3D object can add an extra visual element. Using the butterfly again, I will duplicate the slide. For the first slide, I will delete the turntable animation and change it to top view.
On the second slide I will keep the side view and the turntable animation. Then I will apply the Morph transition to the second slide. The preview shows the butterfly smoothly transitions from the top view to the side view. and then the turntable animation begins.

About the Author
Jennifer Sharkey is known as the Virtual Presentation Specialist. Being passionate about seeing people shine and be heard, she leans into her 20+ years of public speaking experience and uses what she has learned from presenting, both in-person and virtually, to small groups all the way up to 5000 people. Jennifer draws from her experience as an associate professor, academic librarian, and coach to help holistic coaches master virtual presentations to grow their business. Her unique immersive program provides practical strategies and methods to build confidence, engage audiences, and generate authenticity and authority.
Privacy Overview
| Cookie | Duration | Description |
|---|---|---|
| cookielawinfo-checkbox-analytics | 11 months | This cookie is set by GDPR Cookie Consent plugin. The cookie is used to store the user consent for the cookies in the category "Analytics". |
| cookielawinfo-checkbox-functional | 11 months | The cookie is set by GDPR cookie consent to record the user consent for the cookies in the category "Functional". |
| cookielawinfo-checkbox-necessary | 11 months | This cookie is set by GDPR Cookie Consent plugin. The cookies is used to store the user consent for the cookies in the category "Necessary". |
| cookielawinfo-checkbox-others | 11 months | This cookie is set by GDPR Cookie Consent plugin. The cookie is used to store the user consent for the cookies in the category "Other. |
| cookielawinfo-checkbox-performance | 11 months | This cookie is set by GDPR Cookie Consent plugin. The cookie is used to store the user consent for the cookies in the category "Performance". |
| viewed_cookie_policy | 11 months | The cookie is set by the GDPR Cookie Consent plugin and is used to store whether or not user has consented to the use of cookies. It does not store any personal data. |
How To Add Animations To PowerPoint
With PowerPoint, you can make awesome presentations just by using static slides and non-animated elements. However, if you want to literally make your audience go ‘wow’ during your presentation, you’d need to think of a way to really get their attention. The best way to do this is by using animations. And in this tutorial, I’m going to show you exactly how to add animations to PowerPoint so you can use it to your advantage.
Before you proceed with this tutorial, have a look at these 6 PowerPoint Secrets from Profesional Presentation Designers . The design is another important aspect of your slide deck, and adding animations to your PowerPoint without working on an overall design of the presentation will not cut it.
The Different Types of Animations In PowerPoint
Animations are visual effects which make your texts, images, shapes, or charts come ‘alive.’ They catch your audience’s attention and helps them engage with you and your presentation.
Moreover, there are generally two types of animations you can use to make your presentation come alive. These are:
Transitions
The first type of animation is called transition animation ; these are animations added in between slides. When you transition from slide 1 to slide 2, you can add an animation in between the slides. You can view the different transition options by going to the Transitions pane on the PowerPoint ribbon.

(Caption: The Transitions pane in PowerPoint)
The default view shows 10 transitions, but if you click on the little arrow like you see in the screenshot above, then you’ll see many more options like you see here:

(Caption: More Transition options in PowerPoint – choose from Subtle, Exciting and Dynamic Content transition animations)
Transition animations have additional effect options. You will notice this when you click on the transition you want to use. The Effect Options button won’t be grayed out, and you can select additional settings.
For example, I selected ‘Reveal’ as my transition animation. Available effect options would be:
- Smoothly from right
- Smoothly from left
- Through black from right
- Through black from left
Here’s a screenshot of what it looks like:

(Caption: Effect Options are available for some transition animations in PowerPoint)
You can also adjust the timing and duration of each transition as well as set how you want the slides to advance so that the transition can take place.

(Caption: More settings can be adjusted in the Timing section as well as the Animation Pane)
Feel free to play around with the transition animations and effect options that work best with your presentation.
The second type of animations bring the objects or elements within your slide to life. If you want to animate text, an image, shape, graph or chart, this is the type of animation you select.
You first to have to click on the object you want to animate , then click on the Animations tab .

(Caption: The Animations pane in PowerPoint)
The default view shows 8 animations, but if you click on the little arrow like you see on the screenshot above, then you’ll see many more options like you see here:

(Caption: More Animation options in PowerPoint – choose from Entrance, Exit, Emphasis and Motion Paths animations)
You can choose from the following types of animations:
- Entrance animations. The icons for this type of animation are colored green . If you use this type of animation for an object, that object will enter the slide according to your timing preferences.
- Exit animations. The icons for this type of animation are colored red . The object you’ve added this animation to will exit the slide .
- Emphasis animations. The icons for this kind of animation are colored yellow . The object won’t enter or exit the slide (unless you’ve added that particular animation to the same object) but will emphasize and draw attention to that object.
- Motion path animations. This type of animation will allow you to move an object from one spot to another. You can specify or draw the path you want the object to take.
In the next sections, we’ll go over how to add the 4 different types of animations to your slides.
How To Add Animations to PowerPoint In 2 Simple Steps
To add entrance animations to any object in PowerPoint, here’s what you need to do:
- Click on the object you want to animate. In this example, we will use a blue smiley face.

(Caption: The blue smiley face we will be animating for this tutorial)
2. Select the animation you want to use. For this example, we used the entrance animation – fade animation. We set the duration to 2.75 seconds. You will notice in the screenshot below that the fade animation has no effect options (the button is greyed out).

(Caption: The different options available for Fade animation in PowerPoint)
Here’s what those numbers in the screenshot mean:
1 – We chose the Fade animation.
2 – There are no Effect Options for Fade Animation (the button is grayed out and not clickable)
3 – You can adjust settings via the Advanced Animation, Timing, and Animation Pane sections
4 – The number (1) refers to the fact that we’ve added 1 animation to our object (this is the Fade animation).
5 – You can click on the Preview button to preview the animation.
As you can see, adding animations to an object is no rocket science. You can even add entrance, exit, emphasis and motion path animations to a single object!
Important Points To Remember When Adding Animations
It’s so easy adding animations to presentation slides that you can easily lose control. Therefore, you’ll find yourself animating all objects on your slides and adding slide transitions as well. Nevertheless, it might look fun to you, but in reality, it can distract your audience’s attention from the message you’re trying to convey in your presentation.
So here are some guidelines you should following when adding animations to PowerPoint:
- Simplicity is key. Simple animations like fade and appear may not be as impressive as other animations available, but these add a touch of elegance to well-timed slides. It makes your slides look clean and simple.
- Limit the number of animations on a slide. One or two animations per slide should suffice. There’s really no need to animate every single object on each slide.
- Time your presentation well. Make sure your objects appear right after you introduce it. This keeps your audience’s interest piqued.
- Don’t forget to practice. Practicing your timings and your animations are key to a successful presentation.
We hope you learned something new in today’s article. Remember, animations are fun and great when used sparingly and tastefully, but when overdone, you could potentially lose face in front of your audience and look like a total amateur instead.
At 24slides , we’re designing beautiful PowerPoint, Prezi and Keynote presentations using the latest design techniques and loads of creativity. We create professional presentations from scratch and redesign existing ones. Take a look at some examples of our work and let’s get in touch .
You might also find this interesting: PowerPoint’s Morph And Zoom: Everything You Need To Know
Create professional presentations online
Other people also read

Tutorial: Save your PowerPoint as a Video

How To Convert Google Slides To PowerPoint and Vice Versa

How To Create The Best PowerPoint Presentation Background
Ultimate Guide to PowerPoint Animations: Tutorials, Templates, Tips & Tricks
Animations in powerpoint.
We have put together a massive collection of resources for PowerPoint Animations. This includes free & premium tips, tricks, tutorials and templates that you can access online to polish your slides and engage your audience.
We will cover both Custom Animations and Transitions feature in PowerPoint. This includes the new Morph Transition introduced in PowerPoint for Office 365
About PowerPoint Custom Animations
Custom Animation is a useful feature in PowerPoint. You can use it to add interaction to your slides and make the presentation more engaging for your audience. Almost any element in your slide - text, photos, graphs, shapes, audio and video can be animated.
You can add PowerPoint animations to any of these elements in just three steps: (1) Select the object to animate (2) apply an animation, and (3) customize the effects.
Let us see how to apply animation to different parts of a presentation.
Custom animation, when used correctly can enhance the effectiveness of your message in your business presentations. #PowerPoint #Tips
4 Types of Animations
PowerPoint offers 4 types of Animations:
- Entrance animation: Animations to make elements enter the slide.
- Exit Animation : Animations to make elements exit the slide.
- Emphasis Animation : Animations to highlight elements on the slide and direct attention
- Motion Path Animation : Animations that make elements on the slide move from one place to another along predefined paths.
You can add more than one animation to the same object. With this feature, it is possible to create a variety of custom animations to suit your specific requirement.
Animation can help make a PowerPoint presentation more dynamic, and the information more memorable. The most common types of animation effects include entrances and exits.
Learn how to set up basic animations with these tutorials on Microsoft website.
[Basic] Add Animations in PowerPoint 2016
In this easy to follow video, learn how to add animation in PowerPoint 2016. This video shows how to get started and is a primer.
Customizing Animation Effects
Once you add an animation to an object, PowerPoint offers further options to customize the animation. Each Animation effect can be controlled using the following additional settings:
Option 1: Preview Animations
Animations in PowerPoint can be normally viewed only in Slideshow mode. So if you want to preview the animations you added on a slide, PowerPoint allows you to view them using the Preview option.
Option 2: Effect Options
Some effects in PowerPoint like Fly In have additional options available. For example, Fly In animation can be set to Flyin from Left, Right, Top or Bottom of the slide.
In addition to this, text animation can be further set to: As One Object, All at One or By Paragraph.
Option 3: Advanced Animation Effects
These options help you fine tune your animation further. You can:
Add Animation: Add more animation effects to an object
Animation Pane: View Animation Pane to view list of animations applied on the slide and modify them.
Trigger: Start animation on a trigger like on click of a button/text etc. to make your slide more interactive.
Animation Painter: This lesser known tool can be used to copy all the animations applied to one object and "paint" or replicate the animation to another object. This is a very useful tool to reduce the time taken to create animation effects.
Option 4: Animation Timing
The Animation timing tools allow you to control when and how the animations play.
Start: Animations can start On Click, With Previous and After Previous
Duration: Controls how long the animation should play for.
Delay: This feature controls how long after the previous animation the current animation should be played.
Reorder Animation: When the Animation Pane is open, you can reorder the animations and move them up or down with these tools.
5. About Animation Pane
The Animation Pane provides the list of all the animations applied to a slide in once place. You can do the following actions in the Pane:
- Change the Start option
- Edit the Effect options
- Change the Timings
- Remove the animations
- Preview the animations
You can find out more about Animation Panes in this post from Tutsplus .
How To Preview Animations
When you put together a slide with multiple animation effects, you need to preview the animation periodically. Going to Slideshow mode every time takes a lot of time. In this video, you will find some quick ways to preview animations. All the options shared in this video allow you to preview the animation in the slide itself.
Text Animation Effects
PowerPoint animations are useful for text or bullet lists. You can make each point in your list appear one at a time as you present it. In this section we'll explore some basic and advanced ways to present text.
Animations to Bullet Lists
When you present a list of bullet points, you can add animations to make each point exit the slide, after you finish covering it. This post from Techrepublic shows how to add an exit strategy to bullet points in a slide.
[Easy] Useful Animation Tricks for Bullet Points
Learn 3 useful PowerPoint Text animation tricks in the video below. The tricks you will learn are: 1. How to animate a bullet point list one by one 2. How to dim a bullet point after it is animated 3. How to make a bullet point disappear after the animation PLUS How to animate bullet points in reverse order These PowerPoint animation effects should help you make your next presentation more effective.
[Advanced] Animation Effect for Text
Learn how to create a realistic looking effect of a hand writing text in PowerPoint. The animation looks like it was created by whiteboard animation software like Videoscribe. This popular video by Presentation Process has over 1200 Likes and 134K views.
Find these videos useful? Please subscribe to Presentation Process YouTube channel for more:
Most people use animation only to make the bullet points appear one after another. Some advanced users make the points dim after animation. There is so much more to animation than this basic feature. In the following sections we'll see some advanced and creative uses of Animations in PowerPoint.
Picture Animation Effects
In this section you will find some creative ways to animate slides with photos. This includes photos in jpeg or png format as well as vector images in EMF, WMF or SVG format.
You can find video tutorials on how to animate Pictures and Shapes on Microsoft website.
[Advanced] PowerPoint Zoom Animation
Sometimes when you present large pictures in your business presentation, you may be required to zoom in to your pictures to show the details. In such a situation this PowerPoint zoom effect comes in handy. You can use the animation effect to zoom into a certain step in a large multi step process, or you can use this custom animation trick to zoom in on an individual in a large group photo or zoom in on a country in a large world map etc.
[Advanced] PowerPoint Animation to Create Videoscribe Effect
Learn to create an interesting Videoscribe effect with PowerPoint Animation within a few seconds. The effect you will learn is to have a base image and to animate it so that it looks like someone is completing a drawing on the slide. This is a great way to add engagement to your training slides.
If you would like to follow this tutorial, you can download a similar image here .
This kind of animation can be done with any wmf or emf file and can be used to explain business concepts like planning and execution or explanation of a step by step process.
Shapes & SmartArt Animations
Autoshapes in PowerPoint can be used to create visuals for your presentation. In this section, we will see how to animate Autoshapes as well as SmartArt.
[Easy] PowerPoint Timeline Animation
Learn to create a beautiful Animated PowerPoint Timeline Infographic with this step by step tutorial. Grab your audience attention with this easy to design slide with custom animation effect.
[Easy] PowerPoint Animation for SmartArt Objects
When you add animation to a SmartArt graphic in PowerPoint , initially the entire graphic gets animated. But PowerPoint does provide some control over animating SmartArt shapes. To learn how to animate a SmartArt graphic with more control read this post on Indezine .
You can also see the process of animating a SmartArt diagram with the tutorial video below. The diagram we will be using is a core diagram with a circle relationship from the inbuilt PowerPoint SmartArt
The type of diagrams you can create and the animations you can apply, are only limited by your imagination.
Watch the video above to know more
Creative Slide Design & Animation
Design 25 beautiful Slides to impress your boss & clients – using PowerPoint Tips & Tricks. Save time and improve your workflow efficiency. Suited for Beginner and Intermediate PowerPoint users.
Chart Animations
Most business presentations have charts included in them. Many times PowerPoint charts can be overwhelming for the audience. The reason for their overwhelm is - too much information hitting them too soon. If you learn to sequence the way you present your numbers, you make it easy for your business audience to understand your PowerPoint presentation.
This video in Microsoft support site shows how to add animations to Charts and SmartArt.
[Easy] Guide to PowerPoint Chart Animation
Learn to animate your charts like a pro. In this short video tutorial, you will find how to apply custom animation to your PowerPoint charts and present information at your own pace.
[Easy] Animate Excel in PowerPoint
Many presenters have the habit of creating charts in Excel first and then again in PowerPoint. This video shows how you can simply copy an existing chart from Excel and animate it to present your information clearly and in sequence.
Adding Interactivity
PowerPoint animations has a trigger feature which can be used to add interactivity to your slides. These are specially useful for training and e-learning presentations.
Hyperlinks and Triggers
Triggers are like an internal hyperlink on your slide. The person viewing the presentation can control what happens next. This is useful for building multiple choice quizzes. This post from Brightcarbon provides an overview of setting up triggers & hyperlinks.
Creating Simple & Interactive PowerPoint Animated Slide
Engage your audience in training and information presentation with this beautiful slide. The slide has 4 images. On clicking on an image, the description or details relevant to that image appears next to it.
Creating Interactive Buzzers with Sound in PowerPoint
Make your training more engaging and interesting with this creative PowerPoint idea. Follow this step by step tutorial video to create an interactive PowerPoint buzzer with sound effects. You can use this buzzer to run a quiz in your classroom.
45 PowerPoint Quiz Templates Pack
Create excitement & make learning fun with games in your classroom! Gamify your classroom & generate excitement with Ready To Use PowerPoint Quiz Templates.
Quiz templates for any type of training: Corporate Training, Universities, Schools or Freelance Training. Includes complete instructions for customizing & playing each game
Video Animation Effects
You can insert and play videos in PowerPoint. You can insert these videos from YouTube, from your PC or Storage location like OneDrive. This tutorial in Microsoft website covers how to insert video and audio in PowerPoint.
[Easy] Insert YouTube Video in PowerPoint
Learn how to embed an online video into your next presentation. It is a fairly straightforward option in PowerPoint 2016.
[Advanced] PowerPoint Movie Magic with Videos, Text and Animations
Create PowerPoint Movie Magic by using the combo of videos, text and animations. Use this technique to create slides that engage your audience. The presentation shows a car moving along a road. The windshield wiper moves across the screen. Text appears and fades away in sync with the movement of the windshield wiper. We will use the Video Bookmark option, Text Entrance and Exit Animations, and Trigger animations options to create this effect.
Using Transitions Effectively
Slide transitions are the visual movements where one slide changes into another during a presentation. They add to the professional appearance of the slideshow in general and can draw attention to specific important slides. To know how to apply and remove transitions, read this post on Lifewire.
[Easy] 5 Tricks to Use Transition Effects in PowerPoint
Learn how to use PowerPoint slide transition effects in an interesting way to make your presentations creative.
[Advanced] The Power of Dynamic Pan Transition Effect
Sometimes the information you want to present spreads beyond one slide. For example, an excel spreadsheet you stuck on the slide has too many columns to fit into one slide. A map you placed on the slide is too big to be shown on one slide. If you force yourself to show the image in one page (by shrinking the size of the map), the details get too small to be clearly visible to the audience in the last row.
Learn an easy trick to overcome this situation with the video below:
Using Morph Transition
PowerPoint Morph is a revolutionary feature available for Office 365 users. It eliminates the need for complex animation. Technically speaking, PowerPoint Morph is a transition, but in reality it can be widely used a substitute/enhancement for complex animation. Read this post from Efficiency365 for a quick overview of this feature.
[Easy] Animated Roadmap with Morph Transition
Learn to create an interesting animated roadmap that looks like a video. We use the PowerPoint 2016 ( Office 365 ) Morph Transition feature to create this effect. You can use this type of roadmap or timeline in almost any kind of presentation. Engage your audience by explaining and revealing the steps one by one. Link for Roadmap Image
[Advanced] How Morph Transition Can Replace Animation
In this video you will find how to use PowerPoint Morph Transition to replace Custom Animations. See how this can be done with this example of a slide with multiple pictures with text. You'll find how to mimic PowerPoint animation with Morph Transition and create the slides very quickly.
If you would like to learn about Morph Transition, PowerPoint Designer and other such features available in PowerPoint for Office 365, checkout the course below...
Complete PowerPoint Foundation Course
Master Fundamentals of PowerPoint from scratch. From Basics to Advanced. Includes special section on features of PowerPoint 365:
- 13.5 hours on-demand video
- For beginner & advanced users
- Online Access: Full lifetime access
- Practice Activities: Assignments & Quizzes
Animated PowerPoint Templates
Animations take time to visualize and create. You can save time by using ready to use PowerPoint Templates. In this section you will find resources and links for Animated PowerPoint Templates.
PowerPoint comes with some animated 3D templates. This includes sparkling picture frames, lively photograph albums, 3-D rotating photos, and elegant transitions between images.
This page on Microsoft support site provides the link and details.
You can find more free animated PowerPoint Templates including for physics presentations at Presentation Magazine website.
While these free templates are a good resource for student and non-critical presentations, business & training presentations require professional and creative animation effects.
Ready-to-Use Professional Animation Templates
The 750+ Advanced PowerPoint Animation Templates Pack is specifically created for use in training and business presentations. It includes advanced animations for text, lists, pictures, concepts and metaphors. You can preview some of the templates from this pack below:
Animations for Bullet Points, Agenda, Terms & Definitions
Animations for Timelines, Roadmaps & Process Flows
Source: 750+ Advanced PowerPoint Animation Templates Pack
Animations for Pictures and Lists
Animations for Concepts, Metaphors, Business Ideas
And More Professionally Animated Templates to Engage Your Audience...
Make Your Presentations More Engaging without Spending Hours struggling with PowerPoint Animations...
Download 750+ Advanced PowerPoint Animation Templates Pack. Tell your story with 750+ Ready to Use & Easy to Customize Powerful Animations in PowerPoint.
Pramod Naik
Ceo, tianjin tianshi india pvt ltd.
These ready to use animated slides are very classy and ready to use , these are very thoughtfully done .
When I have to put a point across to the team or to a larger audience , these slides greatly benefit me to make my slides sharper and to the point … one just has to visualize as to what is that you need to share to the audience and how , if you can visualize , you are bound to find that slide in this pack , if not similar , better . Secondly when you scan through the slides , the way they are made you also get ideas as to what to share to the team and audience .
Tips for Professional Animation
Here are some quick tips when using PowerPoint Animations. These will help you save time and create your animations more professionally.
[Tip] How to remove Custom Animations from All Slides in 1 click
When you don't want any custom animation at all in your presentation - how do you go about it? Usually you will have to go to every single slide and remove the animations. However if you wish to have on-click control on whether animations are present or now - then use this trick and get complete control over your slides!
5 Irritating Ways to Use Custom Animation
Some presenters have the habit of applying animations the wrong way. Such animations have no purpose and end up irritating the audience. Watch the video below to learn the common mistake presenters make when using custom animations feature.
Time-Saving Tip: Using Animation Painter
Animations take a lot of time to create. Learn how to easily reuse animations applied to an object using Animation Painter tool. This video is part of the bonus tutorial videos provided with purchase of Advanced Animations Pack.
Good PowerPoint animation makes your audience focus on the message not the animation.
Turn Presentations Into Videos
When you make a recording of a presentation, all its elements (narration, animation, pointer movements, timings, and so on) are saved in the presentation itself. In essence, the presentation becomes a video that your audience can watch in PowerPoint. Learn the step by step process in this Microsoft support article .
[Easy] Convert PowerPoint to Video
In this tutorial, you will find how to use save your PowerPoint file as a video. When you save the file as a video, all the animations and transitions you have used will get saved along with the file. You would use this option of saving your presentation as videos to: - Showcase photos in a video format online/ offline - Summary or review of keys points in a presentation or training - Create a booth or kiosk presentation etc.
Free Ultimate Guide to PowerPoint Animations for tutorials, tips & more. #PowerPoint #Presentations
More Ideas for PowerPoint Animation
How to create sparkling text effect for pictures.
Learn to create a Sparkling Text Effect in PowerPoint with this step by step tutorial. You can use this effect for title animation or to highlight an important quote in a presentation.
How to create Clock Needle Animation effect
Learn how to Create Clock Needle Animation Effect in PowerPoint 2013 This is a useful animation effect to show a list, agenda items, steps in a process and more.
Create Motion Graphics with Animation
Learn how to convert Static Pictures into Animated images in PowerPoint. Tell your story with creatively animated PowerPoint slides. The effect looks like motion graphics created in an advanced software. However, this effect uses simple custom animation effects that you can follow in any version of PowerPoint.
Related Posts
Liked this article? Please share:
Note: All trademarks are property of their respective owners. Images are screen grabs from respective sites.

- Privacy Policy
- Terms of Service
- DMCA Protected
© Copyright 2024 Metamorph Training Pvt Ltd. All rights reserved.
C/O SiteSell Inc, 1315 de Maisonneuve Blvd. West, , Suite 1302, Montreal, QC H3G 2W9, Canada
The 7 Best PowerPoint Animation Tips

Your changes have been saved
Email Is sent
Please verify your email address.
You’ve reached your account maximum for followed topics.
If you’re working on an important presentation, you want to make sure everyone in the audience is paying attention to you. Besides having all the relevant information and a good speech, you can add animations to your PowerPoint slides as a tool to engage the audience.
Using animations, you can keep your audience focused through a lengthy meeting and highlight important details, so they’re easier to remember. We’ve put together a quick list of animation tips to help you create a dynamic PowerPoint presentation.
PowerPoint Animation Types
You can use PowerPoint tools to animate pictures, text, tables, shapes, and other objects to build an engaging presentation . Let’s take a quick look at the animation type, so you have an idea of which type better fits your presentation.
- Entrance animations : You should use them when you want new information or objects to show up within the slide.
- Emphasis animations : You can use them to animate already displayed objects to have your audience focus on them.
- Exit animations : These animations determine how objects leave the slide. For example, an object could fade out or fly out of the screen.
- Motion path animations : An object will move within the slide on a predetermined path. There are six types of motion paths that you could use: Lines , Arcs , Turn , Shapes , Loops , and Custom paths. So, you shouldn’t have any problems when it comes to moving objects any way you want.

Now, let's take a look at how you can make the most out of PowerPoint animations.
1. Plan Ahead
Before you start working on your presentation, draw an outline of how it should look. Think about how your idea can reach your audience and how the different animation types will help you achieve your goal. Also, planning ahead is one of the most efficient ways to save time when creating a PowerPoint presentation.
2. Know When to Add Animations
No matter how excited you are to make your PowerPoint presentation stand out , you shouldn’t animate anything until you’ve finished adding every piece of information and object.
Think about it. You’ve animated a picture, but now you need to resize it, so its details are more visible. The resized picture might cover a piece of text or other objects when it enters or moves around the slide, so you’ll have to edit the slide once again.
3. Rename All Objects
If you add a lot of pictures, icons, or text, it’s easier to lose track of them, and you might have a hard time identifying the object that you want to animate or edit. To avoid losing time, you should rename every object right after you insert it.
To do it, select the Home tab. Then, head to the Editing menu and click Select > Selection Pane . To rename the object, double-click on its current name, and the name field will become editable.

4. Keep It Simple
If you want to prepare a professional presentation , less is more. You don’t need to animate everything in your presentation as it might confuse the audience. Instead, think about the most important parts and use animation to make them really stand out.
Take a look at each slide and decide what your audience should focus on. Once you’ve found it, you can use an emphasis animation to spotlight that piece of information. If there are multiple elements that you want to animate, don’t have them moving at the same time. Instead, give them some progression.
Also, having too many types of animations will distract your audience from the idea that you’re trying to share. If there are too many objects moving on your screen, your audience’s focus will be all over the place, and some of them might even quit following your slides. This is why you shouldn’t use more than three animation types throughout your presentation.
5. Adjust the Animation Speed
Depending on the animation, you’ll have to adjust its speed. You can’t have a Spin animation and the object bolting across the screen without any chance for your audience to see it. To adjust the speed, select the object or text that you've animated. Then, in the Animations tab, open the Start menu and select the duration and when it should start.
If you select With Previous , the animation will start at the same time as the previous animation. If you select After Previous , the animation will start right after the previous effect finishes. You can set a Delay value to have a small break between effects. For better control, you should select the On Click option.

6. Set the Eye Flow
Think about how your audience will visualize the information. If there’s a lot of displayed information, they might scan it, instead of listening to you. Think where your audience focus should be and use animations to stimulate that focus.
7. Preview Your Animations
As you work on your PowerPoint presentation and add animations, you should constantly check how they look. But pressing F5 and having the slideshow start from the beginning will take a lot of time if you have many slides and animations. Instead, there’s a quicker way to check how the animations on certain slides look.
You’ll notice that the slides with animations have a little star next to them. If you click the star icon, the animations will start playing. Additionally, you can go to the Animations tab and click Preview to view the animations on the selected slide.

Once you’ve finished your presentation, press F5 and watch the entire slideshow. Observe the animations’ pace. Does your audience have enough time to get the entire information? Is the screen too crowded with too many objects moving at the same time? In this case, you may want to adjust the pace or even remove some animations.
Become a PowerPoint Animations Master
With these PowerPoint animation tips, you are now set to captivate your audience’s attention. It may take a while to figure out which animation you should use, but it will help you better control how you deliver information to your audience.
If you’re confident that you’ve put together the best PowerPoint presentation but are worried about speaking in public, there are a few apps that could help you beat this fear.
- Productivity
- Microsoft PowerPoint
- Computer Animation
How to Quickly Add Good Animations to Your PowerPoint PPT Presentations
Few apps make it as easy as PowerPoint to add animations to your slides. Learn how to bring stylish sizzle to your PowerPoint presentation with animations.

Tired of building the same old, boring slide decks? As a creative, PowerPoint animation is a surefire way to grab the audience! PPT animation brings dry slides to life.
Animation transforms every presentation that you build. In this tutorial, you’ll learn how to add animations in Microsoft PowerPoint. You’ll see that animation PowerPoint templates are the best way to kickstart your next presentation design.
How to Add Animations to PowerPoint (Quick Videos)
Knowing how to insert animation on PowerPoint is an essential skill, and it’s easy to learn. If you like to learn by watching, we’ve got you covered. Here are two helpful videos to learn PPT animation.
How to Quickly Add Animation in PowerPoint
In this short video, you’ll watch me add animations to a PowerPoint presentation. I’ll cover basic animations and sequencing them so that items appear in the order you want. Check out the video below to watch and learn how to get animation in PowerPoint:
Find the Best Animated PowerPoint Templates (Presentation Animation for 2024)
Animated templates are the best way to animate in PPT. Use PPT how to add animation templates to build amazing slides of your own in seconds.
Trying to find the perfect template? This comprehensive video lists some of the very best PowerPoint animation templates that you can download today.
Need Help? Download Our eBook on Making Great Presentations (Free)
We also have a useful compliment to this tutorial. Quickly grab it before you read on. Download our FREE eBook: The Complete Guide to Making Great Presentations . It’ll help you write, design, and deliver the perfect presentation.

What Is an Animation in Microsoft PowerPoint (Definition)?
PowerPoint animations are visual effects for the objects in your PowerPoint presentation. PowerPoint animations bring objects like text, images, or charts on or off your slide.
Microsoft calls these entrances and exits. An entrance is an animation that brings something onto the slide. An exit moves an object off the slide. Use an animation to make an object enter or exit your slide (or even move it between spots on a slide.)
My recommendation is to completely build out your presentation first and add animations later. Focus on content and the ideas you want to convey. Add the sizzle later in the form of well-timed animations.
PPT animations are the visual effects for objects on your slides. Transitions are the animations that occur when you change slides. This tutorial covers only PPT animations.
How to Make Your First Animation
Read on to learn more about how to customize PowerPoint animations and work quickly with templates.
The tips in this section were written using macOS and Microsoft 365. If you’ve got a different operating system or a different version of PowerPoint, your steps may be slightly different.

Let’s learn PowerPoint animation using a template. This is the Orange Animated PowerPoint Template . You can download it today from Envato to follow along as we learn how to add animation in PowerPoint! It’s the perfect tool to learn PowerPoint animations.
It’s easy to add an animation to your PowerPoint presentation. After you’ve finished inputting all your content into a PowerPoint file, begin adding your animations:
- Click on an object to select it on any slide. This could be an image, chart, or block of text.
- Now, find the Animations tab on the ribbon. This is the control center for PPT animation.
- Find the Animation menu, which has star icons on it. Each one represents an animation effect.
- Click on one of the animation effects to add it to the selected object. In this example, I’m going to click on Fade so that the text fades in.

You’ll know that a slide contains animation when a small orange box with a number appears on the slide. Preview your animations by clicking on the Preview button on the far-left side of the PPT Animation tab.

Your animation will play when you switch to Slide Show mode. Each time you click the mouse button or press a button on a presentation “clicker,” the slide will advance. This could mean going on to the next slide or animating in the next slide object.
That’s it! You’ve added your first animation to PowerPoint. Practice how to add animation in PowerPoint with another element, such as a chart or image. Let’s look at other PPT animations.
Explore PowerPoint Animation Styles
PowerPoint has a great variety of styles with which to animate objects on your slides. With the animation presets you can quickly bring an object on or off a slide with one click.
On the Animations tab of the ribbon, there are many one-click styles to apply to an image. Scroll down in this menu to view them. See the screenshot below for the full list of animations:

When you think of how to add animation in PowerPoint, be creative. And don’t hesitate to try out different ideas. You have countless options. As you design one presentation after another, you’ll want to explore your options. This panel lets you do exactly that. It’s how to insert animation on PowerPoint fast.
The names of the slides are also good clues for understanding what the animations will do. “Fly out” causes an object to exit the PowerPoint slide, while “Float In” is indicative of an object coming onto the slide.
Spend time trying out the various PowerPoint animation effects. Click on each one and PowerPoint will play a short preview, right on the slide.
How to Add Your Second PowerPoint Animation
So far, we’ve animated a single object onto our PowerPoint slide. You know how to get a single animation in PowerPoint. Now, let’s learn how to add animation in PowerPoint with a second object.
To add a second PPT animation to a slide, simply select another object. Then, click on one of the animations from the menu again.

Once you add a second animation to a slide, you’ll notice that each animated object has a small number in a box next to it. That number indicates the order the objects will animate in. A box with a “ 1 ” will be animated first, and a “ 2 ” will be animated after it.
What if you want to change the order of our animations? In PPT, how to add animation also includes sequencing steps. Read on to find out about sequencing the animation in PPT options.
How to Sequence Your PowerPoint Animations
You’ve just learned how to animate slides in PowerPoint. With an array of effects added, you’ve built an animated slide that’s ready to share!
But first, you may want to change the sequence of the animations. In other words, you want to adjust the order in which they appear.
In this example, I want the text box reading “Global Growth” to fly in first. Then, I want it to be followed by the image of the factory on the right. Fortunately, this is easy to do with Microsoft PowerPoint. To start, be sure you’re working on the Animations tab on the ribbon. Then, click on the button labeled Animation Pane.
You’ll see a sidebar menu open on the right side of your PowerPoint window. This is the Animation Pane. Think of it as the control center for animations in PowerPoint. It’s ready to help you re-sequence animations fast.

Right now, the photo shows a “1” beside it. This indicates that it comes onto the slide first. The “Global Growth” text comes in second, noted by the number “2” next to it.
On the Animation Pane , all that we need to do is drag and drop to re-sequence the animations. If I want the text to come in first, I’ll move it up in the list of my animations. Simply click and drag on its title in the Animation Pane to move it into a new position.
Notice that the number beside the text box animation changes from a “2” to a “1”. This indicates that it is now the first animated object on the slide.

When you’re managing many objects on a single slide, the Animation Pane is helpful. It can help you visualize the order in which objects are entering or leaving your PowerPoint slide. Plus, you can quickly reorder them by dragging and dropping them.
Control How to Animate Slides in PowerPoint
It’s key to learn how to get animation in PowerPoint that fits your needs. For example, it’s a great idea to alter the duration and triggers for animations. Add animation to PowerPoint in these cases for an attention-getter.
By default, PowerPoint assigns standard values to various types of animation. Often, this is the perfect timing. But in other cases, you might want to make adjustments.
Similarly, you can change what triggers an animation. By default, animations start On Click. This means that your cursor or clicker causes each animation to start.
Again, it’s useful, but it also means that you have to start each animation manually. If you’ve sequenced animations, you may want them to automatically start one after the other.

To make these changes, select an animated object and return to the Animations tab. On the right side, you’ll see the Timing section. Here, you can change the starting trigger by opening the Start dropdown. Duration and delay settings can be adjusted using the menus below.
When to Use Animations in Your PowerPoint Presentations
Here’s the thing: presentations aren’t about animations or how fancy your slides are. They’re all about holding your audience’s attention.
This quote from one of my favorite movies is a great way to think about using animations:
“Your scientists were so preoccupied with whether or not they could , they didn’t stop to think if they should. ” – Jurassic Park
Just because you can add animations doesn’t mean you should. Are they improving your presentation or distracting your audience from your message?

Using too many animations is distracting. When you’ve got objects flying in and out of the slide, you’ll lose the attention of your audience. Less is more while you learn how to insert animation on PowerPoint.
Here are four key principles for applying animations in PowerPoint tastefully:
- Keep objects off-screen until you’re ready to talk about them.
- If you put everything on the slide at once, your audience will stop paying attention to what you’re saying and focus on the text.
- Use simple transitions such as Appear or Fade to keep your slides simple and clean.
- Limit your animations to one or two per slide to maintain simplicity.
What is the definition of animation in Microsoft PowerPoint that goes too far? Anytime the animation supersedes the content, it’s time to rethink things.
So, when should you use presentation animation in PowerPoint? I find it most useful when:
- I’m kicking off my slides. When you think of how to put animation in PowerPoint, start at the beginning. An opening animation is a great way to grab audience focus right away.
- I’m moving from idea to idea. Animations add a clear visual transition. They’re a good tool when you’re changing topics or moving from point to point.
- I need to add emphasis. Animations are best used to emphasize ideas. They add motion, which captures the viewer’s attention. When used sparingly, they’re a powerful way to highlight what matters.
Play the presentation to yourself before presenting it. If you feel like you’ve got too many animations on your slide, consider removing some of them.
5 Quick PowerPoint Presentation Animation Tips
If you’re learning how to animate slides in PowerPoint, it helps to have a few top tips. Let’s walk through five of our favorite fast facts that show you how to get animation in PowerPoint.
1. Animate Your Data
More than ever, PowerPoint presentations are full of data visuals that tell stories. Audiences love charts that help them understand your message visually.
Why not add animations to your data? With the help of our quick screencast , you can learn to do just that.
2. Survey Your PowerPoint Animations Before Starting
Many of the recommended templates include more than one PowerPoint animation. Survey your slides by reviewing all the active animations before you start.

Click on Animations on PowerPoint’s ribbon. Instantly, you’ll see numbered icons on each object that features an animation. As you learn how to insert animation on PowerPoint, review what’s already included in the template. This helps you avoid deleting any key objects.
3. Create an Animated Photo Slideshow
One of the most popular formats for a presentation is a slideshow. And every slideshow is better with animations that smoothly shift from one slide to the next.
4. Use Slide Transitions
This tutorial doesn’t cover transitions, a form of animation that helps shift between two slides. Use those transitions as an animation to bring the focus back to the slide.
Learn how to add animation in PowerPoint for slide changes with transitions. Check out our quick screencast that teaches you how to add transitions in just 60 seconds.
5. Use Fewer Animations
We’ve already mentioned this tip above, but its importance bears repeating. To learn how to get animation in PowerPoint to work effectively, consider that you might be overdoing it.
Everything we do as presenters should consider the audience. Too many animations take away from the content and are more harmful than helpful. Always challenge yourself to delete half the animations you initially included to bring tight focus.
The Best Source for Templates to Add Animation in PowerPoint (With Unlimited Downloads)
There’s a big mistake that rookie presenters make. When they’re learning how to animate slides in PowerPoint, they assume they’ve got to do it all on their own. Beginners ask, “ What is animation in PowerPoint ?” and wind up deep down the rabbit hole of learning the entire app.
Instead of learning how to animate slides from scratch, a better way is to start by using a template. Templates already have most of the work done for you. And thanks to a site called Envato, you’ll unlock unlimited templates with animations for PowerPoint .

For a flat monthly rate, you unlock unlimited downloads of animated PowerPoint templates. Plus, Envato includes millions of other digital assets. These include stock photos, music, fonts, and more. These pair perfectly with your animated slides.
Envato now also includes an AI-powered search feature ! This new tool allows you to input a description of your project to effortlessly locate the finest human-crafted resources.

Start experimenting with this enhanced search tool! Discover the ideal animated PowerPoint templates for your presentations in 2024.
Join now and start downloading!
5 Top Animation PowerPoint Templates From Envato
Now, let’s explore five of the very best templates that help you add animation to PowerPoint. PowerPoint animations are so much easier with top templates. These are available today on Envato:
1. The Fashion PowerPoint

Fashionable templates include the most modern and minimal design elements. Those principles help draw the viewer’s eyes to images that cover the slide. Plus, it includes the best PowerPoint animations already built in!
2. Infographics PowerPoint Animated Slides

Infographics help you illustrate data and ideas. Animating them controls the flow of your narrative. Use this template to your advantage with an array of slide layouts. This one is easy to customize and will impress even the toughest audiences.
3. The Sound: Clean Presentation Template

The Sound is another impressive template that shows you how to get animation in PowerPoint right. It uses the “just enough” animation mindset that helps audiences enjoy your slides to the max. Use 30 unique slides and six color schemes to create an animated presentation.
4. Square Animated PowerPoint Template

Searching for remarkable flexibility for your animated PPT? Square is the template for you. Inside, you’ll find 128 custom-animated slide designs. And with fully editable graphics, make changes to fit your style in a flash.
5. Business Animate PowerPoint Presentation

Businesses need engaging presentations to stand out from the crowd. Use this animation PowerPoint template to create an interesting and wonderfully animated presentation. Add your business concept to the placeholder slides and watch your story come to life.
You Just Learned How to Put Animation in PowerPoint
In this tutorial, you learned to use PowerPoint animations to tastefully animate elements on your slide. Bringing those key bullet points or images on the slide at the right time will make for a great presentation.
When you think of how to add animation in PowerPoint, always use premium templates. They help you create PowerPoint animations. The vast Envato library has thousands of stunning options for animated designs. It’s the best way to learn how to insert animations in PowerPoint!
Related Articles

- Animate pictures, art, and more Video
- Animate text Video
- Animate pictures and shapes Video
- Animate charts and SmartArt Video
- Create custom animations Video

Create custom animations

If you are the adventurous type, you can create some pretty amazing presentations with lots of motion path animations. It's not all that difficult once you get the hang of it.
Customize with motion paths
You can create some pretty amazing presentations with lots of motion path animations:
On the ANIMATIONS tab, click More in the Animation Gallery, and under Motion Paths , do one of the following:
Click Lines , Arcs , Turns , Shapes or Loops . The path chosen appears as a dotted line on the selected object or text. The green arrow indicates the path’s beginning and the red arrow indicates its end. Drag either end to put the endpoints where you want them.
Click Custom Path . When you click where you want the motion path to start, the pointer appears as a cross-hair.
To draw a path of connected straight lines , click where you want the motion path to start. Move the pointer and click to create a line between the two click points. Move and click again to draw another line. Double-click to stop drawing lines.
To draw a freehand path , click where you want the motion to start. Hold the left mouse button and move the pointer on the path that you want the object to follow. Double-click at the motion’s final endpoint.
If you are the adventurous type, you can create some pretty amazing presentations with lots of motion path animations.
You'll see that it is not all that difficult, once you get the hang of it. But let's start out small.
Click the shape called Behind Shape 1 .
Now if we add an Entrance animation like Fly In , we can control where the shape ends up, and the Direction and Sequence with Effect Options .
But we can't control where the shape begins, or the path it takes.
To do that we need to use motion paths. Go down to Motion Paths and select Lines .
This is the motion path: the line describes the path; the green arrow indicates where the shape starts; and the red arrow indicates where the shape ends.
Select the path. This half-transparent shape shows the shape at its endpoint.
Drag the red arrow and position the endpoint over the in-front shape.
Then, preview the animation. And the first shape moves behind the second one.
Motion paths can be a lot of fun.
Try some other ones, like Arcs and Loops .
Also, click Custom Path , if you want to draw your own motion path.
Let's go back to the previous slide and add a motion path to Behind Shape 2 .
Use the Animation Painter to copy the animation.
Then, select the motion path, and move its endpoint on top of the in-front shape.
Preview the animation.
The animation works alright, but the second behind shape ends up covering up the shape we want to keep on top.
This is a problem you'll run into more often when you are creating custom animations. But it's easy to fix.
Right-click the shape and click Send to Back , Send Backward .
Now preview the animation.
That's the way we want it.
You see, all the objects on the slide are organized into layers.
By sending the shape backward, we moved it to a layer behind the in-front shape.
Here's another thing you can do to create custom animations.
This ball shape actually contains two animations: a motion path that moves the shape horizontally and a Spin animation that makes the ball appear to roll as it moves.
To add multiple animations to an object, select the first animation in this gallery.
Then, click Add Animation to add the others.
Also, don’t forget about those additional effect and timing options.
Here's another way to open that dialog box in the Animation Pane .
Click the arrow next to the animation, and click Effect Options .
I added Auto-reverse to the animations, so the objects return to their original positions.
So now, you have everything you need to get started with the animations in PowerPoint.
The best way to understand animations is to experiment on your own.
For more information, check out the links in the course summary.

Need more help?
Want more options.
Explore subscription benefits, browse training courses, learn how to secure your device, and more.

Microsoft 365 subscription benefits

Microsoft 365 training

Microsoft security

Accessibility center
Communities help you ask and answer questions, give feedback, and hear from experts with rich knowledge.

Ask the Microsoft Community

Microsoft Tech Community

Windows Insiders
Microsoft 365 Insiders
Was this information helpful?
Thank you for your feedback.
- PRO Courses Guides New Tech Help Pro Expert Videos About wikiHow Pro Upgrade Sign In
- EDIT Edit this Article
- EXPLORE Tech Help Pro About Us Random Article Quizzes Request a New Article Community Dashboard This Or That Game Popular Categories Arts and Entertainment Artwork Books Movies Computers and Electronics Computers Phone Skills Technology Hacks Health Men's Health Mental Health Women's Health Relationships Dating Love Relationship Issues Hobbies and Crafts Crafts Drawing Games Education & Communication Communication Skills Personal Development Studying Personal Care and Style Fashion Hair Care Personal Hygiene Youth Personal Care School Stuff Dating All Categories Arts and Entertainment Finance and Business Home and Garden Relationship Quizzes Cars & Other Vehicles Food and Entertaining Personal Care and Style Sports and Fitness Computers and Electronics Health Pets and Animals Travel Education & Communication Hobbies and Crafts Philosophy and Religion Work World Family Life Holidays and Traditions Relationships Youth
- Browse Articles
- Learn Something New
- Quizzes Hot
- This Or That Game
- Train Your Brain
- Explore More
- Support wikiHow
- About wikiHow
- Log in / Sign up
- Computers and Electronics
- Presentation Software
- PowerPoint Insertions
How to Add Animation Effects in Microsoft PowerPoint
Last Updated: January 31, 2022 Tested
This article was co-authored by wikiHow Staff . Our trained team of editors and researchers validate articles for accuracy and comprehensiveness. wikiHow's Content Management Team carefully monitors the work from our editorial staff to ensure that each article is backed by trusted research and meets our high quality standards. The wikiHow Tech Team also followed the article's instructions and verified that they work. This article has been viewed 451,096 times. Learn more...
You can animate text and other objects in a PowerPoint slide to add flair to your presentation. Follow these steps to learn how create animation effects in PowerPoint, as well as how to animate the transitions from one slide to another.
Animating Text or Objects

- To select a whole text box, click on the border of the text box. Powerpoint automatically distinguishes text separated by a paragraph or bullet break.
- If your Powerpoint has no objects to animate, you will need to add some .

- You can click through the animations to see a demonstration and view more animations by scrolling with the arrows on the right of the animations box.
- Entrance animations will change how an object enters the page.
- Exit animations will change how an object leaves the page.
- Emphasis animations will add movement or highlights to bring attention to an object.
- Paths determine a course of movement for an object on the page.

- This step can be repeated multiple times to add as many animations to an object as you like.

- This can be a useful tool for staying organized when working with multiple animations.

- “On Mouse Click” will hold the animation until you click the mouse.
- “After Previous” will automatically start the animation after any previous animation (or when the slide appears if there are no other animations)
- “With Previous” will play the animation at the same time as the previous animation on that slide.

- The delay begins after the selected animation action. That is if “On Click” is selected, the delay will start after the click.

- You can also click and drag animation listings in the animation pane.

- Choosing to add a sound manually will open up a window to browse for sound files on your computer, so you will need to have one handy.

Animating Page Transitions

- Select “None” on the left to remove a selected transition.
- A slide can only have one transition at a time.

- ”On Mouse Click” is selected by default.

- A higher duration means a slower transition.
- This setting only adjusts the duration of the transition, not of the slide itself.

- Choose “No Sound” from the same menu to remove any added sound effect.

Adding Animated Images and Videos to a Presentation

- You can click and drag the image to move it around on the slide once it's added.

- You must be connected to the internet during your presentation for online objects to display.

- Embedded videos can only play if you are connected to the internet during your presentation.

Community Q&A

- Click “Apply to all” on the Transitions tab to use the selected transition for all slides in a presentation. [3] X Research source Thanks Helpful 0 Not Helpful 0
- The activation, timing, and duration options can also be accessed in the Animation Pane by clicking the down arrow next to a listed animation and selecting the option from the menu. Thanks Helpful 0 Not Helpful 0

You Might Also Like

- ↑ https://support.office.com/en-us/article/Apply-multiple-animation-effects-to-one-object-9bb7b925-ab0f-47d4-bc11-85d939194bed?ui=en-US&rs=en-US&ad=US
- ↑ http://www.thewindowsclub.com/add-sound-effects-to-powerpoint-animations
- ↑ https://support.office.com/en-us/article/Add-edit-or-remove-transitions-between-slides-in-PowerPoint-2016-for-Mac-937604f5-93f8-4f96-9232-8d55d7f0bead
About This Article

- Send fan mail to authors
Is this article up to date?

Featured Articles

Trending Articles

Watch Articles

- Terms of Use
- Privacy Policy
- Do Not Sell or Share My Info
- Not Selling Info
wikiHow Tech Help Pro:
Level up your tech skills and stay ahead of the curve
- Amazon Prime Day Early Deals
- Summer Sales: Waterproof Bluetooth Speakers
How to Add Animation to PowerPoint
Give your presentations some pizzazz
:max_bytes(150000):strip_icc():format(webp)/KarenMarcus-b36dca4c46e7441c8a50744f9a5c0260.jpg "how to powerpoint animation presentation")
- University of Colorado at Denver
- Colorado State University
What to Know
- Select the item you want to animate, then go to the Animations tab > Animations group > More . Choose an animation.
- Use Effect Options if you want the animation on multiple items. Use the Animation Pane to change the order and timing.
- Use Play All to preview your animations.
So you have to give a talk to your boss and their entire team next week. You know what topics you want to cover, and you've put together a simple PowerPoint slide deck to help the audience understand your concepts. Consider using animation to make your presentation really stand out.
How to Add Animation to PowerPoint on a PC
Here are easy steps for using PowerPoint slide animation. The following instructions are for PowerPoint 2016, 2013, and 2010, as well as PowerPoint for Microsoft 365.
Open your PowerPoint presentation and navigate to the slide to which you want to apply animations.
Select the item you want to animate .
On the Animations tab, in the Animations group, select the More arrow in the Animations box.
You can also add Entrance , Emphasis , or Exit animations:
- An Entrance animates the item as it appears on the slide.
- An Emphasis animates the item after it’s already on the slide.
- An Exit animates the item as it leaves the slide.
Select the animation you want to use. When you select it, you’ll see the animation happen on your slide.
You’ll see the number “1” appear next to the object you’ve animated, indicating this will be the first animation to occur when you select within the slide during your presentation. If you animate more than one item, they'll be numbered in the order in which you create them.
If you want to animate several items within an object with the same animation, select the object, then choose your animation.
On the Animations tab, in the Animations group, select Effect Options to determine whether you want the animation to happen to all the items at once, or to each one separately. You can also adjust the way the animation happens; for example, whether an item “floats in” from the top or bottom of the slide.
To fine-tune the way animations happen during your presentation, on the Animations tab, in the Advanced Animation group, select Animation Pane . A pane will appear in the right-hand column of your screen.
- To change the order of an animation, select it from the list, then use the arrows in the upper-right corner of the pane to move it up or down.
- To adjust the timing, select an animation from the list and select the down-arrow for options.
- To view how the animations happen, select Play All .
To remove an animation, select an animated item, then, on the Animations tab, in the Animations group, select None .
How to Add Animation to PowerPoint Using a Mac
The following instructions are for PowerPoint 2019, 2016, and 2011 for Mac, as well as PowerPoint for Microsoft 365 for Mac.
Open your PowerPoint presentation and navigate to the slide to which you want to apply the animation.
Select the item you want to animate.
On the Animations tab, you’ll see choices for how an item appears on the slide, receives emphasis, or exits the slide. Select the one you want to use.
In PowerPoint 2011 for Mac, the selections are labeled as “entrance,” “emphasis,” and “exit” effects.
You’ll see the number “1” appear next to the object you’ve animated, indicating this will be the first animation to occur when you click within the slide during your presentation. If you animate more than one item, they'll be numbered in the order in which you create them.
To fine-tune the way animations happen during your presentation, click the number of the animation you want to adjust to open the Animations pane.
In PowerPoint 2011 for Mac, these options are available via the Animation tab, under Animation Options .
- Use the Effect Options dialog box to change how the animation works.
- Note : If Effect Options is not available, it may be because there are no options available for that effect.
- Use the Timing dialog box to set how long the animation lasts.
- Click Play From to see your changes in action.
Remember, your purpose is to support your message and build interest. Use animations judiciously, and leave the fancy displays for another time.
You're done.
Why Animation Makes Your Presentation Stand Out
There are a number of ways to spice up your PowerPoint slides, including music, video, slide transitions, and animation. These elements can add interest and depth to your presentation, but too many can become distracting rather than enlightening. The key is choosing elements that will enhance your presentation rather than overwhelm it.
Using animation means applying movement to an item (such as lines of text, graphs, or images) on a slide. Presenters often use it to reveal bullet points one at a time instead of showing them all at once. This strategy can help keep audiences interested because they won’t know what’s coming next. Subtle effects like “appear,” “fade,” and “wipe” often work best; options such as “swivel,” “bounce,” “zoom”, and "typewriter" may get you into distraction territory.
Get the Latest Tech News Delivered Every Day
- How to Apply Custom Animation in PowerPoint
- Dim Text in PowerPoint Presentations
- What Is an Animation in Presentation Software?
- Animate PowerPoint Text One Word or One Letter at a Time
- Add Rolling Credits to a PowerPoint Presentation
- Change Order of Animations for PowerPoint Slides
- How to Use Google Slide Animations and Transitions
- How to Draw Freehand in PowerPoint
- Edit Music, Sound, or Other Audio Settings in PowerPoint
- How to Use the Animation Painter in PowerPoint 2010
- Animate Specific Parts of a PowerPoint Chart
- Add Hyperlinks to PowerPoint Presentations
- How to Add Music to PowerPoint
- How to Hide and Unhide a Slide in PowerPoint
- How to Change the Speed of a PowerPoint Animation
- How to Use the Animation Painter in PowerPoint
How-To Geek
How to use motion path animations in microsoft powerpoint.

Your changes have been saved
Email Is sent
Please verify your email address.
You’ve reached your account maximum for followed topics.
The Best Wi-Fi 7 Routers of 2024
I've made these changes to my iphone settings to make my life easier, 12 chill games i recommend playing this summer, quick links, add a motion path animation, customize the motion path.
Microsoft PowerPoint offers many types of animations . You can add effects to text , images, and shapes. But if you want to create your own, you can select a motion path animation to move your object wherever you like.
With motion path animations in PowerPoint, you can make your object zigzag, loop, spiral, or swoosh. Once you select the motion path you want to use, you can customize the points to create the exact path you want your object to take.
Open your PowerPoint presentation and select the slide where you want to create the animation. Either insert the object you want to animate or select it if you've already added it to the slide.
Related: How to Hide an Object Before Animation in PowerPoint
Go to the Animations tab and click the arrow at the bottom of the Animation selection box. This opens the full collection.

Scroll toward the bottom and you'll see a few options in the Motion Paths section. If you want to use one of these, simply select it to apply it to your object. Notice you can choose Custom Path which allows you to draw the path yourself.

For additional options, click "More Motion Paths" at the bottom of the window.

In the Change Motion Path box, you'll see Basic, Lines and Curves, and Special paths. To see a preview before you apply it, check the box for Preview Effect at the bottom. Then, choose one to see it in action.

When you find the path you want to use, select it and click "OK."

If you want to combine motion paths so that your object ends in a certain spot, check out our how-to.
Related: How to Combine Motion Paths in Microsoft PowerPoint
After you apply the motion path, you may have options to change the direction. Select the animated object and go to the Animations tab. Click the Effect Options drop-down arrow to view your choices. Note that not all paths offer extra effects, but most let you reverse the path direction.

Along with changing the direction of your motion path, you can edit the points. Click the Effect Options drop-down arrow and pick "Edit Points."

You'll then see the motion path with the points as squares. Select and drag a point to move it.

You can also right-click a point for options like making it a smooth, straight, or corner point. Additionally, you can add more points or remove one.

If you want to change the start action or duration , or add a delay, select the animation and use the tools on the Animations tab.

Remember, you can preview your animation as you make edits to it using the Preview button on the left side of the ribbon on the Animations tab. This helps to see if you need more adjustments or want to reorder the animations .
Animations can spruce up your slideshow . So if a motion path animation is what you need, you have plenty of options in PowerPoint.
Related: 8 Tips to Make the Best PowerPoint Presentations
- Microsoft Office
- Microsoft PowerPoint
8 Quick & Easy PowerPoint Animations to Use in Any Lesson

Sara Wanasek

Looking to make your PowerPoint presentations more visually engaging? Adding quick animations can quickly elevate your presentation and capture the attention of your audience. PowerPoint animations can also reinforce your main points and help students visualize different parts of your lesson if used correctly and creatively.
There are many types of PowerPoint animations to use, and you can animate text, shapes, images, or even tables! But some are more beneficial than others, and it’s important to not go too crazy with animations and to choose the best ones that work for the context of your material. These animations are meant to enhance your presentation – not add distractions.
If you are interested in enhancing your PowerPoint, here are eight animations in different contexts that are simple, yet attention-grabbing, that can make your material more memorable. Watch the video for further information on each of these animations and their creation process, or read along. Let’s go!
Add Interactivity & Engagement with ClassPoint
If you haven’t heard of ClassPoint yet, check out this audience enagement tool added right into PowerPoint for free! Run interactive audience questions, add advanced annotation & whiteboard tools to your slides, and more!
Animation 1: Appear
Let’s start with a basic entrance animation. This is an animation for text, images, or shapes to enter onto your slide. The simplest entrance animation is the “ Appear ” effect. This will just delay the time your chosen piece appears on the slide.
This simple transition works great when you have a lot of information on your slide. You can break up your information into bite-sized pieces for students so that they are focusing on one piece at a time, before moving ahead.
How to Add the Appear Animation
Step 1: group objects that you want to appear together..
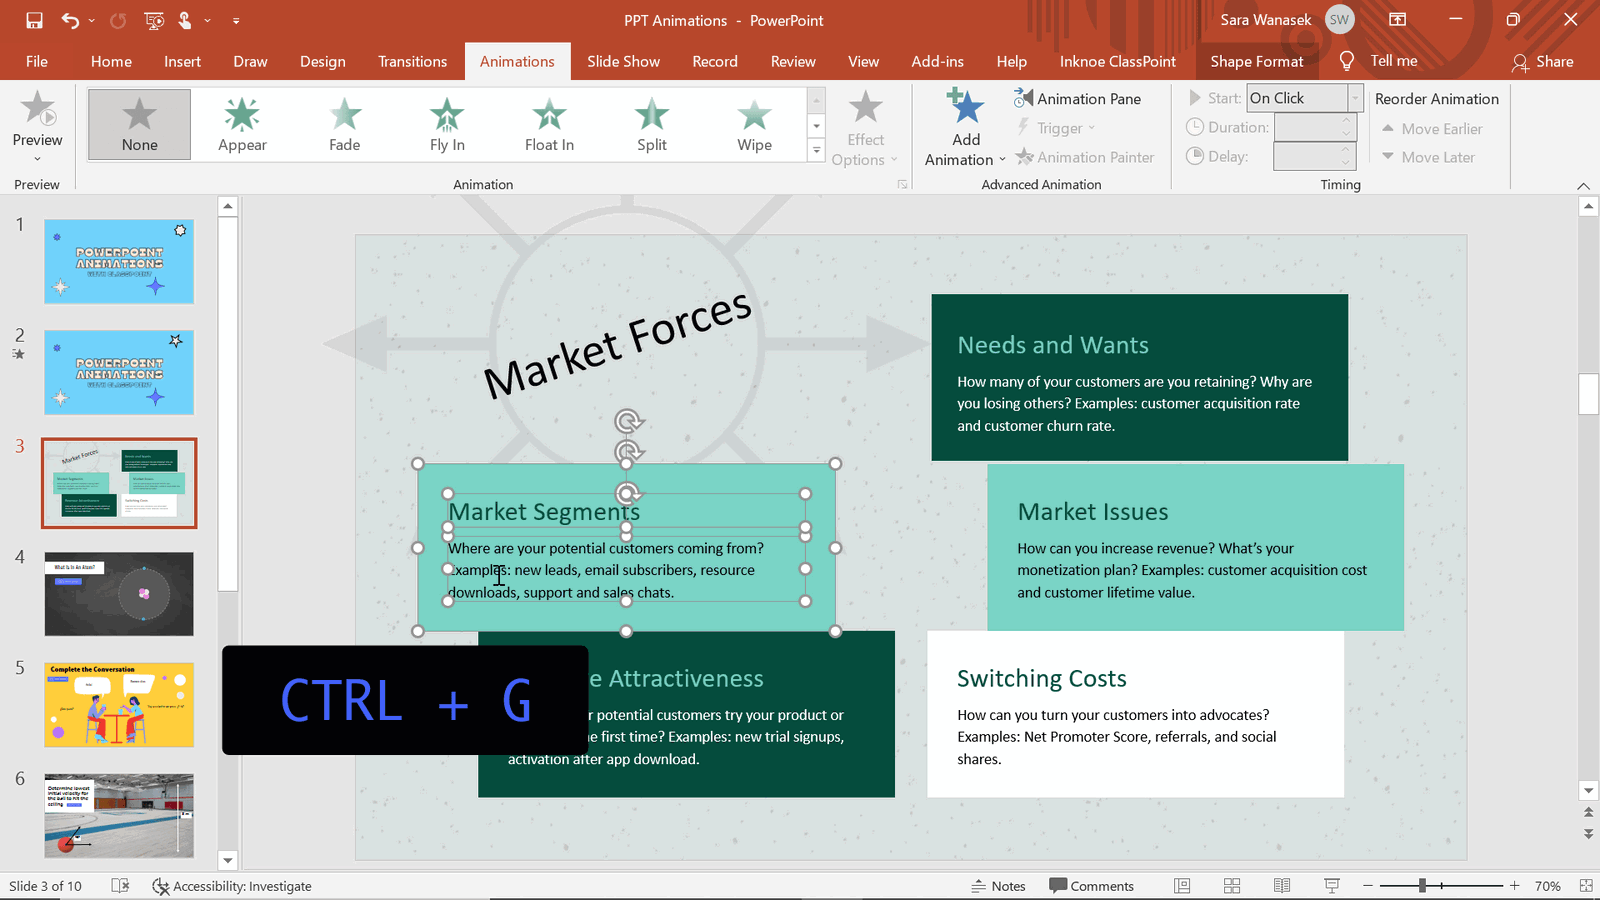
In my example above, I wanted the text inside the corresponding shape to appear together on the screen. To make this happen, they need to be ‘grouped’. To group your objects, hold down the Shift key while clicking all the objects you want to group together. After they are all selected, click the Control + G keys to automatically group them.
Step 2: Add Animation
Click on the object you want to add the animation to. Then, click the Animations tab in the PowerPoint ribbon. We are using the first Entrance animation, Appear , that you can see in the box.
To explore other Entrance Animations, click the drop-down arrow in the right corner of the Animations box.
Step 3: Preview Animation
When you select an animation, you will see a short preview of it. With the Appear animation, it is hard to see the preview, so I suggest going into presentation mode to check it out!
Step 4: Repeat!
Repeat this process for each object you want to animate. It is helpful to set up the animations in the order you want them to appear, but if you made a mistake or something needs to be changed, open the Animations Pane. Click and drag to reorder the animations.
Step 5: Edit Animations
The speed and duration of the animations can be changed if the automatic settings do not fit well. Right-click on the animation in the Animations Pane and click Timing . Here, you can change the length of the animation and add any repeats if necessary.
Pro Tip: The duration of your animation has a huge impact on the experience of your animation! Generally, animations should be fast; I recommend 0.5 sec unless there is a reason to slow down your animation -such as my next example!
Animation 2: Spin
Next, you can add an Emphasis animation to items on your slide. This type of animation adds a little oompf to objects on your slide, and depending on your context, can help deliver and explain your material. The example we have above is using the Spin animation to show how an atom is not a stationary object.
How to Add the Spin Animation to an Atom
Step 1: group objects that you want to appear together..
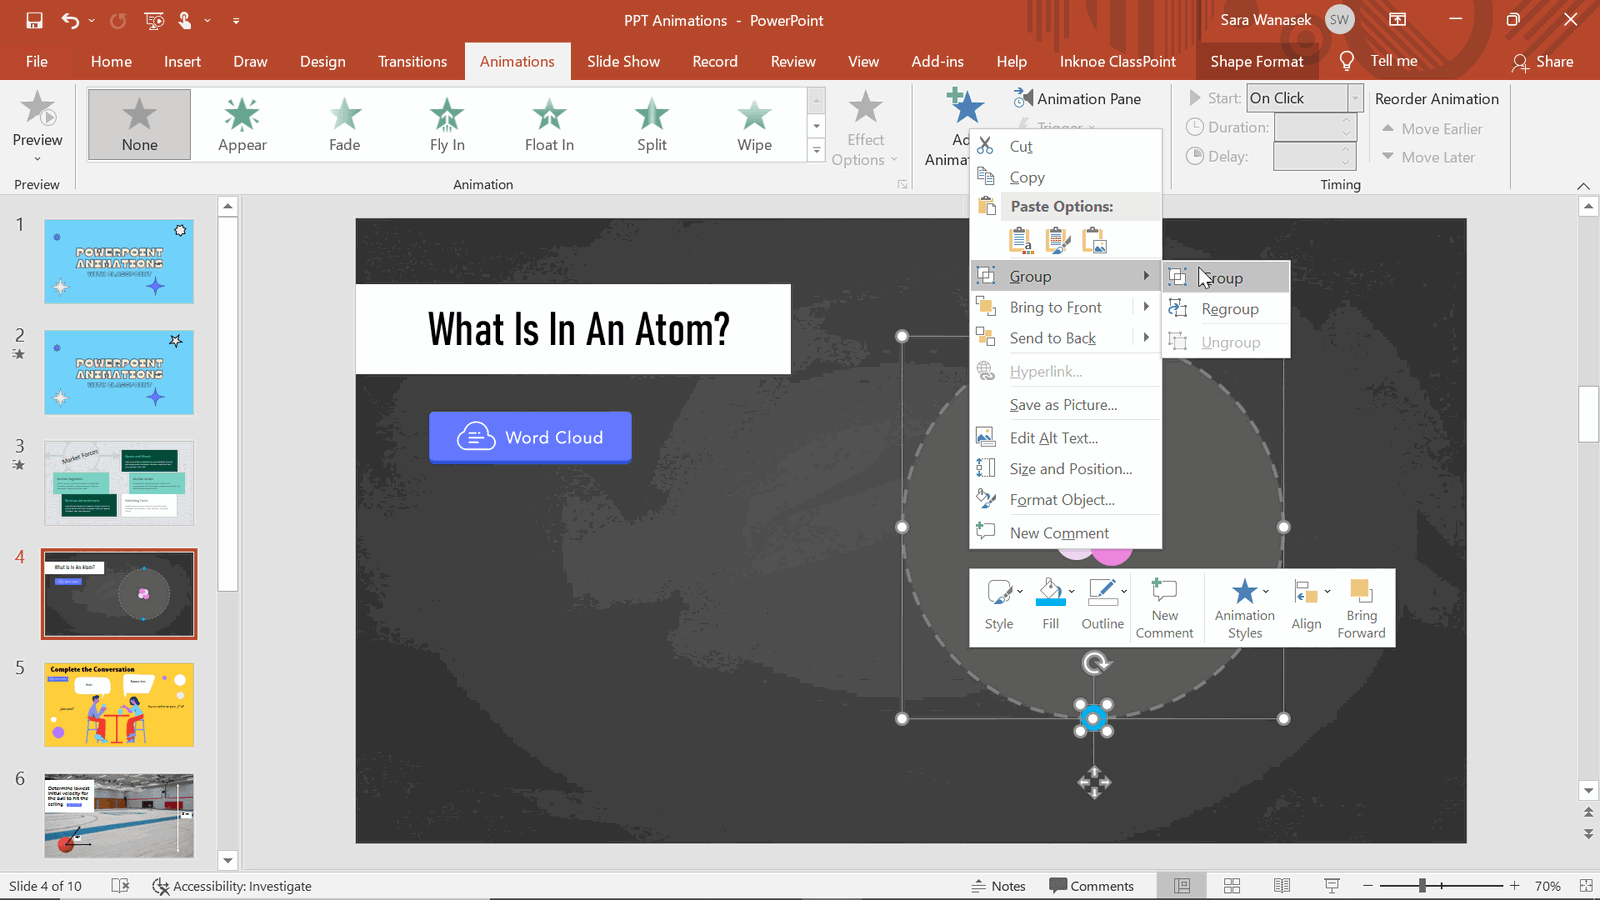
Once you have created the images or shapes you want to spin, you first have to group them together. Use the CTRL + G shortcut or right-click and select “Group”.
Above, I’ve created an Atom diagram using PowerPoint’s shapes. I am getting a little fancy here and actually want to add two spin animations to demonstrate the outside electrons moving in one direction, and the middle electrons in another, so I’ve grouped them separately.
The next step is adding the Spin Animation to the two object groups. First, click on the outer electrons, then in the Animations tab, select the down arrow in the Animation box to reveal more Animations. In the Emphasis section, choose Spin .
Step 3: Edit Start Time of Animation
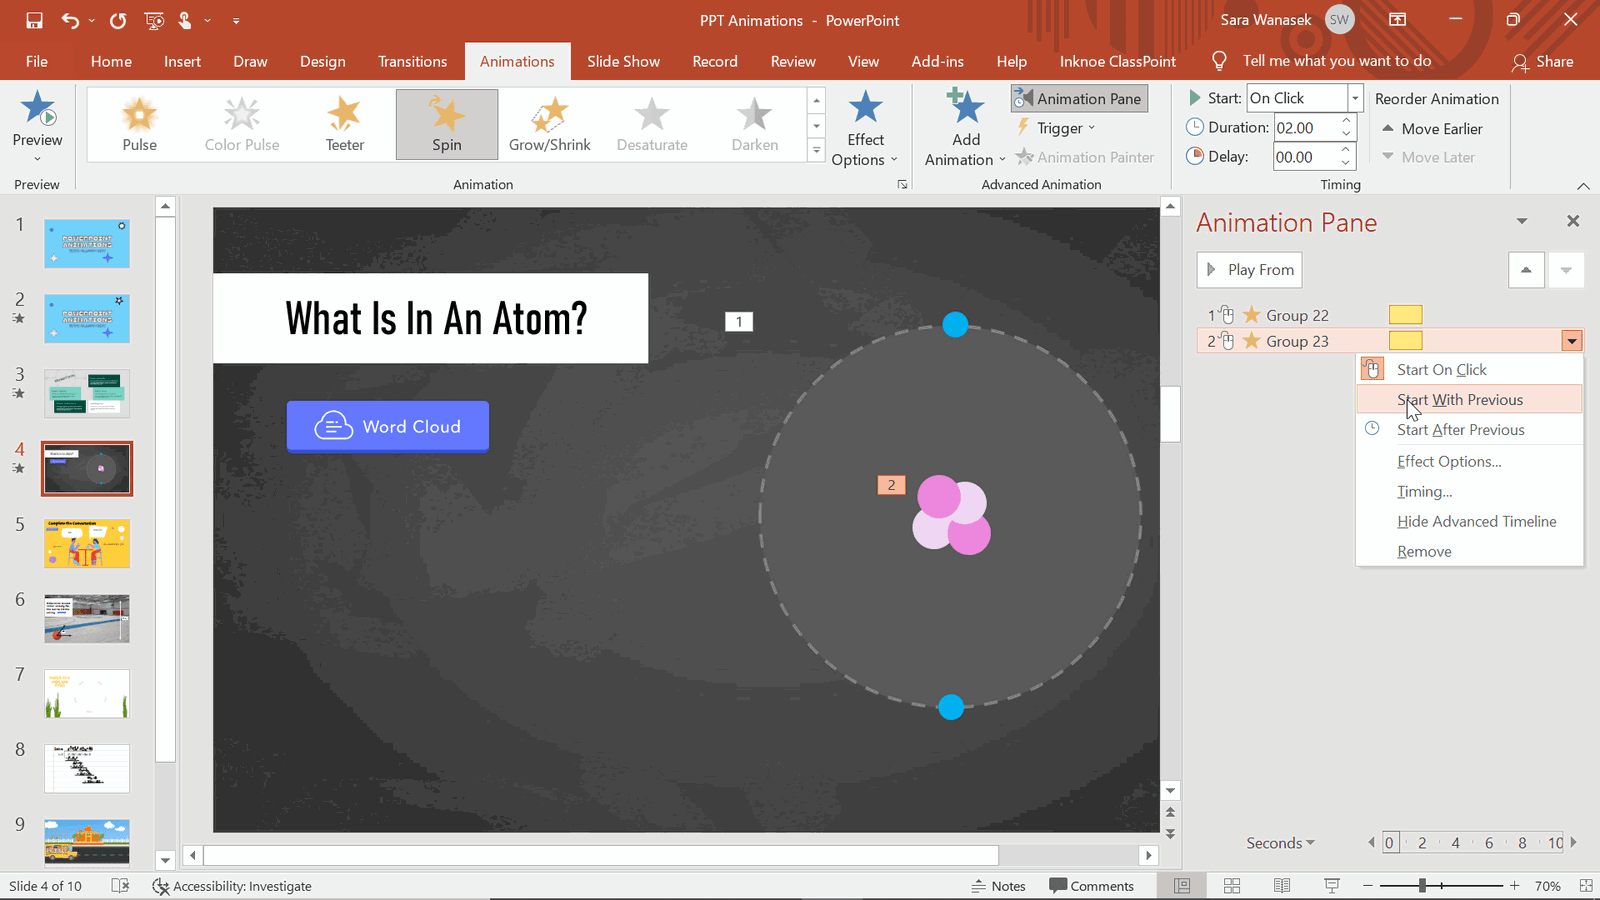
After adding an animation, you can run it and make any edits you would like. Here, the animations automatically were set to appear one after the other, which is something I wanted to change.
You can change the atom animation start time in the Animations Pane on the right by right-clicking on the animation ‘Group’. To make both animations appear at the same time, click on the second animation, the inner electrons, and choose “ Start With Previous .” Here you can also change the animation to start “On Click” if you want to wait to spin your object.
Step 4: Edit Timing and Duration
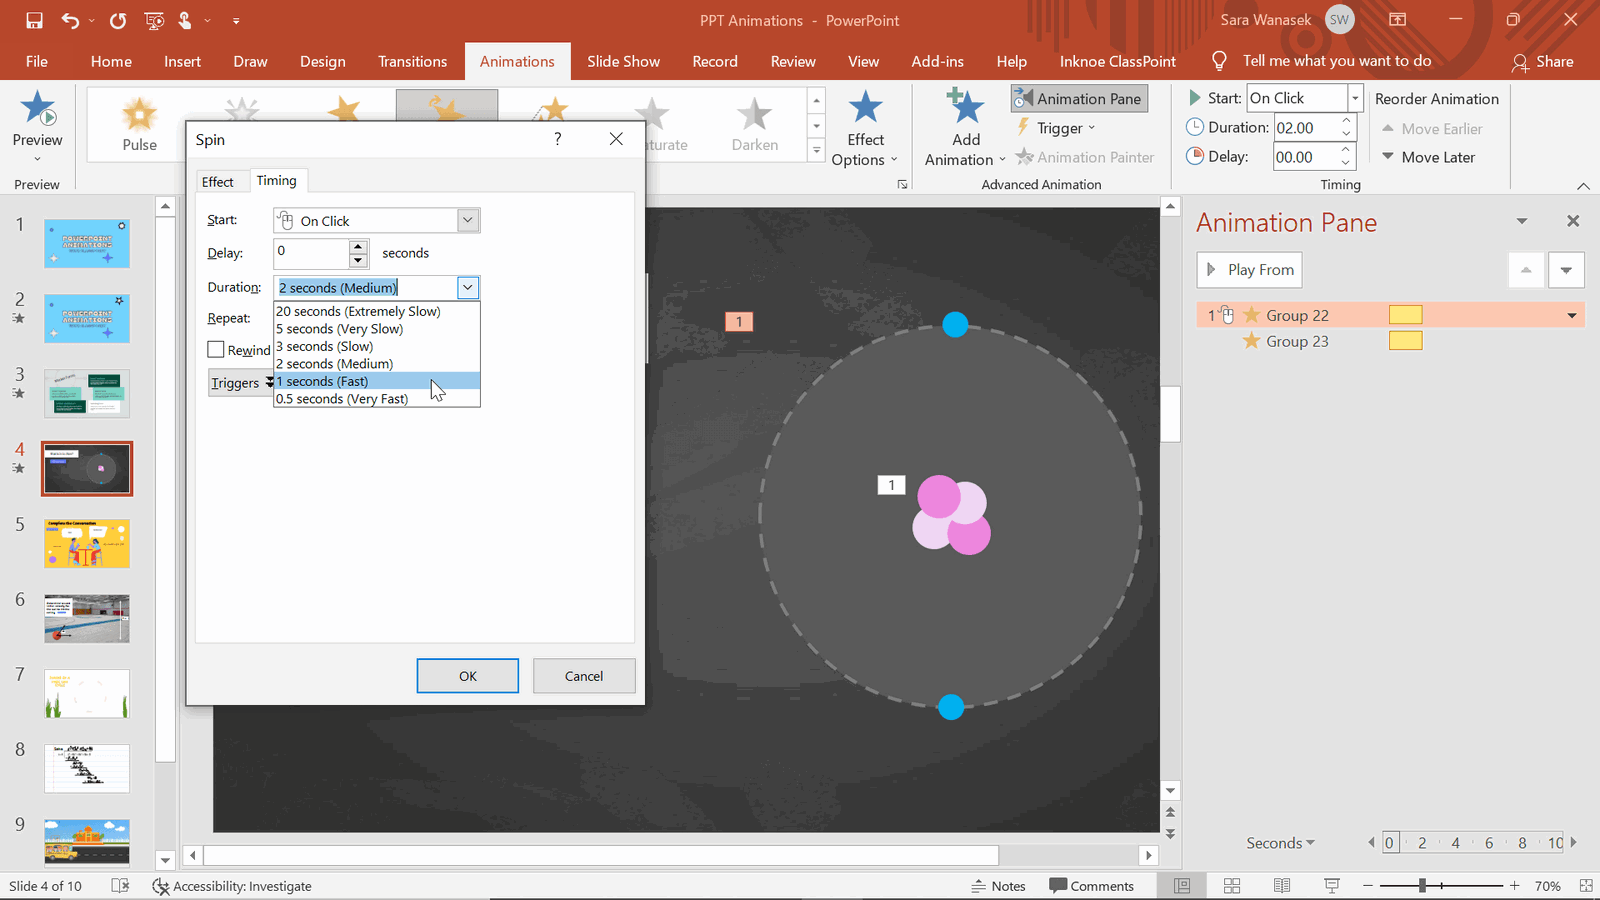
To make my diagram further represent the material, I also wanted to change the timing. Since these protons, neutrons, and electrons do not spin at the same rate , I can change the Spin Duration to show students!
To do this, right-click on the grouped object, then choose Timing . To increase the spin speed, change the Duration to 1 second (fast!).
Then to change the whole effect duration, you can edit the Repeat ! I selected Repeat 3 times making the whole effect last 3 seconds.
For the inner circle, I wanted to slow the speed but still match the whole animation duration. To do this, click on the inner circle animation, and in the Timing section, change the Duration to 3 seconds (slow) and do not repeat it.
Step 5: Edit Effect Options
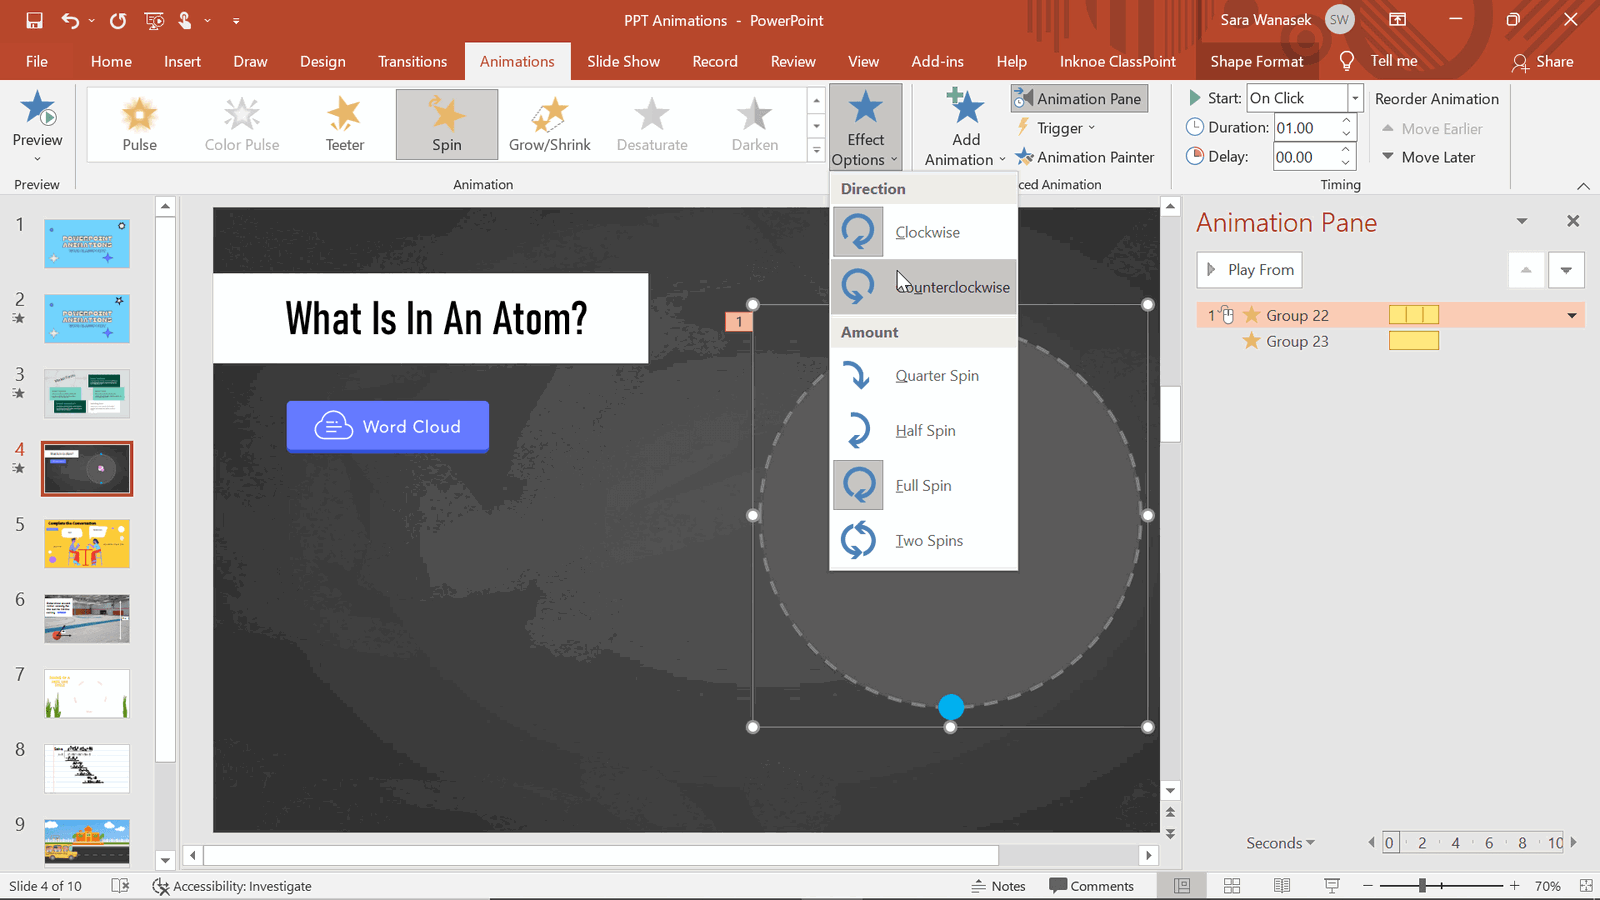
Lastly, you can change the animation effect, which for the Spin animation means the spin direction and amount. In the Animations tab, click on the Effect Options button.
Go back up to the preview, and check out how this PPT animation provided me with the tool to demonstrate the movement of an atom!
Animation 3 & 4: Disappear & Fade
Exit Animations are a great way to include more information on your slide, without crowding the space. For example, in the slide above, I demonstrated a conversation happening between friends – great for a foreign language class! Instead of creating a new slide for each text or making multiple speech bubbles, I used a mix of entrance and exit animations!
How to Use Entrance and Exit Animations Together to Show a Conversation
Step 1: think through order of animations & add them in.
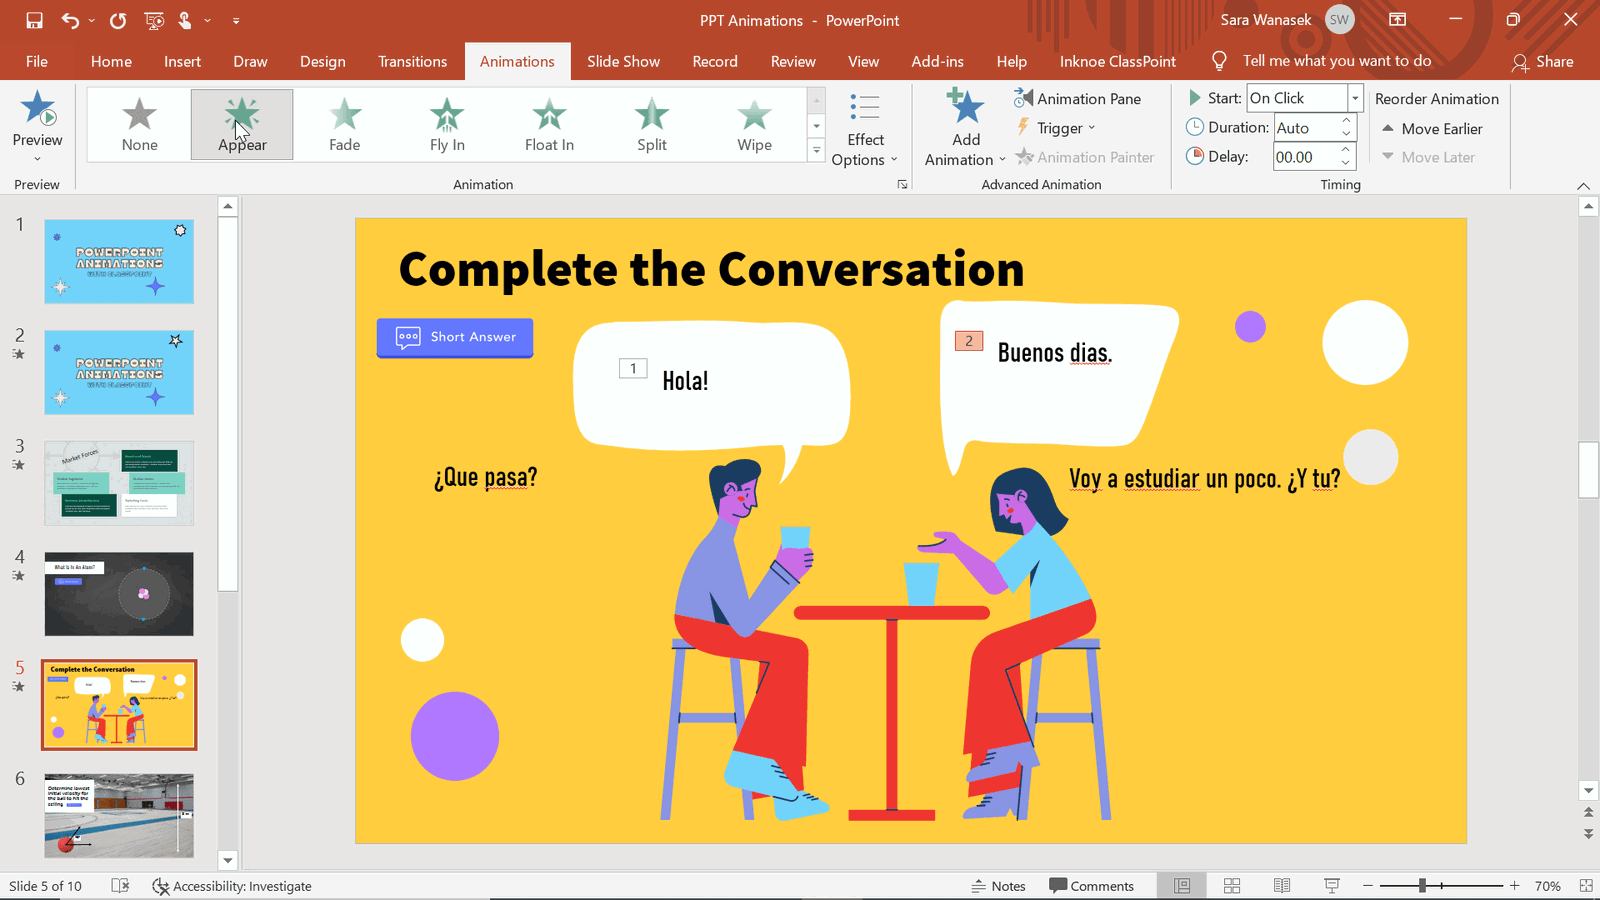
Which text will appear first? disappear first? In the example above, I have 4 textboxes that will go back and forth from their respective speech bubbles. ( I find it easiest to add new dialogue text underneath the speech bubble, add the animations, and then place them layered in the correct spot! )
Once that is set, click on the first text box, then add your entrance effect . I suggest fade or appear as they are the least distracting.
Repeat for the second appearing text. Adding for the third text box is when it gets tricky.
Step 2: Add an Additional Animation to an Object
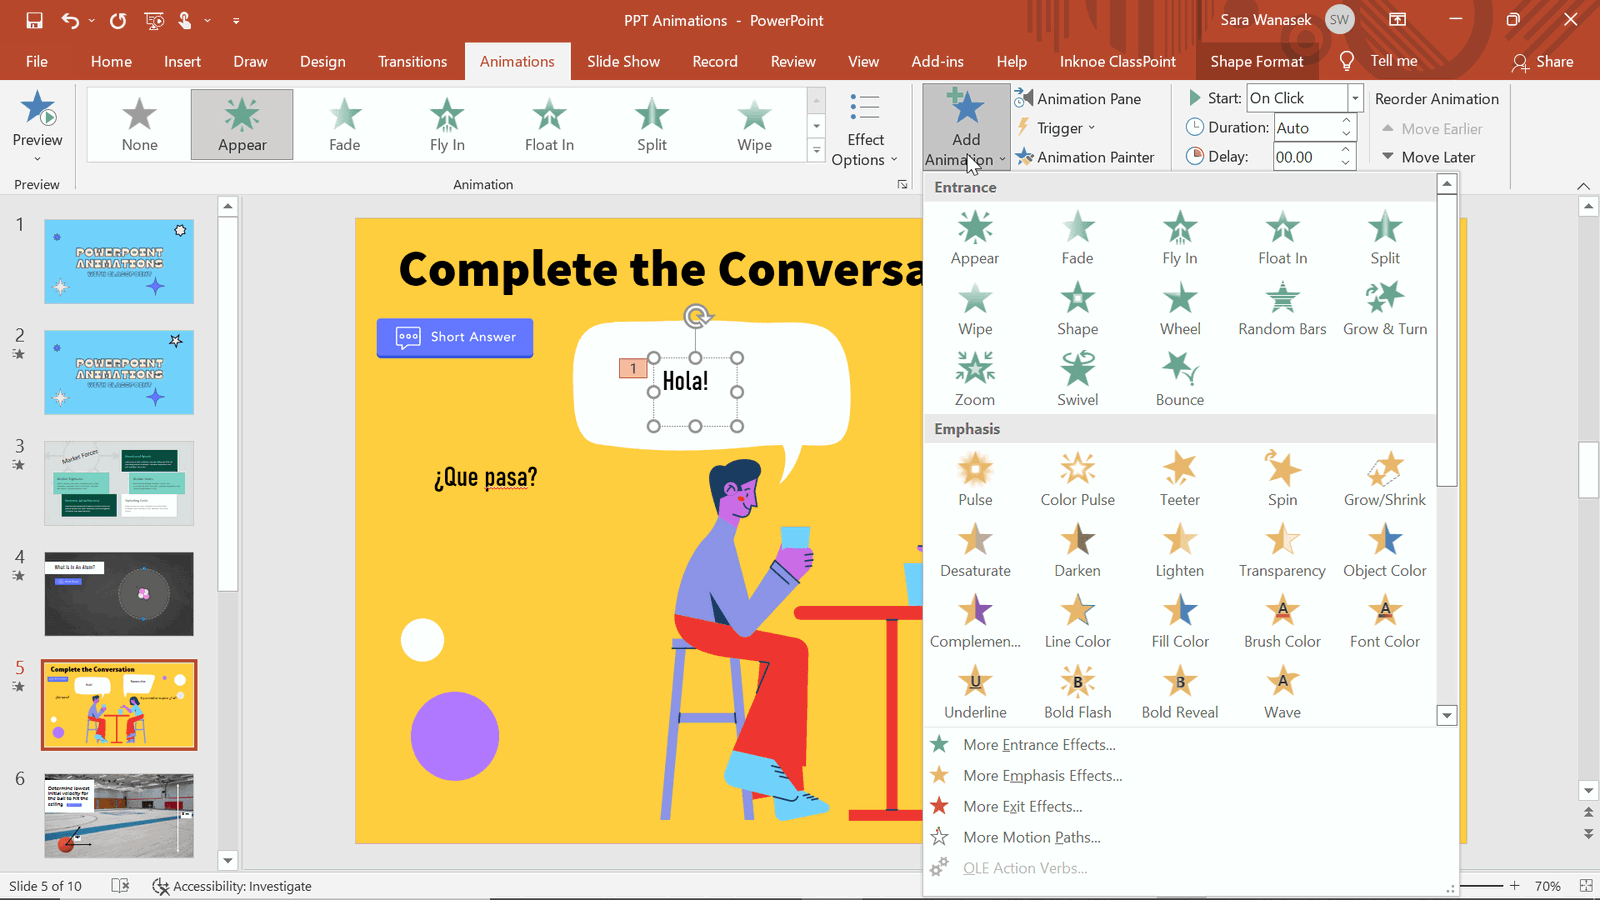
Before the third text can appear, the first one has to disappear. Click on the first text box that has an animation. Then, click the “ Add Animation ” button on the top ribbon. From there, add the disappear animation effect. Now, you will see a number 1 & 3 next to your text box indicating the places of these animations.
Repeat this for the next animations in your sequence.
Step 3: Change Start Time of Animations
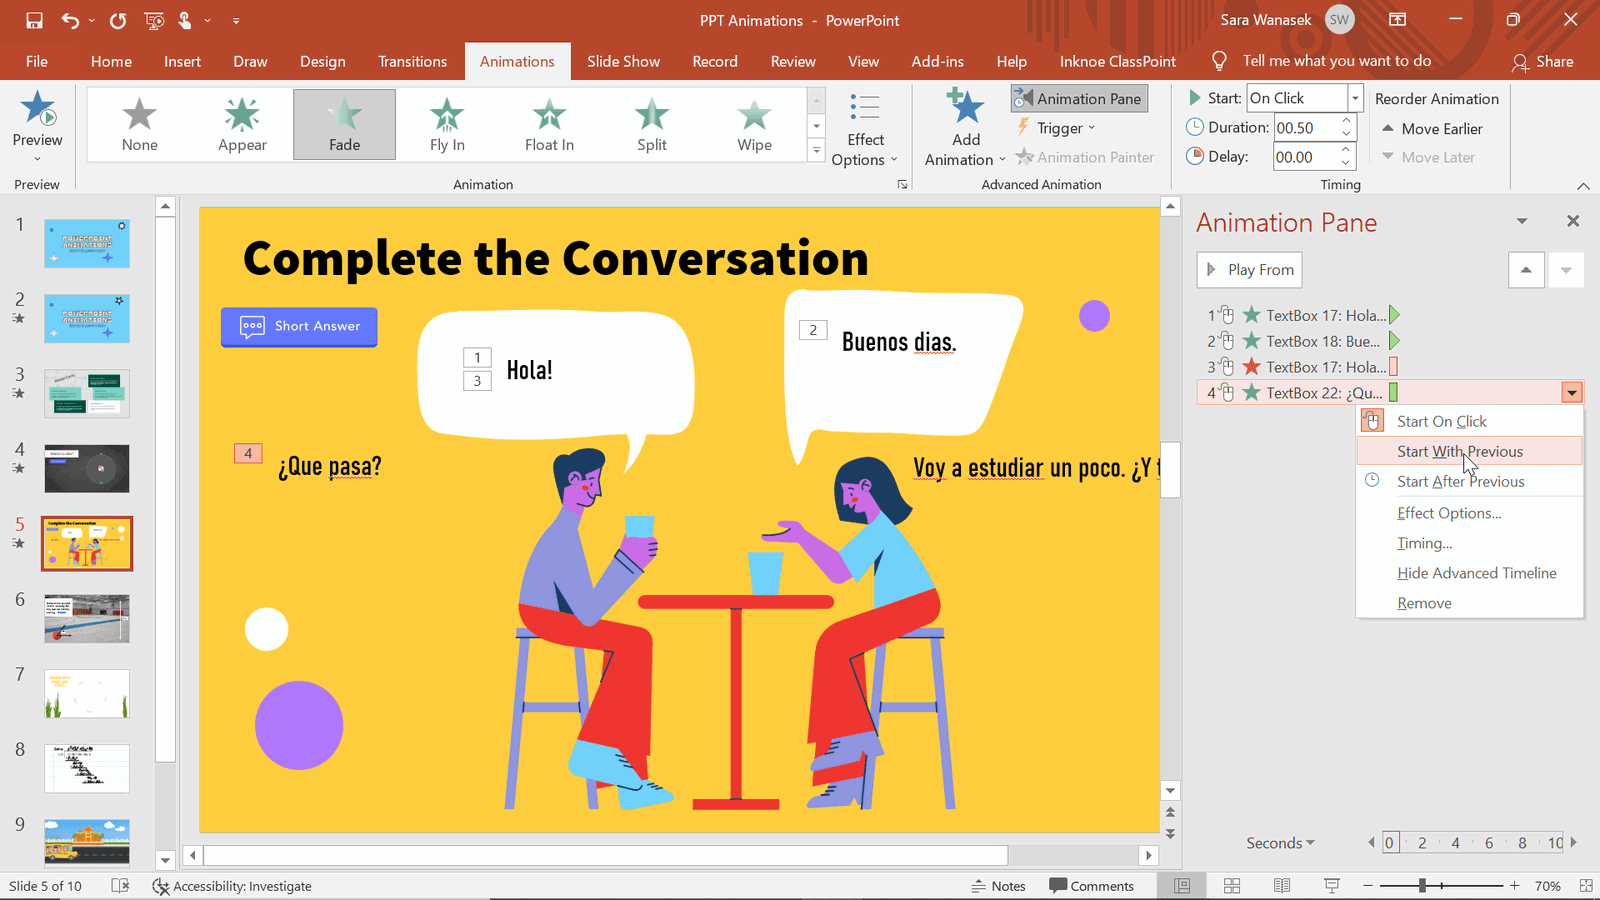
For the example of a conversation, I want the disappearing text and the entering replacement text to appear and disappear at the same time . For example, our 3rd and 4th animations above. Right-click on the 4th Animation in the Animation Pane and select “ Start with Previous .” Now, “Hola” will disappear at the same time “Que Pasa?” is appearing.
Repeat this for any other animations in your sequence.
Step 4: Place Text Boxes in the Correct Location
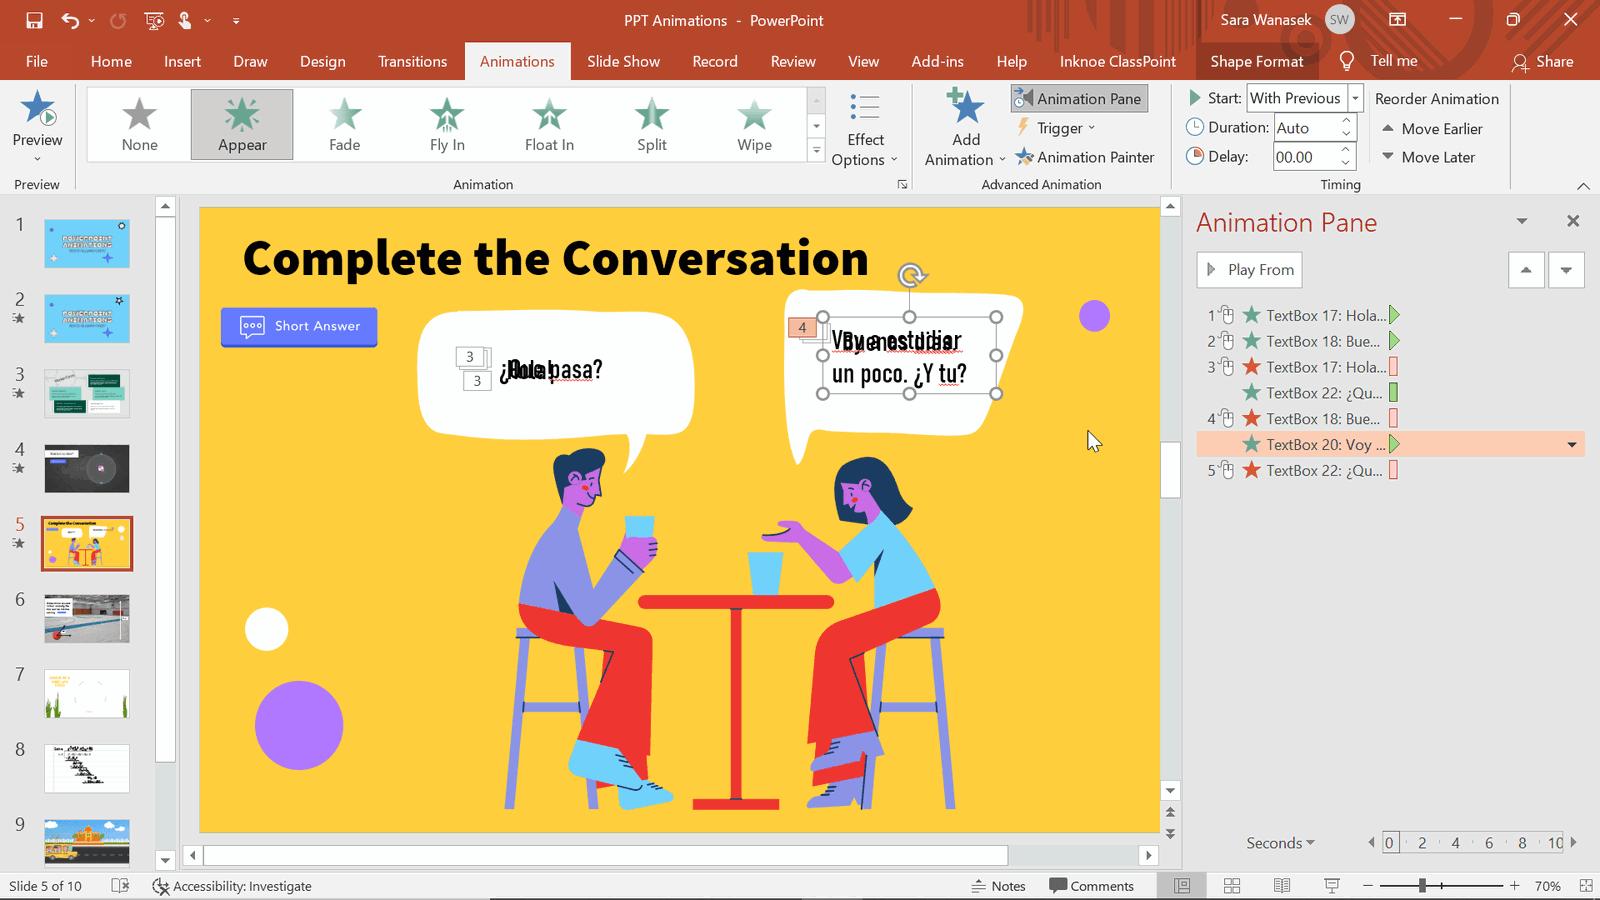
When all the animations are completed and set in the correct order, we can move the text to exactly where we want them. We moved our text right on top of one another so they would all appear in the same place in the speech bubbles.
Now, you can enter presentation mode and click through to see if the conversation flows as you would like!
Animation 5 & 6: Line & Custom Path
In addition to the Entrance, Emphasis, and Exit animations, PowerPoint also has a section of animations called Motion Path Animations . These animations allow your item to start in one location on your slide, then end in another.
This is a helpful tool to eliminate the need for students to mentally animate information themselves. Now, they can fully understand the motion, and focus more on the educational activity. This can be used for many different topics, and just for fun, but I used it above to help demonstrate a Physics problem. Here students must determine the initial velocity the ball will need to hit the ceiling.
How to Create a Motion Path Animation
Step 1: add motion path animation.
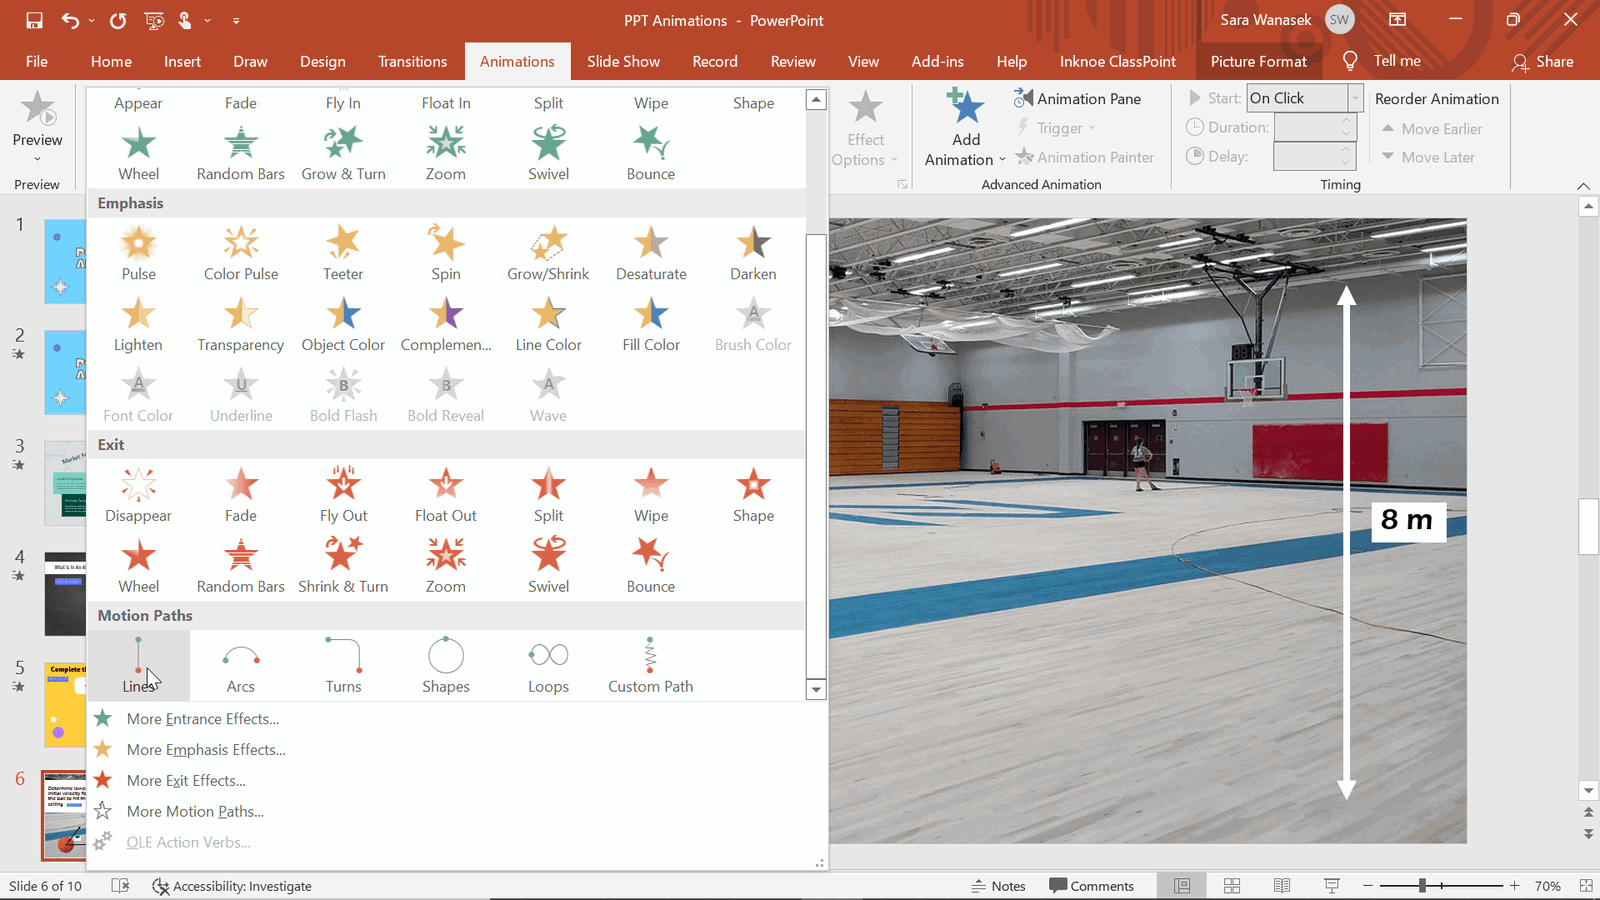
To show this movement of the ball, we will use two different motion path animations. Click on the ball and open the Animation choices. Scroll down until you see the Motion Path section. Select the Line option.
Step 2: Edit Effect Options & Placement
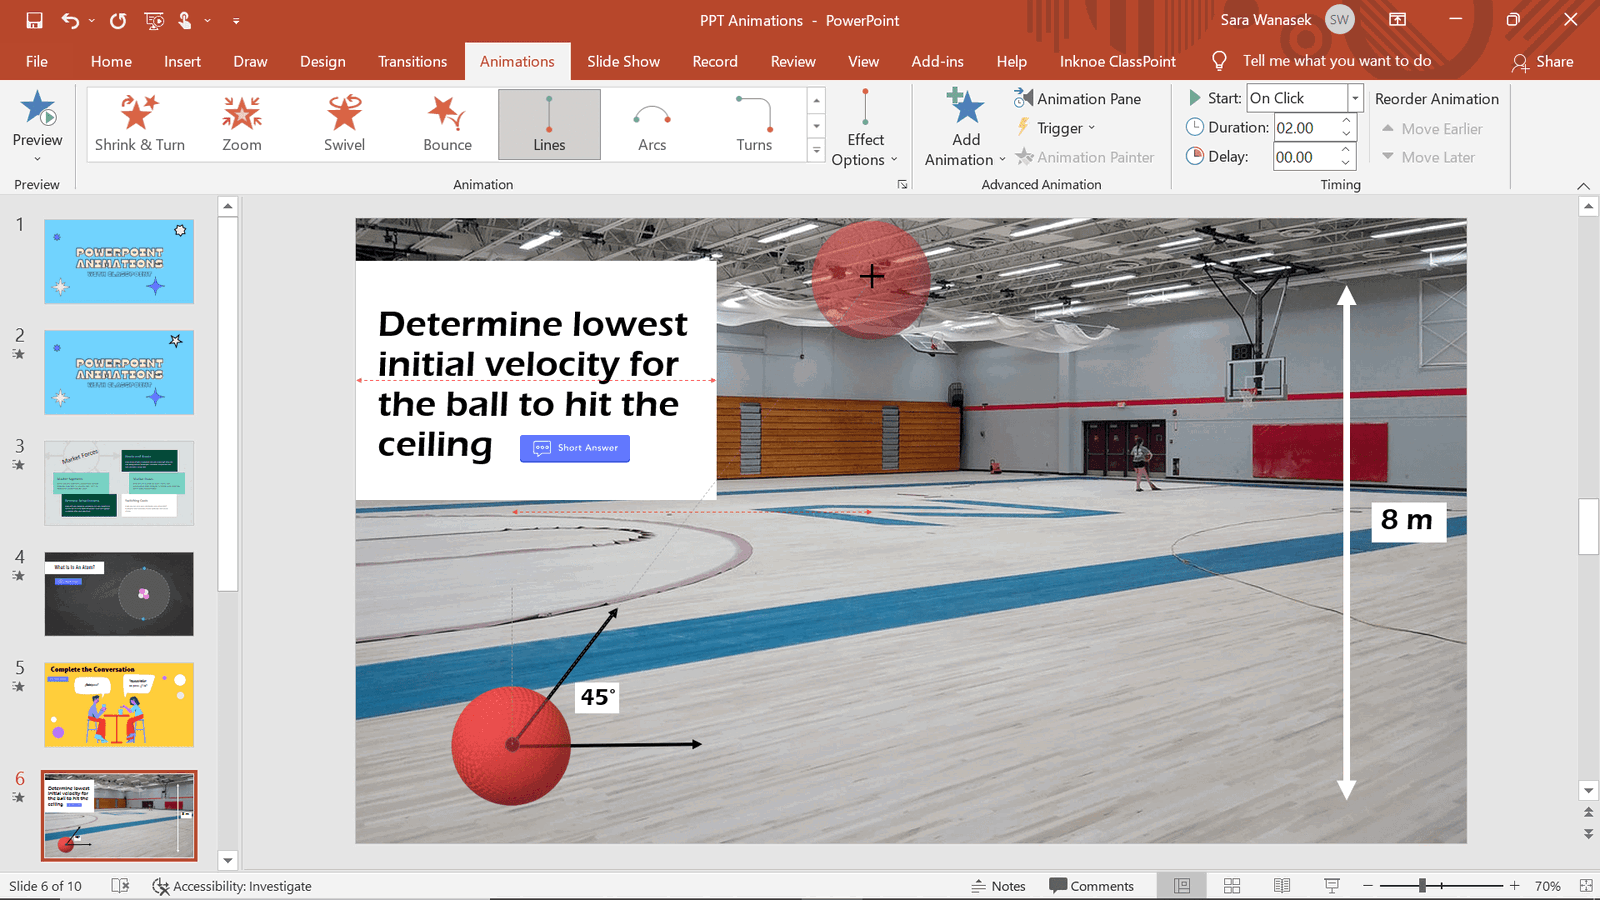
The default for the Line Motion Path is down, but since I want to animate the ball being kicked up, I changed the direction of the motion path. To do this, Click on the Effect Options button and select the Up option. Now the ball moves up, but it’s still not as high as I would like. To adjust to your desired height or location, click on the red arrow and drag it to your desired location.
To preview your animation as you are creating it, click on the animation star on the side of your current slide on the left slide preview panel. At this point, you should see the ball reach the ceiling.
Step 3: Add Custom Path Animation
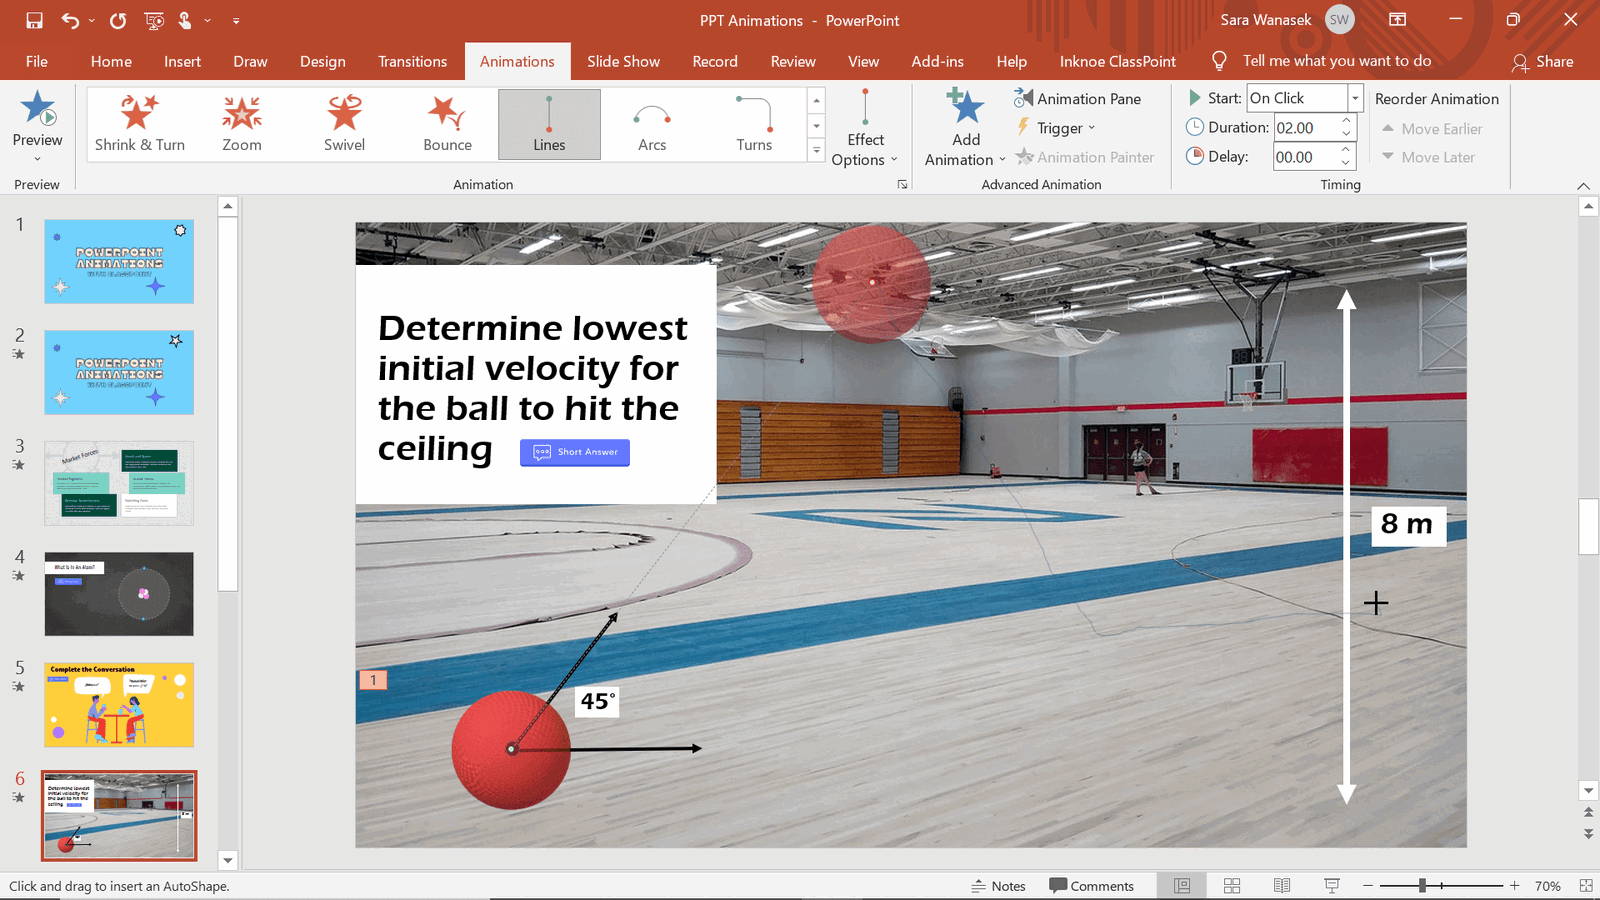
Now that the ball has reached the ceiling, I want gravity to pull it back to the floor. To make this happen, click on the ball, then the Add Animation button. Scroll down to the Motion Path animation and this time click Custom Path. This option allows you to draw a Motion Path anywhere on your slide.
To start, click the spot where the ball left off at the top of the slide, draw a line down to the floor and click to add in a stop. I added a ‘stop’ to make it more realistic by having the ball hit the side of the slide (or the wall!) To do this continue drawing a line over to the edge of the slide and click to stop one last time. To finish, click the ESC button to stop creating your path.
Step 4: Edit Animation Effects
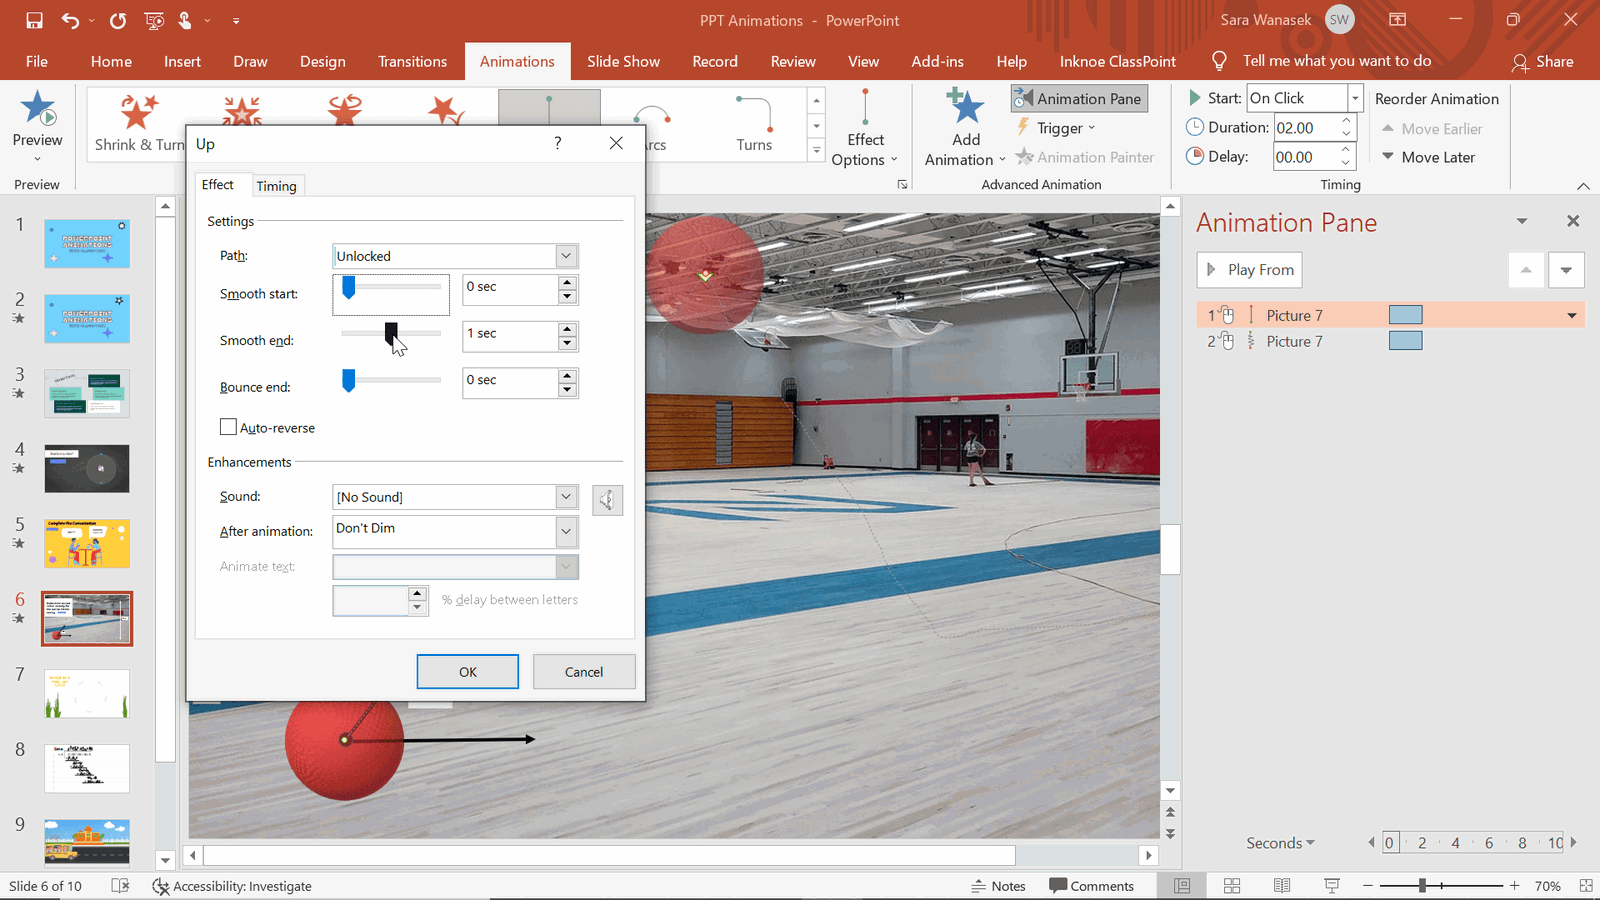
After previewing your animation, there might be a couple of changes you want to make. For example:
- Have the Custom Path Animation to Start After Previous .
- Remove the delay between transitions by right-clicking on the animations and opening the Effect Options . Bring the smooth start and Smooth end to 0.
After those changes, you can preview your animation again, and make any changes to the timing like we did in Animation 2.
Animation 7: Morph Transition
Morphing images is a great way to show changes or effects visually during a presentation. Morph Transition is not technically a PowerPoint animation – it’s a transition! But, the Morph Transition works similarly. This transition is a great way to add a bit of animation to an object as you switch slides. With the Morph transition and a bit of name changing, different images or text can be morphed into each other. This feature, Enhanced Morph , is a great way to add emphasis on changes that are happening, or show steps that affect each other.
In the example above, I have different images of each step in a frog’s life cycle. Instead of showing all at once, we can separate slide by slide to help students visualize this transition.
How to Use the Morph Transition
Step 1: create your first slide & duplicate.
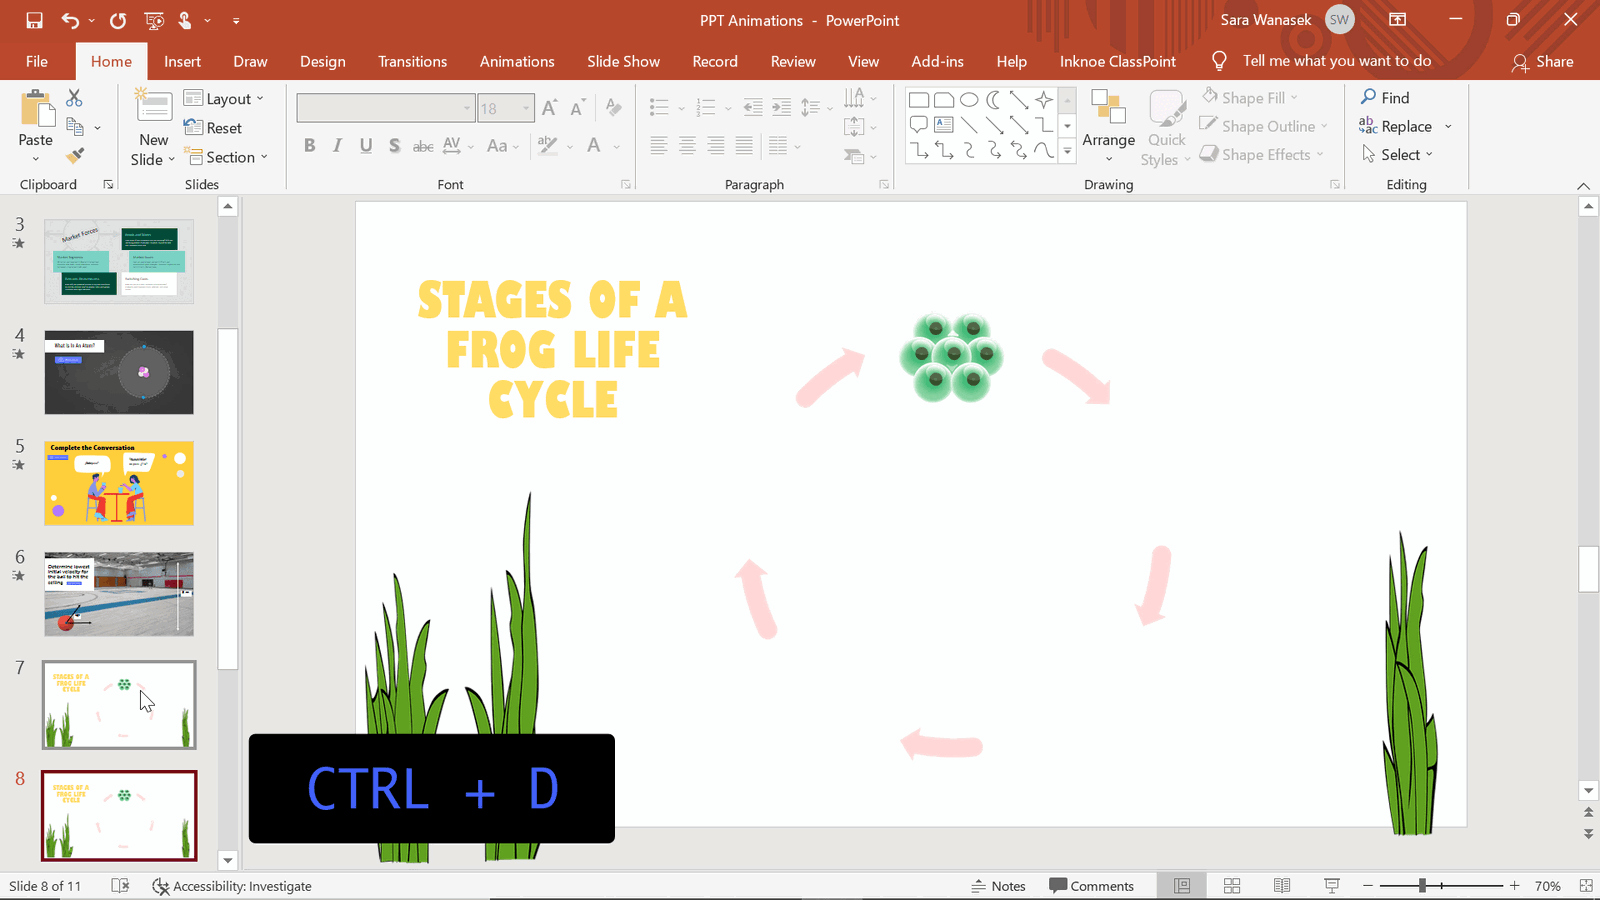
As this is a transition, not an animation, this process will take multiple slides to complete. Start with your first slide with the first image. Then duplicate the slide by right-clicking and hitting Duplicate , or CTRL + D , to continue with your phases.
Next, you can add in the next image of the cycle, and remove the first image in the second slide.
Step 2: Rename Your Images

For PowerPoint to recognize these two different images and morph from one to the other, the two images must have the same name. Open the Selection Pane from the Arrange drop-down menu.
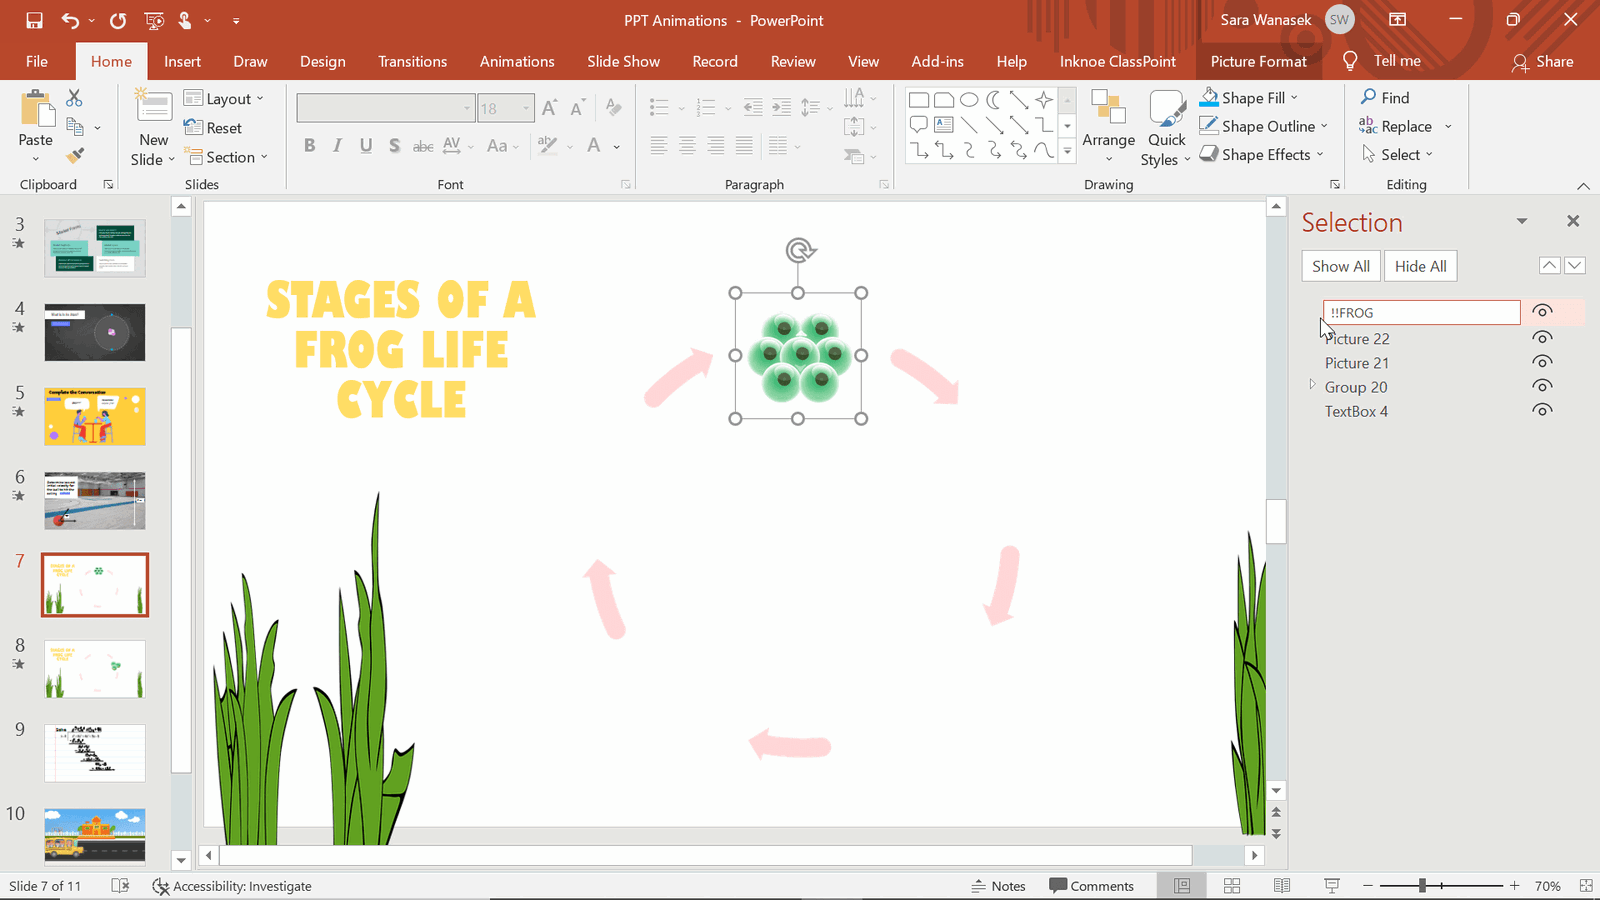
The Selection Pane shows the names of the objects on your slide. Select the image that you will want to morph to have the name highlighted in the Selection Pane. You need to rename this image and the image on the second slide so they match.
In the renaming process, you can name it anything you would like, BUT it must begin with two exclamation marks (!!). I have named ours “!!FROG” Now, copy this name, and go back to your next slide. Click on the added image and paste this same name in the Selection Pane.
Step 3: Add the Morph Transition
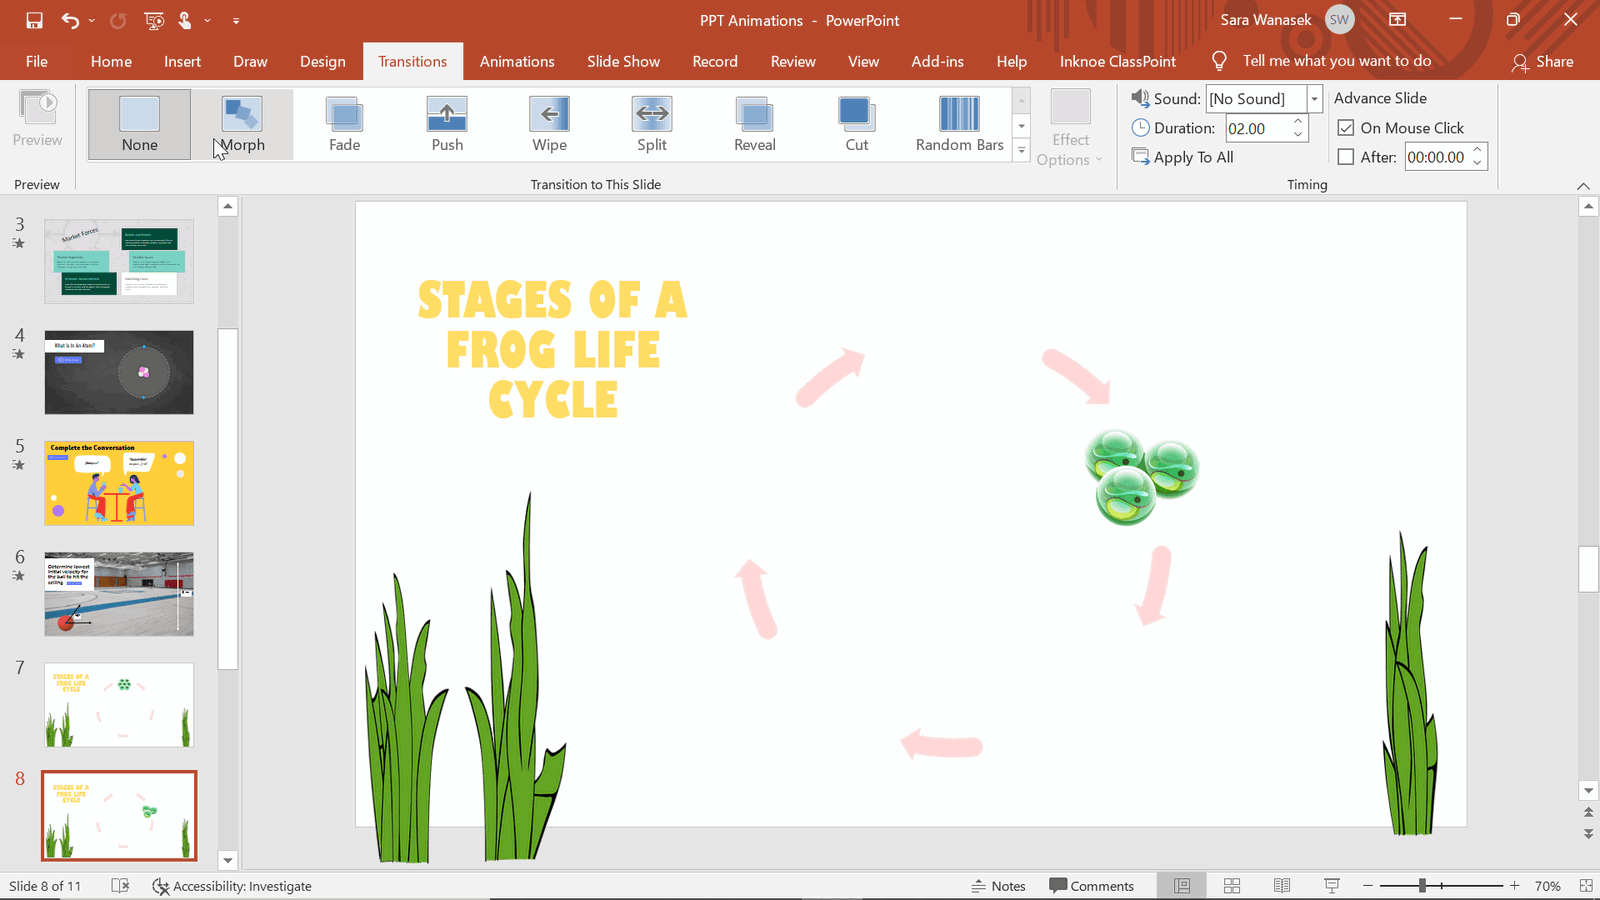
Now, that both images are named the same, you can add in your Morph transition.
Click on the second slide of your process, & in the Transitions tab in the PowerPoint ribbon, click on the Morph transition. You will see a preview of your transition and movement between the first two stages of your life cycle.
Step 4: Repeat for All Steps in the Cycle
Repeat the duplication and image renaming as needed.
Animation 8: Wipe
Our last PowerPoint animation suggestion is the Wipe animation. This one pairs wonderfully with the Drawing features of PowerPoint.
You may not have a touchscreen device to add annotations during your presentations with your students; however, with this simple step animation, you can create that expressive writing, drawing, or problem solving work flow similar to how you would if you were drawing and annotating live. Annotations can help bring focus, perspective, or understanding to certain areas of your presentation material.
In the above example, I used this Wipe animation + drawing for a Math problem. Maybe you have given your students time to work our the example for themselves and now it is time to go over it. Instead of just discussing, before you present, draw out the answer then add some animations. This way you can reveal step by step the problem to add suspense and answer any questions students have while the problem is being gone through.
How to Use Drawing with Animations
Step 1: add annotations to the slide.
Complete your annotations by going into the Draw tab, and writing out what you would like to appear on the screen. Read more information on the Draw tab and how to do this without a touch screen device.
Step 2: Add Animations
Think about the order you want your drawings to appear, then start by clicking on the first drawing and adding in the Wipe Animation.
Step 3: Use Animation Painter for Repeating Animations
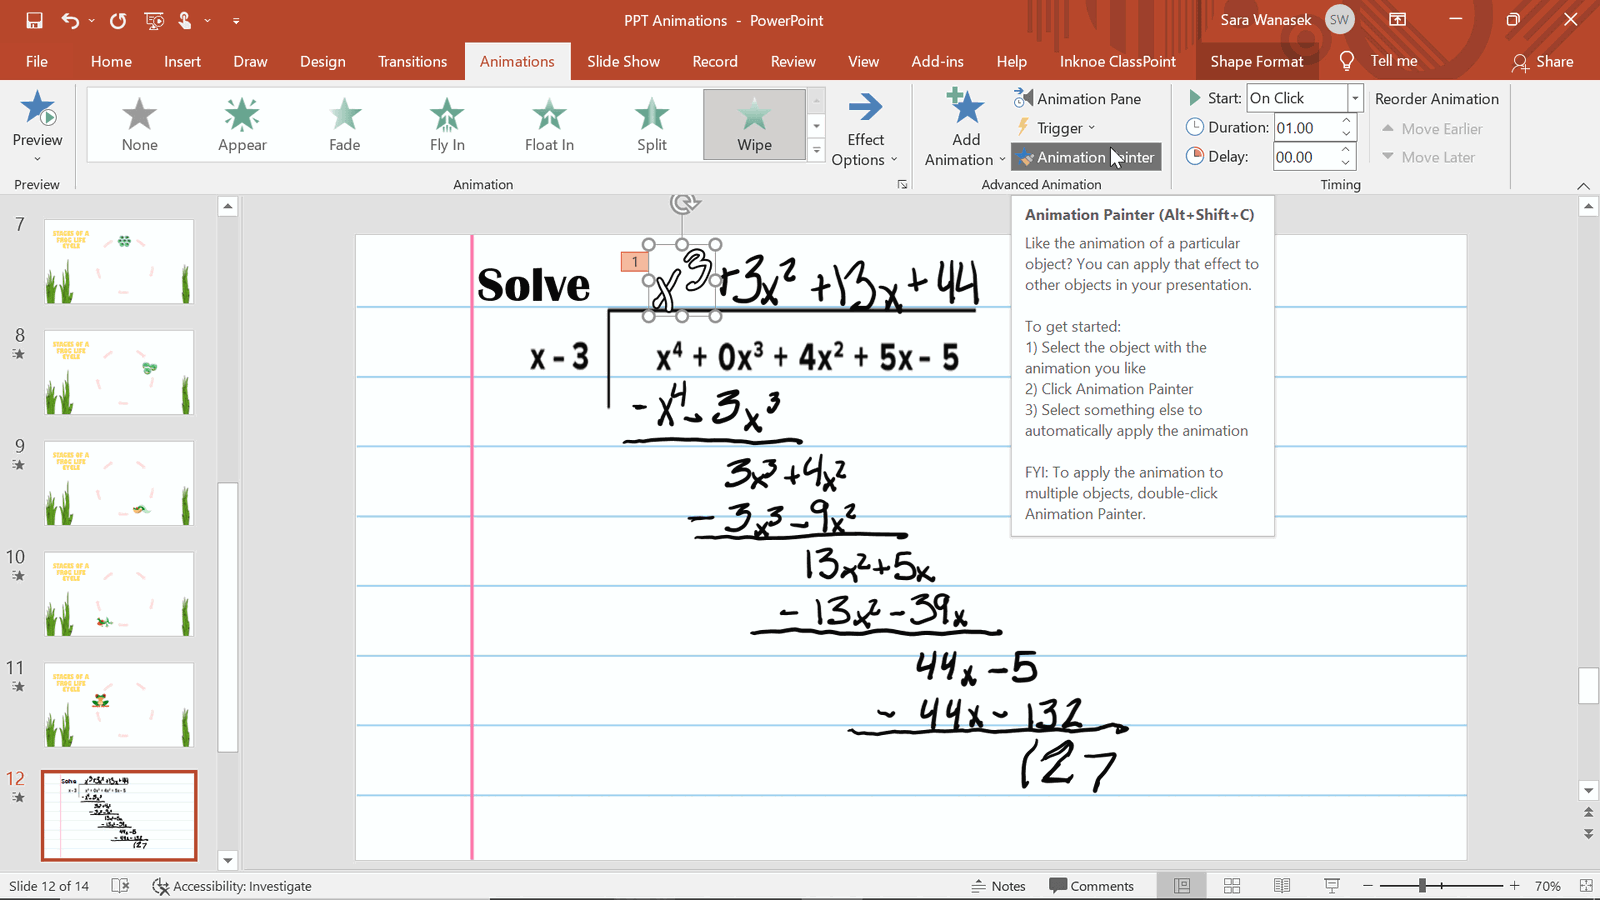
If all the steps are getting the same animation, use the Animation Painter. Similar to PowerPoints other Formatting Painter, this Animation Painter will copy the animations of one object and paste them onto another. This can save you lots of time!
Once all the animations are added, change any of the timing and give it a preview!
These simple eight PowerPoint animations can be quickly and easily (once you get the hang of it) added to any of your PowerPoint Presentations! And if you use animations, you are on your way to delivering more exciting, memorable, and engaging PowerPoint presentations.
For more tips on creating more interactive and engaging PowerPoint presentations, check out the articles below:
- Bitmoji Classroom In PowerPoint: What & How
- How to Create Interactive PowerPoint Presentations
- 5 Popular PowerPoint Add-Ins For More Engaging, Creative Lessons
- How to Better Annotate on PowerPoint Slides
About Sara Wanasek
Try classpoint for free.
All-in-one teaching and student engagement in PowerPoint.
Supercharge your PowerPoint. Start today.
500,000+ people like you use ClassPoint to boost student engagement in PowerPoint presentations.
60 Effective PowerPoint Presentation Tips & Tricks (Giant List)
Here's a PowerPoint presentation tips and tricks guide that takes you through how to make a good PowerPoint presentation.

The best PowerPoint presentations shouldn’t be remembered. Instead, they should fall into the background to support you and the message you’re trying to get across.
Unlike good PowerPoint presentations , bad PowerPoint presentations are a distraction. You may remember them, but not in a good way.
You’ve seen them before. They might have millions of lines of text. Or a disjointed flow to the slides. Even worse, some slides feature ugly photos and poor design that detract from the message you’re trying to get across. That can even hurt your credibility as a professional or speaker.

This article will take you from finding your initial topic to learning how to make a great PowerPoint presentation. Our guide covers everything in between so that you learn how to present a PowerPoint like a pro.
These Microsoft PowerPoint presentation tips and guidelines are organized into sections. So cut straight to the advice you need and come back when you’re ready for the next steps.
Guide to Making Great Presentations (Free eBook Download)

Also, download our Free eBook: The Complete Guide to Making Great Presentations . It’s the deepest resource for learning effective presentation skills for a PPT.
This eBook covers the complete presentation process. It takes the PowerPoint tips and tricks you learn in this article further. Learn how to write your presentation, design it like a pro, and prepare it to present powerfully. It’s another great source for presentation design tips.
Master PowerPoint (Free Course): 15 Essential Tips
This article is full of helpful tips so you can build a powerful presentation. You can also find more PowerPoint tips in this video lesson:
To learn even more about how to make a PowerPoint look good, review the huge list of tips below.
What Makes a PowerPoint Presentation Effective?
Knowing how to use PowerPoint and work within it quickly is helpful. But more important is making a good presentation that hits all your goals. A great PowerPoint presentation is:
- Prepared to Win . Research, plan, and prepare your presentation professionally. It helps you deliver an effective message to your target audience.
- Designed Correctly . Your visual points should stand out without overwhelming your audience. A good PowerPoint visual shouldn’t complicate your message.
- Practiced to Perfection . Rehearse your timing and delivery so that your points land as practiced with a live audience.
- Delivered With Poise . Present with a relaxed inner calm and confident outward projection. Give your audience warmth, excitement, and energy.
- Free From Mistakes . Avoid typos, cheesy clip art, and mistakes like reading directly from your slides.
Consider this your all-inclusive guide to how to make a good presentation. We’ll look at preparing your presentation and explore how to design it in PowerPoint. Plus, we’ll cover how to practice and nail your delivery successfully come presentation time.
We’ll also address what not to do in these tips for PowerPoint presentations—so you can sidestep any big mistakes. Now let’s dig into these tips for effective PowerPoint presentations.
Killer Presentation Preparation Tips to Get Started Right
Before even opening PowerPoint, start by addressing these things. These Microsoft PowerPoint tips and tricks will ensure that you’re prepared for your presentation:
1. Know Your Stuff
Your presentation isn’t about your slides alone. It’s about the message you want to get across. Before filling in stats, facts and figures, think about the narrative that’ll be discussed, why, and in what order.
2. Write It Out
Start in a Word or Google doc, and storyboard or script the entire presentation. This will give you an idea of how the information presented will flow and how viewers will see it in sequence. Learn the complete writing process .
3. Highlight What’s Most Important
A presentation covers the most crucial pieces only. Whatever you’ve been working on that led to this—a paper, a work project, a new product design—doesn’t need to be shared in its entirety. Pick key points and put the rest in an “Appendix” to refer to during the Q&A session at the end.
4. Know Your Audience
How you talk to a room full of medical professionals should be different from the way you address a room full of young entrepreneurs. Everything, in fact, is different: your topic selection, the language you use, the examples you give to illustrate points. The little bits of humor you include should be tailored specifically with your target audience in mind.
Understand your audience’s needs to create a successful PowerPoint presentation. Customize your content to meet their specific requirements.
5. Rehearse! (Yes, Already)
It’s never too early to get used to the rhythm of your presentation and take note of points you want to emphasize. While saying it out loud, you’ll start to develop a “feel” for the material. You’ll notice that some things work well, while others don’t and might need to be worked around.
6. Rewrite After You Rehearse
As you’re rehearsing your presentation, you’re bound to stumble over sections that don’t quite flow naturally. Instead of reworking your delivery, it might be time to consider the content and rewrite the areas that served as stumbling blocks.
“Editing is hard. ‘It’s good enough,’ is a phrase wannabes use. Leaders take editing seriously.” – Anthony Trendl
The most important part of creating a great presentation is the writing stage. The second most important stage is rewriting.
7. Share With a Friend
If the stakes are high for your presentation, it’s never too early to get feedback from those that you trust. Here’s an article that helps you collaborate as a team on a PowerPoint presentation. Get PowerPoint design tips from those that you trust when you collaborate.
Simple Tips to Design Your PowerPoint Presentation Better
Second only to you (the information you bring and how you present it) is your PowerPoint slides. If not designed well, a PowerPoint can be disengaging or distracting (regardless of the content quality). Here are some presentation design tips to make sure this doesn’t happen to you:
8. Keep Your Slides Simple
This is one of the most important PowerPoint presentation tips to follow when designing your slides. Keep in mind that less is more (effective.) A cluttered slide is distracting. It causes confusion for an audience: Which part of the slide should I focus on? Should I read the slide or pay attention to the presenter?
A simple, visually appealing slide will engage your audience, keeping them on track with your main points. Here’s an example of a simple slide that serves its purpose perfectly:

Minimalist slide templates like Nook can help you resist the urge to clutter your slides.
9. Limit Words on Your Slides
Piggybacking on the last point, less is more effective. If possible, avoid bullets altogether. Otherwise cut them to just a few simple words. The audience should be listening, not reading.
10. Use High-Quality Photos and Graphics
One of the most important tips for quality PowerPoint presentations is to use high-quality photos and graphics.
Earlier in this tutorial, you saw Envato Elements, an all-you-can-download service with PPT tips inside of templates. Those pre-built designs are a beginner’s best friend. They’re even better when paired with Elements’ unlimited library of stock photos .
People are more likely to take you seriously if your presentation is visually appealing. Users view attractive design as more usable. Similarly, they’ll view a more attractive PowerPoint as more effective.
11. Use Accurate and Relevant Charts and Graphs
Charts and graphs can also be distracting if they’re not used right. Make sure your information design is simple and clean so that the audience doesn’t spend the entire time trying to decipher what your X axis says. Learn more about PPT data presentation .
12. Use High-Quality, Fresh Templates
Have you seen the old PowerPoint template that looks like worn paper and uses ink splashes? Yeah, so has your audience. Templates can be distracting if they’re too basic or if the design feels dated. You need one with great design options.
Costs are always a concern. But when you use Envato Elements, you’ve got everything you need to create a great PowerPoint presentation . That’s thanks to the incredible all-you-can-download subscription package.
The best PowerPoint tips and tricks can hardly compare to the value of using a template while building your presentation.
On Envato Elements, there are thousands of PowerPoint design templates that are ready to use. Instead of designing a presentation from scratch, start with a template! Just add your specifics to the placeholders.

Templates like Galaxi are impressively designed and waiting for your slide specifics.
The best PowerPoint design tips save you time. And there’s no tip more powerful than this one: use a pre-built template . It helps you master how to present a PowerPoint without spending all your time in the app.
13. Choose Appropriate Fonts
Fonts are an important part of engaging your audience. Fonts and typography choices have a subconscious effect on viewers. They can characterize your company’s presentation and brand either positively or negatively. Make sure that you’re choosing fonts that are professional and modern.
14. Choose Color Well
Like font choice, colors cause specific subconscious reactions from viewers. Choosing an outdated color combination for your presentation will render it ineffective.
Below is an example of the Popsicle PowerPoint template , which has a modern presentation color choice:

The Popsicle PowerPoint template highlights how harmonized color palettes can create beautiful slides.
15. Clean + Simple Formatting Makes All the Difference!
We’ve got a full tutorial on how to make a good presentation slide . Give it a read through and review the accompanying video. Just remember, less is more. The focus is you and your message , not your slides.
16. Make Sure All Objects Are Aligned
A simple way to create a well-designed presentation is to make sure all items on a slide are intentionally aligned. To do this, hold down Shift and select all the objects you want to include. Then choose Arrange in the options bar and apply Alignment Type .
17. Limit Punctuation
This isn’t the place for exclamation points. Emphasize your points (while speaking). Don’t enlist punctuation to do this for you. (Leave these at home!!!)
18. Avoid Over-Formatting Your Points
This PowerPoint presentation tip is simple. There’s no need to have every word of every bullet point capitalized, or to have all your bullet points in title case. If possible, drop bullets altogether. Again, the simpler, the better!
Limit your text formatting, including reducing the use of bullets, underline, and other effects. Compare the before example on the left to the revised version on the right.

19. Combine Information With Graphics in PowerPoint
One of the most powerful presentation skills for PPT is using infographics. With the right type of visuals, slides come to life and reduce the text in favor of graphics.
Infographics help combine information with graphics. It’s easier to explain complex ideas when you use visual formats that are intuitive.
Practice Presentation Tips: Rehearse, Rehearse, Rehearse!
Delivery is probably more important than the actual content. Here’s how to become more aware of your own unique ticks, and how to present like a polished pro:
20. I’ll Say It Again, Rehearse!
Just do it. Again and again. Experiment with pauses, gestures, and body language. Practice around one hour for every minute of your speech.
21. Practice With a Timer
Consistency is key to an effective PowerPoint presentation. The timing should be similar (ideally the same) each time you rehearse. This one will especially pay off when it’s time to present in front of your audience.
22. Slow It Down
Many of the best speakers today intentionally speak slowly. You’ll have the chance to emphasize, appear more thoughtful, and make your information easier to digest.
23. Pause More Often
Like the prior tip, pausing more often allows your main points to be emphasized and gives time for information to sink in. You need to let key points breathe a little before rushing into the next section.
24. Record Yourself
Use your phone’s voice recorder. Assess and critique yourself. Consider:
- Are your pauses too short or too long?
- Are you speaking slowly enough? Too slow?
- When you’re nervous, does your voice get high like the mice in Cinderella?

It’s always weird to hear your own voice recorded; don’t stress it. Use this as a time to adjust.
25. Choose Three Focal Points in the Room
If you stare at the same spot (or even creepier, the same person) the entire time, your presentation will be ineffective (and awkward.) People will be distracted by you, wondering what you’re staring at.
Try this: pick three points in the room (typically: left, center, right). Take time to direct your delivery toward each physical focal point in the room. Also, focus on the center when making your primary points.
26. Vary Your Sentence Length
This makes you sound more interesting, and it’s easier for your audience to follow. Think short and punchy. Or go long and complex for dramatic effect.
27. Modulate!
Don’t speak in monotone for your whole presentation. Be conscious of raising and lowering your voice tone. Otherwise, people will tune you out, and you’ll come across like the teacher in Charlie Brown.
28. Practice in Front of a Mirror
What you look like is as important as how you sound. Pretend you’re having a normal conversation, and allow your hands to move with your speech to emphasize your points. Just don’t get carried away! (I’m thinking Brene Brown or President Obama , not your Aunt Jamie after a few gin and tonics.)
29. Use “Present Mode” When Rehearsing
When you finally are ready to hit the Present button in PowerPoint, make sure you use the Present Mode option. This allows you (and only you) to view extra notes about each slide—just in case you forget something!
30. Practice With New Audiences
If possible, try doing a few real live test runs as a webinar or even at a local Toastmasters organization to get some feedback from a live audience.
31. Engage the Audience by Asking Questions
There’s no reason that a presentation should be one-sided. Why not invert the format and ask your audience a question?
To learn how to create a slide that kicks off a Q&A, use this article . These PowerPoint design tips help you create an engaging and exciting discussion.
Helpful Tips to Step Up and Deliver Come Presentation Time
When the actual day arrives, there are only a few last PowerPoint presentation tips and guidelines to keep in mind:
32. Take a Deep Breath
Deep breathing is proven to relieve stress. It’s simple, and it’ll help you remain calm and in the moment, even up to the last minute before starting.
33. Lighten Up Your Mood
Tell yourself a joke or watch a funny video clip. Do this before the presentation, of course. Research concludes that happy people are more productive. More productive is more focused and able to perform better.
34. Remind Yourself to Take It Slow
When we’re stressed or nervous (or both), we tend to speak faster. Consciously, take yet another deep breath and remind yourself to take it slow!
35. Read the Room
Every presentation room has a temperature. It’s your job as a speaker to gauge it and tailor your presentation to it.
Here’s a great example. Layoffs are coming at a company, and you’re asked to speak to an audience. Even if the audience isn’t personally affected by the actions, you’ve got to consider the morale of the workforce.

Skilled speakers have a knack for reading the energy of the room and adjusting their presentation on the fly.
The last thing that group will want to hear is how strong the economy is and why the company is the best place to work. That doesn’t mean that you’ve got to align to their uncertainty, but don’t go too far against the grain while presenting.
Robert Kennedy III is a master of bringing energy and aligning a speech to the audience. Here’s his advice for adjusting:
“It can be hard to wake up a “dead” crowd but go for it. Most of all, don’t take their energy personally. Focus on serving them with every bit of your fiber then leave empty.”
36. Fake It ‘Til You Make It!
Go forward with confidence. If you act confident, you’ll start to feel more confident. Move slowly with grace, speak clearly, smile, wear something nice. You’ll appear confident to all attendees (no matter how you feel internally).
PowerPoint Presentation Tips and Tricks to Help Avoid Mistakes (What Not to Do)
Most importantly, focus on what you can do to make your presentation better. There are a few important things not to do that we’ve got to address. Here are a handful of PowerPoint presentation tips and tricks to help you avoid missteps.
37. Stop With the Sound Effects
Sound effects are distracting and outdated. In most cases, avoid them. Add audio or music to your presentation to inject interest or highlight an important point, but it’s something to take extra care with. If you insert audio, then make sure your use really connects with your audience and has a fresh approach. Otherwise, it’s best to leave it out.
38. Don’t Use Flashy Slide Transitions
Again, this is distracting and outdated. Use transitions and subtle animations in your PowerPoint presentation. But you need to take care and do it right .
39. Beware of Clip Art
This PowerPoint presentation tip shouldn’t even have to be said. But please, please don’t use clip art. Use professional graphics instead.
40. Don’t Be Afraid to Be Afraid
The fear of public speaking is a real one. Many beginners think that if they’re feeling nervous that a presentation won’t go well or succeed. That might lead them to cancel the presentation.
Here’s a tip from expert Sandra Zimmer, who leads The Self-Expression Center on conquering your fears before you take the stage:
“Get out of your head and into your body. I do this through a grounding exercise that really works to calm nerves and bring you present in the moment.”
If you think that public speaking fears aren’t normal, you might never give your award-winning presentation. So don’t be afraid to be afraid, and acknowledge it’s part of the process!
41. Don’t Read Directly During Your PowerPoint Presentation
If you spend your entire presentation looking at the screen or your note cards, you’re sure to lose your audience’s attention. They’ll disengage from what you’re saying, and your presentation will fall flat.
Reading from your paper or screen also makes it look like you’re not prepared. Many people do it, but no one should. As a general rule, only present something you know well and have, at least mostly, memorized the main points of.
42. Don’t Miss Out on PowerPoint Customizations
Many new PowerPoint users often make significant mistakes when using Envato Elements designs.
The best way to see how to make a good presentation PPT is to start with designs from others. That means using a template, but that doesn’t mean you can’t customize them!

Don’t forget that PowerPoint templates are infinitely customizable. Think of them as guides with built-in presentation design tips.
To see more presentation tips that show you what not to do, make sure to check out our guide .
Work in PowerPoint More Effectively (Tips & Tricks to Level Up Your PPT Skills)
These PowerPoint tips will help you get the most out of the application to level up your next presentation. Let’s dive in.
43. Use the Visual Guides
When you’re designing your next PowerPoint presentation, it helps to create a sense of visual rhythm. Slides that have objects aligned and centered are more likely to resonate with an audience.
44. Use a Few Animations (Tastefully)
Animations in effective PowerPoint presentations are a slippery slope. We’ve all sat through presentations where there were so many objects in motion that it was easy to lose focus on the key ideas in the presentation.
But that’s why animations get an unfairly bad reputation. Use animations to create motion and hold an audience’s attention. Use them sparingly and on key elements on your slide, and you’ll capture that attention properly.
45. Stage Key Content With Animations
You just learned that animations should avoid being distracting. But there’s an important principle to using animations properly. It’s called staging content.
Staging content means that the content appears step by step. There’s nothing worse than overwhelming an audience with all your content at once. But when you stage content, bring it on step by step.
Take it from presentation pro Suzannah Baum :
“If you’re sharing a slide with lots of different points on it, using the animation to reveal those points one at a time is a way to keep the presenter’s content flowing smoothly.”
For more animation presentation tips and tricks, follow our guide .
46. Add a Video to Your PowerPoint
When you’re sharing a big idea in your presentation, it helps to share your perspective from a few different angles. Adding a video to supplement your content can do just that. Luckily, it’s easy to add and embed a YouTube video in your next PowerPoint presentation.
47. Add Charts & Graphs
Charts and graphs can help you tell stories with data. It’s easy for an audience to zone out when you throw a big data table or set of statistics at them.
instead, convert those to charts and graphs. Try out our tutorial to learn how to edit those graphs.
48. Build Your Own Infographics With SmartArt
Earlier in this tutorial, we gave you one of my favorite PowerPoint design tips: use infographic templates.
Here’s another. One of my favorite PowerPoint features is SmartArt, which allows you to build infographics right inside the app.
You don’t have to use another graphic design app like Photoshop or Illustrator to add visuals. Instead, try out SmartArt to help you build graphics that are easy to update.
49. Use Presenter View
Remember that when you use the PowerPoint, you’ re the presentation. The slides are just there to reinforce what you’ve got to say and support your speaking points.
That’s why I always recommend using Presenter view. More often than not, you’re going to have several displays. Presenter view shows your content on your screen, while your presentation is displayed on another screen.
50. Track Your PowerPoint Changes
One of my favorite PowerPoint design tips is to collaborate. Those who know you best will suggest compelling changes that are sure to help you succeed.
As you start collaborating on your presentation, it helps to keep track of proposed and included PowerPoint changes. Use this article to track changes made by others.
10 More Advanced PowerPoint Tips & Tricks
Really need to wow an audience with a good PowerPoint presentation? Give these tips a try to make an unforgettable impression:
51. Engage With an Interactive Quiz
A good PowerPoint presentation gets your audience involved. One of the best PowerPoint tricks is to do that with a quiz. By engaging audiences, a quiz makes your slides memorable.

By adding trivia, you’ll see how to present a PowerPoint in a way that people will love. Channel your inner game-show host today. MIDTEST is a good PowerPoint presentation with quiz slides.
52. Illustrate With Custom Image Masks
One of the top PowerPoint tips is to illustrate your slides. But you can go beyond simple, rectangular images on each slide.

The Burte template is full of PowerPoint tricks , including custom image masks. Image masks shape photos into unique works of art. And thanks to premium templates, you can style photos just like this. Masks overlay your photos onto geometric shapes, instantly elevating your style.
53. Print Handouts With Extra Notes
Wonder how to give a good presentation PPT that audiences will remember? Give them a piece of it to take home.
PowerPoint makes it easy to print handouts with room for notes on the page. This way, audiences can keep copies of your slides, along with their own notes. This is the perfect way to ensure everyone engages with and retains your content.
54. Make Bulk Edits With Master Slides
When you think about how to present a PowerPoint, consider your branding. That means keeping your logo front and center in the eyes of an audience. But if you’re working with a lengthy slide deck, this could seem daunting.
That’s where master slides come in. They’re common in premium layouts, and they’re a leading example of presentation skills for PPT. Master slides let you make bulk edits fast.
55. Shrink File Sizes for Sharing
Many of the top presentation tips involve making your slides more accessible. Often, that involves sharing them with audiences online.
You’ll often find that email clients and cloud services limit the size of files that you share. This can be a problem with large PPT slide decks. But there are a few quick steps you can take to reduce PPT file size. Cut graphics, scale down photos, and more.
56. Map Processes With Flowcharts
As you consider how to do a good PowerPoint presentation, think of ease of understanding. After all, you’re trying to explain something to your audience.

The Flowcharts in Infographics template seamlessly illustrates ideas and processes. A flowchart maps out a process in a visual way. Instead of resorting to endless narration, try a quick illustration like this. It saves you time and effort, and your audience is sure to thank you.
57. Use Brand-Specific Colors
Using presentation skills for PPT helps form an association between your message and branding. There’s no better way to do that than with your brand colors.
PowerPoint makes it easy to change color themes, adding your brand colors and logo to each slide. This is one of the top PowerPoint tricks for marketing presentations.
58. Build Social Media Posts in PPT
A good PowerPoint presentation doesn’t have to be shared through a projector. Use the app and templates to build amazing illustrations to use anywhere.

A template like Soffee helps you learn how to present a PowerPoint easily with a pre-built design.
Try using PowerPoint to create social media posts. It helps you engage with your audience, with no need to design custom layouts from scratch.
59. Be Industry-Specific
One of the top presentation tips in 2024 is to be industry-specific. That means avoiding generic layouts and choosing something more customized.
This offers two key advantages. First, you save time by having layouts built for you. Second, you gain design inspiration for your specific topic. Themed templates are truly the best of both worlds.

The Medical and Health template is a good PowerPoint presentation with a set theme.
60. Design for Online (Virtual) Sharing
Last but not least in our list of PowerPoint tips comes virtual presenting. More and more often, slides will be shared with online audiences around the globe.
Why not design your slides for that very purpose? And then learn how to share flawlessly with a global team? It’s one of the top presentation tips for 2024. Embrace it today.
More Great PowerPoint Tutorial Resources
We’ve built a resource for Microsoft PowerPoint that you’re sure to want to try. It includes countless PowerPoint tips and tricks. It’s called How to Use PowerPoint (Ultimate Tutorial Guide) and has all the PowerPoint design tips you need.
Discover More Top PowerPoint Template Designs From Envato Elements for 2024
You’ve just seen our favorite powerful PowerPoint presentation tips and guidelines to help you improve your speaking. We’ve also mentioned Envato Elements, an incredible all-you-can-download source for top PowerPoint designs .
Here are five of the best PowerPoint templates that you can use to create your best presentation yet:
1. Galaxi PowerPoint Template
Blast off to success with the help of this PowerPoint template! Think of the pre-built slide designs as pro PowerPoint design tips. They’re built by professional graphic designers. All the popular and modern slide styles that are perfect for your next presentation. Use Galaxi’s five styles and 30 designs to create a great presentation.
2. Masmax PowerPoint Template

We selected templates for this article that match the PowerPoint tips and tricks provided. Masmax fits the bill perfectly across its 234 unique slide designs. These slide designs are sure to align with the latest in design expectations.
3. STYLE Multipurpose PowerPoint Template V50

Style is subjective, but we can all agree that this template is stunning! The light and airy slide designs are built with fashion-focused designs in mind. But that doesn’t mean that it’s not perfect for most presentations. When learning to present a PowerPoint, remember that templates can be customized to suit your purpose.
4. Peachme Creative PowerPoint Template

Peachme has image-focused slides with splashy designs. The slides are colorful and perfect for a modern presentation. Don’t worry about remembering all the PowerPoint design tips because they’re included in the pre-built slides. Use Peachme’s designs for your presentation today.
5. Buizi Office Building Rent PowerPoint Template

Buizi markets itself as a real estate focused template. It’s ideal for that purpose because of the minimal, image-focused slide designs. But that also makes it a perfect choice for presentations in many fields.
We’ve just scratched the surface of PowerPoint design tips with these five options. Here are many more, bundled inside of the best roundups on Envato Tuts+:
How to Build a Good PowerPoint Presentation Quickly (In 2024)
You’ve already seen effective presentation skills PPT techniques. But you may be wondering exactly how to do a good PowerPoint presentation. It only takes a few clicks. Let’s learn how in just five steps.
For this mini-tutorial, we’ll use the Enjoy PowerPoint Template from Envato Elements. You’ll see that it’s a beautiful template that helps you learn how to present a PowerPoint by giving you every object and layout you need.

Let’s get started:
1. Choose Your Slides
As you can see, a template like Enjoy has dozens of unique slides inside. The key to how to give a good presentation PPT is to choose only the slides that you need.

One of the best PowerPoint tricks is to start by selecting slides you wish to use from your template.
In PowerPoint, scroll through the sidebar on the left to view different slide layouts. Right-click and choose Delete to remove unwanted designs. Plus, you can click and drag slide thumbnails to reorder them in the deck.
2. Add Text
Consider how to do a good PowerPoint presentation without investing a ton of time. That’s where premium templates come in.

One of our top presentation tips when working with a PPT is to lean on the pre-built text boxes for your content.
To add custom text, simply click and select the contents of any text box on your slide. Then, type in your own words. Repeat as needed throughout your slide deck.
3. Customize Fonts
With text selected, it’s easy to customize fonts on each slide. Find the Font section on PowerPoint’s Home tab. From there, you’ve got a variety of dropdown options.

Another of our top tips for presentation tricks is to use a custom font setting in your template.
Click to change the font, font size, and more. You can also use the buttons on the left to add bolds, italics, and more.
Need more custom font styles? As an Envato Elements subscriber, you’ve got instant access to thousands of custom fonts . Use them in your presentation with ease.
4. Insert Images
Slides like this one contain an image placeholder. That’s another advantage found only with premium templates. These make adding images a breeze.

Add images to your PPTX template for more visually interesting slides.
To get started, find an image file stored on your computer. Then, drag and drop it over the placeholder. PowerPoint will import it, sized and scaled for a perfect fit.
5. Change Colors
One of the top effective presentation skills is changing shape colors. This helps you control the look and feel of each slide.

With a shape selected, find the Shape Format tab on PowerPoint’s ribbon. Then, click on the Shape Fill dropdown. You’ll see a color chooser menu appear. Click on any thumbnail to apply it to the shape or browse through the Gradient and Texture options.
Start Putting These PowerPoint Presentation Tips & Tricks Into Use Today!
Learning to write, design, and present a PowerPoint presentation is an invaluable skill, no matter where you use it. If you’re a good communicator of important messages, you’ll never go hungry.
Luckily, improving PowerPoint presentations isn’t as hard as it seems. Follow these tips for PowerPoint presentations to design and deliver with greater confidence.
Remember: Less is more (effective) . Use PowerPoint presentation templates for better design and more effective visual impact. And you can customize a PPT template quickly , with the right workflow.
Related Articles
Microsoft 365 Life Hacks > Presentations > 7 tips for creating and presenting a webinar
7 tips for creating and presenting a webinar
Creating a webinar presentation requires a blend of technical and content creation skills. A well-crafted webinar should educate your audience and keep them engaged throughout your presentation’s runtime.

If you’re nervous about an upcoming webinar presentation or just looking to hone your craft, use these seven tips to create a webinar that captivates and communicates effectively.
1. Plan your content meticulously
The foundation of a good webinar presentation lies in its planning. Start by defining the purpose of your webinar and thinking about your target audience . What key message do you want your audience to take away from your presentation? Once you have a clear objective, outline your content to build a coherent narrative. Ensure that each slide progresses logically to help your audience understand and retain the information. Here’s how to get started on the content planning phase:
- Identify your main message.
- Outline the structure.
- Create engaging and relevant content.

Tell your story with captivating presentations
Powerpoint empowers you to develop well-designed content across all your devices
2. Design for clarity and engagement
Visuals play an important role in webinar presentations. Use high-quality graphics, readable fonts, and a cohesive color scheme to make your slides aesthetically pleasing and easy to digest. Interactive elements like polls, quizzes, and question-and-answer sessions can also enhance engagement and make your webinar more interactive. Design an engaging webinar with these tips:
- Use clear, concise visuals.
- Incorporate multimedia elements.
- Engage with interactive tools.
3. Master the technical aspects
Technical glitches can disrupt even the best webinar presentation. Before you present the real deal, rehearse your webinar to get comfortable with the tools and platform you’ll be using beforehand. Have a backup plan for technical failures to maintain professionalism should anything go wrong. Follow these tips to master the technical aspects of your webinar:
- Test your equipment.
- Rehearse using the webinar platform.
- Prepare for technical issues.
4. Deliver with confidence and clarity
Learning how to give a webinar involves finding the correct speaking voice and cadence for your presentation. Nail your webinar delivery with these tips:
- Practice your speech.
- Use pauses effectively.
- Pay attention to your inflection and tone.
5. Engage your audience throughout
To keep your audience interested, interact with them throughout the webinar. Ask questions, encourage participants to chat, and address comments or questions as they arise. This interaction not only makes the session livelier but also helps gauge audience understanding and interest. Promote audience participation during your webinar with these tips:
- Encourage questions.
- Use live polls.
- Address audience feedback directly.
6. Follow up after the webinar
The end of your webinar shouldn’t be the end of your engagement. Follow up with attendees via email with a thank you note, additional resources, or a survey to collect feedback. Here are some different ways you can follow up with your audience:
- Send thank you emails.
- Provide additional materials.
- Collect feedback through surveys.
7. Continuously improve
Use the feedback you received and your own observations to improve the way you deliver future webinars. Use these tips to refine your webinars going forward:
- Review feedback.
- Adjust content and delivery.
- Practice continuously.
By following these guidelines, you can create a webinar presentation that not only delivers your message effectively but also keeps your audience engaged and responsive. Think of each webinar as an opportunity to improve your skills and c onnect with your audience over a shared interest and you’ll make a lasting impression.
Get started with Microsoft 365
It’s the Office you know, plus the tools to help you work better together, so you can get more done—anytime, anywhere.
Topics in this article
More articles like this one.

How to introduce yourself in a presentation
Gain your audience’s attention at the onset of a presentation. Craft an impressionable introduction to establish tone, presentation topic, and more.

How to add citations to your presentation
Conduct research and appropriately credit work for your presentation. Understand the importance of citing sources and how to add them to your presentation.

How to work on a group presentation
Group presentations can go smoothly with these essential tips on how to deliver a compelling one.

How to create a sales presentation
Engage your audience and get them interested in your product with this guide to creating a sales presentation.
Everything you need to achieve more in less time
Get powerful productivity and security apps with Microsoft 365

Explore Other Categories
5 Video Presentation Techniques for Maximum Impact
Senior Marketing Manager at Loom

Traditional slideshows can be a snooze-fest. You know, the kind where the people read aloud the text on the slides verbatim while you're also reading the same text yourself.
The flood of information and monotonous narration don’t help their case either.
How will you transform your lackluster, one-way presentations into captivating experiences that leave a stronger impact on your audience?
The answer is simpler than you think: video presentations .
Ready to ditch the dull and embrace the dynamic? Learn five techniques to create video presentations that enthrall your audience and learn how to record them.
The power of video presentations
Video presentations aren’t just a fancy way to show off your tech skills. They’re a powerful way to interact with your audience and leave a lasting impression.
Think about all the times you zoned out during a PowerPoint presentation with endless paragraphs and bullet points. Video presentations serve as an antidote.
So, what really sets video presentations apart?
They grab attention like nothing else. Research shows that presentations with video get 32% more engagement . People are likelier to watch and interact with a video than stare at a static slide.
It’s not just about getting more people to watch your presentations. Videos also boost understanding and retention.
As they say, “A picture is worth a thousand words.” It turns out that a video is worth even more.
The same study revealed that presentations with videos embedded had a 37% longer average reading time. The data shows that video presentations keep people around longer to absorb your message.
How to record a video presentation with audio and video
Video presentations are staples in business and education.
Whether used as video messaging for internal communications , client-facing pitches, tutorials, intros to your webinars, or for onboarding new employees, presentations offer a dynamic way of presenting information.
Luckily, screen recording tools like Loom are now making this process easier than ever before.
You don't need to buy fancy mics or wrestle with clunky presentation slides. You just have to hit record, make some simple edits, and share your video presentation with as many people as you want with a single click. Anyone can create a good video presentation with a bit of practice. Plus, Loom’s video editing tools make it easy to trim and polish your presentation.
Here’s a quick step-by-step overview of how to record a video presentation with audio and video using Loom:
Step 1. Prepare your presentation material
Before you sit down to record, be prepared with your notes, script, or any props or visual aids you might need. At the same time, make sure you choose a quiet, well-lit environment to ensure excellent audio and video quality.
Step 2. Launch Loom
To capture your Mac or Windows screen, open the Loom app on your desktop or use the Chrome extension. If you’re using your mobile for screen recording , you can install Loom’s mobile app.
Also, if you plan to capture:
Google Slides: You can use Loom’s Chrome extension .
PowerPoint, Keynote, or Canva slides: Install the desktop app to capture yourself along with the slides.
Whatever device or computer system you use, you can download and install the Loom app within minutes.
Step 3. Select recording mode
Choose whether you want to record your screen, webcam, or both. If you have slides, select screen and webcam to capture both your presentation and your face. Your face will appear on the screen in a cam bubble, as shown here.

You can also choose to record only your screen or the entire desktop.
Step 4. Start recording
Finally, click the “Start Recording” button.
Watch Loom’s own training video on video recording best practices.
Step 5. Begin your presentation
Deliver your presentation as you would in person, and remember to make eye contact with the camera.
Step 6. Review and edit your presentation video
After stopping the recording, Loom automatically uploads the video file to your Loom account. You can trim the video, add a call to action (CTA), or make other edits directly in Loom’s video editor.
Where some video presentations fall short
Even well-intentioned presentations can sometimes miss the mark. Here are some areas where your video presentations might be falling short:
Lack of engagement: Presentations are a two-way street. If you don’t build in opportunities for audience engagement elements like Q&A, live feedback, polls, and even simple interaction, you’re missing out.
Information overload: Too many key points covered in one presentation can overwhelm viewers.
Technical glitches: Double-check your equipment before the final presentation. Technical glitches like a frozen screen or a microphone cutting out can derail even the best-prepared presentation.
Lack of personalization: What’s the point of the presentation if your tone and message don’t resonate with the audience? Consider your target audience and adjust your presentation style accordingly. For example, a video for new hires might need a different tone and content than one for senior executives.
Considering these nuances and implementing a few interactive elements will help you create an engaging video presentation.
5 techniques for creating great video presentations
Technique 1: engaging storytelling.
Viewers crave something more than just data. They want a story.
Stories resonate powerfully because they tap into your emotions, creating a connection that facts alone can't achieve.
There’s science behind it. When you hear a story, your brain releases oxytocin , which increases trust and positive emotions. Stories also activate multiple brain parts, making them more memorable than isolated facts. In a world where attention is scarce, stories capture and hold it.
So, how do you capture your audience with engaging storytelling? Here are some tips:
Find your narrative arc: Every good story has a beginning, middle, and end. Think of a classic hero facing obstacles, overcoming challenges, and emerging as the victor. Your video presentation can follow a similar arc, even if the hero is your product or service.
Evoke emotions: Identify your target audience to discover what type of content resonates with them. Based on your research, add emotional moments—either funny or thought-provoking—to catch your audience’s attention and create a lasting impact.
Build conflict: Before you start pointing out the solution, introduce the problem that needs solving, the challenge that needs overcoming, or a question that needs answering.
Show, don’t just tell: Talking doesn’t have the same effect as showing the problem your product solves. Use screen recording tools like Loom to demonstrate the problem and its solution firsthand. This helps the viewer appreciate the real value of your product.
Apple’s product launches are an excellent example of engaging storytelling.
They don’t just point out features, they weave a story and paint a picture of how Apple devices will enrich your daily life.
Technique 2: Visual impact and design
Remember those “wall of text” slides? The clipart that looks like it’s from the 90s?
While these types of presentations do the job, it’s worth noting that people process visuals faster than text. A visually appealing video presentation will endear you to your audience and engage them better.
According to research by Robert Horn at Stanford University, actions and visuals make written information 70% more memorable .
Clearly, incorporating visuals into your presentation isn’t just about aesthetics. It’s also about making your message stick.
Here are some tips to help you create visually stunning presentations:
Use high-quality videos and images. High-resolution visuals make your presentation more appealing and easier to grasp. If you’re recording your screen, invest in a good-quality screen recording tool to create polished and professional presentations.
Incorporate data visualization. Use charts, graphs, GIFs, and infographics to present data in an easily understandable manner.
Leverage color psychology. Pick a color combination that aligns with your brand image and messaging. For example, blue evokes professionalism and trust, while orange conveys energy and excitement.
Choose fonts wisely. Typography also affects how your presentation appears visually. Sans serif fonts like Helvetica and Arial are clean and modern, while serif fonts like Times New Roman and Georgia add a touch of sophistication.

Incorporating these tips makes your presentations both visually appealing and more effective in getting your point across.
Technique 3: Effective use of audio elements
You’re watching a National Geographic documentary. It features sweeping aerial shots of the sun-drenched plains of the Masai Mara, close-ups of exotic wildlife, and evocative narration.
But it’s not just the visuals that hold you spellbound. It’s the sound of the rustling leaves, the leap of the gazelles, the gentle river flow, and the commanding voice of the narrator. The background music ties it all together, transporting you into the experience.
While visuals and text capture attention, audio completes the experience by evoking emotions and reinforcing your message.
Want to create a similar immersive audio experience for your presentation? Here are some things to consider:
The voice-over should be crisp and clear. There are two ways to record crisp, clear voice-overs. One, you can invest in a good microphone. Or, you can record your screen with audio like Loom.
Add strategic sound elements. Add background music that matches your content and complements your messaging. In between your presentation, add sound effects that emphasize key points and transitions.
Embrace silence at strategic moments. A well-timed pause can help you create anticipation or emphasize a point. A pause before you move forward also allows the previous message to sink in.
Make sure you blend all these audio elements, including a voice-over, background music, sound effects, and even pauses, to create a perfect harmony.
Technique 4: Interactive elements to engage audience
According to a recent survey, 78% of people saw better online sales with interactive video compared to a passive video.
This means that viewers are more likely to stick around if your video has interactive elements, compared to a one-sided monologue.
Here are some interactive elements that can help you turn one-way presentations into two-way conversions:
Knowledge check quizzes: Keep your audience engaged with brief quizzes a few minutes into the presentation. This will reinforce your message while keeping the viewers engaged.
Polls and surveys: These elements work as the proverbial two birds, one stone—they keep viewers from dozing off and provide feedback you can use to tailor your content.
Clickable CTAs: Guide your viewers to take a specific action by adding clickable elements to your presentation.
Gamification elements: Add a touch of fun with animations, points, badges, and leaderboards. These elements also work as incentives and might encourage viewers to stick around to the end.
But how do you add these interactive elements to your videos?
Pro tip: The easiest way is to find a video recording platform that simplifies the process.
For instance, Loom offers a range of built-in interactive features.
Creators can embed clickable CTAs, annotate their screens, and even add tasks to their presentation videos.

At the same time, viewers can react with emojis for instant feedback, leave time-stamped comments to encourage discussions and tag their teammates.
Recipients can react to a Loom video with any emoji
Technique 5: Timing and pace for maximum retention
Ever watched a video that felt like it was dragging on forever? Or one that was so fast-paced you felt like you were missing key information?
The wrong timing and pace can leave your audience mentally exhausted or disengaged.
But how do you strike the right balance for maximum retention?
One approach is to use Guy Kawasaki’s 10/20/30 Rule of PowerPoint :
Your presentation should have at most 10 PowerPoint slides, which could be 10 critical points in the case of video presentations.
It shouldn’t be more than 20 minutes long.
The font shouldn’t be smaller than 30 points.
If you can’t contain your message in 20 minutes, break your video presentations into bite-size segments to prevent information overload.
Think of it like chapters in a book. Each segment contributes to the overall narrative while standing alone as a valuable piece of information.
You can use a video presentation tool like Loom to make this process seamless.
Loom automatically creates a video library to organize your video clips. This also allows your audience to revisit specific presentation segments later to access key takeaways.

You can also label your videos by specific topics or categories, making them easily accessible.
Elevate communication with video presentations
The verdict is clear: Video presentations help engage your audience and increase interaction.
So, why rely on traditional slideshows when you can get better outcomes with video presentations, especially with access to advanced video presentation software?
For example, with Loom, you can record, edit, and share high-quality video presentations that captivate your audience. No more technical headaches or pricey equipment.
Ready to turn your presentation ideas into videos? Sign up for free and create polished video presentations in no time with Loom.
Jun 29, 2024
Featured In:
Share this article:.
Jeong Lee works in Marketing at Loom.
COMMENTS
Add animation and effects to text, pictures, shapes, and objects in your PowerPoint presentation. Add animations and effects. Select the object or text you want to animate. Select Animations and choose an animation. Select Effect Options and choose an effect. Manage animations and effects.
In this step-by-step tutorial, learn how to use animations in Microsoft PowerPoint. Learn animation fundamentals, layer on multiple animations, adjust the du...
15 Easy PowerPoint PPT Animation Tips, Effects, & Tricks for Beginners in 2023. Let's cover 15 of the best animation in PowerPoint templates. These PowerPoint slide animation techniques are a shortcut to mastery. Before we dive in, it helps to know: PowerPoint animations are controlled with the Animation Pane. 1.
In this PowerPoint slide animation tutorial, you will learn how to organize and animate your presentation contents so that it grabs the attention of your aud...
2. Survey Your PowerPoint Animations Before Starting. Many of the recommended templates include more than one PowerPoint animation. Survey your slides by reviewing all the active animations before you start.. Click on the Animations tab in PowerPoint to show all the objects that have animations. (Photo: Envato Elements)Click on Animations on PowerPoint's ribbon.
Adding Transitions to a Slide. Adding an Animation to a Text, an Image, a Shape or Other Elements of a Presentation. Select the object that you want to animate. Click the Animations tab. Animations tab in PowerPoint. Select the animation that you want from the list. If you want to see which animations are applied to an object, click Animation Pane.
How not to use an Animated PowerPoint Presentation in Court! Presentations with animations aren't always a great idea. In 2014, a court in the United States criticized a PowerPoint presentation by the prosecutor, which led to the court throwing the case out. The presentation was made with sound effects and animations, with flashy elements ...
In this Powerpoint tutorial, you'll learn 10 easy PowerPoint animation tricks and tips for beginners. You'll find insights to build amazing presentations fas...
Click the Animation Painter button. Then click on the object you want to apply the animation to. With this option, it sets the animations to start one after the other. If you double click the Painter option, you can apply the animation to multiple objects without having to click the Painter button for each object.
To add entrance animations to any object in PowerPoint, here's what you need to do: Click on the object you want to animate. In this example, we will use a blue smiley face. (Caption: The blue smiley face we will be animating for this tutorial) 2. Select the animation you want to use.
Select Slide Show button to view the animation. Transitions. In the Thumbnail Pane, select the slide where you want to apply or change a transition. On the Transitions tab, find the effect that you want in the Transition gallery. Select Effect Options to specify how the transition occurs. If you want all slides in the presentation to transition ...
Almost any element in your slide - text, photos, graphs, shapes, audio and video can be animated. You can add PowerPoint animations to any of these elements in just three steps: (1) Select the object to animate (2) apply an animation, and (3) customize the effects. Let us see how to apply animation to different parts of a presentation.
This menu makes it easy to choose an animation to add to an object. On the Animations tab, you can simply click on one of the animation thumbnails to apply it to a selected object. Download this PowerPoint Design template on Envato Elements. Click on the part of the slide that you want to animate.
We've put together a quick list of animation tips to help you create a dynamic PowerPoint presentation. PowerPoint Animation Types You can use PowerPoint tools to animate pictures, text, tables, shapes, and other objects to build an engaging presentation. Let's take a quick look at the animation type, so you have an idea of which type ...
PowerPoint animations are visual effects for the objects in your PowerPoint presentation. PowerPoint animations bring objects like text, images, or charts on or off your slide. Microsoft calls these entrances and exits. An entrance is an animation that brings something onto the slide. An exit moves an object off the slide.
Drag either end to put the endpoints where you want them. Click Custom Path. When you click where you want the motion path to start, the pointer appears as a cross-hair. To draw a path of connected straight lines , click where you want the motion path to start. Move the pointer and click to create a line between the two click points.
11. Add a sound effect to an animation. In the Animation Pane, click the down arrow next to an animation and select "Effect Options" from the context menu. Go to the "Effect" tab in the window that appears and choose from the menu under "Enhancements" to select a sound effect from a list or add one manually.
Open your PowerPoint presentation and navigate to the slide to which you want to apply animations. Select the item you want to animate . On the Animations tab, in the Animations group, select the More arrow in the Animations box. You can also add Entrance, Emphasis, or Exit animations: An Entrance animates the item as it appears on the slide.
Power up your presentations with animated slides using Morph transition! Learn how to create impressive visual effects and engage your audience like never be...
Open the tab and select the animation you want to change. You can do this by clicking the animation number, not the item. On the right side of the ribbon, click "Move Earlier" or "Move Later" below Reorder Animations. If one or the other is grayed out, then that animation is already at the earliest or latest point.
Click the Effect Options drop-down arrow and pick "Edit Points." You'll then see the motion path with the points as squares. Select and drag a point to move it. You can also right-click a point for options like making it a smooth, straight, or corner point. Additionally, you can add more points or remove one.
Step 2: Add Animation. Click on the object you want to add the animation to. Then, click the Animations tab in the PowerPoint ribbon. We are using the first Entrance animation, Appear, that you can see in the box. To explore other Entrance Animations, click the drop-down arrow in the right corner of the Animations box.
These Microsoft PowerPoint presentation tips and guidelines are organized into sections. So, cut straight to the advice you need and come back when you're ready for the next steps. You're about to see the best PowerPoint tips and tricks. The PowerPoint presentation tips we share below will help you make a good presentation.
You can animate the text, pictures, shapes, tables, SmartArt graphics, and other objects in your PowerPoint presentation. Effects can make an object appear, ...
Tell your story with captivating presentations. Powerpoint empowers you to develop well-designed content across all your devices. Learn More. 2. Design for clarity and engagement. Visuals play an important role in webinar presentations. Use high-quality graphics, readable fonts, and a cohesive color scheme to make your slides aesthetically ...
Video presentations aren't just a fancy way to show off your tech skills. They're a powerful way to interact with your audience and leave a lasting impression. Think about all the times you zoned out during a PowerPoint presentation with endless paragraphs and bullet points. Video presentations serve as an antidote.
Free Google Slides theme, PowerPoint template, and Canva presentation template. Elevate your onboarding process with our sleek, black and purple, minimal animated presentation template designed for business professionals. Perfect for PowerPoint and Google Slides, this PPT template ensures a seamless and engaging introduction for new hires.
How To Use Trigger In PowerPoint | PowerPoint Animation Tutorial |#powerpoint #tutorial #animation #trigger Trigger in powerpoint shorts how to use powerpoin...