

Word-Processing Basics
Mar 13, 2019
5.09k likes | 12.39k Views
Word-Processing Basics. List the four basic functions of word processing programs. Name two tools used to navigate a word processing document. Summarize four key features of word processing programs. Identify three standards for word-processing documents. Objectives.
Share Presentation
- word processing
- processing programs
- processing document
- word processing document
- select text feature lets

Presentation Transcript
List the four basic functions of word processing programs. • Name two tools used to navigate a word processing document. • Summarize four key features of word processing programs. • Identify three standards for word-processing documents Objectives
Explain how to identify document files in a list of files • Describe the benefits of selecting text. • Contrast different editing tools, such as the Cut and Copy commands, and the Undo and Redo commands. • Explain what default formatting is. Objectives
Identify four parts of any document that can be formatted. • Summarize the advantage of dividing a document into sections for formatting. • Compare portrait and landscape orientation. • Describe the benefits of creating documents in a desktop-publishing program. Objectives
AutoCorrect • Autosave • Insertion Point • Pagination • Word-Processing program • Word Wrap • Clipboard • Copy Key Terms
Cut • Paste • Redo • Select Text • Undo • Default • Page formatting Key Terms
Sans Serif • Section • Serif Key Terms
1n 1968, IBM first used the term word processing. The term described machines that could be used to type a document, remember the typist’s keystrokes, and produce more than on copy. With this new tool, workers saved time. Introduction
Word-processing programs are used for creating and printing text documents. These programs have four functions: • Writing – entering text and symbols into a document • Editing – revising or reorganizing the text • Formatting – changing how the text looks on the page • Printing – producing a printed copy See the next three slides Functions of Word Processing-Program
Writing Editing
Word-processing programs can be used to create almost any kind of printed document, such as letters, reports, and brochures. They can also be used to created calendars, return address labels, and labels for homemade CDs. Word process application is the most used by people than any other application. Use of Word Processing
When you open a word-processing program, a new blank document is created. It looks like a blank piece of paper on the screen. In Word 2010, you can create another document at any time by clicking the File tab, clicking the New command, selecting Blank Document, and clicking the Create button. Working with a Word-Processing Document
In Windows OS, most word-processing programs allows you to create a new document by pressing Ctrl+N (hold the Ctrl key and press N). In Mac OS, this similarly done by pressing Command+N. Every time you create a new document you need to save it. Click the Save button on the Quick Access toolbar. When the Save As dialog box opens, name your document. Working with a Word-Processing Document
Insertion Point – shows where the text you type will appear. It moves as you type. Scrolling – As you write, you might want to reread or change something you wrote earlier. That is made easy by scrolling using the mouse or keyboard to move through the document. See the next slide Working with a Word-Processing Document
Save Button Click the File tab to begin creating a new document. Scroll bar Insertion Point Document area
Most word-processing programs have these features to help you write, edit and save your work. • With word wrap, the program automatically starts a new line, or “wraps” the text , when the current line is full. • When a page is full, the pagination feature automatically starts a new page. You can also force a new page by inserting a special character, called a page break. Basic Features
The AutoCorrect feature fixes common spelling mistakes as they are typed. You can turn off this feature or modify it to accept unusual words that you often use. • The AutoRecover or autosave feature protects you from losing work. It does so by automatically saving a document as often as you want. If the computer shuts down accidentally, you can retrieve the most recently saved version. Basic Features (Continued)
Text wraps automatically at the right margin. Page Break Page Break
As you write, keep in mind three standards of style to make your work look professional. • Two Standards are met automatically by many programs. They change two hyphens (--) to an em dash (-). They also convert quotation marks to curly quotation marks, or “smart quotes.” • One standard is not automatic – you have to remember to do it. This standard is to type one space, not two, between sentences. Typing Standards for Word-Processing Documents
Opening a Document for Editing Editing can take pace at any time after you have created the document. You can go back and edit text you recently entered., or you can edit a document you created , saved, and closed. You can use a word-processing program’s Open Command to open file, or you can use your operating system’s file management features to find files on a disk (hard drive). In Windows, file names have extensions, such as .txt, .rtf, docx (Windows 2010), or .wpd, although these extensions may be hidden form view. Editing a Document
Selecting Text Usually, people edit more than one character at a time. The select text feature lets you highlight anything from a word to a whole document. Then you can delete it, move it, copy it, or change its formatting. To select text, simply click and drag the mouse over the text you want. Most programs also let you select text by using the keyboard. You hold down the shift key while you use the arrow keys and other keys to select the text. Selected text is highlighted on the screen; that is, it appears with a different background color. Editing a Document
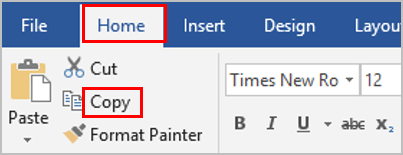
Two common reasons for selecting text are cutting and copying. Both actions place the text in the Clipboard. The Clipboard stores cut or copied text while you work. Once you close the program or shut down the computer, items on the Clipboard are no longer available. • The Cut command removes the selected text from a document and places it on the Clipboard. • The Copy command places a duplicate of the selected text on the Clipboard. Cutting, Copying and Pasting
Pasting command is use to insert an item copied or cut to the Clipboard. Simply place the insertion point where you want the item to appear. Then, click the Paste icon on the Clipboard group of the Home tab or press Ctrl+V. The copied item or text appears where you want it. Cutting, Copying and Pasting Cut Paste Copy Commands in the Home tab, Clipboard group
Using Cut and Paste – Moving a sentence from the middle of a paragraph to the beginning can be done by selecting and dragging it. You can use Cut and Paste to move that sentence farther – for example, to another page – or to move text or a graphic from one document to another. You can even open a new window, paste the text you cut from another document, and save the pasted text as a new document. Cutting, Copying and Pasting
Using Copy and Paste – Copying and pasting saves time when you need to repeat some text. You can also copy and paste to bring a graphic from one document into another. Undoing and Redoing – Word-processing programs have commands that can undo or cancel and edit. If you delete a word by mistake, you can use the Undo command to put it back. Many programs also have a Redo command. You can use this feature to put a change back in effect after canceling it with Undo. Cutting, Copying and Pasting
Merging – Most word-processing programs have a mail merge feature you can use to generate customized form letters, mailing labels, envelopes, and even e-mails. You create a word-processing document that includes the content you want everyone to receive and then merge it with a data source of customized information, such as names and addresses. Cutting, Copying and Pasting
Appearance is Important A document’s formatting – its appearance – is sometimes as important as its contents. This is why word-processing programs have so many tools to format documents. Word-processing programs include many preset formats, called defaults. The program applies these formats automatically, unless you change them. Formatting a Document
Formatting Characters Character formatting lets you change the look of letters. Three primary formats are applied to Characters: • The font is the family used. • Font size is the height of characters, measure in points. One point equals 1/172 inch. • Font styles are characteristics such as boldface and italic. Formatting a Document
Formatting Characters There are four general categories of fonts. Serif fonts, such as Times New Roman, have serifs, or lines projecting from the ends. They are easy to read and are often used for document text. San Serif fonts, such as Arial, do not have serifs, and are often used for headings. Script fonts are used to simulate hand-writting. Decorative fonts have embellishments such as a curlicues Formatting a Document
Formatting Paragraph A paragraph is any text that ends with the press of the “Enter Key”. Whenever you press Enter, you create a paragraph. You can change many paragraph formats, including: • Alignment – This is the way a paragraph lines ups between the page’s left and right margins Formatting a Document
Formatting Paragraph • Line spacing – This is the amount of space between the lines of the text in a paragraph • Indentation – This is added space between a margin and the text. • Tabs – These are stops placed along a line. Pressing the Tab key moves the insertion point to the next stop. Tabs can be used to align text in tables or columns. Formatting a Document
Formatting Pages Page formatting affects how and where text is positioned on the page. The main features in page formatting are: • Orientation – Text can be printed in one or two directions, or orientations. In portrait orientation, text is printed down the page’s long edge, creating a page that is taller than it is wide. Formatting Sections
Formatting Pages • Orientation – In landscape orientation, text is printed down the page’s short edge, creating a page that is wider that it is tall. • Headers and footers – This is special information placed at the top of the page – headers – or at the bottom – footers. These placeholders can show page numbers, the date, or the document’s title. Formatting Sections
Publishing from a Desktop Desktop-publishing (DTP) programs are used to create high-quality publications that look as if they were produced on a printing press. They can be used to do some of the same tasks as word-processing programs, but they greatly expand design options so you can create high-quality documents. Basics of Desktop Publishing
- More by User

Word Processing
Desktop Publishing (DTP)- The use of a personal computer as an inexpensive production ... Basic word processing and desktop publishing documents. Use the FBLA ...
655 views • 23 slides

WORD PROCESSING BASICS
WORD PROCESSING BASICS. Introduction to Computers. OVERVIEW. The Computer System Types of Computers Computer Memory Processing Power Hardware Software Networks Your Responsibility As a Computer User. THE COMPUTER SYSTEM.
696 views • 15 slides

Word Processing. By Eric Kellerer. That is a quick definition for a powerful tool. Definition. A Word Processor is a Computer application that allows text to be:. Entered Edited Printed Saved. There are many , many Word Processing Programs. Word for Windows 2000, 97
769 views • 10 slides

Word processing
Word processing. vocabulary. Headers/footers. Sections at the top and at the bottom used for page numbering. Print preview. A tool to let you see what your printout will look like. Copy. To make an exact duplicate(twin). Formatting . Make changes to the way a document looks. underline.
376 views • 13 slides

Word Processing. BCSI-8 The students will utilize word processing software. Identify and explain basic word processing terminology. Label the parts of a word processing screen. Create and save a basic word processing document. Retrieve, edit, manipulate, and print a document
475 views • 8 slides

Word Processing. Computer Technology Fremont High School – Ms. Beck. Word Window. K. A. B. C. J. D. I. H. G. E. F. Microsoft Word. What is it? A processing program, or application software, that allows you to enter and edit text.
520 views • 27 slides

Word Processing. Intermediate Microsoft Word. Introducing Binary.
424 views • 26 slides

Word Processing. Referencing. Questions. If the ASCII for A is 65, what is the ASCII for F ? What search string (including Wild Cards) would I use to find the words Good, God and Gold, but not Gone or G.Ford ? What is the shortcut key for Thesaurus ?
337 views • 21 slides

Word Processing. Word Processing. A word processor is a computer that can be used for writing, editing and printing text. We are going to use a word processing package called Microsoft word. This is an example of a general purpose package.
1.11k views • 26 slides

Word Processing. BCSII-4 : The student will utilize word processing software. a) Identify uses of word processing software and careers related to word processing. b) Identify and explain word processing terminology.
506 views • 9 slides

Chapter 3. Word Processing. Overview. Define Word Processing Understand Enter Operations Understand Edit Operations Identify Print Formatting Operations Explain Advanced Operations. Abilities. Most Common Application Create Manipulate Print Save. Enter / Edit Operations.
320 views • 12 slides

Word Processing Basics
Word Processing Basics. Review for the Competency Exam!. Keyboarding Technique. Eyes on Copy or Screen! Do not look at _________! Fingers curved and resting on _______ ______ ! Correct fingers used for keystrokes! Key with smooth rhythm and quiet hands!
499 views • 28 slides

Word Processing. Basic Microsoft Word (Part I). Questions. How do you access the File Menu in Word 2007? Name 3 Word Processing programs. What does the Insert (INS) Key Do (Word 2007)? Is Adobe Reader a word processor?. Answer: Click the Office Button at the top left of the Word Window.
769 views • 28 slides

Word Processing. A beginners Guide. Jeff Kautz-Instructional Technology Specialist- ã. Vocabulary-Basics. Icon-a small box on the screen that represents available activities Buttons-a box or symbol to be clicked on in order to proceed through a program
663 views • 29 slides

Word Basics
Word Basics. Unit 3 – Formatting Documents Elizabeth Steel Ponder Palestine Public Library Adult Services. Unit Objectives. Explore different variations of text style and how font choice can effect the readability and mood of your message.
549 views • 32 slides

Word Processing. Group 3 La'Shara Allen Alesia White Adrianne Ashley Taylor Mulford Andie Fornea Nicki Ross . What is Word Processing?.
393 views • 8 slides

Word-Processing Basics. Nathan Hernandez, Alan Dominguez, Jose Maldonado. Chapter Outline. Chapter Outline Chapter 6 Overview Lesson 6–1 Creating a Document Lesson 6–2 Editing a Document Lesson 6–3 Formatting a Document Chapter Review and Assessment. Chapter 6 Overview.
661 views • 41 slides

Word Processing. Prior to the invention of the personal computer, text had to be arranged in a number of different ways. For personal use, you may have owned a typewriter; for large-scale publication, a typesetting machine or linotype.
248 views • 8 slides

Word Processing. Introduction Alastair Nottingham Department of Computer Science. Course Introduction. Things to be aware of: 2 x Practicals ? x Quizzes 1 x Test (Component) 1 x Practical Exam (Component) 1 x Written Exam (Component). Course Information.
383 views • 17 slides

Word Processing. Microsoft Office: Exploring Word 2011 for MAC. What is word processing?. Answer: is the creation of documents using a word processor. It can also refer to advanced shorthand techniques, sometimes used in specialized contexts with a specially modified typewriter.
1.07k views • 50 slides

Word Processing Basics Memorandums
Word Processing Basics Memorandums. Apply correct memorandum format. What are Memorandums?. A memorandum is a short message from one person to another in the same business or organization. Memorandums are usually referred to as memos.
532 views • 7 slides
Your current User-Agent string appears to be from an automated process, if this is incorrect, please click this link:
- My presentations
Auth with social network:
Download presentation
We think you have liked this presentation. If you wish to download it, please recommend it to your friends in any social system. Share buttons are a little bit lower. Thank you!
Presentation is loading. Please wait.
WORD PROCESSING.
Published by Jody Barrett Modified over 6 years ago
Similar presentations
Presentation on theme: "WORD PROCESSING."— Presentation transcript:

General Purpose Packages

Word Processing and Desktop Publishing Software

Word processing A word processor can be used to write, edit, format and print text. Before word processors, printed documents were typed directly on to.

Parts of a Computer.

Standard Grade Notes General Purpose Packages. These are Software packages which allow the user to solve a range of problems.

A word processor is a computer that can be used for writing, editing and printing text. We are going to use a word processing package called Microsoft.

Created Revised5/2/2015 SPS Technology Department 1 Introduction to Microsoft Word.

Word Processing The Basic by: Eleysa,Hizami,Earicka,Oliver & Ellavera.

Int 1 Revision Word Processing Most people are familiar with word processing packages such as Microsoft Word, Open Office and Word Perfect. Here are some.

Slide 1 Word Processing. Slide 2 What is a word processor? A word processor is a computer that you use for writing, editing and printing text. A dedicated.

Chapter 2 Publishing a Trifold Brochure

Document Processing CS French Chapter 4. Text editor used for simple text entry and editing not intended to look good for editing programs and data e.g.

Word Processing. ► This is using a computer for: Writing EditingTEXT Printing Used to write letters, books, memos and produce posters etc. A.

General Purpose Packages Word Processors. Lesson Objectives You will know Different Features of word processing software: –Formatting –Standard Paragraphs.

(MICROSOFT WORD) Screen Elements Special Keys Spelling & Grammar Check Font Face, Size, Style Alignment & Spacing Saving A File Closing MS Word DAY 1.

Copyright ©: SAMSUNG & Samsung Hope for Youth. All rights reserved Tutorials Software: Word processing Suitable for: Beginner Improver Advanced.

Word Processing Standard Grade Computing LA/LM. Word processor a computer program that allows you to manipulate text What is?

Introduction to Computers Seminar I. Parts of the Computer Personal Computer a PC (any non-Mac computer) has four major pieces of hardware-- keyboard,

With Microsoft Office 2007 Introductory© 2008 Pearson Prentice Hall1 PowerPoint Presentation to Accompany GO! with Microsoft ® Office 2007 Introductory.
About project
© 2024 SlidePlayer.com Inc. All rights reserved.
- History & Society
- Science & Tech
- Biographies
- Animals & Nature
- Geography & Travel
- Arts & Culture
- Games & Quizzes
- On This Day
- One Good Fact
- New Articles
- Lifestyles & Social Issues
- Philosophy & Religion
- Politics, Law & Government
- World History
- Health & Medicine
- Browse Biographies
- Birds, Reptiles & Other Vertebrates
- Bugs, Mollusks & Other Invertebrates
- Environment
- Fossils & Geologic Time
- Entertainment & Pop Culture
- Sports & Recreation
- Visual Arts
- Demystified
- Image Galleries
- Infographics
- Top Questions
- Britannica Kids
- Saving Earth
- Space Next 50
- Student Center
- Is Internet technology "making us stupid"?
- What is the impact of artificial intelligence (AI) technology on society?

word processing
Our editors will review what you’ve submitted and determine whether to revise the article.
- Academia - History of Word Processing
- Stanford University - A Brief History of Word Processing
- Open Library Publishing Platform - Student Success - Word Processing
- Workforce LibreTexts - Word Processing Software
- BCCampus Publishing - Basic word processing
- word processing - Student Encyclopedia (Ages 11 and up)
word processing , operation in which a text-editing software program called a word processor is used to create a document on a computer. A word-processing system can produce a wide variety of documents, including letters, memoranda, and manuals, rapidly and at relatively low cost.
The precursor of the modern word-processing system was developed in 1936. This device consisted of a kind of automatic typewriter, called an autotypist, that could store and reproduce simple documents. The autotypist used punched paper tape for its storage medium. In 1964 researchers at International Business Machines Corporation (IBM) produced the Selectric Typewriter, a relatively high-speed, automatic typewriter that had a magnetic tape data-storage unit and retrieval device. The development of electronic digital minicomputers and microcomputers during the late 1960s and ’70s gave rise to faster word-processing systems with greater capabilities.
A typical word-processing system consists of a printer that is linked to a computer . In many such systems the input terminal consists of an alphanumerical keyboard and a visual display. The display enables the keyboard operator to input and also check, edit, or revise the information to be entered. The text of the document, including all corrections, additions, and deletions made by the keyboard operator, is recorded by the computer. When the final draft is ready, the operator prints as many copies of the document as required. The information also can be stored by the computer for later retrieval.
Want to create or adapt books like this? Learn more about how Pressbooks supports open publishing practices.
Unit 9. Basic word processing skills
Topic A: Basic word processing
Click play on the following audio player to listen along as you read this section.
Word processing – the use of a program (software application) running on a computer that allows users to create, edit, format, and store documents.
Create a Document
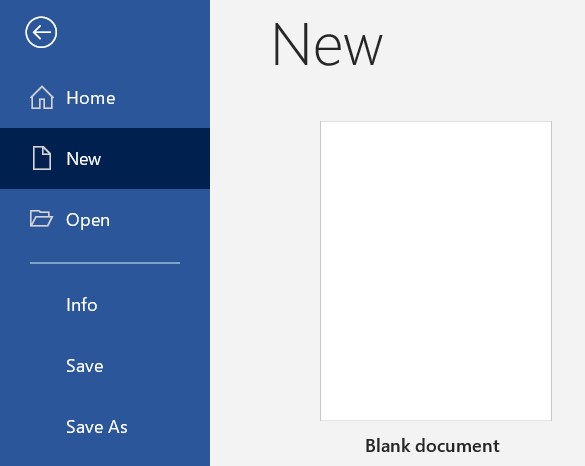
- Start Microsoft Word .
- Click the File tab.
- Click the New tab.
- Click Blank document . (A new blank document appears.)
- Type your text. The text you type will be inserted into the document.
Edit a Document
Editing a document – making revisions to a document, focusing on correcting errors, improving the accuracy of language, rearranging, making words and sentences clearer and more effective, etc.
Editing in word processing may include the following tasks:
- Adding text (terms, phrases, paragraphs, etc.)
- Deleting a part of a text
- Copying text
- Moving text
- Pasting text
- Checking for grammar and spelling
- Formatting text
Select Text
Before editing text, you’ll need to select it. This is also sometimes called “highlighting text.”
- Go to the location where stores your file or folder (hard drive, USB, etc.).
- Open the document you wish to edit.
- To select a word: double-click the word.
- To select a paragraph: triple-click the paragraph.
- To select any amount of text: click and drag the I-beam over the text to highlight it.
Delete (or remove) text
- Select the text you wish to delete.
- Press the Delete key (on the keyboard).
- Move the I-beam pointer to the text you want to delete. Click to set the insertion point there (a blinking vertical line).
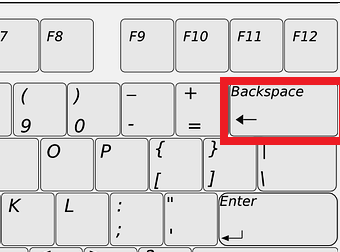
- To delete text to the right of the insertion point, press the Delete key on the keyboard. (On a Mac keyboard, press the fn key plus the Delete key.)
Copy and Paste
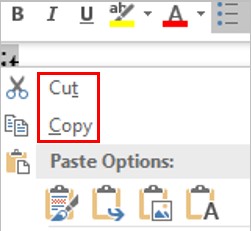
Copy vs. cut.
- Copy – duplicates the selected item (text, symbol, table, image, etc.).
- Cut – removes the selected item from its original position.
Copy and paste vs. cut and paste
- Copy and paste – duplicates the selected item. The selected item can be found in both original and the new, pasted location(s).
- Cut and paste – duplicates the selected item then deletes the original. The selected data can be found only at the new, pasted location (the item has moved from one location to another).
Steps to copy / cut and paste
- Select the item you wish to Copy or Cut .
- Copy: Cntr + c (On a Mac, it is Cmd + c )
- Cut: Cntr + x (On a Mac, it is Cmd + x )
- Position the insertion point where you wish to insert the item.
- Select the item you wish to copy or cut.
Review a Document
Check spelling and grammar.
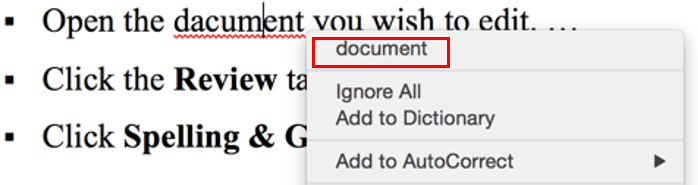
- Select the correct spelling from the suggestion list to correct the spelling error. For each error, Word will offer one or more suggestions.
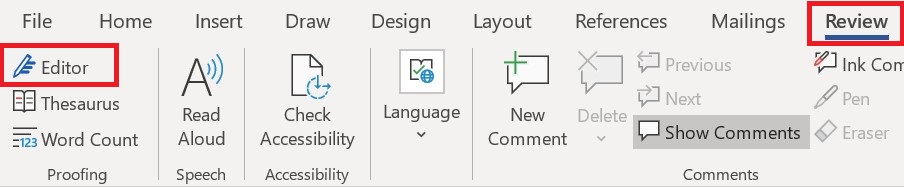
- Click the Review tab.
- Click one of the options from the suggestion list to change the spelling error. The program will move to the next misspelled word.
Find Synonyms
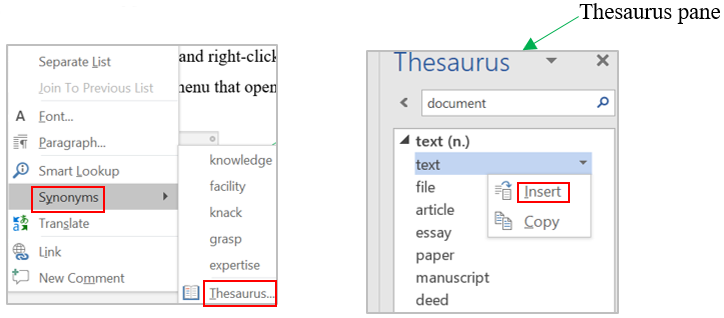
- Right-click a word for which you wish to find a synonym for.
- Click the Synonyms command from the pop-out menu.
- Find a desired word in the list and click it to replace the original word.
- If none of the synonyms are desired, click the Thesaurus command to open the full thesaurus. (The Thesaurus pane will appear.)
- Find a desired word in the Thesaurus pane list and right-click it and then click Insert .
- Select a word for which you wish to use the thesaurus.
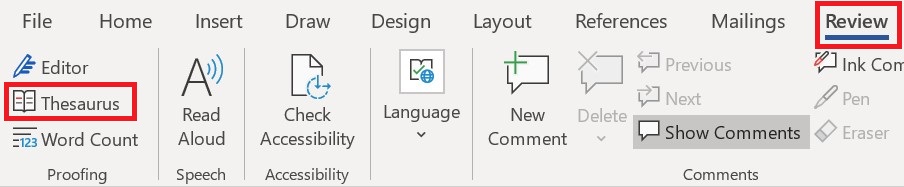
- Find a desired word in the “Thesaurus” pane and right-click it and then click Insert .
- Close the Thesaurus pane.
the use of a program (software application) running on a computer to create, edit, format, and store documents.
making revisions to a document, focusing on correcting errors, improving the accuracy of language, rearranging, making words and sentences clearer, more effective, etc.
make a duplicate of the selected items (text, symbol, table, image, etc.) and place it in another location.
removes the selected item from its original position.
Key Concepts of Computer Studies Copyright © 2020 by Meizhong Wang is licensed under a Creative Commons Attribution 4.0 International License , except where otherwise noted.
Share This Book
Word Processing

Learning Objectives
- Type letter text
- Apply styles and set grammar and spelling options
- Select and insert text
- Copy, cut, and paste text
- Check spelling and grammar
- Insert synonyms
- Use format painter
- Apply advanced font settings
- Create document footers
- Save documents as PDF files
- Find and replace
- Bulleted and numbered lists
- Set paragraph indents
- Modify line and paragraph spacing

A word processor is software or a device that allows users to create, edit, and print documents. It enables you to write text, store it electronically, display it on a screen, modify it by entering commands and characters from the keyboard, and print it. Of all computer applications, word processing is the most common.

Word processing has evolved into much more than words typed on a piece of paper. It is a means to communicate with others and create content for websites, graphic design, blogs , and publications of all types.
Modern word processing software and applications are integrated into the cloud. If you save your documents to your cloud-based storage, you can retrieve them from any device and continue to work with and share your documents.
Common Word Processing Software:
- Microsoft Word
- WordPerfect
Google Docs
- Apple Pages
Since Microsoft Word is widely used in industry, and we are using Microsoft Windows, we will focus on Word going forward. There are many similarities across word processing software, so the skills we are learning can be translated to other software and apps. The following “Practice It” assignments are designed to be completed using Microsoft Word in Office 365 on a PC with Windows 10 or higher.
WORD PRACTICE 1

Prefer to watch and learn? Check out this video tutorial:
Complete the following Practice Activity and submit your completed project.
For our first assignment in Word, we will create a flyer to be printed or posted online. The flyer will advertise a volunteer opportunity for Health Sciences students at Paradise Valley Community College. Key skills in this practice are inserting text, pictures, and textboxes and formatting text and footers.
- Start Word. Click Blank Document.
- Show formatting marks by navigating to the Home Tab, Paragraph Group, and selecting the Show/Hide icon. This is a Toggle Button . This means it has two modes, on and off. To turn it on, click it once; to turn it off, click it again.
- Show the ruler by navigating to the View tab, Show Group, and selecting the Ruler checkbox. A checkbox is a type of input control. A checkbox value is only included in the submitted data if the checkbox is currently checked. In other words, when the box is checked, the value is included.
- Navigate to the File Tab to enter Backstage View . In Backstage View, select File, then Save As. Click the Browse button. In the Save As dialog box , navigate to your flash drive and Word folder. In the Name field, type Yourlastname_Yourfirstname_Word_Practice_1 as the file name, and then save.
- Type Volunteer Opportunity Available and press Enter twice.
- Type the following text: This fall, Paradise Valley Community College is offering a unique volunteer opportunity for Health Sciences students . Press spacebar.
- Navigate to the Insert Tab, Text Group, and choose the Object arrow. Then choose Text from File. In the Insert File dialog box, browse to your Word data files folder. Select the file Text_Word_Practice1. The text will automatically update your document.
- Select all of the text in the document. On the Home Tab, Font Group, ensure the Font is Calibri and Font size is 11.
- Select the title Volunteer Opportunity Available , including the paragraph mark. On the Home Tab, Font Group, select the arrow next to Text Effects and Topography. In the third row, third column, apply the Fill: Blue, Accent color 5; Outline: White, Background color 1; Hard Shadow: Blue, color 5 text effect.
- With the title still selected, change the font size to 36.
- On the Home Tab, Paragraph Group, choose Center to align the title centered on the page.
- On the Home Tab, Font Group, change the font color to Blue, Accent 1 for the title.
- With the title still selected, on the Home Tab, in the Font Group, choose the arrow next to the Text Effect and Typography icon. Apply a Shadow and under Inner, click Inside: Right text effect.
- Position the insertion point at the beginning of the paragraph that begins with This Fall.
- On the Insert tab, Illustrations group, choose Pictures. Navigate to your data files folder and choose the HSPicture_Word_Practice1 image.
- Be sure the picture is selected, and apply the Square text wrapping option.
- Using the sizing handle at the lower right-hand corner of the picture, drag up and to the left until the bottom of the graphic is aligned at approximately 3.5 inches on the vertical ruler.
- Click Undo to return the picture to its original size. The Undo icon is located in the Quick Access Toolbar in the upper left-hand corner.
- On the Picture Tools, Format Tab, in the size group, change the shape width to 4″.
- On the Quick Access Toolbar, click the Save icon. Then, compare your document to the image below.
Note: You may want to toggle Show/Hide to off so that you can see how the document will look when printed or posted online.

- Ensure the picture is still selected. Display the Layout dialog box by selecting the Layout Options shortcut menu, then choose See more. In the Layout dialog box for the picture, make sure the Position Tab is selected.
- Set the horizontal alignment to Left, relative to Margin.
- Set the vertical alignment to Top, relative to Line. Select OK to close the dialog box.
- With the picture selected, apply the Soft Edges 10 Point picture effect. This is on the Picture Tools Format Tab, Picture Styles group, under Picture Effects, Soft Edges.
- With the picture selected, on the Picture Tools, Format tab, in the Adjust Group choose the Artistic Effects arrow. Apply the Pastels Smooth artistic effect. Deselect the picture.
- Shadow setting
- Triple Lines style
- Blue, Accent 1 color
- Whole document
- Position the insertion pointer at the blank paragraph below the title and press Enter four times.
- On the Insert Tab, in the Illustrations Group, choose Shapes. Insert a Rounded Rectangle shape at the left margin at approximately 1.5 inches on the vertical ruler. Click once to insert a 1-inch-by-1-inch Rounded Rectangle, or use the drag-and-drop feature.
- On the Drawing Tools, Format Tab in the Size Group, change the shape height to approximately 1.8 and the shape width to 6.4.
- Select the Rectangle shape and type the following text: For more information, please contact Grace Smith at 602-787-6714 . O r, email [email protected]
- Italicize the text, change the font to Calibri, and increase the font size to 16.
- With the text still selected, explore the mini-toolbar by clicking the Font Color button arrow, and under Theme Colors, click on Blue, Accent 5, Darker 50%.
- With the shape still selected, go to the Drawing Tools, Format Toolbar, the Shape Styles Group. Select the arrow next to Shape Outline and under Theme Colors, click on Blue, Accent 5, Darker 50%. Change the weight to 3 pt.
Compare your document to the image below.
Note: It is OK if your document does not look exactly like the screenshot below. This is your first attempt at practicing a new skill. You will have the opportunity to make final adjustments, using the skills you learned, at the end of this practice.

- Using the keyboard shortcut CTRL+END, navigate to the end of your document. If your keyboard does not have these keys, click to put your insertion point after the period after opportunity. Hit enter 3 times.
- Your insertion point should be approximately at the 7″ mark on the horizontal ruler. On the Insert Tab, in the text group, click the arrow next to the textbox and draw a textbox at approximately the 1″ mark on the vertical ruler. Draw a textbox by dragging down to create a textbox that is approximately 1.5 inches high by 4.5 inches wide. Type the following in the textbox: Volunteering is an excellent way to gain service hours. Service hours are required for entry into some Health Sciences programs, and it looks great on your resume. Dedicating your time as a volunteer helps you make new friends, expand your network, and boost your social skills.
- In the Layout dialog box on the Position Tab for the textbox set the horizontal alignment to Centered, relative to Margin.
- Set the Vertical alignment by typing .75 in the Absolute position box and selecting Below Paragraph.
- On the Size Tab, type 1.5 in the Absolute Height box and 4.5 in the Absolute Width box. Then click OK.
Note: For a reminder on how to set up the precise layout, review the steps above.
- With the textbox still selected, on the Drawing Tools, Format Tab, in the Shape Styles group, Apply the Colored Outline—Blue, Accent 1 shape style.
- Under Shape Effects , apply the Offset Center outer shadow shape effect to the textbox.
- Select the text in the textbox, change the font size to 14 italics, and center the text.
- Save the document. Compare your document to the image below.

- On the Insert Tab, in the Header & Footer Group, choose Edit Footer. On the Header & Footer Design Toolbar, in the Insert Group, choose Document Info. Use Document Info to insert the file name in the footer. Select the File Name Field . The File Name should display in the lower right-hand footer of the document. Do not type it in; rather use the Document Info Field.
- In the Tags box: trainee, flyer, internship
- In the Subject box: your course name and section number
- In the Author box: your first and last name
- Turn off formatting marks. As a reminder, formatting marks are on the Home Tab, Paragraph Group.
- Take a moment to compare your document to the image below and make any modifications based on what you have learned.
- Using Find and Replace (Home tab, Editing, Replace), change all instances of PVCC and Paradise Valley to SPSCC or South Puget Sound.

- Zoom in to view the document in a larger size. Zoom is located in the lower right-hand corner of the Word window.
- Save again, and ensure you have your file saved in a safe location. Take note of that location because you will need to find your file to upload it for grading.
- Submit the file for grading per your instructor’s instructions.
WORD PRACTICE 2


For Word Practice 2, we will use Word to create a document to inform potential applicants of a trainee program at South Puget Sound Community College’s Fine Arts Division. Key skills in this practice are creating lists, tab stops, and SmartArt .
- Start Word and open Starter_Word_Practice2 from your Data files folder. Save the file as Yourlastname_Yourfirstname_Word_Practice_2 in your Word folder. Show the formatting marks and turn on the ruler.
- On the Layout Tab, in the Page Setup Group, Choose the arrow under Margins. Choose Custom Margins. In the Page Setup Dialog Box, change the left and right margins to 1″.
- On the Insert Tab, in the Header and Footer group, choose Footer , then Edit Footer. In the Header and Footer Toolbar, Design Tab, in the Insert Group, choose the arrow under Document Info. Add the file name to the footer.
Note: Another way to get to the Footer is to double-click in the lower margin portion of the document. To exit the footer, double-click anywhere above the footer or below the header. It is preferable to find white space to click in.
- Starting at the top of your document, select all the text in the document. On the Home Tab, in the Paragraph group, select Align left.
- Move your insertion point to the top of the document.
- Select the title only: SPSCC (change PVCC to SPSCC if necessary) Fine Arts Division. Using the mini-toolbar , change the font size of the title text to 36.
- Using the technique you just learned, change the font of the second paragraph “Trainee Program” to 24.
- Select the first two paragraphs, and center align them. Compare the first page in your document to the screenshot below.
Note: Another way to select the two paragraphs is to use the CTRL key on your keyboard. This is especially helpful when the sections are nonadjacent.
- Select the entire document. On the Home Tab, Paragraph group, select the arrow next to Line and Paragraph Spacing. Change the line spacing for the entire document to 1.5 and save the document.
- Set the indentation for the paragraph that begins, “Our trainee program’s primary…” to First Line Indent. This is done by launching the Paragraph dialog box on the Home Tab. In the Paragraph dialog box, on the Indents and Spacing Tab, under Indentation, set the Special Box to First Line by .5″. Click OK. Notice on the ruler, a marker has been set at the .5″ mark.
- In the next paragraph, which begins, “As a trainee,” drag the First Line Indent marker to the 0.5 mark on the Horizontal ruler.
- Using either method, apply a first line indent of .5″ to the paragraph beginning with “Here is a partial…”
- Select the entire document. Launch the Paragraph dialog box on the Home Tab. In the Paragraph dialog box, on the Indents and Spacing Tab, change the After Paragraph Spacing for the entire document to 6 pt. Click OK.
- Select the two subheadings, “Requirements” and “Upcoming Trainee Programs” and change the Before Paragraph Spacing for the selection to 12 pt. To select two nonadjacent headings, use the CTRL key on your keyboard. Select the first heading, hold down the CTRL key, and then select the second heading.
- Select the paragraph starting with Educational and the next 2 paragraphs and apply bullets . Bullets are located on the Home Tab, Paragraph Group, Bullets. Choose the first bullet option.
- Select the three trainee positions and apply bullets. Use the same bullet style that you applied in the previous step.
- Apply the same bullets to all four paragraphs that have October meeting dates.
- Position the insertion point at the end of the paragraph starting with “Our requirements” following the colon and press Enter one time.
- “Be enrolled in an accredited video program,” and press Enter.
- “Be available during the entire production process,” and press Enter.
- “Submit three faculty letters of recommendation.”
- Select and format all three lines as a bulleted list .
- Select all four of the October meetings. Use the mini-toolbar and select the check mark symbol as a bullet.
- Use Format Painter and change the bullets for the two bulleted lists on Page 1. The Format Painter is on the Home Tab, Clipboard group. To use the format painter, select the area first. Then, click the format painter icon once to activate it. Then, select the area that you would like to “paint.” This will apply the format you originally selected.
Note: If you double-click the format painter, it will “hold” the format so that it can be applied to multiple selections.
- Select the bulleted list of October meeting dates on Page 2.
- Ensure the tab indicator to the left of the horizontal rule is set to Left Tab. You can verify this by hovering your mouse over the tab indicator. If you click once, it will change the indicator.
- Using the horizontal ruler, set a left tab at the 4-inch mark. The Left Tab is set by clicking once on the 4-inch mark on the horizontal ruler. You will see the Left Tab indicator show up on the ruler.
- Drag the new tab marker at 4 inches to 4.5 inches on the Horizontal ruler, and then double-click it to launch the Tabs Dialog Box.
Note: If the Tabs Dialog box does not display, launch the Paragraph Dialog Box, then click Tabs.
- In the Tabs Dialog Box, ensure the 4.5″ tab stop is highlighted. Change alignment to Left.
- In the Tab Stop Position, replace the 4.5 with 3.5.
- Select the 3 leader option. Select set.
- Clear the 4.5″ tab stop position by selecting it, then clicking Clear. Repeat this process with all tab stops until the only one displayed is the 3.5″. Select OK to close the Tabs Dialog Box. Compare your bulleted, leader list to the image below.

- In the bulleted list with dot leaders, position the insertion point at the end of the line starting with Filming and ending with Studio A. Enter a new blank bullet item, type Set Creation Press Tab, and type October 11, 7:00 p.m., Cafeteria. Save your work.
- At the top of the document, move the insertion point to the blank space above “Trainee Program” and hit enter one time.
- On the Insert Tab, Illustrations group, insert a Circle Process SmartArt graphic. This is under the Process grouping.
- In the first blue circle of the SmartArt graphic, type Apply.
- In the placeholder in the middle row, type Interview. Notice how the SmartArt shape automatically resizes the text you enter for the best fit.
- In the third circle, type Learn.
- Click the outer border of the SmartArt to ensure the entire graphic is selected.
- On the SmartArt Toolbar, Format Tab, Size group, change the SmartArt height to 2 and the width to 6.5.
- With the SmartArt still selected, on the Smart Art Toolbar, Design Tab, in the SmartArt Styles Group, change the color to Colorful—Accent Colors.
- Ensure the SmartArt is still selected, on the SmartArt Toolbar, Design Tab, in the SmartArt Styles Group Apply the 3D Cartoon SmartArt style.
- Scroll to the end of the document, or use the shortcut keys CTRL+END. Press Enter and drag the first line indent back to the left margin.
- On the Insert Tab, Media Group, choose Online Video.
- In the Search Box next to YouTube , type “PVCC Fine Arts” to search for a video to embed. Select the video, and then click Insert. If you do not have the YouTube search box, you can find PVCC Fine Arts on YouTube by following this link: https://www.youtube.com, and searching for PVCC Fine Arts.
- With the embedded video selected, on the Picture Tools, Format Tab, in the Size group, change the Height and Width of the picture to 2″.
- On the Home Tab, Paragraph Group, Center the video icon.
- Save your document, and compare it to the screenshot below.
WORD PRACTICE 3


For Word Practice 3, we will use Word to create a resume that will be used to apply for a Help Desk position at the SPSCC Help Desk. Key skills in this practice are creating and modifying tables and sharing documents online.
- Launch Microsoft Word. Click Blank Document.
- Show formatting marks and show the ruler.
- Save the document as Yourlastname_Yourfirstname_Word_Practice_3 in your Word Folder.
- On the Insert Tab, in the Header and Footer group, Choose Footer , then Edit Footer. In the Header and Footer Toolbar, Design Tab, in the Insert Group, choose the arrow under Document Info. Add the file name to the footer. Exit the footer.
- At the top of your document, Insert a 2 X 4 table . To insert a table, navigate to the Insert Tab, Tables Group, and drag your cursor in the grid to create a table with two columns and four rows.
- PROFESSIONAL OBJECTIVE [Press Tab]
- Desire a Help Desk Assistant position where I can use my expertise in providing desktop and application support to users. [Press Tab]
- QUALIFICATIONS [Press Tab]
- A results-oriented help desk specialist experienced in providing in-depth customer support. [Press Enter]
- Demonstrated ability in diagnosing problems. [Press Enter]
- Extensive end-user training experience. [Press Enter]
- Capable of working with a diverse customer base. [Press Enter]
- Experienced in different operating systems and applications. [Press Tab]
- In the third row, type WORK EXPERIENCE and press Tab.
- Using the Insert Text from File function, insert the text from Text_Word_Practice3.
Check to see if the Resume Assistant displays on the Review tab. If not, go to the next step. If so, click Resume Assistant and add the role Help Desk Assistant, add the technology industry, and then click a related service. Scroll down to view more resumes, interesting articles and a link to get started on LinkedIn. Close the Resume Assistant.
- Remove the blank line at the end of the inserted text.
- In the fourth row, in the column to the left, type EDUCATION AND CERTIFICATIONS and press Tab.
- University of Youngstown, Youngstown, OH
- Bachelor of Science degree in Computing, 2020
- Microsoft Certified Solutions Expert (MCSE)
- CompTIA Network+
- CompTIA Security+

- Select all the text in the cell to the right of QUALIFICATIONS, apply bullets, and decrease the indent. The bullets and decrease indent are located on the Home Tab, Paragraph Group.
- Use the Format Painter to copy the bullets and decrease the indent to the description of the work experience.
- In the text next to EDUCATION AND CERTIFICATIONS, apply bullets to the list. Increase the indent for the Bachelor of Science Degree.
- Drag the table vertical border between the two columns until the white arrow is at approximately 1.5 inches on the horizontal ruler.
- Select the text in the first column. Ensure all of the text in the first column is left aligned.
- On Table Tools, Layout Tab, Cell Size group, using the Width box down spin arrow, set the column width to 1.4 for the first column.
- Click Auto-fit and select Auto-fit Window.
- Use the one-click Row/Column insertion button to insert a new row above EDUCATION AND CERTIFICATIONS.
- In the left cell of the new row, type TECHNICAL SKILLS and press Tab. If necessary, turn off the bullets.
- Platforms: Windows 10, MacOS, Unix
- Applications: Microsoft Office 365, Norton/McAfee Anti-Virus, Norton Internet Security, Photoshop
- Strong knowledge of LAN and WAN technologies
- Solid knowledge of Oracle Help Desk system
- In the top row of the table change the top and bottom cell margins to 0.04. Cell margins are on the Table Tools Layout Tab, Alignment Group. Remove any extra spaces or lines in the first row of the table.
- At the top of the document, insert a row above the first row. On the Table Tools Layout Tab, in the Rows & Columns Group, choose Insert Above.
- Select the entire first row that you just added. On the Table Tools Layout Tab, Merge the two cells in the top row.
- Matt Smith [Press Enter]
- (867) 555-1012 [Press Enter]
- 1254 Success Way Phoenix AZ 85320 [Press Enter]
- [email protected] [Press Tab]
Note: Pressing Tab would move to the next cell, whereas pressing CTRL + Tab moves within the cell.
- Select Matt Smith and use the mini-toolbar to bold and italic and change the font size to 14.
- Select all of the text in the first row, and set Spacing Before and After to 0 pt. Remove any extra line spacing.
- With all of the text still selected in the first row, center all of the text.
- Beginning in the second row, italicize and bold all of the headings in the left-hand column.
- In the cell to the right of WORK EXPERIENCE, italicize and bold the job title “Help Desk Technician.”
- In the cell to the right of EDUCATION AND CERTIFICATIONS, bold University of Youngstown. Change the Spacing After to 12 pt. for the line beginning with Bachelor.
- In the cell to the right of WORK EXPERIENCE, select Help Desk Technician and set the spacing to 12 pt. after.
- Click the crosshair indicator in the upper left-hand corner of the table
- Start at the top of the table and click and drag to select the entire table
- Use the shortcut key CTRL + A
- On the Table Tools, Design Tab, in the Border Group, select No Border.
- With the table still selected, in the Table Tools, Design Tab, in the Border Group, select Borders and Shading. In the Borders and Shading dialog box, apply the thick upper line and thin lower line table style to the top of the table and the thin upper line and thick lower line to the bottom of the table.

- In the line beginning with Matt Smith, change the Spacing Before to 12 pt.
- In Backstage View, display the print preview under Print. If necessary, exit Backstage View and make modifications. Compare your documents to the image below.
- In Backstage View, under Info, show advanced properties and type in the keywords box “resume.”
- Type your course name and section number in the Subject box and be sure your name is in the Author box.
Note: For this activity, you will have to use a second account or work with a partner who is available to view your presentation.
- In Backstage View, click Share, Present Online .
- Share the document using Present Online. Select one of the two methods for using the link or sending the link to your partner or instructor.
- Click Start Presentation, and when you are finished, end the presentation. Save the document and before closing Word, verify where your document is saved. Close Word.
WORD PRACTICE 4


For Word Practice 4, we will use Word to create a cover letter to accompany your resume that you created in Word Practice 3. Key skills in this practice are creating a letterhead , finding and replacing text, drag and drop, table styles, and editing and checking your document.
- Start Word and display a new blank document. Display the formatting marks and rulers.
- Save the file as Yourlastname_Yourfirstname_Word_Practice_4 in your Word folder.
Note: On the Design Tab, in the Document Formatting group, you will see Styles. Click the down arrow to view the Default and No Paragraph style and examine the screen tips. Leave the Default style set.
- Type the following, pressing Enter once after each line.
1531 New York Avenue, New York, NY 37201
(919) 555-1221 [email protected]
Note: If the email address automatically converts to a hyperlink, remove it by right-clicking and selecting Remove Hyperlink.
- Select the name Matt Smith and change the font to 18 and apply bold.
- Select the second and third paragraphs that contain the address and contact information. Change the font to 12, apply bold, and Align right.
- With the second and third paragraphs selected, change the line spacing options to single, and check the box to not add a space between paragraphs of the same style.
- Click in the first paragraph with the name, and insert a solid 2 ¼ pt. single line border below the paragraph. To launch the borders and shading dialog box, go to the Home tab, Paragraph group, click the arrow next to the borders icon, and launch borders and shading at the bottom of the list.
- Using Document Info, add the file name to the footer.
- Move the insertion point to the blank line below the letterhead and press Enter three times. Ensure the alignment is set to align left.
- Using Insert Date & Time, insert the date using the third date format and press Enter four times. Insert Date & Time is located under the Insert tab, Text Group, Date & Time.
- Type the following address, pressing Enter after each line, except the last line:
Mr. Stephen Shell, Human Resources Manager
352 Crosslove Way
Borderline, KY 40505
- Press Enter two times.
- Right-click on the word Borderline. Choose the first option to correct the word to Borderline.
- Select the entire inside address . Change the Spacing After for the inside address to 0, and remove the space before and after the paragraph if necessary.
- Type Dear Mr. Shell: and press Enter two times.
- Type exactly as shown:
I am writing to express my interest in a position at your company. My enclosed resume details specific information regarding my background.
- Using the Text From File command, insert the text from the Text_Word_Practice_4 file.
- Press Enter one time and type:
Sincerely, [press Enter four times]

- Select the text beginning with the date and through the end of the document and change the spacing after to 0.
- Position the insertion point at the beginning of the document. On the Home Tab, in the Editing Group, choose Find. The Navigation Pane will open on the left-hand side.
- In the search document box, type “background” and hit Enter. Notice how this word is now highlighted in your document, and a preview displays below in results.
- Click the arrow next to the search document box, and click replace. The Find and Replace dialog box will appear. In the “Replace with” box, type “experience.” Replace the first instance, and then close the dialog box.
- In the paragraph that begins “As shown on,” select and drag the word skills to the right of the word unique. Use the drag-and-drop technique by selecting the text, holding down the mouse or cursor, and moving the text to the new location.
- In the paragraph that begins with “You can contact,” drag the first sentence to the end of the paragraph. Use the drag-and-drop technique by selecting the text, holding down the mouse or cursor, and moving the text to the new location.
- Position the insertion point in the blank paragraph above the paragraph beginning with “You can contact me.”
- On the Insert tab, tables group, Insert a 2 x 3 table.
- In the first cell of the table, type Communication Skills.
- Complete the table using the following information:
| Communication Skills | Excellent Listener, Stress Management and Emotion Control |
| Technical Skills | Operating Systems, Applications, Networking |
| Education | Bachelor of Science |
- Ensure the table is selected. To autofit the contents of the table, on the Table Tools Layout tab, in the cell size group choose Autofit, contents.
- On the Table Tools Design tab, on the Table Styles group, apply the Grid Table 4—Accent 2 table style. Ensure the Header Row checkbox is not checked.
- Center the table between margins.
- On the Review tab, in the Proofing group, choose Spelling & Grammar.
- Beginning at the top of the document, perform a spelling and grammar check , correcting all errors. Ignore spelling errors related to names. Delete any repeated words.
- In the paragraph that begins “As shown on,” use the Thesaurus to change shown to presented . Select the word shown , right-click, and select synonyms. If the word presented does not display, launch the thesaurus for other options.
- Save your document and display Backstage view.
- In Backstage view, show all properties. Type cover letter in the Keywords box, your course name and section number in the Subject box, and be sure your name is shown in the Author box.
- View the Print Preview in Backstage View. The document should fit on one page. If not, make adjustments to ensure your cover letter is one page. Compare your document to the image below.

WORD PRACTICE 5


For Word Practice 5, we will use Word to create a research paper. Key skills in this practice are formatting a research paper, footnotes and endnotes, citations and bibliographies, and advanced properties.
- Start Word, and open the file Starter_Word_Practice5 from your data files folder on your flash drive. Save the document as Yourlastname_Yourfirstname_Word_Practice_5 in your Word Folder.
- Select all of the text in the document. For the entire document, change the line spacing to 1.5 and the Spacing After to 0 pt.
- Emily Sophia
- Dr. Michelle Carter
- HTM Research Capstone
- April 20, 2020
- Technology and Your Health
- Center the text in the last typed line: Technology and Your Health.
- On the Insert Tab, Header & Footer group, select Header, then Edit Header. In the Header on the first page, type Sophia and then spacebar.
- On the Header & Footer toolbar, Design tab, in the Header & Footer Group, choose Page Number. Add a Simple Plain Number page number in the current position and right-align the header.
- Select all the text beginning with “The Idea of” to the end of the document. With the text selected, on the Home Tab, Paragraph Group, click the arrow next to the Line and Paragraph Spacing icon and choose Line Spacing Options. Under Indentation, apply the First line indent. Confirm that the By: box is set for 0.5″. Click OK. Deselect the text and notice how the first line of every paragraph is indented by half an inch.
- On the Insert Tab, Header & Footer group, Edit the Footer. Use Document Info to add the filename to the footer. Double-click in the white space in the document to exit from the Footer view.
- In the paragraph that begins with “Self-quantifying,” position the cursor in the second line of the paragraph to the right of the period after “self-trackers” on page 2.
- On the References Tab, Footnotes group, choose Insert Footnote . Notice how the insertion point moves to the bottom of the page, and a “1” is inserted. To add the footnote, type “The Department of Health & Human Services is researching methods to improve healthcare.” A footnote indicator was automatically added to self-trackers[1].
- Changing the font size to 9
- On the bottom left side under Format, choose Paragraph. Set the First Line indentation to .05″
- Select Double line spacing
- To apply your changes and back out of these screens, select, OK, OK, and Apply.
- On the References Tab, in the Citations & Bibliography group, in the Style Window, set the bibliography style to MLA 7th Edition .
- Author: Henderson, Robert
- Title: Living with Technology
- City: Chicago
- Publisher: Grant Publishing
- Medium: Print
- Click OK to add the citation. Notice how an in-text citation automatically populated at the end of the paragraph.
- Select the in-text citation, and right-click and choose Edit Citation. Edit the citation by typing 4 in the Pages box.
- Type a period to the right of the citation and delete the period to the left of the citation.
- Author: Johnson, Ralph A. and Mary Martin
- Title: Impact of Technology on Mental Health
- City: New York
- Publisher: The IT Press
- Edit the citation by typing 25 in the Pages box.
- Author: Jones, B. E.
- Name of Web Page: NIH 2014-April Brief
- Month: April
- Year Accessed: 2018
- Month Accessed: May
- Day Accessed: 15
- Medium: Web
- At the end of the document, insert a manual page break. On the Layout tab, Page Setup Group, choose Page Breaks, Page.
- On the new blank page, set the paragraph indentation to None.
- On the References Tab, Citations & Bibliography Group, choose the arrow next to Bibliography and select the text Insert Bibliography.
- Above the first line of the bibliography (you may need to hit Enter to create space for the title), type Bibliography.
- Select the title Bibliography. Change the font to Arial Black, the font size to 14, the font color to Black, Text 1, and then center the text.
- Select the three references but not the blank paragraph and change the paragraph line spacing to 2.0 and the spacing before and after to 0 pt. Select OK.
- On the References Tab, in the Citations & Bibliography group, select Manage Sources to launch the Source Manager. Using the Source Manager, in the Master List, change the H in Henderson to B. Click Yes to any messages that populate, then click OK.
- Select the three sources under Bibliography. Right-click in the gray box, and choose Update Field. Notice this updates the citations and bibliography to reflect this change.
- Document title: Technology and Health
- Keywords: technology, research paper
- Comments: Draft of class report
- Subject box: your course name and section number
- Company: SPSCC HTS Program
- Manager box: Dr. Michelle Carter
- Author: your first name and last name
Note: Use the Summary tab on the Advanced Properties dialog box, to display the document properties and the Statistics tab to show document statistics.
- Select Quantified Self on page 1, fourth paragraph, and click Smart Lookup on the Review Tab. If necessary, click Got It, and show any additional information source. Choose one or two sites to view, and then close the Smart Lookup Pane.
- Move to the top of the document and display the document in Read Mode by going to the View tab, in the View Group choose Read Mode.
- Click Tools from the upper left corner. Click Find and in the search box type Benderson. Notice how the results display in the Navigation Pane and are also highlighted in the text of the document.
- Click View in the upper left-hand corner.
Click Edit Document to return to Print Layout view. Close the Navigation Pane if necessary.
- Take a moment to Save your file, and ensure you know the location where it is stored. Most likely this is in your Word Folder on your flash drive.
- In Backstage View, select Save As Adobe PDF, then Save. Your file location should default to the same location. If not, make note of where your file is being saved. It may take a few minutes to convert your document to a PDF. View your file once it is converted, and then close it.
- Using Windows Explorer, open a new folder and navigate to where your PDF file is saved. Do not open your file. Instead, right-click on the file icon, choose Open with, Word 2016. The PDF file will start to convert back to Word. Click OK. Take note of any changes that might have occurred during the file conversion process.
- Submit the file for grading per your instructor’s instructions. Be sure to submit your Word Document, not the PDF file.
WORD PRACTICE 6

For Word Practice 6, we will use Word to create a newsletter for Health Sciences students at SPSCC. Key skills in this practice are formatting text as columns, editing pictures, and inserting screen clips , symbols, and special characters .
- Start Word and open Starter_Word_Practice6. Save the file as Yourlastname_Yourfirstname_Word_Practice_6 in your Word folder.
- Using Document Info, insert the file name in the footer.
- Select the first paragraph that begins with Paradise Valley and change it to South Puget Sound and apply Bold text and change the font color to Blue-Gray, Text 2.
- With the title still selected, go to the Home Tab, Paragraph Group, select the arrow next to Borders and choose Borders and Shading to launch the Dialog Box. Add a Blue-Gray, Text 2Darker 25%, 2¼ pt. solid line bottom border.
- Select all the text beginning with Health Sciences Newsletter down to the end of the document excluding the final paragraph.
- On the Layout Tab, Page Setup Group, Set the columns to two. Compare your screen to the image below:

- With the two columns of text still selected, change the spacing after to 6 pt. and Justify the text.
- Position the insertion before December Birthdays and insert a column break on the Layout tab, breaks group, and select column. This will ensure the column of December Birthdays is a new column.
- Position the insertion point at the end of the document in the empty space after the paragraph that begins with “When you are finished…”
- On the Insert tab, Illustrations Group, Select Pictures. Browse to where your data files are stored and insert the Health Sciences Logo named Word_Practice_6_Image1.
- The picture height to 2.0″.
- The text wrapping layout to Top and Bottom.
- The horizontal alignment to Centered, relative to Column.
- The vertical alignment to Bottom, relative to Margin.
- With the picture selected, on the picture tools, Format toolbar, in the Size group, choose the arrow under Crop.
- Using the Cropping handles on the picture, crop the picture by using the far right crop handle, dragging to the left until only the circle heart logo is visible. Everything in the gray area will be cropped. The cropped image should look something like this:

- With the image still selected, choose layout options. Use the Text Wrapping tab to change the layout text wrapping to Square. Choose more. Under options, choose Lock Anchor .
- Use the Position tab to set the horizontal alignment to Centered, relative to Page.
- With the image still selected, zoom to 200%.
- On the Picture Tools, Format Toolbar, Adjust Group, choose the arrow next to Corrections. Under Sharpen/Soften , choose Sharpen 50%.
- Under Color, choose Saturation 400% for the Color Saturation .
- Under Corrections, set the Brightness/Contrast to Brightness: +20% Contrast +20%.
- With the picture still selected, set the Zoom back to 100%.
- Resize the picture to 2.17″ for the height and 2.65″ for the width.
- With the picture still selected, on the Picture Tools, Format toolbar, in the Size Group, choose the arrow next to Arrange. Choose the arrow next to rotate and then choose Flip Horizontal.
- Near the top of the document in the left column, delete the word December. Position the insertion point in the blank paragraph under Health Sciences Newsletter.
- Redisplay the newsletter, and ensure the insertion point is in the paragraph below Health Sciences Newsletter. On the Insert tab, click Screenshot, and then click Screen Clipping . Drag from the upper left corner of the browser below the address bar to the lower right corner above the taskbar. Your screen clip may vary based on the resolution and web browser utilized.
- With the Screen Clip selected, resize height to .8″ and the width to 3.12.
- With the picture still selected on the Picture Tools Format tab, choose Quick Styles and select the first Style: Simple Frame White.
Note: After inserting the screen clip, you may need to readjust the position of the logo at the bottom of the document. Since the Text Wrapping is set to Square, you can manually adjust it by selecting and dragging it.
- Change the font color to Blue Gray Text 2.
- Apply Bold.
- With the text still selected, launch the Font dialog box. Under effects, choose the checkbox next to small caps .
- Using Format Painter , apply the same formatting to each of the heading paragraphs. To use the Format Painter, select the text. Then select the Format Painter icon on the Home Tab, Clipboard Group. Then select the text that you would like to apply formatting to.
- In the paragraph under the heading Winter Scholarship Fundraiser, delete the comma and space between Sylvia Haines and her title and insert an em dash . This is a special character located on the Insert Tab, Symbols Group, Symbol, More Symbols, Special Characters, Em Dash.
- Apply a Blue Gray Text 2, 1½ pt. shadow border.
- Apply a Blue Gray Text 2 Lighter 60% shading.
- Center the text.
- Position the insertion point in the second column, towards the bottom of the document under Main Campus. On the Insert Tab, Text Group, select the arrow next to Word Art . In the second row, the second column choose the Word Art Style Gradient Fill-Blue, Accent 1, Reflection.
- With the Word Art still selected, use the drag and drop technique to position it so that it is centered in the column. Ensure the font size of the WordArt is 28. In the WordArt type: We appreciate you!
- On the Design Tab, Choose Page Borders. In the Page Borders Dialog Box, choose the Box Border, the style with a thick upper line and thin bottom line, Automatic color, 3pt width, to the whole document.
- In Backstage view, add “newsletter, March” to Keywords, course name and section number to Subject, and make sure your name displays as Author.
- Save the document and compare it to the image below. Make any adjustments before submitting per your instructor’s instructions.
MASTER ACTIVITY 1

Complete the following Master Activity and submit your completed project.

During the first chapter, you should have already created a Google Account. You will need to be logged into your Google account to complete this assignment. Since Google docs is web based, it changes frequently. The steps outlined here may be slightly different from what you see on your screen. If you do not already have a Google account, you will need to create one. Go to http://google.com and in the upper right corner, click Sign In. On the Sign In screen, click Create Account. On the Create your Google Account page, complete the form, read and agree to the Terms of Service and Privacy Policy, and then click Next step. On the Welcome screen, click Get Started.
- From the desktop, open your browser, navigate to http://google.com, and then sign in to your Google account. In the upper right corner of your screen, click Google apps, and then click Drive. If you are already logged into your South Puget Sound Google Apps Account, click Apps, then Drive.
- To create a folder in which to store your web projects, click New, and then click Folder. In the New folder box, type BPC110 and then click Create to create a folder on your Google Drive. Double-click your folder to open it.
- In the left pane, click New, and then click Google Docs to open a new tab in your browser and to start an Untitled document. At the top of the window, click Untitled document and then, using your own name as the file name, type Lastname_Firstname_WordMaster1 and then press Enter to change the file name.
- To the right of the file name, point to the small file folder to display the ScreenTip Move to. Click the file folder and notice that your file is saved in the BPC110 folder.
- Click in your document to close the Move to folder dialog box and to position the insertion point at the top of the document. Type Internship Opportunity and then press Enter two times. Type: Interviews will be held Friday and Saturday, January 14 and 15 in the Career Services Office.
- Select all of the text. Click the Font size arrow, and then click 24. With the text still selected, click Center.
- Select the title Internship Opportunity and then click Text color. In the first column, click the last color, and then apply Bold.
- Select Enter two times to create empty space after the text. Click Insert, and then click Image, then Search the Web. In the search box type Social Media and insert any image that represents social media.
- Click the picture to select it, and then point to the square sizing handle at the upper left corner of the picture. Drag down and to the right until the sizing handle aligns with approximately 3 inches on the ruler.
- If necessary, scroll up to view the image and the text above it. Click directly under the picture and insert a 2 x 2 table by selecting the Insert Tab, then Table. Type Join our team as a social media coordinator in the first cell of the table. Select the entire first row of the table, right-click, and choose Merge. Then, center the text. In the second row of the table in the first cell, type: Interviews will be conducted on the spot.
- In the last cell, type: We are hiring two interns!
- Select all of the text in the table, change the font size to 14, and change the color to any color that coordinates well with your image.
- If necessary, select the ellipses in the Toolbar (three dots) to view the table border width, and select zero so that no borders are displayed.
- Click Insert, Headers and Footers, and then Footer.
- In the Footer, choose the arrow next to options. Enter a page number and center it on the page.
- Click Tools, Spelling and Grammar, Spelling and Grammar Check. Verify Spelling and Grammar are correct.
- Take a moment to preview your document, and make any adjustments as necessary. Ensure your document fits to one page only.
- Your document will be saved automatically. Submit as instructed by your instructor
MASTER ACTIVITY 2

In this activity, you are working for an employment agency and have been asked to fix a resume before sending it to potential employers. Follow the guidelines below to correct the resumes, ensuring it is professional, organized, and easy to read without changing the content.
- From your data files, open the file Starter_Word_Master2. Rename the file as Lastname_Firstname_Word_Master2.
- Merge the first two cells in the first row of the table.
- Center the text in the first row.
- Change the font, font color, and font size of the text in the first row.
- Change the font of the remaining text to ensure it coordinates with the heading.
- Apply bullets, indenting, and modify the Font to the text in the second column to make it easier to read.
- Resize the table, and ensure the resume fits to one page only.
- Hide table borders.
- Apply a border to the first row only, to ensure the name and contact information stand out.
- Ensure font, font size, and paragraph spacing are consistent.
- Run spelling and grammar check and make all necessary corrections.
- Submit as instructed by your instructor.
MASTER ACTIVITY 3

In this activity, you will research a topic that is interesting to you and write a one-page, three-paragraph research paper. If you have a research paper from another course, you may use that for this assignment. Your research paper must include the following elements:
- A running header in MLA seventh edition style
- At least two footnotes
- At least two citations
- A bibliography (this should be on a separate page, for two pages total)
Use PDF reflow to save your research paper as a PDF file
CHALLENGE IT

Complete the following Challenge and submit your completed project.

In this challenge activity, you will complete a project that incorporates all the key skills learned in the Word unit. As the Director of Career Services, you have been asked to prepare and present documents to the Board of Directors regarding an upcoming National Convention. You have been asked to prepare
- A letter to the board explaining the upcoming convention
- A newsletter to employees with information on the convention
- An essay on why internships matter
- A Resume for the Keynote Speaker
- An online Flyer to advertise the event
- Open the Word document Starter_Word_Challenge. Be sure that the rulers and formatting marks display.
- Rename your file as Lastname_Firstname_WordChallenge and save it.
- On the letter on Page 1, select the first paragraph—Paradise Valley Community College, Career Services—and increase the Font Size to 28 pt. Change the Font Size of the next four paragraphs—the address lines and website—to 12 pt.
- Select the first five paragraph lines that you just formatted, change the Font to Arial, and then with the text selected, display the Borders and Shading dialog box. Create a 6 pt., Automatic-colored border on the left side of the selected text.
- In the paragraph that begins “If you have any,” select the second sentence and move it to the beginning of the paragraph. Adjust spacing as necessary so that there are no extra blank spaces at the end of the paragraph. Remove any extra spaces as necessary to ensure the letter fits on one page.
- On Page 2, in the newsletter, select the second paragraph of text, which begins with “All Employee Newsletter.” Display the Borders and Shading dialog box, and then add an Automatic-colored, 3 pt. line below the paragraph.
- Starting with the paragraph that begins “All Employee Newsletter,” select all of the text from that point to the end of the page, including any paragraph marks for that page only. Do not select the Page Break. Change the Spacing After to 6 pt., format the text in two columns, and apply the Justify alignment.
- At the top of the first column, select the paragraph Annual National Convention Special Edition. From the Font dialog box, change the Font Size to 20, apply Bold, and add the Small caps effect. Then Center the paragraph. Apply the same formatting to the other headings on the newsletter.
- On the same page, in the blank line above the last paragraph of the newsletter, insert the picture from your downloaded files “Word_Challenge_Step8.”
- Set the Height of the picture to 1.2″ and the Width of the picture to 3.2″ and apply the first Picture Style, Simple Frame, White.
- Under the image, type:
For more information, please visit our website at www.maricopa.edu. Click on the link for the Annual National Convention. Here you will find additional information on the agenda, which will be updated daily. You can also message conference organizers with any questions you might have prior to and during the conference. Housing, meals, and additional safety protocols will be announced here.
- At the bottom of the newsletter, insert an online recycling image using the Bing image search, and center it at the bottom of the page.
- Ensure the headings on the newsletter are 20 pt., and the text underneath is 12 pt.
- Thick upper line, thinner lower line
- Automatic Color
- Ensure the page border is applied to the newsletter only
- 123 Maple Drive
- Ajo, AZ 81657
- www.janajoneskeynote.com
- In the second row of the table, in the first cell, type Career Highlights, and then press Tab.
- In the second cell of the second row, insert the text from the downloaded file Text_Word_Challenge.docx and then press BACKSPACE to remove the blank line at the bottom of the inserted text. If necessary, ensure there is a blank line after each entry.
- Northern Arizona University
- Ph.D. in International Women’s Studies
- University of Florida
- M.S. in Organizational Psychology
- University of Indiana
- B.S. in Psychology
- Women in IT Corporation
- NASA Consulting Agency
- National Science Foundation
- National Council on STEAM
- Apply Bold to each of the headings: Career Highlights, Education, and Professional Experience.
- Drag the vertical border between the two columns to the 1.5-inch mark on the horizontal ruler.
- In the first row, merge the two cells, and then Center the text. Select the name Jana Jones, increase the Font Size to 24 pt., apply Bold, and then add 24 pt. space before the text. Select the web address and add 18 pt. space after the text. Select the address and web address and increase the font size to 14.
- Create a bulleted list, using solid round black bullets, for the items to the right of Career Highlights and also for the items to the right of Professional Experience. Decrease both bulleted lists one time. Ensure both bulleted lists are set to 2.0 line spacing and remove any extra lines if necessary.
- Apply Bold to the name of each university, and then apply 12 pt. spacing after to the name of each college degree.
- Select the headings Career Highlights, Education, and Professional Experience and apply small caps and font size 14 pt.
- Select the table, and then remove all borders. From the Borders and Shading dialog box, add a 3 pt. solid border to the top and bottom of the table.
- Near the top of Page 4, in the paragraph that begins Internships, position the insertion point to the right of the period following world, and then insert the following footnote: A recent study from Georgetown University found that, on average, college graduates earn $1 million more in earnings over their lifetime.
- Modify the footnote style by changing the Font Size to 11 pt., Calibri; add a First Line Indent of 0.5″; and set Line spacing to 2.0 (double).
- June 5, 2020
- On Page 6, in the blank line after Internships matter, insert a page break. In the blank line below the Works Cited title, insert the built-in Bibliography. Center the Bibliography title and delete Works Cited. If necessary, insert another page break, which will be page 7.
- On Page 7, select the title National Convention and center it, bold, Font size 28, and apply small caps.
- Select the two paragraphs below the title that begin Friday and Saturday, and then change the Spacing After to 0.
- Select the three paragraphs below the title—the dates—and then from the Borders and Shading dialog box, apply a Box border using theme color Blue, Accent 1 (fifth column, first color), and a 3 pt. border. Click the Shading tab, and add Shading using theme color Blue, Accent 1, Lighter 80% (fifth column, second color). Ensure the text is centered.
- Click after the period after the word experience and hit enter. Insert an online video from YouTube about Internships. Change the Height of the picture to 3″, the Width to 4″, and then set the wrapping to Square. If necessary, drag the video image to the right until it aligns with the right margin.
- Apply the Simple Frame White Picture Style.
- To the SmartArt graphic, change the colors to Colorful-Accent Colors 2-3 and apply the White Outline style.
- Your final document should be 7 pages. Ensure your file is saved.
Software or a device that allows users to create, edit, and print documents
A regularly updated website or web page, typically one run by an individual or small group, that is written in an informal or conversational style
Characters that display on the screen but do not print, indicating where the Enter key, the Spacebar, and Tab key were pressed, also called non printing characters
A button that can be turned on and off by clicking it once to turn on, and clicking again to turn it off
A centralized space for file management tasks such as opening, saving, printing, or sharing a file
Allows the user specify the drive, directory, and name of a file to save their file
Located above the Ribbon (top-left) and provides access to commonly used features and commands, such as Save and Undo/Redo, and is customizable
Appears whenever you right-click text in Word, Excel or PowerPoint and provides a quick-access version of the Font group on the Home tab, plus a few extra buttons from other groups
One or more keys used to perform a menu function or other common functions
a moveable, resizable container for text or graphics
a graphical tool that adds visual interest
The bottom margin of each page
Appears whenever you right-click text in Word, Excel, or PowerPoint and provides a quick-access version of the Font group on the Home tab, plus a few extra buttons from other groups
Specifies the distance between where the lines in a paragraph start in relation to the left or right margins
A list of items in no particular order that are preceded by a bullet for emphasis and organization
Allows you to copy formatting from one item and apply it to another
Horizontal position which is set for placing and aligning text on a page
The space between tab stops can show a line, dots or dashes to line up information and guide the reader
The intersection of a row and column in a table
A feature in Word where you can see suggestions from LinkedIn to enhance your resume
A feature in Word tables that allows users to insert a new row or column by pointing to the desired location and then clicking once
A Word feature that allows you to share your documents online using a web browser
A letter of introduction that highlights key points in the resume that follows
The heading at the top of a sheet of letter paper that typically includes name and address or company logo.
The name and address of the person of business received the letter, positioned below the date line
Identifies spelling and grammatical errors and provides suggestions for correction
Allows you to capture an image from your screen
Normal characters that don't appear on standard keyboards; but once inserted into a Word doc, they look the same as keyboard characters
A feature in word that allows you to move your image to any position on the same page as the anchor paragraph which forces the object to stay in that position
An efficient way to add effects to a picture such as shape, border, and other effects
A punctuation symbol that indicates and explanation or emphasis
Informally as dot-dot-dot, is a series of dots that indicates an intentional omission of a word, sentence, or whole section from a text without altering its original meaning. When selected, additional options appear
Computer Applications Copyright © 2022 by LOUIS: The Louisiana Library Network is licensed under a Creative Commons Attribution 4.0 International License , except where otherwise noted.
Share This Book
Filter by Keywords
10 Best Word Processing Software Programs in 2024 (Free & Paid)
Senior Content Marketing Manager
August 31, 2024
Start using ClickUp today
- Manage all your work in one place
- Collaborate with your team
- Use ClickUp for FREE—forever
When you sit in on a virtual conference or when your boss starts firing off their favorite productivity tips, what do you do? You open a digital document and take notes. 📝
…probably with the same word processing software you’ve used since the ninth grade. 👀
Word processing software isn’t what it used to be— it’s better .
These tools have evolved beyond the boring blank screens we felt forced to use. Now, word processing can actually be fun!
Rich text editing, dynamic formatting, intuitive writing assistance , and collaboration features are some of the greatest benefits to using top word processing software. But the best part? It’s also incredibly affordable.
Follow along as we dive into every must-have word-processing feature and the 10 best word-processing software for every team, writing style, and use case! Complete with detailed feature comparisons, pros and cons, pricing, ratings, and more!
What is a Word Processing Software?
What should you look for in word processing programs, 2. microsoft word, 3. google docs, 4. grammarly, 5. wps office, 6. dropbox paper, 9. evernote, 10. libreoffice, find the best word processing application for your work.
Word processing software is an application used to capture, format, and edit any form of writing—whether it be your general thoughts, meeting notes, SOPs, or email drafts. Your mind may immediately go to typewriters, but the benefits of word-processing software extend much further than that.
Thanks to the modern development of project management software , collaboration tools, and intuitive design, word processing software can do more than you ever thought possible! You can edit one document alongside your peers, arrange documents by category , share them via simple links, and flex your creativity with rich formatting. And these days, that’s just the bare minimum!
The thing is, there are a ton of word processing software to choose from these days.
In fact, we’d bet our bottom dollar that you can think of a few off the top of your head as we speak! You might even have a top three!
But with the number of new, flexible, and exciting features being added to word processing tools each day, it’s important to know what to look for in your go-to software in order to best serve your use case and to get the most bang for your buck.
All this talk about advanced features makes you wonder—what does this functionality actually look like?
You don’t have to settle for the basic features we grew up struggling with. You also don’t have to fork over an arm and a leg to access powerful software that can take your documents so much further!
Here is a list of our favorite, must-have features to look for in your next word-processing software:
- Ease of use : Make sure your software is easy to learn, share with others, and efficiently supports your most-used functions
- Cloud-based and a reliable offline mode : Things happen! You might lose your wifi connection, need to switch devices, or be asked to share your documents on the spot. Cloud-based software and offline functionality ensure these hurdles won’t pose any real problem
- Collaboration features : These features make it possible for you to edit and develop documents in real-time with the team! With clarity and without overlap. And consider it a bonus if you can also tag your team or comment on your text
- Custom permissions and sharing : Especially if you often work with stakeholders, clients, or other departments, it’s important to have the ability to choose who can edit, view, or give access to your work
- Version history : This is your way of keeping a digital paper trail. Plus, if you make a mistake, you’ll have the power to go back and restore your text
- Integrations : The more integrations, the more information you can pull into your documents! Plus, it goes both ways, multiple integrations with your chosen word processing software means you can also access your documents from virtually anywhere and from any other tool
10 Best Free Word Processor Software Examples in 2024
There’s no reason why your word-processing software can’t be exciting, dynamic, or collaborative.
Digital editors and document sharing have come a long way in the past decade and we have tons of software to show for that growth! The challenge then becomes finding a tool that’s tailored to your unique needs and aligns with your work style.
So what do you do? You refer back to this list!
We’ve researched and tested the best word-processing software to bring you 10 of our favorites based on their best features, limitations, pricing, ratings, and more!
ClickUp is the ultimate all-in-one productivity tool for teams across industries to centralize their work into one collaborative platform. ClickUp is known for its rich set of fully customizable features, including a built-in document editor to create everything from simple to-do lists to detailed wikis, then connect them directly to your workflow.
With the ability to convert text into actionable tasks, embed data from virtually any other work tool, and collaborate on documents in real-time, ClickUp Docs is the ideal word processing tool for teams, students, and enterprise companies alike.
ClickUp best features
- ClickUp Brain to assist in writing compelling copy, brainstorming, editing, proofreading, summarizing notes and more!
- Advanced word processing and work management features across every pricing plan , even Free Forever
- Embed media, tables, bookmarks, and even other documents into ClickUp Docs to bring more context and value into your roadmaps and knowledge bases
- Live detection in ClickUp Docs lets teams edit, contribute, and comment on the same document in real-time
- Link Docs to tasks and add widgets to automatically update workflows from your document editor
- Turn highlighted text into action items and delegate them to the team with threaded comments and @mentions
- Hundreds of templates for any use case , including several created specifically for ClickUp Docs
- Easy and secure sharing via URL for any guest, collaborator, or even public access
- Over 1,000 integrations to embed work into ClickUp Docs from virtually anywhere
- Nested pages and styling options to create visual hierarchies within every Doc

ClickUp cons
- There can be a bit of an adjustment period learning all of ClickUp’s advanced features
- Some views are not yet offered on the mobile app
ClickUp pricing
- Free Forever
- Unlimited : $7 per user, per month
- Business : $12 per user, per month
- Enterprise : Contact ClickUp for custom pricing
- ClickUp Brain: Add to any paid plan for $7 per member per month
ClickUp ratings and reviews
- G2: 4.7/5 (5,680+ reviews)
- Capterra : 4.7/5 (3,540+ reviews)

Microsoft Word is a powerful word processor for anyone to create Word documents, spreadsheets, emails, and more. It’s part of the Microsoft Office Suite, which makes it easy to integrate with other Microsoft products like Excel and PowerPoint.
Word offers various features to help you stay organized, such as template options for different types of formal documents and advanced editing tools. You can add images, tables, charts, hyperlinks, and other media to enhance the look of your MS Word documents. The program also provides many features to help make creating documents more efficient, such as a spellchecker, auto-corrector, and thesaurus.
Microsoft Word best features
- OneDrive storage to save and access documents from anywhere
- Real-time collaboration to share and edit with others
- Spelling and grammar checker
Microsoft Word limitations
- Functions on the toolbar are different from version to version
- Many features of Word forms don’t transfer and cause the format to break when printing documents
Microsoft Word pricing
- Microsoft Word is available as a standalone version for $159.99 or with a Microsoft 365 subscription
Microsoft Word ratings and reviews
- Capterra: 4.7/5 (1,600+ reviews)
- G2: 4.7/5 (1,000+ reviews)

Google Docs is an online word processor that makes it easy to create and edit professional documents. With real-time collaboration tools, Google Docs provides a platform for groups of people to collaborate on a single project , ensuring that everyone stays up-to-date with the document’s progress. Features like templated and automated formatting are also available to make your document look professional.
With Google Docs, users can track changes, comments, and suggestions as they make revisions and edits. All of the documents you create in Google Docs are automatically saved in the cloud, so you can access them from any device at any time. So whether you’re on your desktop or mobile device, you can continue working!
Google Docs best features
- @Mentions to pull relevant people, files, and events
- Smart Compose helps you write faster with fewer errors
- Third-party applications with project management tools
- Comment replies from Gmail
Google Docs limitations
- Limitations on document sizes
- Not suitable as a scalable knowledge base system
Google Docs pricing
- Google Docs is free with a Google account
Google Docs ratings and reviews
- Capterra: 4.7/5 (27,000+ reviews)

Grammarly is an AI-powered writing assistant. It helps you identify and fix grammar, spelling, punctuation, and other writing errors quickly. Grammarly offers suggestions while you’re using desktop apps or websites, including Gmail, ClickUp, LinkedIn, Google Docs, and more!
With Grammarly, you get feedback on your writing in real-time so you can improve it instantly. Plus, with its deep understanding of grammar topics and linguistics, you can trust your next report or project will be polished and professional. Grammarly makes it easy to focus on what’s important—creating strong, compelling content.
Discover the top content collaboration software !
Grammarly best features
- Style Guide to capture voice and style for consistent documents
- Text snippets to insert sentences and paragraphs in all workflows
- Tone Detector for effective communication
- In-app editor to upload documents
Grammarly limitations
- Doesn’t work for all apps and websites
- Expensive monthly subscriptions
Grammarly pricing
- Premium : $12/month
- Business : $15/member per month
Grammarly ratings and reviews
- Capterra: 4.7/5 (6,000+ reviews)
- G2: 4.6/5 (1,200+ reviews)
Check out these Grammarly alternatives !

WPS Office is a comprehensive office suite that provides you with the tools and features necessary to manage all your documents, files, and presentations efficiently. It supports popular file formats and is compatible with PC and mobile devices. With WPS Office, users can create and edit text documents, spreadsheets, and slide shows in an intuitive and user-friendly interface.
It also includes powerful document management tools such as colorful themes, annotation, split PDF documents, and file format conversion. The software also has advanced collaboration capabilities that allow multiple users to work on the same file simultaneously.
WPS Office best features
- 100,000+ templates organized by categories
- Multiple language support
- Text extraction
- Watermark creation
WPS Office limitations
- Limited ability to handle different work styles and preferences
- A free plan is not available
WPS Office pricing
- WPS Standard: Free
- WPS Pro : $23.99 for 6 months or $35.99 for 1 year
WPS Office ratings and reviews
- Capterra: 4.5/5 (1,200+ reviews)
- G2: 4.4/5 (200+ reviews)

Dropbox Paper offers a simple way to start a project. The drag–and–drop feature allows users to break down complex tasks into easily manageable chunks. By inviting teammates to collaborate on projects , everyone can contribute to the conversation, comment on each other’s work, and brainstorm in real-time.
The Master Doc feature allows anyone to create a hub for other docs. For complex or long-term projects, organizing documents from the start will boost productivity. It provides you with an efficient way to access and manage all the related documents by creating links to them. You don’t need to spend extra time searching for files. Search or navigate within the master document!
Dropbox Paper best features
- Search bar to find publicly viewable docs associated with a team member’s email address
- Keyboard shortcuts to highlight specific text
- Custom templates to standard forms
- Auto-generated table of contents
Dropbox Paper limitations
- Limitations on file upload sizes in a Dropbox account
- Basic users can only be signed into three devices at a time
Dropbox Paper pricing
- Plus : $9.99/month for 1 user
- Family : $16.99/family per month for up to 6 users
- Professional : $16.58/month for 1 user
- Standard : $15/user per month for 3+ users
- Advanced : $24/user per month for 3+ users
- Enterprise : Contact Dropbox for pricing
Dropbox Paper ratings and reviews
- Capterra: 4.4/5 (100+ reviews)
- G2: 4.1/5 (4,400+ reviews)

Notion is a document-based workspace for your notes, tasks, documents, and databases. It’s a versatile tool as a word processor to track any information, from project milestones and task reminders to travel plans and personal ideas.
Notion’s operating system makes it easy to organize whatever you need to keep track of. With its intuitive drag-and-drop interface, you can quickly set up custom workspaces tailored to whatever type of project or goal. Plus, Notion allows you to link between different databases and notes, create checklists, embed media, and more.
Check out the best Notion alternatives !
Notion best features
- iOS, Windows, web browser, MacOS platforms
- Calendar, Kanban boards, lists, and gallery views
- Notion AI for writing assistance
- Bidirectional linking
Notion limitations
- Pricey premium plans compared to other word processors on this list
- Limited project and task management features
Notion pricing
- Plus : $8/user per month, billed annually
- Business : $15/user per month, billed annually
- Enterprise : Contact Notion for pricing
Notion ratings and reviews
- Capterra: 4.7/5 (1,100+ reviews)
- G2: 4.6/5 (1,000+ reviews)

Coda is a powerful document editor for creating and managing content. With Coda, you can create documents from scratch, edit existing ones, track changes, collaborate with others in real-time, and share them securely. The editor provides a range of tools to help you write fluently and quickly—including text formatting, image editing, tables, and hyperlinks.
Coda also comes with built-in collaboration features, so you can invite people to join in on projects and discuss changes easily. With its easy-to-use interface and intuitive tools, Coda is a word processor solution for anyone looking to build professional documents!
Coda best features
- Building blocks to upgrade documents into boards
- Dashboards to view connected data
- Google Calendar and Slack integrations
- Drag-and-drop basic templates
Coda limitations
- Not scalable as a document database compared to other word processors
- Limited integrations with other apps
Coda pricing
- Pro : $10/month per Doc Maker, billed annually
- Team : $30/month per Doc Maker, billed annually
- Enterprise : Contact Coda for pricing
Coda ratings and reviews
- Capterra: 4.6/5 (40+ reviews)
- G2: 4.7/5 (300+ reviews)
Bonus: Compare Coda Vs. Airtable

Evernote is an online note-taking application to help you be more productive and organized. With Evernote, you can store anything from text-based notes to images, videos, and audio recordings. You can even add reminders and read web pages offline. Evernote is available for various platforms, including mobile devices. Plus, it has a Web Clipper browser extension!
No matter what type of project you’re working on, Evernote makes managing the details easier. Whether it’s brainstorming new content ideas or planning a business meeting, Evernote gives you the freedom to capture, organize and sync all your information. With features like searchable tags and categories, you’ll have the tools to find what you need, when you need it.
Connect Evernote and ClickUp to manage your notes in one place!
Evernote best features
- Calendar view to connect schedules and notes
- Document scanner to go paperless
- Due dates and reminders functionality
- Google Calendar integration
Evernote limitations
- Limited number of saved templates on all plans
- Limited free plan only allowing users for 50 notes per user
Evernote pricing
- Personal : $10.84/month, billed annually
- Professional : $14.17/month, billed annually
- Teams : $20.83/month per user
Evernote ratings and reviews
- Capterra: 4.4/5 (7,700+ reviews)
- G2: 4.4/5 (1,900+ reviews)

LibreOffice is a free open source office suite designed to make completing everyday tasks easier. It’s an open-source product, meaning that it’s free and available to all users. LibreOffice includes programs for word processing, presentation building, spreadsheet editing, database manipulation, formula editing, drawing, and more.
Together these tools provide an intuitive user experience and help individuals create their best work. With LibreOffice, you can develop financial reports, spreadsheets, presentations, and more. If you want more functionality, extensions are available through the LibreOffice repository.
LibreOffice best features
- Formula editor to insert mathematical and scientific formulas
- LanguageTool APIs for grammar checking
- OpenDocument Format (ODF) extensions
- Custom templates
LibreOffice limitations
- Outdated interface compared to other free word processing programs
- Not scalable as a long-term document database
LibreOffice pricing
- LibreOffice is free
LibreOffice ratings and reviews
- Capterra: 4.3/5 (1,600+ reviews)
- G2: 4.3/5 (200+ reviews)
Check out these LibreOffice alternatives !
It’s time to ask for more from your word processing software, ClickUp Docs will show you how. 🙂
Edit with the team, turn your thoughts into actionable tasks, and connect your documents directly to your workflow, all without leaving your editor! No other word processor can enhance the value of your documents like ClickUp can. But the best part? ClickUp does it all for free.
Access ClickUp Docs, unlimited tasks, tons of templates and resources, more than 1,000 integrations, and so much more when you sign up for ClickUp today .
Questions? Comments? Visit our Help Center for support.
Receive the latest WriteClick Newsletter updates.
Thanks for subscribing to our blog!
Please enter a valid email
- Free training & 24-hour support
- Serious about security & privacy
- 99.99% uptime the last 12 months

Word Processing Software: A Beginner’s Guide
- April 30, 2024

A word processor is a digital tool that lets you create, edit, format, and save text documents on your computer or smart device. Coming with a bunch of advantages over traditional pen and paper, there aren’t many people who haven’t used one at some point.
But, everyone has different levels of ability, so we thought it would be useful to have a simple-but-detailed look at word processing software, what the basic functions are, and where you can find them. So, there’s the intro – let’s get into word processing software, and what it can do.
Contents Toggle 1. ‘Which word processor should I use?’ 2. Common word processor terms 3. Understanding the interface 4. How to create a new document 5. How to format text 6. Paragraph formatting 7. Applying styles 8. How to cut, copy, & paste text 9. Find & replace 10. Undo and redo 11. Working with images, shapes, & tables 12. Headers, footers, & lists 13. Spellcheck & autocorrect 14. AI assistance 15. Templates 16. Keyboard shortcuts 17. Saving your work 18. Comments & tracked changes 19. Printing 20. More word processing tips
The Basics:
We’re going to take things right from the top, and if you’re reading this, you probably know what’s coming next. But, this is a ‘101’ article, so we’re going to get right down to the basics of word processing software before we take a look at everything else.
1. ‘ Which word processor should I use?’
There are many word processors available, each with its own features and functionalities – and, if you’re a beginner, knowing which one to go for may leave you feeling a little overwhelmed. Here are some of the most-used ones.
Microsoft Word: The industry standard, offering a vast array of tools for professional and personal use.
Google Docs: A free, cloud-based word processor with excellent collaboration features. Perfect for working on documents with others online.
Apple Pages: Designed for Mac users, Pages offers a user-friendly interface and integrates seamlessly with other Apple products.
OfficeSuite Documents: This is a very viable alternative to Microsoft Word, offering a high level of compatibility with other file formats, and is just one part of an office pack that also features Sheets, Slides, PDF, & Mail.
If you’re feeling a little overwhelmed with choice, take a look at our guide on what to look for in a free word processor .
2. Common word processor terms
You’ll be seeing a bunch of terms being used in this guide, so just in case, we’ve put together a glossary of the most popular. But, seeing as that might be a bit long, it’s in a drop-down format, so just click the link below to show or hide the definitions.
See common terms
Font – refers to the design of the characters you type. Common fonts include Times New Roman, Arial, and Calibri.
Font size is the size of the characters in a font, measured in points (pt).
Bold, italics, and underline are formatting options that can be applied to text to make it stand out.
Alignment refers to how text is positioned on a line. Text can be left-aligned, right-aligned, centered, or justified.
Line spacing refers to the amount of space between lines of text. Common line spacing options include single spacing and double spacing.
Paragraph formatting includes options such as indentation, spacing before and after paragraphs, and line spacing.
Margins are the spaces around the edges of a page.
Headers and footers are lines of text that appear at the top and bottom of every page, respectively.
Bullets and numbering can be used to create lists.
Tables can be used to organize information in rows and columns.
Find and replace is a feature that can be used to find and replace text in a document.
Spell check is a feature that can be used to check for spelling errors in a document.
Formatting is the process of changing the appearance of text, such as by changing the font, font size, or alignment.
Editing is the process of making changes to the content of a document, such as adding, deleting, or moving text.
Document is a file that contains text, formatting, and other elements.
Template is a pre-formatted document that can be used to create new documents.
File is a collection of data stored on a computer.
Open is to load a document into a word processing program.
Save is to store a document on a computer.
Print is to create a physical copy of a document on paper.
Close is to exit a document.
3. Understanding the interface
Most word processor software solutions share a similar layout, designed to make everything you need easily visible and accessible.
For the following guide and screenshots, we’ll be using OfficeSuite Documents .
Menus : Located at the top of the screen, menus contain a list of commands categorized by function (e.g., File, Edit, Format).
Toolbars : Rows of icons offering quick access to frequently used commands like font style, bold, or italics. You can customize toolbars to display the ones you use most.
Workspace : The main area where you type and edit your document. It typically resembles a blank page and provides a visual representation of your work.
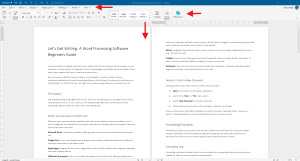
4. How to create a new document
Here’s how to create a new document:
- Open your chosen word processor application.
- Look for the “ New ” or “ File ” menu option, usually found towards the top-right of your menu.
- Select “ New Document ” (or something with similar phrasing).
- A blank document will open in the workspace, ready for you to start writing.
- Word processors also offer templates for specific document types like letters, resumes, or reports, providing a pre-formatted structure to save you time. More on that later.
Formatting:
Now that you’ve got your document started, let’s take a look at how to format it for clarity and impact. By using a combination of text formatting, paragraph formatting, and styles, your document will go from plain text to a visually appealing and professional piece of work.
5. How to format text
Formatting individual characters within your text allows you to emphasize key points and improve readability. Here are some common formatting tools:
Bold : Makes text stand out, often used for headings or important information.
Italics : Adds emphasis or indicates foreign words or phrases.
Underline : Can be used for emphasis or hyperlinks (depending on the context).
Font styles, colors and sizes : Choose from various fonts (e.g., Times New Roman, Arial) to create a specific look and feel. Adjust the font size and color for better readability or to differentiate headings from body text.
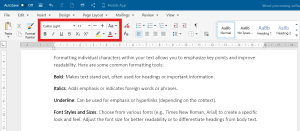
6. Paragraph formatting
Formatting entire paragraphs affects their overall presentation and organization and can help make your document quicker to read and easier on the eye.
Alignment : Align your text left, right, centered, or justified (straight edges on both sides).
Indentation : Create space at the beginning of each paragraph for a clean, organized look.
Line Spacing : Adjust the space between lines of text for improved readability.
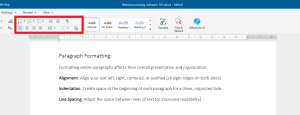
7. Applying styles
Styles are pre-defined sets of formatting options that can be applied to text with a single click, ensuring consistency throughout your document and saving you time from applying individual formatting for each instance.
Most word processors offer a variety of built-in styles like Heading 1, Heading 2, Body Text, and Caption. You can also create custom styles to match your specific needs.
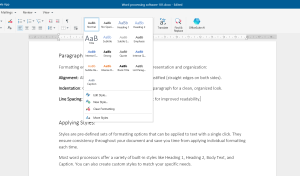
8. How to cut, copy, & paste text
These common word processor functions allow you to rearrange text sections efficiently or copy content from other sources. They can be found in the “Edit” part of your menu, or by right-clicking on your selected text.
Cut : Removes the selected text from its current location and stores it temporarily in the clipboard (a hidden storage area). You can use the keyboard shortcut Ctrl+X
Copy : Creates a duplicate of the selected text in the clipboard, leaving the original text intact. You can use the keyboard shortcut Ctrl+C
Paste : Inserts the content from the clipboard at the current cursor location in your document. You can use the keyboard shortcut Ctrl+V.
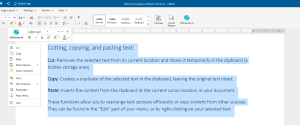
9. Find & replace
Find : Locates specific words or phrases within your document. This is helpful for searching for typos, inconsistencies, or specific information.
Replace : Not only finds but also allows you to replace the searched term with a different word or phrase. This is a powerful tool for making widespread edits quickly and accurately.
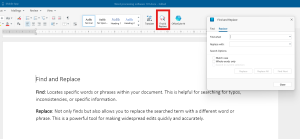
10. Undo and redo
These editing tools give you the freedom to experiment and make changes without fear of permanent mistakes, so go ahead and use them to refine your document as you want.
Undo : Reverts the last action you performed. This is a lifesaver if you accidentally delete something or make an unwanted change. Most word processors allow you to undo multiple actions.
Redo : Reverses an undo action, bringing back the change you previously undid.
You can find “ Undo ” and “ Redo ” under the “ Edit ” section of your top menu, or by clicking on the back arrow in the top toolbar.

11. Working with images, shapes, & tables
Inserting images and shapes : Enhance your document with visuals by inserting pictures, charts, or graphs. Most word processors allow browsing your computer files or even online sources to locate images.
Formatting images : Resize, crop, and adjust image properties like brightness and contrast to seamlessly integrate them into your document’s layout.
Creating and formatting tables : Organize information clearly with tables. You can insert rows and columns, define cell borders, and merge cells for a professional look.
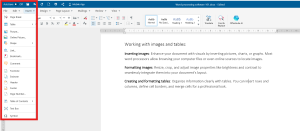
12. Headers, footers, & lists
Lists : Use bulleted or numbered lists to present information in a clear, concise way. Great for steps in a process, key points, or features of a product.
Headers and footers are areas at the top and bottom of a page used to display recurring information like page numbers, titles, and dates for better document organization and readability
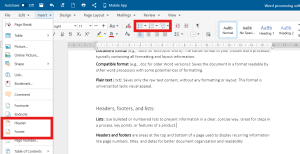
13. Spellcheck & autocorrect
There’s no need to worry about your spelling. Depending on your word processor, you’ll be able to find spell check features under the “Review” tab in the top menu.
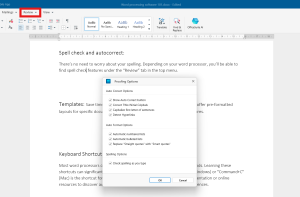
14. AI assistance
Some word processors will have an AI assistant to help you with your writing. With OfficeSuite Documents, just hit the button in your toolbar and let the assistant help you refine your writing. More on that here.
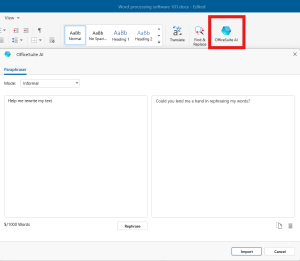
15. Templates
Save time and effort by using pre-designed templates. These offer pre-formatted layouts for specific document types like resumes, business letters, or brochures. You can usually find these under the “ File ” menu, where you’ll then need to click on “ New ”, or when you open a new, blank document.
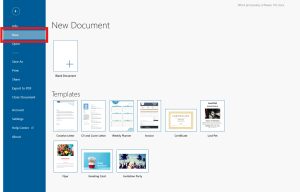
16. Keyboard shortcuts
Most word processors offer keyboard shortcuts for frequently used commands. Learning these shortcuts can significantly boost your productivity. Here are some of the more common ones you can use in OfficeSuite and other word processors. The shortcuts may vary on the software you use.
Bold : Ctrl+B
Italic : Ctrl+I
Underline : Ctrl+U
Print : Ctrl+P
Save : Ctrl+s
Find : Ctrl+F
Replace : Ctrl+H
Copy : Ctrl+C
Cut : Ctrl+X
Paste : Ctrl+V
Collaboration and sharing:
Sharing your work is easy. Most word processors offer built-in sharing features, including the ability to save your work to a cloud storage service like MobiDrive , Google Drive or OneDrive. Then, within the platform, you can invite others to access and edit the document by sharing a link.
This allows for real-time collaboration, where everyone can see changes as they happen. Alternatively, you can choose to send a copy of your document as a PDF or another format, depending on whether you want them to edit it or just view it.
Here’s a lot more information on how to use MobiDrive .
17. Saving your work
Before you share your work, it’s super important to save it. Most word processors offer various file formats to choose from, but here are some of the more common ones you’ll find.
Document format (e.g., .docx for Microsoft Word): The native format of your chosen word processor, typically containing all formatting and layout information.
Compatible format (e.g., .doc for older Word versions): Saves the document in a format readable by other word processors with some potential loss of formatting.
Plain text (.txt): Saves only the raw text content, without any formatting or layout. This format is universal but lacks visual appeal.
PDF : Saving your work as a PDF is a great way to preserve the formatting of the file if you’re not sure what software or device the recipient is using. You can read more about how to save pages as a PDF in our handy guide.
You can save your work by clicking “ File ” from your top menu, or using the shortcut Ctrl+S .
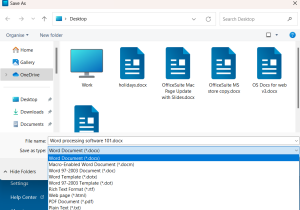
18. Comments & tracked changes
Even if you’re not working in real-time, you can still collaborate through comments and track changes:
Comments : Allow you to leave notes or questions directly within the document for others to see and address.
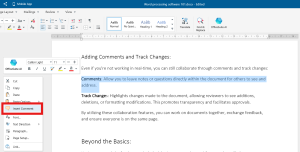
Track changes : Highlights changes made to the document, allowing reviewers to see additions, deletions, or formatting modifications. This promotes transparency and facilitates approvals.
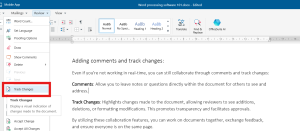
By using these collaboration features, you can work on documents with anyone else, exchange feedback, and ensure everyone is on the same page.
19. Printing
Once your document is finalized, you might want to print a physical copy. Here’s what to consider:
Formatting for print: Adjust margins, headers, and footers to ensure everything fits correctly on the page. You can often use a “Print Preview” function to visualize the layout before printing.
Printing options: Most word processors offer printing options like selecting which pages to print, number of copies, and duplex printing (double-sided).
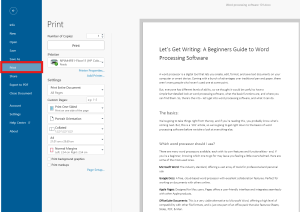
20. More word processing tips
So, there’s a quick look into how to use a word processor, and should be enough to get you typing away happily. The good news is that we a have a bunch of other articles which can help you create written content using OfficeSuite Documents, or any other word document.
How To Convert Pages To PDF – Find out more about PDFS, why they are great, and how you can convert your work.
How To Copy A Word Document – Knowing how to copy a word document is important for when you want to share or preserve your work. Here’s how.
What To Look For In A Free Word Processor – There are many word processors out there, but how do you choose one? Well, you can find out here.
How to brainstorm with Documents – Word processors are a great tool for brainstorming. Here are some tips on how to get your creativity flowing.
You May Also Like

- 7 minute read
How Many Pages is 1000 Words?
- by Tyler Bates
- June 20, 2024

- 6 minute read
How To Convert Pages To PDF
- April 23, 2024

- 8 minute read
What A Resume Should Look Like
- April 15, 2024

- 14 minute read
The Best Presentation Software to get in 2024
- March 28, 2024

- 16 minute read
The Best Microsoft Office Alternatives in 2024
- March 19, 2024

How To Copy A Word Document
- March 8, 2024
| | | Page - - |
Word Processing refers to the act of using a computer to create, edit, save and print documents. In order to perform word processing, specialized software (known as a Word Processor) is needed. One example of a Word Processor is Microsoft Word, but other word processing applications are also widely used. Examples include: Microsoft Works Word Processor, Open Office Writer, Word Perfect and Google Drive Document.. These programs allow users to create a wide variety of documents including ( The editing and formatting capabilities of the word processor demonstrate the application's true power. Text can be inserted, edited, moved, copied or deleted within your document and the appearance of the text can be modified in numerous ways. Most word processors also give your the ability to check your spelling and grammar and many have built in dictionaries and other tools to assist you in your writing. The remainder of this lesson will introduce you to a few of the basic concepts and functions of Word Processing and then provide you with links to tutorials which will assist you in expanding your skills using Microsoft Word, the standard word processing software application at Broome Community College.
| ||
| ||
Experience Teachmint X - AI driven Interactive Flat Panels and Smart Boards
More from roshani varak
Recommended content, learn from anywhere on any device.
Top Leader by G2
Top Performer by SourceForge
Top Leader by SoftwareSuggest
Ranked Amongst Top 25 Companies by LinkedIn
ISO27001 Certified
Most Preferred Workplace
We use cookies to enhance site navigation and analyse usage, read our Privacy Policy for more.
- International
- Education Jobs
- Schools directory
- Resources Education Jobs Schools directory News Search

Word Processing - Introduction to Word Processing
Subject: Computing
Age range: 11-14
Resource type: Other
Last updated
22 February 2018
- Share through email
- Share through twitter
- Share through linkedin
- Share through facebook
- Share through pinterest

Tes paid licence How can I reuse this?
Your rating is required to reflect your happiness.
It's good to leave some feedback.
Something went wrong, please try again later.
This resource hasn't been reviewed yet
To ensure quality for our reviews, only customers who have purchased this resource can review it
Report this resource to let us know if it violates our terms and conditions. Our customer service team will review your report and will be in touch.
Not quite what you were looking for? Search by keyword to find the right resource:
IMAGES
VIDEO
COMMENTS
1 Introduction to Word Processing. ICT Module Code: MAU07102 Introduction to Word Processing Compiled by: Geofrey F. Kalumuna. 2 Introduction There are several word processing applications around the world. This sub-module will cover basic word processing concepts, and introduce you to the common screen elements found in Microsoft Word.
These programs have four functions: • Writing - entering text and symbols into a document • Editing - revising or reorganizing the text • Formatting - changing how the text looks on the page • Printing - producing a printed copy See the next three slides Functions of Word Processing-Program. Writing Editing.
A word processor is a device or software program capable of creating, storing, and printing text documents. It allows users to write and modify text, display it on a screen, save it electronically, and print it out. Word processing software is one of the most common technology tools in the world, allowing users to create resumes and cover ...
A word processing program is a software program that includes tools for entering, editing, and formatting text and graphics. The electronic files you create using Word are called documents. One of the benefits of using Word is that document files can be stored in a variety of places on your computer, or in the cloud using one drive, and easily ...
3 Components of a Word Processing System. CPU (Central Processing Unit) - Work is saved in Memory Monitor or VDU (Visual Display Unit) Floppy Drive Keyboard Mouse Printer Word Processing Software (Application Software) 4 What is a Word Processing Package. It is "application software" or a "program" which allows you to:- Enter Edit and ...
Welcome to Module 1 of our comprehensive Microsoft Word tutorial series! In this video, we'll take you on a journey through the basics of Microsoft Word. You...
word processing, operation in which a text-editing software program called a word processor is used to create a document on a computer. A word-processing system can produce a wide variety of documents, including letters, memoranda, and manuals, rapidly and at relatively low cost. The precursor of the modern word-processing system was developed ...
Word processing is often combined with other software in an office suite. A typical office suite includes word processing, spreadsheet, presentation and database software. Learning Outcomes.
Word processing - the use of a program (software application) running on a computer that allows users to create, edit, format, and store documents.. Create a Document. Steps to create a new word processing document (Word, Office 365): Start Microsoft Word.; Click the File tab.; Click the New tab.; Click Blank document. (A new blank document appears.)
Word processing has evolved into much more than words typed on a piece of paper. It is a means to communicate with others and create content for websites, ... Click Start Presentation, and when you are finished, end the presentation. Save the document and before closing Word, verify where your document is saved. Close Word.
There are 3 modules in this course. Word processing applications are an essential productivity tool for business and education. Understanding how to use word-processing apps can make you a more efficient and valuable worker. In this mini-course, you will learn the essentials of effectively using word processing apps to work with document files.
10. LibreOffice. via LibreOffice. LibreOffice is a free open source office suite designed to make completing everyday tasks easier. It's an open-source product, meaning that it's free and available to all users. LibreOffice includes programs for word processing, presentation building, spreadsheet editing, database manipulation, formula ...
Here's how to create a new document: Open your chosen word processor application. Look for the " New " or " File " menu option, usually found towards the top-right of your menu. Select " New Document " (or something with similar phrasing). A blank document will open in the workspace, ready for you to start writing.
Word Processing. Word Processing refers to the act of using a computer to create, edit, save and print documents. In order to perform word processing, specialized software (known as a Word Processor) is needed. One example of a Word Processor is Microsoft Word, but other word processing applications are also widely used.
A word processor is software or a device that allows users to create, edit, and print documents. It enables you to write text, store it electronically, display it on a screen, modify it by entering commands and characters from the keyboard, and print it. , Word processors can create multiple types of files, including text files (.txt), rich ...
A presentation suitable for KS3 looking at the basic functions of word processing. Presentation includes multi-choice questions to engage students and get them thinking about the subject throughout the presentation. Learning Objective (s): Identify some of the functions of Microsoft Word. Main Skills: Interpret written text and diagrams.