

Hide or show a slide
If there is a slide that should be included in the presentation file, but you don't want it to appear in the slide show, you can hide the slide.
A hidden slide remains in the file; it is merely hidden when you run Slide Show view. You can switch between the Hide Slide and Unhide Slide options for any slide in the presentation.
While editing slides in Normal view, in the navigation pane on the left, you can hide or unhide a slide, as described below. In Slide Sorter view, you can use the same method to hide or unhide a slide. And while you're presenting to an audience, you can unhide a slide, as described below.
Hide a slide
In the left navigation pane, select the thumbnail image of the slide you want to hide.

Unhide a slide
In the left navigation pane, select the hidden slide you want to unhide.
Right-click the slide, then select Unhide Slide .
Show a hidden slide during a presentation
If you're in Slide Show view and you decide that you want to show a hidden slide, you can do so:
Right-click the current slide and select See All Slides .
The screen switches to a thumbnail list of all the slides in the presentation.
Select the hidden slide you want to show.
The selected slide is shown full-screen and the slide show resumes.
If you are using presenter view, your audience won't see the steps you take to select the slide. They will simply see the slide you select in step 2.
Right-click the slide, and then click Unhide Slide .

In the left navigation pane, select the slide you want to hide.

Control-click the slide, then select Unhide Slide .
Do one of the following:
If you're presenting with the full screen slide show on all monitors, go to the slide that appears before the hidden slide, and then press H.
If you're using Presenter view, move the pointer to the bottom of the screen to access the slide navigation pane, and then click the hidden slide.
Why hide slides?
Hiding slides is particularly useful when you have added slides to a presentation that provide different levels of detail on the subject matter, perhaps for different audiences. You can mark these slides as hidden so that they are not displayed in your main slide show, but you can still access them if you need to.
For example, a member of your audience might ask you to explain an item in more detail. In that case, you can reveal the hidden slides that contain those details. However, if time is short and the audience is comprehending the concepts that you are delivering, you may want to keep the slides with the supplementary information hidden so that you can continue your presentation without visibly skipping over slides.
Create and present a custom show

Need more help?
Want more options.
Explore subscription benefits, browse training courses, learn how to secure your device, and more.

Microsoft 365 subscription benefits

Microsoft 365 training

Microsoft security

Accessibility center
Communities help you ask and answer questions, give feedback, and hear from experts with rich knowledge.

Ask the Microsoft Community

Microsoft Tech Community

Windows Insiders
Microsoft 365 Insiders
Was this information helpful?
Thank you for your feedback.
- PRO Courses Guides New Tech Help Pro Expert Videos About wikiHow Pro Upgrade Sign In
- EDIT Edit this Article
- EXPLORE Tech Help Pro About Us Random Article Quizzes Request a New Article Community Dashboard This Or That Game Happiness Hub Popular Categories Arts and Entertainment Artwork Books Movies Computers and Electronics Computers Phone Skills Technology Hacks Health Men's Health Mental Health Women's Health Relationships Dating Love Relationship Issues Hobbies and Crafts Crafts Drawing Games Education & Communication Communication Skills Personal Development Studying Personal Care and Style Fashion Hair Care Personal Hygiene Youth Personal Care School Stuff Dating All Categories Arts and Entertainment Finance and Business Home and Garden Relationship Quizzes Cars & Other Vehicles Food and Entertaining Personal Care and Style Sports and Fitness Computers and Electronics Health Pets and Animals Travel Education & Communication Hobbies and Crafts Philosophy and Religion Work World Family Life Holidays and Traditions Relationships Youth
- Browse Articles
- Learn Something New
- Quizzes Hot
- Happiness Hub
- This Or That Game
- Train Your Brain
- Explore More
- Support wikiHow
- About wikiHow
- Log in / Sign up
- Computers and Electronics
- Presentation Software
- PowerPoint Insertions
How to Hide a Slide in PowerPoint Presentation
Last Updated: December 18, 2023 Tested
wikiHow is a “wiki,” similar to Wikipedia, which means that many of our articles are co-written by multiple authors. To create this article, 14 people, some anonymous, worked to edit and improve it over time. The wikiHow Tech Team also followed the article's instructions and verified that they work. This article has been viewed 118,607 times. Learn more...
Hiding a slide in PowerPoint is a good idea if you need to quickly present, and do not want to show a certain slide but do not want to necessarily delete that slide. PowerPoint makes it very easy to hide any number of slides in your presentation.
Hiding the Slide

- If you have successfully selected a slide, a box will appear around that slide.

- If you have successfully hid a slide, there will be a slash over the number correlated with the hidden slide.
- Repeat this process to hide multiple slides.

Accessing the Hidden Slide

- Choose Place in this document from the options on the left side of the pop-up window.
- Select the hidden slide and click the OK button from the bottom right of the window.
Community Q&A

- Once your slide is hidden during your presentation and you decide you want to go to it via another slide then include a button hyperlinked back to the slide from the one you want it on. Thanks Helpful 0 Not Helpful 0

You Might Also Like

- http://www.solveyourtech.com/how-to-hide-a-slide-in-powerpoint-2010/
About This Article
- Send fan mail to authors
Is this article up to date?

Featured Articles

Trending Articles

Watch Articles

- Terms of Use
- Privacy Policy
- Do Not Sell or Share My Info
- Not Selling Info
Keep up with the latest tech with wikiHow's free Tech Help Newsletter
How to Hide a Slide in Microsoft PowerPoint
Make your presentation more flexible
Sometimes, not every slide you set up makes its way to your final product. We’ll show you how to hide and unhide slides while creating or delivering a Microsoft PowerPoint presentation.
Hide or Unhide a Slide When Creating a Presentation
You can hide a slide in either Normal or Slide Sorter view in PowerPoint.
- Go to the View tab and choose Normal or Slide Sorter .
- Select the slide you want to hide. In Normal view, you can do this using the slide thumbnails on the left side.
- Then, choose the Hide Slide button on the Slide Show tab (You can also right-click the slide you want to slide and pick Hide Slide from the pop-up menu).

You’ll then see the slide number with a line through it. The slide is still included in the presentation but is hidden when you present the slideshow.

You can also hide multiple slides at once if you like. Select the slides by holding the Ctrl key as you click each one. Then, choose Hide Slide on the Slide Show tab (or right-click any of the selected files and select Hide Slide from the pop-up menu).

Every slide you hide has a line through the slide number to indicate that it’s hidden.

You can unhide a slide while creating your presentation by reversing the process.
In Normal or Slide Sorter view, select one or more slides and choose Unhide Slide on the Slide Show tab (Or right-click the slide and pick Unhide Slide from the pop-up menu).

Unhide Slides During a PowerPoint Presentation
While you can’t hide a slide during your presentation, you can unhide hidden slides while presenting. You can do this either in Slide Show or Presenter View.
- In either view, select the See All Slides icon in the toolbar on the bottom left or right-click the current slide and pick See All Slides .

- Select the hidden slide to display it on the screen.

- Your slide show then picks right up with the selected slide now unhidden.

Alternatively, you can use a keyboard shortcut to display the hidden slide. Press H when the slide before the hidden one is on the screen. You should see the hidden slide appear and can continue your PowerPoint presentation.
Now that you know how to hide and unhide slides in Microsoft PowerPoint take a look at these tips for improving your presentation .

Sandy Writtenhouse is a freelance technology writer and former Project, Department, and Program Manager. She turned her education, job experience, and love of technology into a full-time writing career. With all sorts of gadgets in her home and her hands, she seeks to help others make life easier through technology. Read Sandy's Full Bio
Read More Posts:


How to Hide and Unhide Slides in PowerPoint (with Shortcuts)

Hide or Unhide Slides in PowerPoint in Normal, Slide Sorter, or Slide Show View
by Avantix Learning Team | Updated September 29, 2021
Applies to: Microsoft ® PowerPoint ® 2013, 2016, 2019 and 365 (Windows)
You can hide slides in PowerPoint presentations so that they do not appear during a slide show unless you want to display them. Typically, you hide slides in Normal View or Slide Sorter View and then run your slide show. During a slide show, you can unhide slides or you can return to Normal View or Slide Sorter View and unhide them.
Recommended article: How to Print a PowerPoint Presentation with Notes
Do you want to learn more about PowerPoint? Check out our virtual classroom or in-person PowerPoint courses >
Most users will right-click to hide and unhide slides in PowerPoint. However, instead of right-clicking, you can also press Shift + F10 or press the Context button at the bottom of your keyboard (which appears as a box with lines if you have it) to display the context menu. The Hide Slide command also appears on the Slide Show tab in the Ribbon.
Hiding slides in Normal View
To hide slides in Normal View:
- If necessary, click the View tab in the Ribbon and select Normal in the Presentation Views group.
- In the Navigation pane on the left, right-click the slide that you want to hide. A drop-down menu appears.
- Click Hide Slide. In the Navigation pane on the left, the slide appears in grey and the slide number appears with a slash through it.
- Repeat for other slides.
Below is Hide Slide in the context menu in Normal View in a PowerPoint presentation:

To use a keyboard shortcut to hide slides in Normal View:
- Display the slide you want to hide.
- Press Alt > S (Alt and then S) to access the Slide Show tab in the Ribbon.
- Press H to select Hide Slide.
Unhiding slides in Normal View
To unhide or show hidden slides in Normal View:
- In the Navigation pane on the left, right-click the slide that you want to unhide. A drop-down menu appears.
- Click Hide Slide.
To use a keyboard shortcut to unhide slides in Normal View:
- Display the slide you want to unhide.
- Press H to select Hide Slide (which will unhide a hidden slide).
Hiding slides in Slide Sorter View
To hide slides in Slide Sorter View:
- If necessary, click the View tab in the Ribbon and select Slide Sorter in the Presentation Views group.
- Click a slide thumbnail. You can also Ctrl-click multiple slide thumbnails if you want to hide multiple slides.
- Right-click the slide (or one of the selected slides) that you want to hide. A drop-down menu appears.
- Click Hide Slide. The slide(s) appear in grey and the slide number(s) appear with a slash through it.
Below is Hide Slide in the context menu in Slide Sorter View in a PowerPoint presentation:

To use a keyboard shortcut to hide slides in Slide Sorter View:
Unhiding slides in Slide Sorter View
To unhide one or multiple hidden slides in Slide Sorter View:
- Click a slide thumbnail (hidden slides appear in grey with a line through the slide number). You can also Ctrl-click multiple hidden slide thumbnails if you want to unhide multiple slides.
- Right-click the slide (or one of the selected slides) that you want to unhide. A drop-down menu appears.
To use a keyboard shortcut to unhide one or multiple hidden slides in Slide Sorter View:
- Click a slide thumbnail of a hidden slide. You can also Ctrl-click multiple slide thumbnails if you want to unhide multiple slides.
- Press H to select Hide Slide which will unhide the selected hidden slides.
Showing a hidden slide during a slide show using See All Slides
If you are running a slide show (typically by clicking the Slide Show button on the bottom right of the screen) and you want to unhide a slide:
- In Slide Show View, right-click the current slide. A drop-down menu appears.
- Select See All Slides. The screen displays thumbnails of all the slides in the presentation.
- Click the hidden slide you want to show. The selected slide is shown full-screen and the slide show resumes.
If you are using Presenter View, the audience won't see thumbnails before you select the slide. They will only see the slide you selected.
Below are slide thumbnails in a PowerPoint presentation when the user has selected Show All Slides:

Showing a hidden slide during a slide show using a keyboard shortcut (2 shortcuts)
You can also use keyboard shortcuts to show hidden slides during a slide show.
To unhide a slide during a slide show using your keyboard (method 1):
- In Slide Show View, navigate to the slide after which there is a hidden slide. For example, navigate to slide 4 if you want to unhide slide 5.
- Press H on your keyboard.
To unhide a slide during a slide show using your keyboard (method 2):
- In Slide Show View, type the slide number of the hidden slide you want to display.
- Press Enter.
These shortcuts will temporarily unhide the slide and display it in Slide Show View. It does not unhide the slide in Normal View or Slide Sorter View.
Hidden slides can be great to display optional content when needed. You can also hyperlink to hidden slides.
Subscribe to get more articles like this one
Did you find this article helpful? If you would like to receive new articles, join our email list.
More resources
How to Insert Slide Numbers in PowerPoint
PowerPoint Slide Show Shortcuts (50+ Shortcuts)
3 Ways to Change the Font on All Slides in PowerPoint
How to Use the Built-in Laser Pointer in PowerPoint (with Shortcuts)
How to Add Animation in PowerPoint (Animate Images, Text or Other Objects)
Related courses
Microsoft PowerPoint: Intermediate / Advanced
Microsoft PowerPoint: Design for Non-Designers
Microsoft PowerPoint: Animations Bootcamp
Microsoft Excel: Intermediate / Advanced
VIEW MORE COURSES >
Our instructor-led courses are delivered in virtual classroom format or at our downtown Toronto location at 18 King Street East, Suite 1400, Toronto, Ontario, Canada (some in-person classroom courses may also be delivered at an alternate downtown Toronto location). Contact us at [email protected] if you'd like to arrange custom instructor-led virtual classroom or onsite training on a date that's convenient for you.
Copyright 2024 Avantix ® Learning
You may also like

How to Insert or Type E with an Accent Mark in PowerPoint (È, É, Ê, Ë, è, é, ê, or ë)
You can insert or type e with an accent mark in PowerPoint using built-in tools or keyboard shortcuts (including Alt code shortcuts). The letter e can be inserted with an accent in both upper or lower case in text boxes or placeholders on slides, the slide master or layouts. The following are common accents in upper or lower case – È, É, Ê, Ë, è, é, ê, or ë.

How to Fade a Picture or Part of a Picture in PowerPoint (Using a Gradient)
You can fade a picture in PowerPoint by drawing a rectangle shape on top of the picture and then filling the rectangle with a gradient from opaque to transparent. This technique is often used to fade an image into the background of a slide. Since the rectangle is placed on top of the image and then text may be placed on top of the rectangle, you may need to reorder the objects.

How to Lock an Image, Shape or Other Object in PowerPoint
You can now lock an image, shape or other object in PowerPoint. Objects can be locked in Normal View or Slide Master View. Only PowerPoint 365 users can lock objects to prevent moving and resizing. This is helpful if you want to select and move other objects on the slide or prevent others from moving or resizing an object. You can lock items using the context menu or the Selection Pane.
Microsoft, the Microsoft logo, Microsoft Office and related Microsoft applications and logos are registered trademarks of Microsoft Corporation in Canada, US and other countries. All other trademarks are the property of the registered owners.
Avantix Learning |18 King Street East, Suite 1400, Toronto, Ontario, Canada M5C 1C4 | Contact us at [email protected]
Our Courses
Avantix Learning courses are offered online in virtual classroom format or as in-person classroom training. Our hands-on, instructor-led courses are available both as public scheduled courses or on demand as a custom training solution.
All Avantix Learning courses include a comprehensive course manual including tips, tricks and shortcuts as well as sample and exercise files.
VIEW COURSES >
Contact us at [email protected] for more information about any of our courses or to arrange custom training.
Privacy Overview
Pin it on pinterest.
- Print Friendly
How to hide and unhide a slide in Microsoft PowerPoint, and view hidden slides while you're in presentation mode
- You can hide and unhide a PowerPoint slide by right-clicking it in the sidebar.
- You can still view any hidden slides while you're in presentation mode — they'll appear gray or show a null symbol once they're hidden, however.
- You may wish to hide slides you don't plan on using for a presentation, but don't want to delete in case you wind up needing them later.
- The process behind hiding and unhiding PowerPoint slides is nearly identical in both the desktop and web versions of PowerPoint.
- Visit Business Insider's Tech Reference library for more stories .
Hiding a slide in Microsoft PowerPoint takes only a few steps — and unhiding that slide later is just as easy
You may find this option helpful if you don't plan on using the slide in your presentation, but feel that you might need it later on. Instead of deleting the slide, you can simply hide it and then access it when you need it.
Here's how to do it all using PowerPoint for the desktop or web, on your Mac or PC.
Check out the products mentioned in this article:
Microsoft office (from $149.99 at best buy), apple macbook pro (from $1,299.00 at apple), acer chromebook 15 (from $179.99 at walmart), how to hide and unhide a powerpoint slide on a mac or pc.
1. Open the PowerPoint presentation on your Mac or PC .
2. Right-click on the slide you wish to hide.
3. Click "Hide Slide."
4. This will immediately hide the slide and indicate it's hidden by making it gray with a null symbol in the upper left corner. When you right-click again, you'll also see a check mark next to the "Hide Slide" option.
5. Click "Hide Slide" with the check mark next to it to unhide it and reverse your previous action.
6. You can always use the COMMAND or CTRL keys to select multiple slides as well.
7. Lastly, if you start the slideshow, you can still access any of the slides you've hidden. Start the slideshow by right-clicking and selecting "Slide Show" (or using the keyboard shortcut), by accessing the "Slide Show" tab at the top, or by clicking the podium icon in the bottom right corner. You can also opt to view your slideshow in "Presenter View" which is only available in the desktop app, not the online version of PowerPoint.
8. Right-click on any slide in presentation mode, where you'll find the option "By Title." You can then jump to any slide. The hidden ones will be displayed in parentheses such as "(2) Slide 2." When you click on one, you'll automatically jump to that slide. Remember, if you simply click through your slides as normal, PowerPoint will skip over these so it's important that you manually access it if you wish to display that slide.
9. If you choose to use "Presenter View," the process is even easier. You'll already see previews of all of your slides at the bottom of the screen. Hidden slides will appear in gray with a null symbol. Click on any hidden slide to jump to it.
How to hide and unhide a PowerPoint slide on your web browser
1. Open PowerPoint on your preferred web browser.
2. Right-click on any slide thumbnail on the left side of your screen.
3. Select "Hide Slide."
4. This will automatically make the slide gray. Right-click and select "Hide" again to unhide the same slide.
5. To access hidden slides while in presentation mode, you'll need to start the slideshow. There are less options to do so on the web version, but the podium icon in the bottom right corner is the same as the desktop version. You can also choose to access the "Slide Show" tab at the top, though you won't find the "Presenter View" option there.
6. You'll see options in a small pop-up box in the bottom left corner. Click the first option that shows slide panes to jump to another screen.
7. This screen will show all of your slides, including the hidden ones. Click on a hidden slide to jump to it.
Related coverage from Tech Reference :
How to change and format the background of your powerpoint slides to custom designs, how to add music to a powerpoint slideshow to make your presentation more engaging, how to create a custom powerpoint template to use or share with others, how to copy or duplicate a powerpoint slide and put it anywhere in your slideshow, how to download and access microsoft powerpoint on your mac computer.
Insider Inc. receives a commission when you buy through our links.
- Main content
Home Blog PowerPoint Tutorials How to Hide a Slide in PowerPoint Presentations
How to Hide a Slide in PowerPoint Presentations

One of users’ most commonly asked questions is how to hide a slide in PowerPoint since users tend to try and test different approaches for the final presentation. Instead of making multiple versions of the same presentation, we will follow a procedure similar to our article on how to hide a slide in Google Slides .
For this tutorial’s purpose, we’ll use the Business Case Study PowerPoint Template , but you can work these same steps with any other presentation you create.
Method #1: Hide a slide in PowerPoint via right-click
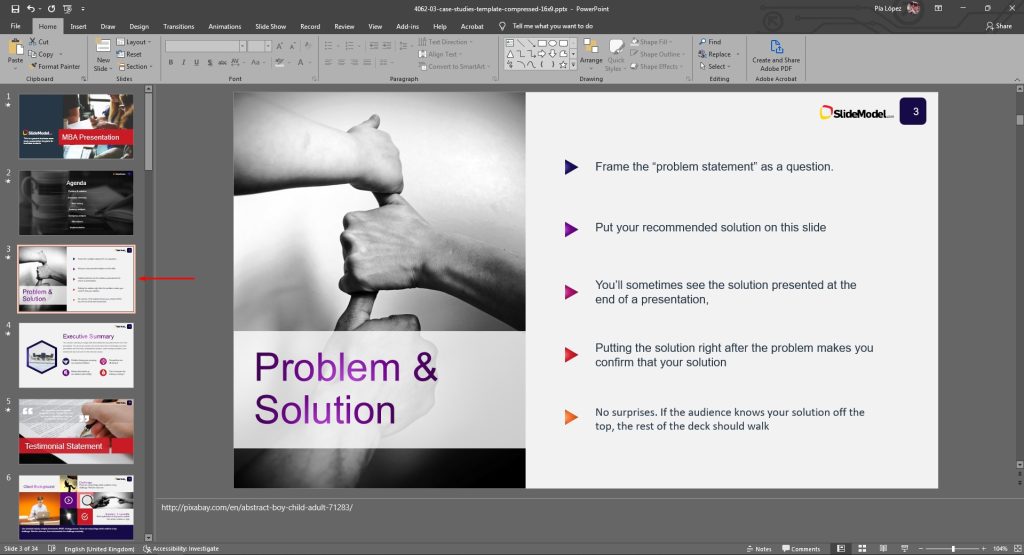
The first method to hide a PowerPoint slide is very intuitive. Say we want to hide the third slide of this presentation.

We right-click over the slide in question at the navigation bar and click on the option Hide Slide .

The hidden slide will remain hidden for slideshow presentations. You can tell the slide is hidden because it looks grayed out, and the number for the slide is crossed by a bar.

To unhide the slide, you have to right-click over it again and unselect the Hide Slide option.

And the slide will be visible again, as shown below.
Method #2: Hide a slide in PowerPoint via the Slide Show tab
The second option to hide a PowerPoint slide is viable when you are recording or rehearsing your presentation via the Slide Show tab, as it’s one of the available options in this Ribbon’s menu.
Start by selecting the slide you desire to hide. Switch to the Slide Show tab. In there, click on Hide Slide .

The slide is hidden after that step. To unhide the slide, click again on Hide Slide, and it will make the slide available for slideshow mode.
How to print a presentation in PowerPoint with hidden slides
Finally, it’s important to mention that you need to tweak some settings before printing your presentations in PowerPoint; otherwise, the hidden slides will get printed.
To quickly fix this issue, go to File and then select Print . The printing options for PowerPoint will be displayed. The first section below Settings says “Print All Slides”. That’s where you need to click and look all the way down at that contextual menu to locate Print Hidden Slides . Uncheck that option.

And that’s how easily you can hide a slide in PowerPoint.
To hide a slide, use the right-click method: – Navigate to the slide you want to hide. – Right-click on the slide thumbnail in the navigation pane. – Select Hide Slide from the context menu. The slide will appear grayed out with a line through the slide number.
To unhide a slide: – Right-click on the hidden slide thumbnail (it will be grayed out and have a line through the slide number). – Select Hide Slide again to uncheck the option. The slide will return to normal visibility.
Yes, you can hide a slide while in Slide Show mode: – Select the slide you want to hide. – Go to the Slide Show tab in the Ribbon. – Click Hide Slide. The slide will be hidden during the slideshow.
A hidden slide will appear grayed out in the slide navigation pane, and a diagonal line will cross through the slide number.
Hiding a slide allows you to keep the content for potential use without displaying it during the presentation. This can be useful for rehearsing different versions or having backup information that you may or may not want to present.
To print a PowerPoint presentation without hidden slides: – Go to File > Print. – In the Settings section, click on Print All Slides. – Scroll down and uncheck Print Hidden Slides to exclude them from the printout.
Yes, hidden slides can be included in printed handouts by default unless you uncheck the Print Hidden Slides option in the print settings.
There is no direct keyboard shortcut to hide a slide, but you can quickly access the hide option using the right-click menu or the Slide Show tab in the Ribbon.
Yes, you can hide multiple slides at once: – Hold down the CTRL key and select the slides you want to hide. – Right-click on one of the selected slides and choose Hide Slide. All selected slides will be hidden.
Once you hide a slide, it will not be displayed during the presentation unless you manually navigate to it. Ensure you are familiar with your slide sequence to avoid accidental navigation.
Like this article? Please share
PowerPoint Tips, Presentation Skills, Presentation Tips Filed under PowerPoint Tutorials
Related Articles

Filed under Presentation Ideas • July 17th, 2024
How to Convert a Text Document into a Presentation with AI
One of the biggest challenges for presenters is to summarize content from lengthy reports, academic papers, or any other kind of written media in an informative and concise way. Rather than losing countless hours going over and over the same text, we can speed up the process thanks to the virtues of artificial intelligence. In […]

Filed under Google Slides Tutorials • July 15th, 2024
How to Export Trello Board to Google Slides
In this article you will learn how to export Trello Boards and convert them instantly into Google Slides, in a step by step tutorial.

Filed under PowerPoint Tutorials • July 15th, 2024
How to Print PowerPoint Slides with Notes
Let’s take a look at how to print PowerPoint slides with notes. A step-by-step guide following different procedures for Desktop, Mac and Web versions.
Leave a Reply
- Live Stream the Summer Olympics
- Killer Laptop Deals Available Now
How to Hide and Unhide a Slide in PowerPoint
Make a slide appear and disappear in your presentation
:max_bytes(150000):strip_icc():format(webp)/SandyWrittenhouseLW-834c59ce7ca340ab9c70b5aa756b6320.jpg "powerpoint hide slide in presentation")
- Kaplan University
Jonathan Fisher is a CompTIA-certified technologist with more than 10 years of experience writing for publications like TechNorms and Help Desk Geek.
:max_bytes(150000):strip_icc():format(webp)/jonfishersquare-93eb80e77a004035887f56816d3623c5.jpg "powerpoint hide slide in presentation")
- Wichita Technical Institute
What to Know
- When creating a presentation, use Normal or Slide Sorter view. Right-click a slide and select Hide Slide/Unhide the slide.
- Windows: To show a hidden slide during a presentation, right-click and pick See All Slides or click See All Slides . Choose the hidden slide.
- On Mac, press H on the slide before the hidden one. Using Presenter View, click the hidden slide in the navigation pane at the bottom.
This article explains how to hide and unhide slides in Microsoft PowerPoint on Windows and Mac.
How to Hide a Slide in PowerPoint
You can hide a slide as you’re building or reviewing your presentation. The process is the same for PowerPoint on Windows and Mac.
Go to the View tab and click either Normal or Slide Sorter in the ribbon. Right-click the slide and choose Hide Slide , which marks the option. You can also select more than one slide at a time and hide them all at once.
When you hide a slide in PowerPoint on Windows, the slide number has a slash through it. Here, you can see slides 10, 11, and 12 are hidden.
When you hide a slide in PowerPoint on a Mac, it displays a circle with a line through it. Again, you can see slides 10 through 12 are hidden.
Show a Hidden Slide During a Presentation
You can present a hidden slide during your presentation and resume your slideshow as usual. Although you have a couple of ways to do it, the options differ slightly in PowerPoint on Windows versus Mac.
Show a Hidden Slide on Windows
To show a hidden slide in PowerPoint on Windows, you’ll display all slides in the presentation as thumbnails and then choose the hidden one.
If you have your slideshow in full view, right-click the current slide and select Show All Slides . Your audience will not see you perform this action. They’ll merely see the hidden slide when you select it as described below.
If you’re using Presenter View, either right-click the slide and pick Show All Slides or click the Show All Slides icon on the bottom left of the screen.
Once you see your slides as thumbnails using one of the above actions, just select the hidden slide to present it.
Show a Hidden Slide on a Mac
There are two ways to display a hidden slide during a presentation in PowerPoint on a Mac. The option you use depends on if you’re presenting the slideshow in full screen on all monitors or if you’re using Presenter View.
If you have your slideshow in full view, press H on your keyboard when you get to the slide before the hidden slide.
If you’re using Presenter View, click the hidden slide in the navigation pane at the bottom of the screen.
Unhide a Slide
To unhide a slide while working on your presentation, use Normal or Slide Sorter view . Right-click the slide and select Hide Slide to unmark the option.
You can hide slides depending on the audience, such as a presentation for different departments in your company. Either way, this is a handy PowerPoint feature to keep in mind.
You can hide and reveal text in PowerPoint using the Dim Text effect or PowerPoint animations . You can also hide slide numbers and crop pictures to hide parts you don't want to appear on the slide.
To hide or narrow the Slide pane on the left in Normal view, move the mouse pointer to the splitter bar between the thumbnails and slide view, then drag the splitter bar to the left.
To hide the toolbar when presenting in PowerPoint, go to File > Options > Advanced and uncheck Show popup toolbar . To hide the sound icon , select the audio clip icon on the slide and choose Playback > Hide During Show .
Get the Latest Tech News Delivered Every Day
- How to Use Speaker Notes in PowerPoint
- How to Hide Replies on X
- How to Hide Apps on iPhone
- How to Select More Than One Slide in PowerPoint
- The 10 Most Common PowerPoint Terms
- How to Use Copilot in Powerpoint
- How to Hide Desktop Icons
- Slide Layouts in PowerPoint
- Copy Slides to Another PowerPoint Presentation
- How to Unhide Games on Steam
- How to Use PowerPoint Slide Master Layouts
- How to Make a Slideshow on PowerPoint
- How to Hide and Unhide Worksheets in Excel
- How to Do a Voiceover on PowerPoint
- How to Share a PowerPoint on Zoom
Byte Bite Bit
How to Hide a Slide in PowerPoint: Step-by-Step Guide
Presentations are all about delivering the right message to the right audience. Sometimes, we need to adjust our slides for different crowds . Imagine you’re in the middle of a stellar PowerPoint presentation and suddenly realize that a specific slide isn’t quite relevant for this particular audience. No worries! Hiding a slide in Microsoft PowerPoint is a breeze and ensures you keep your flow without awkward interruptions.

In our experience, keeping a slide hidden can also be a great way to maintain a polished, streamlined presentation. You might ask, “But how do we hide and unhide these slides?” Simply right-click on the slide thumbnail and select ‘Hide Slide’. It’s that straightforward! Plus, this doesn’t delete the slide; it’s still there if you need it for another audience or occasion. Think of it as a magician’s trick, with the card up your sleeve, ready to surprise and impress when the moment calls for it!
From our perspective, this feature is a lifesaver. Picture this: preparing for a big presentation, and time is of the essence. Instead of recreating the whole deck for different audiences, we can just hide or unhide specific slides with a few clicks. This flexibility allows us to tailor our messaging on the fly, ensuring we always hit the mark. Whether it’s a client pitch, a classroom lecture, or a team update, managing slide visibility keeps our presentations as dynamic as our audience needs them to be.
- 1.1 Navigating Through Different Views
- 1.2 Managing Slide Visibility
- 1.3 Organizing Slides for Impactful Presentations
- 2.1 Utilizing Design Templates
- 3.1 Incorporating Multimedia Elements
- 3.2 Using Shortcuts for Efficiency
- 4.1 Mastering Presenter View
- 4.2 Handling Multiple Monitors and Audiences
Mastering Slide Management
Effectively managing your slides in PowerPoint can make a huge difference in your presentations. We’ll explore how to navigate different views, manage slide visibility, and organize slides for impactful presentations.
Navigating Through Different Views
PowerPoint offers several views to help organize and manage your slides, each with its unique benefits.
In Normal View , we can edit individual slides and see thumbnails of all slides, making it easy to switch between them. This view is perfect for day-to-day editing and tweaking.
Slide Sorter View displays all our slides as thumbnails. This view helps us reorganize slides and see the big picture. We can drag and drop slides to reorder them, making it a breeze to change the sequence.
Slide Show View lets us preview our presentation exactly like our audience will see it. By rehearing our talk in this view, we can catch any visual or timing issues before the big day.
Notes Page View allows us to add speaker notes to each slide. This view is beneficial for adding detailed notes without cluttering the slide itself.
Managing Slide Visibility
Managing slide visibility is crucial for presenting a polished slide deck, and PowerPoint makes this easy with the hide slide feature.
To hide a slide, we right-click the slide in the thumbnail pane and select “Hide Slide”. The slide number will appear crossed out, and the thumbnail turns grayed out, indicating it’s hidden.
Unhiding a slide follows the same process. Right-click the hidden slide and click “Hide Slide” again. This flexibility helps us control what content is shown during the presentation without permanently deleting slides.
Special tip: even though a slide is hidden, we can quickly show it during a presentation by using the “See All Slides” feature under the Slide Show tab. Our audience won’t see us navigating through the presentation, keeping the focus on our content.
Organizing Slides for Impactful Presentations
Organizing slides effectively can make our presentations more engaging and impactful.
First, we recommend starting with a clear structure: an introduction, body, and conclusion. This approach helps us keep the audience engaged from start to finish.
Using sections in PowerPoint helps group related slides together. We can add sections in Slide Sorter View by right-clicking between slides and choosing “Add Section”. This tool is especially useful for lengthy presentations.
It’s also helpful to use consistent design elements like fonts, colors, and layouts. The Slide Master tool is perfect for this. We can set up a uniform design that applies to all our slides, saving time and ensuring a professional appearance.
Implementing bullet points and breaking content into smaller sections can enhance readability. Visual aids like images, charts, and graphs also add variety and keep things interesting.
By following these strategies, we can ensure our slides are well-organized and impactful, making our presentations shine.
Enhancing Slide Aesthetics
When it comes to making a PowerPoint presentation visually appealing, the use of design templates and tailored slides can significantly enhance the experience for your audience. Let’s explore how to leverage these features effectively.
Utilizing Design Templates
Design templates in Microsoft PowerPoint are a game-changer for creating polished and professional-looking presentations. They offer a variety of pre-designed slide formats that can be easily customized to fit our content needs.
Benefits of Using Templates:
- Consistency across slides
- Time-saving with pre-set formats
- Enhanced visual appeal
To use a template, go to the “Design” tab in Microsoft Office and browse through the various templates available. We can download additional templates online if needed. Once a template is selected, apply it to our entire slide deck or individual slides as required.
Customizing templates allows us to keep the presentation aligned with our branding or specific aesthetic preferences by changing colors, fonts, and other design elements. By doing this, we ensure that our slides not only look great but also maintain a professional consistency that keeps the audience engaged from the start to the end of the presentation.
Advanced PowerPoint Techniques
When mastering PowerPoint, we should explore incorporating multimedia elements and utilizing shortcuts for efficiency. These techniques elevate our presentations and streamline our workflow.
Incorporating Multimedia Elements
Adding multimedia elements like images, videos, and audio can greatly enhance the effectiveness of our presentation. By embedding a video, we can demonstrate complex concepts dynamically. For example, to insert a video, navigate to the Insert tab on the toolbar, select Video , and choose either This Device or Online Video .
Integrating audio clips for background music or voice-overs is also straightforward. Using the same Insert tab, we can pick Audio and then Audio on My PC or Record Audio .
Animations and transitions provide movement to slides, making them more engaging. We apply these effects by selecting an element, then choosing Animation from the toolbar, and picking a desired effect. Finally, setting the timing and triggers ensures the animations occur at the right moment.
| Video | Insert | > > or |
| Audio | Embed | > > or |
| Animation | Apply | > |
Using Shortcuts for Efficiency
Harnessing keyboard shortcuts can significantly boost our productivity. PowerPoint offers numerous shortcuts that simplify tasks. For example, pressing Ctrl + M quickly inserts a new slide. To start a presentation from the beginning, use F5 , while Shift + F5 resumes from the current slide.
Navigating between slides is seamless with Page Up and Page Down . Moreover, Alt + S accesses the Slide Show tab on both Windows and Mac, providing quick control over presentation settings.
When we need to hide or unhide slides, Alt + S + H serves as a handy shortcut. Using these key commands saves time and allows us to maintain our focus on delivering compelling content.
Common Shortcuts
- Ctrl + M: New Slide
- F5: Start Presentation
- Shift + F5: Resume Slide
- Alt + S + H: Hide/Unhide Slide
Presentation Preparedness and Delivery
Being prepared for a presentation and mastering delivery techniques ensures a smooth and engaging experience for both the presenter and the audience. It’s crucial to utilize tools like Presenter View and manage multiple monitors effectively.
Mastering Presenter View
Presenter View is our best friend during a presentation. It allows us to see upcoming slides, notes, and a timer, helping us stay on track.
First, ensure that Presenter View is enabled. Go to the “Slide Show” tab and check the “Use Presenter View” box. This feature enables a look behind the curtain without showing our audience.
If we find ourselves flustered by remembering slide numbers or notes, keeping this view active is like having a cheat sheet. Plus, it lets us manage slides seamlessly, so if we need to skip to a hidden slide, our audience won’t see our frantic scrolling. Presenter View shows us thumbnails of our slides, making navigation a breeze.
Handling Multiple Monitors and Audiences
Presenting with multiple monitors adds a layer of complexity, but it’s vital for professional delivery. We can dedicate one monitor to Presenter View , while the other shows the Slide Show to the audience.
To set this up, connect the secondary monitor and configure the display settings in PowerPoint. Select “ Monitor 2 ” for the Slide Show , and make sure Presenter View shows up on the primary monitor. This way, we manage the show without the audience seeing our behind-the-scenes work.
Being mindful of audiences in varying environments is critical too. In large rooms, adjust font sizes and graphics to ensure visibility for the back rows. For virtual presentations, ensure all monitors display optimal resolution, and always check that audio and video settings are perfect for remote viewers.
Control the Slide Show from our primary monitor’s Presenter View , while our audience enjoys a polished, uninterrupted presentation. Whether in a packed hall or a Zoom meeting, mastering these technical details sets us up for a confident and engaging delivery.
Related posts:
- How to Add Music to PowerPoint: A Step-by-Step Guide for Seamless Presentations
- How to Curve Text in PowerPoint: Step-by-Step Guide
- How to Insert GIF into PowerPoint: A Step-by-Step Guide
- How to Present PowerPoint with Notes: Master Speaker Tips
- How to Create an Org Chart in PowerPoint: Step-by-Step Guide for Beginners
- How to Wrap Text in PowerPoint: A Step-by-Step Guide
- How to Change Font on All Slides in PowerPoint: A Step-by-Step Guide
- How to Use Slide Master in PowerPoint: Streamline Your Presentation Design
- How to Present PowerPoint with Notes: Expert Tips for Seamless Delivery
- How to Indent Bullet Points in PowerPoint: A Step-by-Step Guide
- How to Change Theme Colors in PowerPoint for a Customized Presentation
- How to Add Watermark to PowerPoint for Professional Presentations
Leave a Comment Cancel reply
Save my name, email, and website in this browser for the next time I comment.
- Slides and Organization
How to Hide a Slide in PowerPoint?
Written by: Bill Whitman
Last updated: April 9, 2024

How to Hide a Slide in PowerPoint
Hiding a slide in PowerPoint is a simple process that can be essential for tailoring presentations to your audience without deleting any slides. To hide a slide, right-click on the slide you want to hide in the slide thumbnail pane on the left-hand side of the screen, and select “Hide Slide” from the dropdown menu. The slide will remain in the deck but will not show during the presentation unless you unhide it.
Quick summary
- Right-click on the slide thumbnail you wish to hide.
- Select “Hide Slide” from the dropdown menu.
- The slide remains in the deck but won’t appear in the presentation mode.
- Unhide the slide by right-clicking it and selecting “Hide Slide” again.
At LearnPowerpoint.io , we’re committed to offering simple solutions to enhance your presentation skills. Hiding a slide in PowerPoint allows you to customize your presentations dynamically, catering to different audiences without altering the core structure of your presentation deck. This feature is particularly useful for creating a more focused and impactful presentation by temporarily removing irrelevant or unnecessary slides without permanently deleting them.
Step-by-Step Guide to Hiding a Slide
For those who prefer a more detailed guide, here’s how to hide a slide:
- Navigate to the “View” tab in PowerPoint and click “Normal” to display the slide thumbnails on the left side.
- Find the slide you wish to hide. You can quickly scroll through the slides if you have a large presentation.
- Right-click on the selected slide’s thumbnail.
- Choose “Hide Slide” from the dropdown menu. The slide will then be marked by a slash through the slide number, indicating it is hidden.
Unhiding Slides
If you decide you want a slide to be part of your presentation again:
- Right-click on the slide (which will be marked as hidden).
- Click “Hide Slide” in the dropdown menu to unhide it. The slash through the slide number will disappear, indicating it is now visible in the presentation.
Why Hide Slides in PowerPoint?
Hiding slides in PowerPoint can be very handy for several reasons:
- Customizing Presentations for Different Audiences: You can easily adapt your presentation without creating multiple versions.
- Focusing on Key Points: Helps to streamline presentations, making them more direct and impactful.
- Keeping Backup Slides: You can keep extra, detailed slides at the end of your presentation hidden, ready to use if needed during Q&A sessions.
With these techniques, you can ensure that your PowerPoint presentations are tailored perfectly to each specific audience, maintaining engagement without losing the versatility of your original slide deck. At LearnPowerpoint.io , we believe in empowering our readers with practical tips to make the most out of PowerPoint’s features, enhancing both the quality and delivery of your presentations.
Other Categories
- Advanced Features and Interactivity
- Basic Features and Usage
- Media and Design
- Text and Formatting

How to Do a Voiceover on PowerPoint?

How to Reference PowerPoints?

How to Create a Hyperlink in PowerPoint?

How to Insert a Table in PowerPoint?

How to Insert Excel into PowerPoint?

How to Download PowerPoint?

How to Merge Shapes in PowerPoint?

How to Delete a Slide in PowerPoint?

How to Align Objects in PowerPoint?
Featured posts.

One Time Code
< Go back to Login
Forgot Password
Please enter your registered email ID. You will receive an email message with instructions on how to reset your password.

How to Hide And Unhide A Slide In PowerPoint
To shorten your presentation time or remove a slide that includes research or sources, you may save the information on the slide for yourself. Use the PowerPoint Hide Slide tool to hide slides from a slide show that you don’t need to be shown. The PowerPoint Hide Slide option offers customization and flexibility to shorten a presentation’s duration without making a new one, add slides to backup data and respond to audience inquiries, or add more information when time permits.
Let’s understand how to hide and unhide a slide in PowerPoint.
How To Hide A Slide In PowerPoint In Windows?
There are multiple ways you can hide a slide in PowerPoint on Windows. Let’s have a look at them:
- Normal View
- Slide Sorter
- Keyboard Shortcuts
Method 1: Using Normal View
To hide a slide in PowerPoint with Normal View:
- Open your PowerPoint presentation.
- Go to the “View” tab and select “Normal” from Presentation View (if not already selected).
- Browse the slide you want to hide.
- Right-click and select the “Hide Slide” option.
- Your hidden slide will be greyed out in your slide pane.
- To perform this function for multiple slides, hold down the Ctrl key, select all the slides you wish to hide, and repeat the same process.
Method 2: Using Slide Sorter
To hide a slide in PowerPoint with Slide Sorter option:
- Open your presentation in PowerPoint.
- Go to the “View” tab and select “Slide Sorter” in the Presentation View section to view your slides in grid view.
- Click on the slide you wish to hide.
- Right-click and select the “Hide Slide” option to hide that slide.
- You can repeat the same procedure for other slides as well.
- If you wish to hide multiple slides, hold down the Ctrl key and select all the slides you want.
- Right-click on any one of the slides and select the “Hide Slide” option.
Method 3: Using Keyboard Shortcuts
You can also hide slides in PowerPoint using keyboard shortcuts:
- After opening your presentation, go to the “View” tab and select “Normal” to view the slides on your left pane.
- Select the slide you want to hide.
- Use Alt+S to access the Slide Show ribbon.
- Press on H to hide that particular slide.
- Use the same process to unhide the slide.
How To Unhide A Slide In PowerPoint On Windows?
These are the ways you can use to unhide a slide in PowerPoint in Windows:
- Keyboard Shortcut
Follow the steps below to unhide a slide in PowerPoint on Windows using “Normal View” option:
- In the left pane, the hidden slides are greyed out.
- Right-click on it and select the “Unhide Slide” option.
- You can repeat the same process for other slides.
- Use the Ctrl button for multiple slides and select all the slides you want to unhide.
To unhide a slide in PowerPoint with Slide Sorter option:
- After opening your PowerPoint presentation, go to the “View” tab.
- Select “Slide Sorter” in the Presentation View section.
- Now, you’ll see all the slides in a grid view.
- Browse the slides you want to unhide. It will be greyed out for you to distinguish.
- Right-click on the slide you want to unhide.
- Select the “Unhide Slide” option to unhide your slide.
- Repeat the same procedure for other slides.
Method 3: Using Keyboard Shortcuts:
- To unhide a slide in PowerPoint, you can use the Alt key.
- Click on the slide you want to hide.
- Then use Alt+S to access the Slide Show ribbon.
- Press H to unhide that slide.
If you are running a slideshow and you want to display your hidden slide, follow the steps below:
- When your presentation is in the Slideshow view, right-click on any slide.
- Click on the “See All Slides” option.
- Now, you’ll see all your slides in a grid view.
- Click on the hidden slide that you want to view.
- The hidden slide will now appear in front of you on your Slideshow.
If you use PowerPoint on Mac, the process to hide/unhide a slide is slightly different. Let’s learn about it in detail.
READ MORE: How To Copy And Paste A Slide In PowerPoint
How To Hide A Slide In PowerPoint On Mac?
Below are the steps to hide a slide in PowerPoint on Mac:
- In the left navigation pane, browse the slide you want to hide.
- After selecting the slide, right-click on it and go to the “Hide Slide” option.
- By doing this, the slide will be hidden immediately and marked as such by turning grey and displaying a null symbol in the upper left corner. When you right-click again, the “Hide Slide” option will also get a checkmark.
- You can do the same for multiple slides.
- Hold down the Shift key to hide multiple sequential slides and select your section’s first and last slide. Use the right-click to hide all the slides.
- Hold down the Command key for multiple non-sequential slides and select all the slides you want to hide. Right-click on the slide and hit the “Hide Slide” button to hide the slides.
How To Unhide A Slide In PowerPoint On Mac?
Here are the steps to unhide a slide in PowerPoint on Mac:
- After opening your PowerPoint presentation, browse for the slide you want to unhide in the left navigation pane.
- Right-click on the slide and select the “Unhide Slide” option to unhide that slide.
- Your slide will not appear in your Slideshow.
- You can repeat the same process for multiple slides by holding the Command or Shift key and selecting all the slides you want to unhide.
- Right-click on any of the slides and select the “Unhide Slide” option to unhide the selected slides.
Hang on and read more if you are someone who uses PowerPoint on Web and wants to hide/unhide a slide in PowerPoint on Web.
How To Hide A Slide In PowerPoint On The Web?
Below are the two ways to hide a slide in PowerPoint on web:
Follow the steps below to hide a slide in PowerPoint on the web using Normal View:
- Open your PowerPoint presentation on PowerPoint Web.
- Click on the slide you wish to hide from the left navigation pane.
- Right-click on it and select the “Hide Slide” option.
- Your slide will now be hidden.
- To indicate your slide is hidden, it will be greyed out with a blocked symbol on it.
Follow the steps below to hide a slide in PowerPoint on the web using the Slide Sorter option:
- First, open your document on the PowerPoint Web.
- Go to the View tab and select Slide Sorter to view your slides in a grid view.
- Right-click on any slide and select the “Hide Slide” option to hide that particular slide.
- If you want to hide a section of slides, hold down the Shift key and select your section’s first and last slide.
- Right-click and select the Hide Slide option.
- All your selected slides will now be hidden.
How To Unhide A Slide In PowerPoint On the Web?
You can unhide slide in PowerPoint on the Web using the steps below:
To unhide a slide in PowerPoint Web using Normal View,
- Open PowerPoint Web and select your document.
- Right-click on the hidden slide.
- Go to the Unhide Slide option to unhide the slide.
- To unhide multiple slides, press down the Ctrl key and select all the slides you wish to unhide.
- Right-click on any slide and click on the Unhide Slide option to unhide the selected slides.
To unhide a slide in PowerPoint Web using Slide Sorter,
- In the PowerPoint web, open your presentation.
- Go to the View tab.
- Select Slide Sorter, and now your slides will be visible in a grid view.
- You can easily select the slide that you want to unhide.

- Hold the Ctrl key for multiple slides and select all the slides you want to unhide.
- Right-click on any slide and select the Unhide Slide option to unhide the slides.
Hiding slides can be beneficial when you have made a presentation for all types of audiences and want to present it to different groups. These slides can be marked as hidden so that they are not shown in your primary slide show but that you can still access them if necessary.
For example, if you’re presenting to various departments in your firm, you can hide slides according to the audience. Either way, this is a handy feature of PowerPoint to keep in mind.
You can use this option instead of deleting it if you are unsure what to do with that slide.
In this article, we have provided detailed information on how to hide a slide in PowerPoint.
To continue receiving such useful blogs, remain updated on our latest blogs.
How Do I Hide A Slide In PowerPoint In Between A Slideshow?
You cannot hide a slide between a slideshow, but you can do it before that, and your hidden slide will not be visible in the Slideshow.
How Do You Unhide A Slide In PowerPoint In A Slideshow?
Right-click on any slide and select the “See All Slides” option. All your slides(hidden included) will now be visible to you in a grid view. Click on the slide you wish to view.
Is There Any Keyboard Shortcut To Hide/Unhide A Slide In PowerPoint Directly?
No, there is no direct keyboard shortcut to hide or unhide a slide in PowerPoint directly, but you can use the Alt key to access the “Hide Slide” option in the toolbar.
How Will I Distinguish The Hidden Slides?
In your presentation pane, your hidden slides will be greyed out, and an eye-blocking symbol will appear on them to help to distinguish them.
Can I Hide All My Slides In PowerPoint At Once?
You can use Ctrl/Cmd+A to select all the slides and then right-click and select the “Hide Slide” option to hide all the slides.
Table Of Content
Related presentations.

Project KickOff Presentation
Related posts from the same category.

22 May, 2023 | SlideUpLift
How To Copy And Paste a Slide In PowerPoint
When making presentations, you can save time and effort by simply copying and pasting a slide into PowerPoint. The duplicate slide option in PowerPoint is useful to eliminate the two-step

3 May, 2024 | SlideUpLift
How To Delete A Slide In PowerPoint? [1-Minute Guide]
Whether you are giving a presentation at work, school, or to friends and family, ensuring it is polished and professional is crucial. Figuring out how to delete a slide in

23 May, 2023 | SlideUpLift
How To Hide And Unhide A Slide In Google Slides
How To Hide A Slide In Google Slides On A Computer? There are a couple of ways to hide a slide in Google Slides on a computer: Using Right Click

16 May, 2023 | SlideUpLift
How To Move A Slide In PowerPoint
PowerPoint is an excellent presentation software that helps you create eye-catching yet informative slideshows. Whether you are making a business presentation or a school project, knowing how to move a

How to Add a New Slide in PowerPoint
PowerPoint is a powerful tool that allows users to create engaging and dynamic slideshows for various purposes. Adding new slides to a PowerPoint presentation is a fundamental skill that is

15 May, 2023 | SlideUpLift
How To Add Slide Numbers To PowerPoint
Adding slide numbers to PowerPoint presentations is an important aspect of creating effective presentations. Slide numbers not only help you organize your presentation but also allow your audience to follow

15 May, 2024 | SlideUpLift
How To Create A Captivating Title Slide For A Presentation
Are you looking for a way to ditch the boring title slide and hook your audience from the start? This blog will teach you all you need to know to

9 Jun, 2023 | SlideUpLift
How To Delete A Slide In Google Slides?
Google Slides is a great place to make fantastic presentations for school, college, or work. But keeping your presentation minimal and decluttered is very vital. It is necessary not to

27 May, 2023 | SlideUpLift
How To Copy And Paste A Slide In Google Slides
When working on a presentation using a Google Slides template, you might want to make new slides while maintaining the template's design. Or, on occasion, you can choose to duplicate

How To Add A New Slide In Google Slides
Google Slides is an easy way to create group projects and presentations. Many people can work together at a time on a project to make a great presentation. Moreover, you
Related Tags And Categories
Forgot Password?
Privacy Overview
Necessary cookies are absolutely essential for the website to function properly. This category only includes cookies that ensures basic functionalities and security features of the website. These cookies do not store any personal information
Any cookies that may not be particularly necessary for the website to function and is used specifically to collect user personal data via ads, other embedded contents are termed as non-necessary cookies. It is mandatory to procure user consent prior to running these cookies on your website.
How to Hide a Slide in Powerpoint 2010: A Step-by-Step Guide
Hiding a slide in PowerPoint 2010 is a nifty trick that allows you to skip over a particular slide during a presentation without deleting it. To do this, right-click on the slide you wish to hide, and select ‘Hide Slide’. The slide will remain in your deck but will not be shown during the presentation.
After hiding a slide, it will still be a part of your PowerPoint file, but it just won’t appear in the slideshow. You can unhide it at any time if you change your mind.
Introduction
Ever been in the middle of a presentation and wished you could skip a slide without the audience knowing? Maybe it contains outdated information, or it’s just not relevant to the current audience. Well, you’re in luck because PowerPoint 2010 has a slick feature that allows you to do just that – hide slides. This function is a lifesaver for presenters who need to tailor their presentation on the fly without shuffling through slides or deleting content.
Whether you’re a student, a business professional, or just someone who likes to keep their presentations crisp and to the point, understanding how to hide slides in PowerPoint 2010 is an essential skill. Let’s dive into the steps to achieve this.
Step by Step Tutorial: Hiding a Slide in PowerPoint 2010
The following steps will guide you through the process of hiding a slide in PowerPoint 2010.
Step 1: Open Your PowerPoint Presentation
Open the PowerPoint presentation and navigate to the slide you want to hide.
After opening your presentation, make sure you’re in Normal view where you can see all your slides on the left-hand side pane.
Step 2: Right-Click on the Desired Slide
Right-click on the slide thumbnail that you want to hide.
A context menu will appear with several options. Look for the ‘Hide Slide’ option.
Step 3: Click on ‘Hide Slide’
Click on the ‘Hide Slide’ option in the context menu.
Once you click this, the slide will become slightly dimmer, indicating that it’s hidden.
Step 4: Save Your Presentation
Save your presentation to make sure the changes are applied.
It’s always good practice to save your work frequently, especially after making changes.
| Benefit | Explanation |
|---|---|
| Flexibility | Hiding a slide gives you the flexibility to adapt your presentation without deleting slides. |
| Professionalism | It helps maintain a professional appearance by allowing you to skip over redundant or irrelevant slides seamlessly. |
| Tailored Presentations | You can create a single presentation and tailor it to different audiences by hiding or showing certain slides. |
| Drawback | Explanation |
|---|---|
| Accidental Skipping | There’s a risk of accidentally skipping over a hidden slide you intended to show. |
| Forgetfulness | You might forget that a slide is hidden and not review it before an important presentation. |
| Overdependence | Relying too much on this feature can make presenters lazy in updating their presentations properly. |
Additional Information
Knowing how to hide a slide in PowerPoint 2010 is a neat trick, but there’s more to it. For instance, did you know that you can hide multiple slides at once? Just hold down the Ctrl key and click on each slide you want to hide, then right-click and select ‘Hide Slide’. Voila! You’ve just hidden several slides in one go.
Another tip is to use the Slide Sorter view to get a better overview of which slides are hidden – they’ll appear with a ‘no entry’ sign over them. And remember, just because a slide is hidden, doesn’t mean it’s gone. You can always unhide it by right-clicking and selecting ‘Hide Slide’ again, which will toggle it back into view.
- Open your PowerPoint presentation.
- Right-click on the slide thumbnail you wish to hide.
- Click on ‘Hide Slide’ in the context menu.
- Save your presentation.
Frequently Asked Questions
Can i hide multiple slides at once.
Yes, by holding down the Ctrl key and clicking on each slide you wish to hide, then right-click and select ‘Hide Slide’.
Will hiding a slide delete it from my presentation?
No, hiding a slide does not delete it; it simply won’t be visible during the slideshow until you unhide it.
Is there a shortcut to hide a slide?
There isn’t a keyboard shortcut, but right-clicking and selecting ‘Hide Slide’ is quick and easy.
Can I hide a slide during the presentation?
It’s best to hide slides before starting the presentation. However, you can navigate past a slide during the presentation if needed.
How do I know which slides are hidden?
In Slide Sorter view, hidden slides have a ‘no entry’ sign over the slide number, indicating they are hidden.
Mastering the simple yet effective technique of hiding a slide in PowerPoint 2010 can make all the difference in delivering a polished presentation. It’s all about controlling your content and presenting only what’s necessary.
And remember, just because you hide a slide doesn’t mean it’s lost in the ether. You can always bring it back with just a couple of clicks. So go ahead, give it a try and see how it transforms your presentation game!

Matt Jacobs has been working as an IT consultant for small businesses since receiving his Master’s degree in 2003. While he still does some consulting work, his primary focus now is on creating technology support content for SupportYourTech.com.
His work can be found on many websites and focuses on topics such as Microsoft Office, Apple devices, Android devices, Photoshop, and more.
Share this:
- Click to share on Twitter (Opens in new window)
- Click to share on Facebook (Opens in new window)
Related Posts
- How to Rotate a Powerpoint Slide Presentation
- How to Download a Google Slides Presentation as a Powerpoint File
- How to Delete a Slide in Powerpoint 2010: Step-by-Step Guide
- How to Unhide a Hidden Workbook in Excel 2010: A Step-by-Step Guide
- How to Hide Tabs in Excel 2010: Step-by-Step Guide
- How to Hide Background Graphics in Powerpoint 2013: A Step-by-Step Guide
- How to Hide the Speaker Notes in Google Slides: A Step-by-Step Guide
- How to Do a Powerpoint Google Slides Presentation Conversion
- How to Delete Multiple Slides in Google Slides: A Step-by-Step Guide
- How to End Powerpoint on Last Slide in Powerpoint 2010: A Step-by-Step Guide
- How to Make Google Slides Vertical (5 Quick Steps)
- How to Add a New Slide in Google Slides: A Step-by-Step Guide
- How to Hide Column in Google Sheets: A Step-by-Step Guide
- How to Make a Powerpoint Slide Vertical in Powerpoint 2013: A Step-by-Step Guide
- How to Stop Hiding a Slide in Google Slides
- How to Add a Hyperlink on Google Slides
- How to Change Slide Size in Powerpoint 2016
- Can You Save a Powerpoint as a Video in Powerpoint 2013? Find Out Here!
- How to Put Embedded Youtube Video in Powerpoint 2010: A Step-by-Step Guide
- How to Add Page Numbers in Powerpoint 2010: A Step-by-Step Guide
Get Our Free Newsletter
How-to guides and tech deals
You may opt out at any time. Read our Privacy Policy
- PowerPoint Training
How to Hide a Slide in PowerPoint

PowerPoint Training Features:
Interactive bite-sized lessons
Get Certified
Accurate skill assessments
Customizable, LMS-ready content
4.9 out of 5 on G2

Move a Slide
The order of your slides isn’t set in stone; you can easily rearrange them in the Thumbnails pane.

A horizontal line appears as you drag the slide, indicating where the slide will be moved. When you release the mouse button, the slide is dropped in the new location and all slides in the presentation are renumbered accordingly.
If you need to reorder many slides, it’s easier to use the Slide Sorter view.
Hide a Slide
If you don’t want a slide to be included in the final slide show, you can hide it from your audience. It won't show up when you play the slide show, but you will still see it in the editing views so you can bring it back in the future.
- Select the slide you want to hide.
- Click the Slide Show tab.

The slide number is crossed out, indicating that it is hidden.
To unhide a slide, select it and then click Hide Slide again.

FREE Quick Reference
Free to distribute with our compliments; we hope you will consider our paid training.
- LinkedIn-ready certificate
- Skill assessments
- Bite-sized, interactive lessons
- Saved progress
How to Make PowerPoint Notes Invisible While Presenting
Making PowerPoint notes invisible during a presentation is a straightforward process. Simply use the Presenter View option, which shows your notes on your screen but not on the audience’s view. With a few clicks, you can deliver a seamless presentation without your notes being visible to everyone.
After completing this action, you will be able to present your PowerPoint slides without the audience seeing your personal notes, creating a more professional and clean presentation.
Introduction
Imagine you’re giving a big presentation. Your slides are perfect, but you’re a bit nervous and could use some notes to keep you on track. The last thing you want is for your audience to see these notes, distracting from the impact of your slides. That’s where the ability to make PowerPoint notes invisible during a presentation comes in handy.
PowerPoint is an incredibly powerful tool for creating compelling presentations. Whether you’re a student, a business professional, or a lecturer, mastering PowerPoint is a valuable skill. One of the lesser-known features of PowerPoint is the ability to keep your speaker notes private while presenting. This feature is particularly important for anyone who relies on cues or additional information to deliver their presentation smoothly. It’s a simple trick that can make a big difference in how confidently you present your information.
Step by Step Tutorial on Making PowerPoint Notes Invisible
Before getting into the steps, it’s important to understand what we’re aiming for. By following these steps, you will be able to view your notes on your computer while only the slides are displayed to your audience. This allows you to reference your notes discreetly during your presentation.
Step 1: Set Up Multiple Monitors
Ensure that you have a second monitor or projector connected to your computer.
Having a second monitor or projector connected is essential for using Presenter View. This allows you to view your notes on one screen while the audience sees only the presentation on the other.
Step 2: Enable Presenter View
In PowerPoint, click on the ‘Slide Show’ tab and check the ‘Use Presenter View’ box.
Enabling Presenter View is the key action that hides your notes from the audience. This option is usually found in the ‘Monitors’ group on the ‘Slide Show’ tab.
Step 3: Start Your Slide Show
Start your slide show as you normally would, and your notes will be visible only to you.
Once Presenter View is enabled and you start your slide show, you’ll see your notes on your screen, while the audience will see only the slides.
| Benefit | Explanation |
|---|---|
| Professionalism | Having your notes hidden from the audience gives your presentation a sleek, professional look. |
| Confidence Booster | Knowing your notes are there for your eyes only can lessen anxiety and boost your confidence during the presentation. |
| Flexibility | Presenter View allows you to see upcoming slides and notes, thus offering better control over your presentation flow. |
Having your notes hidden from the audience helps maintain the focus on the content of your slides, rather than on your personal cues. This contributes to a more professional appearance and can help you make a better impression.
Knowing that you can reference your notes without the audience seeing them can be a significant confidence booster. This safety net allows you to focus on delivering your message rather than memorizing it.
With Presenter View, not only can you see your current slide’s notes, but you also get a preview of upcoming slides. This flexibility can be a game-changer, allowing you to better plan your transitions and manage your presentation’s pace.
| Drawback | Explanation |
|---|---|
| Equipment Dependency | You need a second monitor or projector to use Presenter View, which isn’t always available. |
| Technical Issues | Technical difficulties can arise, such as the second screen not being recognized. |
| Learning Curve | It may take time to become comfortable with Presenter View if you’re not tech-savvy. |
One significant limitation is the need for additional equipment. Without a second monitor or projector, you won’t be able to use Presenter View.
Technical issues can also pose a problem, such as when the second screen isn’t immediately recognized by your computer, which could cause delays or disruptions to your presentation.
For those who are not tech-savvy, using Presenter View may require a bit of a learning curve. Becoming comfortable with this feature can take some practice.
Additional Information
When preparing for a presentation, there are a few extra tips you might find useful. First, rehearse with Presenter View ahead of time to become comfortable with toggling between your notes and the slides. Familiarize yourself with the controls, so you don’t fumble during the actual presentation.
Another tip is to keep your notes concise. Since you’ll be the only one seeing them, it might be tempting to write down everything, but this can be counterproductive. Short, keyword-based notes are generally more helpful than lengthy paragraphs.
Also, always have a backup plan. Technology can be unpredictable, so be prepared to give your presentation without your notes being visible on your screen. This could mean having a printout of your notes or being familiar enough with your material that you can present without them.
Finally, remember to engage with your audience. While it’s great to have notes, don’t become so reliant on them that you fail to make eye contact and connect with your audience. Presenter View is just a tool to aid you, not a crutch to lean on.
- Connect a second monitor or projector.
- Check the ‘Use Presenter View’ box in PowerPoint.
- Start your slide show to view notes on your screen and slides on the audience’s screen.
Frequently Asked Questions
What is presenter view.
Presenter View is a PowerPoint feature that allows you to view your notes on your screen while the audience sees only the presentation slides.
Can I use Presenter View without a second monitor?
No, Presenter View requires a second monitor or projector to function correctly.
How can I ensure my notes are completely invisible to the audience?
By using Presenter View and making sure your laptop is not mirrored on the projector or second screen.
What should I do if my computer doesn’t recognize the second monitor?
Check your connection and make sure that you have the correct display settings on your computer.
Can I still see the next slide in Presenter View?
Yes, Presenter View allows you to see not only your notes but also a preview of the upcoming slide.
In conclusion, making PowerPoint notes invisible during a presentation is a nifty trick that can make a significant difference in your delivery. It allows for a more professional appearance and can help boost your confidence as a speaker. By following the steps outlined, you’ll be able to leverage the power of Presenter View to keep your notes private while still engaging your audience with a polished presentation.
Always remember to practice ahead of time, keep your notes concise, and, most importantly, ensure that you’re prepared for any technical hiccups that might arise. Good luck with your presentations, and may your PowerPoint notes always remain invisible to your audience!

Matthew Burleigh has been writing tech tutorials since 2008. His writing has appeared on dozens of different websites and been read over 50 million times.
After receiving his Bachelor’s and Master’s degrees in Computer Science he spent several years working in IT management for small businesses. However, he now works full time writing content online and creating websites.
His main writing topics include iPhones, Microsoft Office, Google Apps, Android, and Photoshop, but he has also written about many other tech topics as well.
Read his full bio here.
Share this:
Join our free newsletter.
Featured guides and deals
You may opt out at any time. Read our Privacy Policy
Related posts:
- How to Save Powerpoint as PDF with Notes
- How to Set Time for Slides in Powerpoint
- How to Show Speaker Notes in Google Slides
- Can I Convert My Powerpoint to Google Slides?
- How to Unhide a Slide in Powerpoint 2013
- How to Add Page Numbers in Powerpoint 2010
- How to Drag Slides From One PowerPoint to Another: A Step-by-Step Guide
- How to See Notes on PowerPoint on the Laptop: A Step-by-Step Guide
- How to Make a Powerpoint Slide Vertical in Powerpoint 2013
- How to Delete a Slide in Powerpoint 2010
- How Do I Print Just the Notes in Powerpoint 2010?
- How to Loop a Slideshow on Powerpoint 2013
- How to Hide a Slide in Powerpoint 2010
- How to Rotate a Slide in PowerPoint: A Step-by-Step Guide
- How to Delete Multiple Slides in Google Slides
- How to Change the Font on All Slides in Google Slides
- How to Check Word Count on Powerpoint 2010
- How to End Powerpoint on Last Slide in Powerpoint 2010
- How to Insert Slides from Another Presentation in Powerpoint 2010
- How to Make Table Borders Invisible in Google Docs: A Step-by-Step Guide
Stack Exchange Network
Stack Exchange network consists of 183 Q&A communities including Stack Overflow , the largest, most trusted online community for developers to learn, share their knowledge, and build their careers.
Q&A for work
Connect and share knowledge within a single location that is structured and easy to search.
How can I temporarily hide elements on a slide? [duplicate]
I have a slide on which I want to construct a complex animation, but all the elements on that slide make it almost impossible to construct what I want to achieve.
Is there a way to temporarily hide elements on a slide?
- microsoft-powerpoint
You're going to want to use the Selection Pane .
On the Home tab on the ribbon, find the Arrange button and collapse the attached menu. Then open the Selection Pane by clicking the option with the same name.

Toggle the visibility of individual elements by clicking the eye icon next to their name.

Remember to click Show All when you're done setting up your animation, as the visibility is a permanent setting and carries over into the final presentation.
Not the answer you're looking for? Browse other questions tagged microsoft-powerpoint .
- Featured on Meta
- Announcing a change to the data-dump process
- Upcoming initiatives on Stack Overflow and across the Stack Exchange network...
Hot Network Questions
- Can't get started with Tao Ex 3.6.6 regarding cardinality of power sets.
- adjective as a noun
- Terminology: A "corollary" to a proof?
- Why is much harder to encrypt emails, compared to web pages?
- What are the not-winglet wingtips on the CL-415?
- Why try to explain the unexplainable?
- Connect 3 on different board sizes
- How do you say "ubi librum in eundem locum ubi eum repperit posuit" more elegantly?
- Confusion about Mathematical Induction
- Three up to 800 & sum to 2048
- Do the quarks in neutrons tend to have much larger momenta than the quarks in protons?
- How to best handle many breadcrumbs with overflow menu
- Camera on me and my computer screen all day
- Why is my internet speed slowing by 10x when using this coax cable and splitter setup?
- How to deal with unmovable files like MFT when trying to shrink a partition?
- What does な mean in the interjection バカな?
- 10Base-T Half Duplex Segment Length 100m?
- Identifying transistor topology in discrete phono preamp
- P versus semi-NP?
- Can I remove these truss supports?
- Using the "tab distance" feature in QGIS labels
- Isn't manual port forwarding actually less safe than UPnP?
- Immigration at Japan: Do they check approved leave dates?
- Doesn't our awareness of qualia imply the brain is non-deterministic?
Shortcuts for Microsoft Office!
Creative solutions for microsoft office, hide slide parts in powerpoint, hide powerpoint slide objects.
Sometimes you have a part or parts (objects) on a slide that you want to use again but that box (placeholder) information doesn’t apply to a current situation. You could create a duplicate slide and delete or edit the information but PowerPoint has an easier solution.
Available in PowerPoint 2007 and above.

Use the Selection Pane to Hide Slide Parts
This feature is especially helpful if this is a slide presentation that is used frequently. No messing around with deleting or duplicating. Here’s how to hide objects on the slide until you need to use them again:
- On the Home tab, Editing group, click the drop down arrow on Select
- Choose Selection Pane…
A task pane displays on the right side of your slides (can be dragged to left side if you prefer)
The elements (placeholders) will be listed for the current slide (shown here in example), and identify Title, Shapes, Pictures, Slide numbers, text boxes (anything that is an object). You can also rename the objects in the Selection Pane to make it clear what they represent.

Use the Icons to Display and Hide
I don’t want the “ Free through Saturday !” to display on the slide currently but will use it later so don’t want to delete the placeholder:
- Click on the placeholder border in the slide to select that text box which will automatically highlight its item name in the Selection Pane. (You can also click its item name in the Selection Pane and the box will be selected).
- That placeholder is now hidden and the eye becomes a line.
- Click the line to display the object on the slide again.
You can hide/display any parts of a slide without editing. PowerPoint will accommodate with the Selection Pane details as long as it can identify as an object.
Note : The slide image example above represents an actual eBook of mine available on Amazon as shown. However, it is not free, so if this was an actual slide presentation, I would remove that placeholder. If you would like to be notified of any free promotion, just fill out the signup form on this page and get a free cheat sheet of Office tips while you wait!
If you are doing narrations, creating video or using PowerPoint for teaching or demonstration, take a gander at my blog for using Office Mix to take your PowerPoint to a new level. https://gaylelarson.com/share-powerpoints-office-mix/
Have you played with the Selection Pane? How are you using this feature to organize slide presentations? Thanks for reading and c omment below.
Leave a Reply Cancel reply
Your email address will not be published. Required fields are marked *
How to Track Changes in PowerPoint? A Step-by-Step Guide

Table of Contents
PowerPoint is a great tool not just for making presentations, but also for working together on them. If you want to share your slides with others and get their feedback, PowerPoint’s Review feature can help you track changes and see comments.
This feature allows you to compare different versions of your presentation side-by-side, so you can see exactly what’s been added, removed, or edited. You can then choose to accept or reject those changes, and even add your own notes to discuss them further.
This blog post will guide you through using the Review feature in PowerPoint to track changes made to your presentations. Let’s get started!
Steps to Track Changes in PowerPoint
Step 1: create a copy and send your presentation for review .
Before sharing your presentation for feedback, it’s important to create a separate working copy. This ensures you don’t accidentally overwrite your original version with edits. Here’s how to do it:
- Save a Draft: Start by saving your current presentation as a draft. This can be helpful for referring back to your initial ideas during the review process.
- Create a Dedicated Review Copy: Next, save another copy of your presentation with a different filename. This will be the version your reviewers will work on. Consider including “For Review” or “Feedback” in the filename to avoid confusion.
- Choose a Sharing Platform: Select a secure, shared location to store your review copy. Popular options include OneDrive, SharePoint, or a similar cloud storage platform. Uploading your presentation there allows reviewers to access it easily.
- Generate a Shareable Link: Once uploaded, right-click the review copy file and find the option to “Copy Link. This link is what you’ll send to your reviewers in an email.
- Provide Instructions: In your email to reviewers, include clear instructions on how you’d like them to provide feedback. Do you want them to add comments directly within the slides, or would you prefer a separate document summarizing their thoughts?
By following these steps, you’ll have a dedicated review copy ready for collaboration and can effectively track the changes made by your reviewers.
Create presentation slides with AI in Seconds in Google Slides
10M+ Installs
Works with Google Slides

Step 2: Use the Compare Feature and Merge Both Versions
After everyone has finished reviewing your shared presentation, you can use the Compare feature to review their changes and integrate them into your original document. Here’s how to do it:
1. Open the Original Version: Start by opening the original version of the presentation that you saved before sharing it for review. This will serve as the baseline for comparing the changes.
2. Navigate to the Review Tab: Locate the “Review” tab on the PowerPoint ribbon. This tab houses all the functionalities related to reviewing and editing presentations collaboratively.
3. Access the Compare Feature: Within the “Review” tab, look for the “Compare” button. Clicking this button will initiate the process of comparing your original version with the edited version received from reviewers.
4. Select the Edited Version: A window titled “Choose File to Merge with Current Presentation” will appear. Here, browse and select the edited version of the presentation that contains the reviewers’ comments and changes. This could be a file you received via email or downloaded from a shared folder.
5. Merge the Presentations: Once you’ve selected the edited version, click the “Merge” button. This will initiate the merging process, where PowerPoint will compare both presentations and highlight the differences.
6. Review Changes in the Revisions Pane: A new pane on the right side of your screen called the “Revisions” pane will appear. This pane displays all the changes made by reviewers on each slide. Look for sections titled “Slide Changes” and “Presentation Changes” to identify specific modifications.
7. Inspect Individual Changes: Click on each list item within the “Slide Changes” or “Presentation Changes” section to see the details of the edits made to specific elements on the slide. This could include added text, deleted content, formatting changes, or image replacements.
8. Review Reviewer Comments: If reviewers left comments alongside their edits, you’ll find them displayed under “Slide Changes” in the “Revisions” pane. Clicking the “Comments” button at the bottom of the PowerPoint window (on the status bar) will open a dedicated section for viewing all comments left by reviewers.
Step 3: Reviewing and Accepting/Rejecting Changes
This step lets you review the edits suggested by others and choose whether to keep them.
- Keeping a Change: If you like a change, simply click the checkbox next to the edit that says “Other authors: A change has been made.” This will accept the change and incorporate it into your presentation.
- Skipping a Change: If you don’t want to accept a change, you don’t need to do anything! Changes without checked boxes won’t be applied to your final presentation.
Benefits of Track Changes in PowerPoint
- Streamlined Collaboration: Multiple editors can work on a single presentation simultaneously. Track Changes highlights edits, clearly indicating who made what modification and when. This eliminates confusion and allows you to easily see the proposed changes. You can then decide to accept or reject them, ensuring everyone contributes effectively.
- Effortless Version Control: Tracking Changes makes managing different versions of your presentation a breeze. You can easily revert to an earlier version if needed, or compare multiple versions to see the specific changes made in each. This is helpful for tracking progress or making sure you haven’t lost important information.
- Enhanced Quality Control: By using Track Changes, you can guarantee that all edits are reviewed and approved before finalizing the presentation. This helps to catch errors or missing information before they become a problem in the final product.
- Regulatory Compliance: In some regulated industries like finance or healthcare, Track Changes can be crucial for meeting compliance requirements. It ensures that all changes made to the presentation are documented and verifiable. This provides a clear audit trail for regulatory purposes.
- No design skills required
- 3 presentations/month free
- Don’t need to learn a new software

Closing Thoughts
PowerPoint’s Track Changes feature offers a powerful and user-friendly solution for collaborative presentations. By following the steps outlined in this guide, you can effectively track edits, manage reviewer feedback, and ensure a streamlined workflow for creating high-quality presentations. From improved collaboration to enhanced quality control, Track Changes empowers you to deliver polished and impactful presentations every time.
Save Time and Effortlessly Create Presentations with SlidesAI

Google Slides and PowerPoint Are Fine, but I Prefer This Alternative

Your changes have been saved
Email Is sent
Please verify your email address.
You’ve reached your account maximum for followed topics.
Quick Links
What is slidesgo, how do you use slidesgo, reasons to use slidesgo, underrated features of slidesgo, more featured and educational content on slidesgo, slidesgo educator community and academy, key takeaways.
- Slidesgo is a versatile, user-friendly tool with customizable templates for various uses.
- Start using Slidesgo in four steps: Explore, choose, download, and customize templates.
- Slidesgo offers a diverse template collection, evolves with the times, and can increase productivity.
- Explore underrated and valuable Slidesgo features, such as tutorials, blogs, slidesgo academy, and more.
Slidesgo isn't just another presentation tool — it's my go-to option for spicing up school projects, creating custom collages, and delivering polished business slides. Here's why Slidesgo is a must-try!

Slidesgo is a free, user-friendly platform offering an array of customizable templates for education, business, creative projects, and social media. Slidesgo stands out among alternative presentation tools for its seamless integration with platforms like Google Slides and PowerPoint, boosting productivity across different platforms.
Slidesgo is valuable for students, professionals, educators, and anyone seeking easy personalization of colors, fonts, and layouts to align with their specific needs and branding.
For best results with Slidesgo, keep these four quick tips in mind before and during use:
- To download any template, you will need to create an account with Slidesgo .
- Once you register with Slidesgo, you can edit templates online and download up to five templates per month.
- There are two plans: Free and Premium (monthly or yearly payments). I've only used the free version since it provided everything I needed. However, if you anticipate using this tool more than five times a month, the premium plan is worth considering.
- A yellow crown in the top left of a template thumbnail means you can only access it with the premium plan.
Using Slidesgo is a breeze. Here are four simple steps to get started after creating an account:
- Visit the Slidesgo homepage .
- On Slidesgo's homepage, you can explore trending searches, the latest themes, popular options, and more to find your preferred template. Use the menu bar to click Explore or Create and refine your choices.
- Select the template of your choice, and adjust the color you want using those available.
- Download the template by selecting which app you'd like to connect it with (PowerPoint, Canva, Google Slides, etc.).
Slidesgo can significantly help with productivity for school, work, or even social media purposes. Here are three reasons why I'd recommend you try this presentation tool.
Slidesgo Has a Diverse Template Collection
Slidesgo offers a wide range of themes and purposes with its diverse template collection. Some specific examples include template themes and purposes for a thesis defense, marketing plan, newsletter, infographic, or portfolio.
If you want to use an AI presentation maker to save time , you can do so as well. With its wide range of options, it's easy to find inspiration and spark your creative juices to take your presentations to the next level.
Slidesgo Evolves With the Times
This tool frequently updates its template library, which allows you to explore fresh and new options to take your presentations to the next level. For example, Inside Out 2 has been receiving a lot of attention recently, and if you have the premium monthly or yearly plan, there are Inside Out templates to use.
Slidesgo Can Significantly Increase Your Productivity
With these ready-made templates at your disposal, you can eliminate the time and energy you'd spend designing layouts and backgrounds from scratch. This platform streamlines the creation of presentations with an easy-to-navigate site and customizable options, saving you ample time and energy to prepare eye-catching presentations.
While creating your presentations, don't forget that there are certain design mistakes you should strive to avoid.
You can use Slidesgo to do more than just enhance your PowerPoint presentations. Simply click on the Learn tab to explore Slidesgo's blogs, tutorials, and tips to refine your presentation skills.
Slidesgo Blogs and Articles
There are many blogs and articles available to assist you with business, educational, and other objectives. For instance, I've read blogs and articles about key tips for virtual presentations, overcoming public speaking nerves, and more.
In one central location, you can create impressive presentations and learn about presentation tools, techniques, tips, and more for your personal and professional needs.
Slidesgo Video Tutorials
The Slidesgo tutorials are incredibly useful. They offer clear-cut directions to help you navigate Microsoft PowerPoint or Google Slides . The tutorials on offer include how to create collages, a word cloud, Venn diagrams, and more.
Slidesgo Tips and Tricks for Presentations
Want to improve your public speaking skills or learn Google Slides and PowerPoint keyboard shortcuts? This information hub offers valuable tips to help you take your presentation skills to the next level. As a former Advanced Public Speaking Instructor and Speech and Debate community member, these tips can be useful to have in your presentation toolkit.
Explore this website to discover its extensive template collection, including featured content. The Slidesgo featured content quickly helped me choose the perfect template for my presentation needs, making it a great starting point for newcomers. To access the featured content, follow these simple steps:
- Hover over the Explore tab on your laptop or desktop, or locate it on your mobile device.
- Click on the featured content and explore away.
Here, you'll find a curated selection of template options including Editor's top picks, multipurpose designs, interactive layouts, animated templates, and more.
Slidesgo has two incredibly unique features that are free to access and aim to support educators and learners in their endeavors to create effective presentations: the Slidesgo Educator Community and Slidesgo Academy.
The Slidesgo Educator Community
The Slidesgo Educator community feature connects educators to share tips and resources, and collaborate on best practices for creating presentations. This community is ideal for educators at all levels and subjects as it fosters networking and continuous learning in presentation creation and delivery.
The Slidesgo Academy
The Slidesgo Academy platform offers video tutorials, step-by-step guides, and more to help you create engaging presentations. You can learn at your own pace and convenience, accessing these materials anytime, anywhere.
- Productivity
- Office Templates
- Presentations
How-To Geek
6 ways to speed up your powerpoint file.

Your changes have been saved
Email Is sent
Please verify your email address.
You’ve reached your account maximum for followed topics.
How to Use Checkboxes in Excel to Track Task Progress
How i got rid of microsoft edge's unnecessary features, how you can use onenote to maximize your productivity, quick links, reduce your powerpoint file size, review the master slides, check for macros and add-ins, disable autosave, other options.
There are many reasons why your PowerPoint file is running slowly, and all of them lead to frustration and wasted time. Before you throw your computer out the window, take a look at these tips that will hopefully get you back up and running more smoothly.
It's likely that the main cause of your sluggish PowerPoint file is its size. Since PowerPoint is a presentation designer, you might have lots of images, audio clips, and videos, each increasing the memory the program consumes on your computer. You might have also added many animations and transitions to make your PowerPoint more impressive, but these also add to your file's size. Addressing these will significantly reduce your file size and, thus, quicken the program's processing speed.
The question to ask is whether you need so many images in the first place. Go through your slides and remove any images that don't add any true value to your presentation. If you still find that you have lots of images, consider making them smaller by dragging the corner image handle towards the center of the picture.
Hold Ctrl to select many images on a slide at the same time, and then adjust one of those images to make them all smaller.
A second option is to remove artistic effects from images. It might be tempting to use PowerPoint's built-in picture editor, but adding shadows, reflections, and borders instantly adds kilobytes to your file. To revert the image to its original formatting, first select the image, and then click "Reset Picture" in the Picture Format tab on the ribbon.

Finally, consider compressing your images . While this will reduce their quality, using a lower resolution will mean that PowerPoint won't have to work as hard to display them in both the Normal and Slide Show views. Select an image in your slideshow, and click "Compress Pictures" in the Picture Format tab.

Then, you can either choose to compress the image you selected or all images in your file. If you plan to project your finished presentation onto a screen, 150 PPI is the optimal choice for reducing your file size without lowering the image quality too much.
The other way to compress your images, and all future pictures you add, is to first click File > Options. Then, click "Advanced" in the left-hand menu, and change "Default Resolution" to 150 PPT or 220 PPI in the Image Size And Quality options.

Then, click "OK."
Removing backgrounds and watermarks from your slides will also help to speed up your file.
Audio and Videos
As well as compressing images, you can also compress the media within your presentation, but the method differs slightly. Click File > Info, and choose the "Compress Media" drop-down button. There, click "HD" or "Standard" as alternatives to the Full HD option.
Compressing the media in your presentation will also remove embedded subtitles and alternate audio tracks.

If this doesn't speed up your file, consider removing the media from your PowerPoint file altogether. This doesn't mean you have to lose that feature from your slideshow, however—adding a link to the video or audio, which you can click when delivering your presentation, is a good alternative.
Animations and Transitions
Animations are a good way to emphasize details in your PowerPoint presentation or gradually introduce information step-by-step, and transitions between slides can look professional and slick. However, overusing these features not only distracts your audience and looks tacky, but also reduces your PowerPoint's performance efficiency. Keeping animations and transitions to a minimum, in terms of both quantity and type, will make a big difference. If possible, try to stick to these rules:
- Ask yourself, "Does this make my presentation better?" If the answer is no, don't put it in.
- Use slick effects that last less than one second without you having to change the speed of the animation . Fade and Cut are professional and quick transition effects, and Appear and Fade are optimal entrance animations.
- Use the same transition effect for each slide, and the same animation for each item.
- Try to avoid adding more than one animation to each item, and avoid animating individual words and letters.
You might think that the slides in the thumbnail pane on the left-hand side are the only slides in your file. However, the Slide Master contains hidden information that dictates how your presentation is designed. You can see the master slides by clicking "Slide Master" in the View tab on the ribbon.

First, scroll through the Slide Master, and right-click and delete any of the layouts you don't need.

Second, you might see objects (such as pictures or formatted text) that don't add any value to your PowerPoint. Click the relevant master slides and remove those items.
While useful, macros and add-ins—advanced tools that enable more features and functions—significantly add to your PowerPoint file's workload, and could be the reason it is running slowly.
Macros let you automate a series of commands to execute a task with a single click or keyboard shortcut. To check which macros you have enabled in your PowerPoint, click the "Macros" button in the View tab. This will bring up a dialog box, where you can view, edit, and—importantly—delete any macros.

Even though deleting a macro means you might lose some automation, it will likely speed up your file significantly.
Add-ins are custom tools you can add to PowerPoint that enable you to do more with the program. For example, you can add more customized charts or interactive elements to take your presentation to the next level. However, since you're effectively adding another program to PowerPoint, these affect its performance hugely.
To see whether you have add-ins installed, click the "Add-ins" icon on the Home tab, and any add-ins will show under My Add-ins in the drop-down dialog box.

Then, to remove an add-in, click "More Add-ins."

In the Office Add-ins window, click "My Add-ins," and click the three dots next to whichever add-in you want to delete. Finally, click "Remove."

This will remove the add-in from your Microsoft account, affecting all Office applications compatible with this add-in.
This tip is somewhat of a last resort, as Microsoft 365's AutoSave is a great way to ensure you don't lose your work if something unexpected happens, such as an impromptu update or the dreaded blue screen of death .
However, because AutoSave uploads the latest version of your PowerPoint file to your OneDrive account every few seconds, it's always working in the background and might slow down the program's performance.
Providing you're sure that you'll remember to press Ctrl+S every few minutes to save your work manually, try disabling AutoSave to speed up your file.
If you can't see the AutoSave icon, right-click any of the tabs and click "Show Quick Access Toolbar."

If you still can't see it, click the "Customize Quick Access Toolbar" down arrow, and check "Automatically Save."

Then, click the AutoSave toggle to "Off," and the AutoSave function will stop working away in the background.
Failing all of the above, there are two more options you might explore to work more efficiently in PowerPoint.
Use PowerPoint for the Web
If you're using a low-spec computer, it mightn't be powerful enough to handle PowerPoint's complexities. Using the web-based version of PowerPoint could be your way around this issue, as it doesn't require the use of any software on your PC. What's more, PowerPoint for the web is a slimline version of the desktop app, so it's likely to perform more efficiently on lightweight PCs and tablets.
Clean up Your PC
Have you considered that the issue mightn't be PowerPoint itself? Try opening some other apps, and see whether they also run more slowly than you'd hope. If this is the case, try freeing up some space on your PC . Similarly, if your computer has just installed an update, this might be the cause of your device's sluggish performance, and there are different things you can try to fix this issue.
As well as optimizing your file, you can increase your PowerPoint effectiveness and efficiency by avoiding some of the common mistakes that people make when using the program.
- Microsoft PowerPoint
- Microsoft 365
Got any suggestions?
We want to hear from you! Send us a message and help improve Slidesgo
Top searches
Trending searches

welcome back to school
109 templates

90 templates

first day of school
68 templates

classroom rules
5 templates

cell biology
45 templates

meet the teacher
31 templates
2D Shapes Cut-outs
It seems that you like this template, 2d shapes cut-outs presentation, premium google slides theme and powerpoint template.
Download the 2D Shapes Cut-outs presentation for PowerPoint or Google Slides and create big learning experiences for the littlest students! Dynamic and adorable, this template provides the visual stimuli that Pre-K students thrive on and makes your lessons more playful and exciting — after all, Pre-K education is all about playing to learn! Simplify the process of creating educational presentations that meet the unique requirements of the youngest learners with this editable Google Slides theme and PowerPoint template.
Features of this template
- 100% editable and easy to modify
- Different slides to impress your audience
- Contains easy-to-edit graphics such as graphs, maps, tables, timelines and mockups
- Includes 500+ icons and Flaticon’s extension for customizing your slides
- Designed to be used in Google Slides and Microsoft PowerPoint
- Includes information about fonts, colors, and credits of the resources used
What are the benefits of having a Premium account?
What Premium plans do you have?
What can I do to have unlimited downloads?
Don’t want to attribute Slidesgo?
Gain access to over 29300 templates & presentations with premium from 1.67€/month.
Are you already Premium? Log in

Register for free and start downloading now
Related posts on our blog.

How to Add, Duplicate, Move, Delete or Hide Slides in Google Slides

How to Change Layouts in PowerPoint

How to Change the Slide Size in Google Slides
Related presentations.

Premium template
Unlock this template and gain unlimited access

- Powerpoint Tutorials
How To Embed a Video In Your PPT from Any Source?

Creating a PowerPoint presentation from scratch can be a daunting task, but with the help of a PowerPoint presentation template, you can easily create a polished and professional-looking presentation in no time.
A well-designed PowerPoint presentation can help you deliver your message to your audience with supporting proof, data, analysis, and more. However, including all of the necessary content in your presentation can be time-consuming.
One of those necessary content is nothing but videos.
I hope this might be all of your problems.
In some cases, you may need to include external source videos to help simplify your presentation. But how can you seamlessly embed a video from an external source into your presentation without causing any confusion?
Tada! Slide Egg can help you simplify your presentation by allowing you to easily source and embed videos from external sources. Let’s get into the steps for it.
Step 1: Open the PowerPoint application on your desktop.
Step 2: Choose the slide where you want to add the video.
Step 3: Navigate to the web and search for the source video.
Step 4: Once you have found the source video, copy its URL from the address bar.
Step 5: In your PowerPoint presentation, navigate to the slide where you want to add the video.
Step 6: Highlight the text or object on the slide where you want to place the video.
Step 7: Right-click on the highlighted text or object and select “Hyperlink” from the drop-down menu.
Step 8: In the “Insert Hyperlink” dialog box, paste the video’s URL into the “Address” field and click “OK.”
Step 9: Once you’ve added the hyperlink, the text or object you selected will now be clickable and will direct the viewer to the external video source.
Now, just by following these simple steps, you can easily embed videos from any external source into your PowerPoint presentation without having to download and store the video file.
Okay. You may have doubts about the benefits or the help of adding an external link or source. I have given them below.
How Can Sourcing Videos Benefit Your Presentation?
Adding the source link to your template helps you to directly access the video without any manual control.
This can eliminate the need to download external videos and search for them each time. It also helps you prevent confusion when selecting videos.
One more advantage you have here is that incorporating source videos into your presentation can enhance the audience’s understanding of the topic. It explains the content well so your audience can grab the ideas faster.
We are at the end…
Including videos in your presentation can help your audience better understand the content and keep them engaged throughout your presentation.
So don’t hesitate or wait to include any video links that can make your presentation more compelling and effective. That’s what will help you grab your audience’s attention quickly.
Now that you have learned to add video to your presentation, check out Slide Egg for free PowerPoint templates and Google Slides that will help take your presentations to the next level with eye-catching, cutting-edge PowerPoint templates with a wide range of categories and easy-to-use options.
Don’t have the time to create your own presentation? No problem! Just send your content details to our PPT design service , and we’ll take care of the rest.
Spread Love
Related blogs.

Ramachandiran
Recent blog.

Get Top 5 Free PowerPoint Templates of 2023 in Slide Egg!
15000+ Free PowerPoint Templates. Oh, that’s something crazy! 15 Free downloads per day. Come on; we are not kidding. That’s...

What is Google Slides and What is it used for?
Google Slides is a well-known presentation software that is used by millions of people around the world. However, many people...

Free PowerPoint Templates and Google Slides Themes
Yes! Slide Egg offers you millions of free PowerPoint Presentations that enhance your presentation experience. Our ready-to-use and ready-to-modify PowerPoint templates and...
SIGNUP FOR NEWSLETTER
COMMENTS
A hidden slide remains in the file; it is merely hidden when you run Slide Show view. You can switch between the Hide Slide and Unhide Slide options for any slide in the presentation.
To hide slides during a presentation, open PowerPoint and select the slide that you want to hide by clicking it. The slide will have a box around it if it's selected.
Hiding a slide in PowerPoint is a good idea if you need to quickly present, and do not want to show a certain slide but do not want to necessarily delete that slide. PowerPoint makes it very easy to hide any number of slides in your presentation.
Learn how to hide and unhide slides in PowerPoint for different scenarios. Follow easy steps to customize your presentation without deleting any content.
You can hide slides in PowerPoint presentations so that they do not appear during a slide show unless you want to display them. Typically, you hide slides in Normal View or Slide Sorter View and then run your slide show. During a slide show, you can unhide slides or you can return to Normal View or Slide Sorter View and unhide them.
You can hide and unhide a PowerPoint slide by right-clicking it in the sidebar and selecting the "Hide Slide" option.
This article will guide you on how to hide and unhide slides and how to reveal hidden slides during your slideshow presentation (after a last-minute change of mind).
One of users' most commonly asked questions is how to hide a slide in PowerPoint since users tend to try and test different approaches for the final presentation. Instead of making multiple versions of the same presentation, we will follow a procedure similar to our article on how to hide a slide in Google Slides.
If you have slides for different audiences or purposes in your PowerPoint presentation, you can hide those you don't need and unhide them later.
Effectively managing your slides in PowerPoint can make a huge difference in your presentations. We'll explore how to navigate different views, manage slide visibility, and organize slides for impactful presentations.
Hiding a slide in PowerPoint is a simple process that can be essential for tailoring presentations to your audience without deleting any slides. To hide a slide, right-click on the slide you want to hide in the slide thumbnail pane on the left-hand side of the screen, and select "Hide Slide" from the dropdown menu.
Use the PowerPoint Hide Slide tool to hide slides from a slide show that you don't need to be shown. The PowerPoint Hide Slide option offers customization and flexibility to shorten a presentation's duration without making a new one, add slides to backup data and respond to audience inquiries, or add more information when time permits.
Learn to easily hide slides in PowerPoint 2010 with our step-by-step guide. Keep your presentation clean and focused without deleting slides.
A horizontal line appears as you drag the slide, indicating where the slide will be moved. When you release the mouse button, the slide is dropped in the new location and all slides in the presentation are renumbered accordingly.
Hello everyone. I am using PowerPoint for Mac v16.49 Microsoft 365 Licenced. Is it possible to delete all object parts (like part of shape or photo etc.) that stays out side of the slide area?
Explore reasons why you may want to hide slide titles, and learn two ways to hide them. This is a much better option than deleting slide titles!
Learn how to hide your PowerPoint notes from your audience while still seeing them on your screen. This tutorial will show you how to adjust the settings for your presentation mode.
I have a slide on which I want to construct a complex animation, but all the elements on that slide make it almost impossible to construct what I want to achieve. Is there a way to temporarily hide
Hide slide objects or parts in a PowerPoint slide. Display and hide PowerPoint slide objects using Selection Pane. Rename Selection Pane slide objects
Learn how to track changes in PowerPoint with this step-by-step guide. Discover the tools and techniques to effectively monitor and manage revisions. | Learn tips and tricks to enhance your presentations and improve your productivity with SlidesAI Blogs.
Slidesgo is a free, user-friendly platform offering an array of customizable templates for education, business, creative projects, and social media. Slidesgo stands out among alternative presentation tools for its seamless integration with platforms like Google Slides and PowerPoint, boosting productivity across different platforms.. Slidesgo is valuable for students, professionals, educators ...
Free Google Slides theme, PowerPoint template, and Canva presentation template. Immerse your audience in the significance of water baptism with this engaging slideshow template, perfect for churches, ministries, and religious educators.
You might think that the slides in the thumbnail pane on the left-hand side are the only slides in your file. However, the Slide Master contains hidden information that dictates how your presentation is designed. You can see the master slides by clicking "Slide Master" in the View tab on the ribbon.
These five Google Slides alternatives are worth considering if you're trying to make an engaging presentation to introduce a new idea or convince others.
Learn how to hide the play/pause bar of a video file in PowerPoint slides with easy steps and tips from Microsoft Community.
Commence reading at once! Capture every slide and sound! Learn how to screen record your presentation with ease using MS Office. Boost your skills today!
If you make slide presentations often, then you probably know about Microsoft PowerPoint. However, there are several free alternatives that are worth trying.
Hi, Is it possible to hide an object in the slide and show while in presentation? I have a callout which shows a table ( a breakdown for total which is part of a table - excel link). When I click the
Download the 2D Shapes Cut-outs presentation for PowerPoint or Google Slides and create big learning experiences for the littlest students! Dynamic and adorable, this template provides the visual stimuli that Pre-K students thrive on and makes your lessons more playful and exciting — after all, Pre-K education is all about playing to learn!
Creating a PowerPoint presentation from scratch can be a daunting task, but with the help of a PowerPoint presentation template, you can easily create a polished and professional-looking presentation in no time. A well-designed PowerPoint presentation can help you deliver your message to your audience with supporting proof, data, analysis, and ...