- Electrophysiology Rigs
- Multiphoton Imaging
- Optogenetics and Uncaging
- Manipulators
- Microscopes
- Stages and Platforms
- By technique
- Electrophysiology
- Three-Photon Imaging
- Two-Photon Imaging
- Optogenetics
- Fluorescence Imaging
- Microinjection
- Network Studies
- Learning Zone
- Case Studies
- Events News
- Careers at Scientifica
- Research Jobs
- Company News
- Our Service & Support
- Distributors


Tips for presenting your scientific poster at a conference
A scientific poster is a visual presentation that summarises your research findings and is typically displayed at conferences or academic events. Presenting one can be intimidating, but it's a valuable opportunity for feedback and confidence-building. Check out our top 9 top tips for successfully presenting your poster at a scientific conference.
Be welcoming
You should do your best to stand at your poster for the entirety of the conference poster session. If you do need to leave your poster for any reason, ensure you include your email address on it, so you can be contacted by conference attendees who may read your poster while you are not there. Read more tips for making your poster stand out here.
To make everyone feel welcome, stand to the side of your poster. This will make it easy for your potential audience to move closer and see the whole thing.
Think of your poster as a conversation starter. Smile and say hello to everyone who walks past and looks at you or your poster. Invite them to read more and, if they seem interested, ask if they would like you to talk them through it or if they have any questions.
Engage your audience
Remember to be enthusiastic - your research is exciting! Even towards the end of the poster session, when your energy levels may be lower, it is important to remain enthusiastic. If it is clear you find your work interesting, your audience are more likely to as well!
As you are presenting your poster, point to relevant parts of the poster so that people can follow as your talk through it. Try to avoid putting your hands in your pockets or behind your back.
Remember to also keep looking back at the audience, to keep them engaged and feeling involved in the presentation.
If you are already presenting your research to someone or a small group and someone else walks up, acknowledge them by making eye contact with them and smiling. Once you have finished with your initial visitors ask the newcomer if there was anything they missed that they would like a further explanation of, or whether they have any questions.
The most important aspect of presenting a poster at a conference is to make the most out of the opportunity you’ve been given. Who knows what might become of an interaction that you have in front of that notice board?

Tips for presenting your scientific poster at a conference: Engage your audience
The “elevator” pitch
First impressions really count in poster presentations. To pique the interest of your potential audience you should have a very short synopsis (maximum three sentences and no longer than two minutes) of your research prepared, which contains three vital bits of information:
- What is your research topic?
- What have you found?
- Why is that important?
The aim here is to get your audience hooked and wanting further details. Keep the bigger picture in mind, as the audience first needs the background info to then get excited about the small details of your research. Make sure your pitch is punchy, intriguing and relevant.
Creating a story
Once you’ve reeled in your audience and they are eager to learn more, it’s time to build the narrative of your research. Like all great stories your research needs a beginning, a middle and an end. Aim for this to be 10 minutes long, or less.
The introduction should set the scene and introduce the main characters:
- What is the necessary background information about your research topic that the audience must know?
- How did this lead you to your research question, what were you hoping to find out and why?
- Who are the main characters (e.g. a disease, a drug, a cell type, a brain region, a technique)? What are the relevant parts of their “characteristics” to the story?
The middle section is the adventure, it answers:
- How did you get from your research question to your conclusion? Why did you choose to take that route?
- What did you find on your way? Were there any interesting twists to your research?
The final section is the conclusion to the story:
- What is the ultimate consequence of your journey? What does this mean for your characters?
- Is this really the end of the adventure or are there plenty more adventures still to come? What might they look like?
Remember: You are the narrator; it is up to you as the story teller to make the content both compelling and exciting. Attendees are not all experts in your field.; if you are unsure how familiar your audience is with your subject area, ask them.

Tips for presenting your scientific poster at a conference: Create a story
The importance of practice
Presenting your poster is ultimately a form of performance. In performances, whether they involve acting, music, sport or presenting, practice is a major factor in success. After all, however much of a cliché it is: practice makes perfect. Rehearse what you will say and practice presenting on your friends and family. Once you begin speaking at your poster session you will be pleased that you spent time preparing and practising.
Before the poster session starts make sure that you:
- Understand exactly what all the figures on the poster show, that you can explain them fully and know their full implications.
- Have your elevator pitch memorised
- Know all the key points to your research story without referring to written notes
- Are ready to answer likely questions with confidence, and know how to deal with difficult questions that you might not be able to answer fully.

Tips for presenting your scientific poster at a conference: Practice, practice, practice
Check the audience's understanding
Ask members of the audience whether you have been clear or if you should go into more detail, rather than asking if they understand, as this could make them feel stupid or ignorant.
For example, say something like “Have I been clear enough” or “should I go into more detail about……?” instead of “do you understand how this works?”
The handout
There are pros and cons to having a handout with additional supporting materials or key information from your poster. You must decide for yourself if it will be of benefit to you depending on several factors including:
- What is the purpose of your poster?
- What are you hoping to achieve with your presentation?
- Will it enhance your audience’s engagement with your research or not?
The major positive outcome of a handout is that gives your audience something to take away with them to remind them about you, your research and why they were interested in it. It also gives them a way to get in touch with you should they have further questions.
The main negative is that some people who may be interested and could benefit from speaking to you about your poster will take the leaflet, read it (or not) and never engage with your research again. It is an easy way for them to avoid talking to you, for whatever reason that may be.
If you decide to go ahead with a handout there are several items that should be included:
- The project title
- Your name and affiliation
- Your professional email address (and phone number if your happy for people to contact you that way)
- The key information from your poster (including a link to the relevant paper if it has already been published.
- Any supporting materials not included on the poster that may be of help.

Tips for presenting your scientific poster at a conference: The handout
Expand your network
Look for opportunities to exchange contact information. If someone is particularly interested in your poster and wants to know all the details of your research, it may be better to suggest meeting them for a coffee after the poster session, or arranging another time for further discussions. This will ensure that other potential audience members don’t get bored and wander off without talking to you because they have been waiting too long.
Exchanging contact information and having further discussions can be a great way to expand your network and find potential collaborators for the future.

Tips for presenting your scientific poster at a conference: Expand your network
Dealing with feedback
It is important to welcome feedback, be prepared for discussion and not to be too defensive in the face of criticism.
If someone asks you a question or makes a comment that you don’t think is relevant, ask them to explain the relevance of their comment. They may have stumbled across something that you haven’t thought of because of their fresh perspective on the topic, or they might just not understand your research. Also, a negative comment or question might not actually be a criticism, but a genuine desire to understand why you’ve done something so they can fully interpret the poster. It is unlikely that someone has visited your poster to be vindictive, and if they have it is important not to engage them, shrug off their comments and move on to the next person who is genuinely interested.
Remember to thank the audience for listening and thank them for their feedback. People who have visited your poster could potentially be employers or colleagues in the future.
You got this!
In summary, presenting your poster at a conference is a chance to showcase your research, receive feedback, and connect with peers. Embrace the opportunity, be welcoming and enthusiastic, and enjoy the experience of sharing your work with others.

Neurowire blog posts
How to make your scientific posters stand out

Less is more: Advice for keeping your poster concise

10 tips for presenting your poster online at a virtual conference

How to get the most out of a scientific conference

9 simple and effective public speaking tips for scientists
Contact Form
* denotes required field
- Sign me up for the Scientifica newsletter to receive news based on the above interests
- I agree to my data being held and processed in accordance with the privacy policy *
0" x-text="errorMessage" class="tw-text-red-500">
Get more advice
Receive the latest tips straight to your inbox
- Locations and Hours
- UCLA Library
- Research Guides
- Research Tips and Tools
Poster Presentations
- Size, Layout, and Text
Elements of a Poster
Change size in powerpoint, using the ruler, grid, and guides in powerpoint, more powerpoint training, template resources, font choice, text alignment.
- Colors and Images
Your poster should include these elements:
- Author(s), with affiliations and emails
If your poster is a representation of a research study, you will want to include the following sections:
- Introduction or objective
- Conclusions and/or discussion
- Acknowledgements
If your poster is a representation of an event or other kind of project, you may want to forego formal abstract sections in favor of the 5 Ws:
- Who (introduce the author, organization, or community)
- What (what did you do? how did you do it?)
- Where (where did you do it?)
- When (when did it take place?)
- Why (what are the outcomes, implications, or future possibilities?)
To change the size in Powerpoint:
- Go to the Design tab and choose "Slide Size" (it's on the right size of the ribbon)
- Choose "Custom Slide Size"
- Change "Slides sized for:" to "Custom"
- Fill in your desired width and height.
Click the View tab to see checkboxes that will allow you to turn on the Ruler, Grid, and Guides (click the image below to see a screenshot).

Ruler : Allows you to see the dimensions of your slide. You'll see a vertical and horizontal ruler.
Grid : By default, the gridlines are 1 inch apart. Right click in white space of your poster to get more options for spacing. This enables precise alignment.
Guides : By default, you'll get one horizontal and one vertical guide placed in the center of your poster. Right click on a guide to add more guidelines, or to delete one. You can use Guides to invisibly define columns of your poster, margins, and more. This gives you manual control, alternatively, you can use Smart Guides (see below).
Smart Guides : Powerpoint has a built-in system for showing you alignment as you move objects around. The video below demonstrates what Smart Guides look like.
Once you've got your slide layout set, you'll want to start creating Shapes and Text Boxes. Here are some tips and tricks for working with objects:
- Use Ctrl+D to duplicate any object.
- Then you can format them all at once, identically!
- You can also group them, for easier movement and alignment (right click to see the Group option).
Most posters are landscape (horizontal) orientation. The title/author(s) will be across the top, with 3–4 columns below that contain the rest of the poster elements. Make sure you leave plenty of white space in your design—a poster crammed full of text and images is very difficult to read.
Here is an example of a 2 column poster layout using the 5 Ws for headings (who, what, where, when, and why):
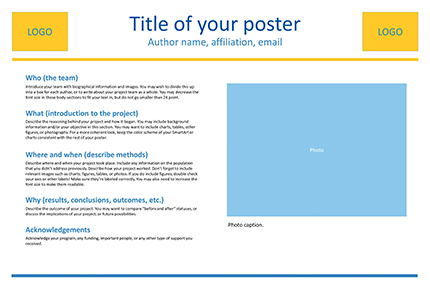
Use the links below to download this template and other similar templates in two sizes: 24x36 and 36x48. These templates include a variety of placeholder elements for photos and figures.
- 2 column Powerpoint template, size 24x36
- 3 column Powerpoint template, size 24x36
- 3 column Powerpoint template, size 36x48
- 4 column Powerpoint template, size 36x48
Below are some additional web resources where you can search for templates. Keep in mind that you may need adjust the size of a template for your own poster. Alternatively, you can use the resources on this page to design your own layout in Powerpoint.
- David Geffen School of Medicine poster templates Although this is labeled for the sciences, the information can be used in many disciplines.
- Penn State poster template
- PhD Posters
- MakeSigns.com poster templates
- The body of your poster should have a minimum 24 point font . Viewers should be able to read your smallest text from a few feet away.
- The title of your poster should have a 50+ font size, depending on the size of your poster and the length of the title.
- Do not use all uppercase letters for the title or body of the poster.
- Avoid using more than 2 or 3 different fonts in one poster.
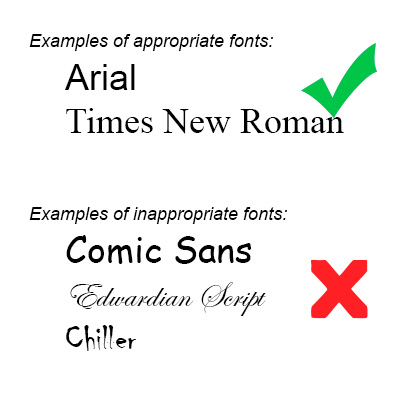
- Stick with basic fonts like Times New Roman or Georgia for serif, or Arial or Helvetica for sans-serif. Avoid elaborate, difficult-to-read, or cartoon-like fonts.
- In general, left-align your text boxes (with the possible exception of your title and any image captions). Avoid centering the text on your whole poster.
- << Previous: Home
- Next: Colors and Images >>
- Last Updated: Nov 9, 2023 2:31 PM
- URL: https://guides.library.ucla.edu/posters
Home Blog Design How to Design a Winning Poster Presentation: Quick Guide with Examples & Templates
How to Design a Winning Poster Presentation: Quick Guide with Examples & Templates

How are research posters like High School science fair projects? Quite similar, in fact.
Both are visual representations of a research project shared with peers, colleagues and academic faculty. But there’s a big difference: it’s all in professionalism and attention to detail. You can be sure that the students that thrived in science fairs are now creating fantastic research posters, but what is that extra element most people miss when designing a poster presentation?
This guide will teach tips and tricks for creating poster presentations for conferences, symposia, and more. Learn in-depth poster structure and design techniques to help create academic posters that have a lasting impact.
Let’s get started.
Table of Contents
- What is a Research Poster?
Why are Poster Presentations important?
Overall dimensions and orientation, separation into columns and sections, scientific, academic, or something else, a handout with supplemental and contact information, cohesiveness, design and readability, storytelling.
- Font Characteristics
- Color Pairing
- Data Visualization Dimensions
- Alignment, Margins, and White Space
Scientific/Academic Conference Poster Presentation
Digital research poster presentations, slidemodel poster presentation templates, how to make a research poster presentation step-by-step, considerations for printing poster presentations, how to present a research poster presentation, final words, what is a research poster .
Research posters are visual overviews of the most relevant information extracted from a research paper or analysis. They are essential communication formats for sharing findings with peers and interested people in the field. Research posters can also effectively present material for other areas besides the sciences and STEM—for example, business and law.
You’ll be creating research posters regularly as an academic researcher, scientist, or grad student. You’ll have to present them at numerous functions and events. For example:
- Conference presentations
- Informational events
- Community centers
The research poster presentation is a comprehensive way to share data, information, and research results. Before the pandemic, the majority of research events were in person. During lockdown and beyond, virtual conferences and summits became the norm. Many researchers now create poster presentations that work in printed and digital formats.

Let’s look at why it’s crucial to spend time creating poster presentations for your research projects, research, analysis, and study papers.

Research posters represent you and your sponsor’s research
Research papers and accompanying poster presentations are potent tools for representation and communication in your field of study. Well-performing poster presentations help scientists, researchers, and analysts grow their careers through grants and sponsorships.
When presenting a poster presentation for a sponsored research project, you’re representing the company that sponsored you. Your professionalism, demeanor, and capacity for creating impactful poster presentations call attention to other interested sponsors, spreading your impact in the field.
Research posters demonstrate expertise and growth
Presenting research posters at conferences, summits, and graduate grading events shows your expertise and knowledge in your field of study. The way your poster presentation looks and delivers, plus your performance while presenting the work, is judged by your viewers regardless of whether it’s an officially judged panel.
Recurring visitors to research conferences and symposia will see you and your poster presentations evolve. Improve your impact by creating a great poster presentation every time by paying attention to detail in the poster design and in your oral presentation. Practice your public speaking skills alongside the design techniques for even more impact.
Poster presentations create and maintain collaborations
Every time you participate in a research poster conference, you create meaningful connections with people in your field, industry or community. Not only do research posters showcase information about current data in different areas, but they also bring people together with similar interests. Countless collaboration projects between different research teams started after discussing poster details during coffee breaks.
An effective research poster template deepens your peer’s understanding of a topic by highlighting research, data, and conclusions. This information can help other researchers and analysts with their work. As a research poster presenter, you’re given the opportunity for both teaching and learning while sharing ideas with peers and colleagues.
Anatomy of a Winning Poster Presentation
Do you want your research poster to perform well? Following the standard layout and adding a few personal touches will help attendees know how to read your poster and get the most out of your information.

The overall size of your research poster ultimately depends on the dimensions of the provided space at the conference or research poster gallery. The poster orientation can be horizontal or vertical, with horizontal being the most common. In general, research posters measure 48 x 36 inches or are an A0 paper size.
A virtual poster can be the same proportions as the printed research poster, but you have more leeway regarding the dimensions. Virtual research posters should fit on a screen with no need to scroll, with 1080p resolution as a standard these days. A horizontal presentation size is ideal for that.
A research poster presentation has a standard layout of 2–5 columns with 2–3 sections each. Typical structures say to separate the content into four sections; 1. A horizontal header 2. Introduction column, 3. Research/Work/Data column, and 4. Conclusion column. Each unit includes topics that relate to your poster’s objective. Here’s a generalized outline for a poster presentation:
- Condensed Abstract
- Objectives/Purpose
- Methodology
- Recommendations
- Implications
- Acknowledgments
- Contact Information
The overview content you include in the units depends on your poster presentations’ theme, topic, industry, or field of research. A scientific or academic poster will include sections like hypothesis, methodology, and materials. A marketing analysis poster will include performance metrics and competitor analysis results.
There’s no way a poster can hold all the information included in your research paper or analysis report. The poster is an overview that invites the audience to want to find out more. That’s where supplement material comes in. Create a printed PDF handout or card with a QR code (created using a QR code generator ). Send the audience to the best online location for reading or downloading the complete paper.
What Makes a Poster Presentation Good and Effective?
For your poster presentation to be effective and well-received, it needs to cover all the bases and be inviting to find out more. Stick to the standard layout suggestions and give it a unique look and feel. We’ve put together some of the most critical research poster-creation tips in the list below. Your poster presentation will perform as long as you check all the boxes.
The information you choose to include in the sections of your poster presentation needs to be cohesive. Train your editing eye and do a few revisions before presenting. The best way to look at it is to think of The Big Picture. Don’t get stuck on the details; your attendees won’t always know the background behind your research topic or why it’s important.
Be cohesive in how you word the titles, the length of the sections, the highlighting of the most important data, and how your oral presentation complements the printed—or virtual—poster.
The most important characteristic of your poster presentation is its readability and clarity. You need a poster presentation with a balanced design that’s easy to read at a distance of 1.5 meters or 4 feet. The font size and spacing must be clear and neat. All the content must suggest a visual flow for the viewer to follow.
That said, you don’t need to be a designer to add something special to your poster presentation. Once you have the standard—and recognized—columns and sections, add your special touch. These can be anything from colorful boxes for the section titles to an interesting but subtle background, images that catch the eye, and charts that inspire a more extended look.
Storytelling is a presenting technique involving writing techniques to make information flow. Firstly, storytelling helps give your poster presentation a great introduction and an impactful conclusion.
Think of storytelling as the invitation to listen or read more, as the glue that connects sections, making them flow from one to another. Storytelling is using stories in the oral presentation, for example, what your lab partner said when you discovered something interesting. If it makes your audience smile and nod, you’ve hit the mark. Storytelling is like giving a research presentation a dose of your personality, and it can help turning your data into opening stories .
Design Tips For Creating an Effective Research Poster Presentation
The section above briefly mentioned how important design is to your poster presentation’s effectiveness. We’ll look deeper into what you need to know when designing a poster presentation.
1. Font Characteristics
The typeface and size you choose are of great importance. Not only does the text need to be readable from two meters away, but it also needs to look and sit well on the poster. Stay away from calligraphic script typefaces, novelty typefaces, or typefaces with uniquely shaped letters.
Stick to the classics like a sans serif Helvetica, Lato, Open Sans, or Verdana. Avoid serif typefaces as they can be difficult to read from far away. Here are some standard text sizes to have on hand.
- Title: 85 pt
- Authors: 65 pt
- Headings: 36 pt
- Body Text: 24 pt
- Captions: 18 pt

If you feel too prone to use serif typefaces, work with a font pairing tool that helps you find a suitable solution – and intend those serif fonts for heading sections only. As a rule, never use more than 3 different typefaces in your design. To make it more dynamic, you can work with the same font using light, bold, and italic weights to put emphasis on the required areas.
2. Color Pairing
Using colors in your poster presentation design is a great way to grab the viewer’s attention. A color’s purpose is to help the viewer follow the data flow in your presentation, not distract. Don’t let the color take more importance than the information on your poster.

Choose one main color for the title and headlines and a similar color for the data visualizations. If you want to use more than one color, don’t create too much contrast between them. Try different tonalities of the same color and keep things balanced visually. Your color palette should have at most one main color and two accent colors.
Black text over a white background is standard practice for printed poster presentations, but for virtual presentations, try a very light gray instead of white and a very dark gray instead of black. Additionally, use variations of light color backgrounds and dark color text. Make sure it’s easy to read from two meters away or on a screen, depending on the context. We recommend ditching full white or full black tone usage as it hurts eyesight in the long term due to its intense contrast difference with the light ambiance.
3. Data Visualization Dimensions
Just like the text, your charts, graphs, and data visualizations must be easy to read and understand. Generally, if a person is interested in your research and has already read some of the text from two meters away, they’ll come closer to look at the charts and graphs.

Fit data visualizations inside columns or let them span over two columns. Remove any unnecessary borders, lines, or labels to make them easier to read at a glance. Use a flat design without shadows or 3D characteristics. The text in legends and captions should stay within the chart size and not overflow into the margins. Use a unified text size of 18px for all your data visualizations.
4. Alignment, Margins, and White Space
Finally, the last design tip for creating an impressive and memorable poster presentation is to be mindful of the layout’s alignment, margins, and white space. Create text boxes to help keep everything aligned. They allow you to resize, adapt, and align the content along a margin or grid.
Take advantage of the white space created by borders and margins between sections. Don’t crowd them with a busy background or unattractive color.

Calculate margins considering a print format. It is a good practice in case the poster presentation ends up becoming in physical format, as you won’t need to downscale your entire design (affecting text readability in the process) to preserve information.
There are different tools that you can use to make a poster presentation. Presenters who are familiar with Microsoft Office prefer to use PowerPoint. You can learn how to make a poster in PowerPoint here.
Poster Presentation Examples
Before you start creating a poster presentation, look at some examples of real research posters. Get inspired and get creative.
Research poster presentations printed and mounted on a board look like the one in the image below. The presenter stands to the side, ready to share the information with visitors as they walk up to the panels.

With more and more conferences staying virtual or hybrid, the digital poster presentation is here to stay. Take a look at examples from a poster session at the OHSU School of Medicine .
Use SlideModel templates to help you create a winning poster presentation with PowerPoint and Google Slides. These poster PPT templates will get you off on the right foot. Mix and match tables and data visualizations from other poster slide templates to create your ideal layout according to the standard guidelines.
If you need a quick method to create a presentation deck to talk about your research poster at conferences, check out our Slides AI presentation maker. A tool in which you add the topic, curate the outline, select a design, and let AI do the work for you.
1. One-pager Scientific Poster Template for PowerPoint

A PowerPoint template tailored to make your poster presentations an easy-to-craft process. Meet our One-Pager Scientific Poster Slide Template, entirely editable to your preferences and with ample room to accommodate graphs, data charts, and much more.
Use This Template
2. Eisenhower Matrix Slides Template for PowerPoint

An Eisenhower Matrix is a powerful tool to represent priorities, classifying work according to urgency and importance. Presenters can use this 2×2 matrix in poster presentations to expose the effort required for the research process, as it also helps to communicate strategy planning.
3. OSMG Framework PowerPoint Template

Finally, we recommend presenters check our OSMG Framework PowerPoint template, as it is an ideal tool for representing a business plan: its goals, strategies, and measures for success. Expose complex processes in a simplified manner by adding this template to your poster presentation.
Remember these three words when making your research poster presentation: develop, design, and present. These are the three main actions toward a successful poster presentation.

The section below will take you on a step-by-step journey to create your next poster presentation.
Step 1: Define the purpose and audience of your poster presentation
Before making a poster presentation design, you’ll need to plan first. Here are some questions to answer at this point:
- Are they in your field?
- Do they know about your research topic?
- What can they get from your research?
- Will you print it?
- Is it for a virtual conference?
Step 2: Make an outline
With a clear purpose and strategy, it’s time to collect the most important information from your research paper, analysis, or documentation. Make a content dump and then select the most interesting information. Use the content to draft an outline.
Outlines help formulate the overall structure better than going straight into designing the poster. Mimic the standard poster structure in your outline using section headlines as separators. Go further and separate the content into the columns they’ll be placed in.
Step 3: Write the content
Write or rewrite the content for the sections in your poster presentation. Use the text in your research paper as a base, but summarize it to be more succinct in what you share.
Don’t forget to write a catchy title that presents the problem and your findings in a clear way. Likewise, craft the headlines for the sections in a similar tone as the title, creating consistency in the message. Include subtle transitions between sections to help follow the flow of information in order.
Avoid copying/pasting entire sections of the research paper on which the poster is based. Opt for the storytelling approach, so the delivered message results are interesting for your audience.
Step 4: Put it all together visually
This entire guide on how to design a research poster presentation is the perfect resource to help you with this step. Follow all the tips and guidelines and have an unforgettable poster presentation.
Moving on, here’s how to design a research poster presentation with PowerPoint Templates . Open a new project and size it to the standard 48 x 36 inches. Using the outline, map out the sections on the empty canvas. Add a text box for each title, headline, and body text. Piece by piece, add the content into their corresponding text box.

Transform the text information visually, make bullet points, and place the content in tables and timelines. Make your text visual to avoid chunky text blocks that no one will have time to read. Make sure all text sizes are coherent for all headings, body texts, image captions, etc. Double-check for spacing and text box formatting.
Next, add or create data visualizations, images, or diagrams. Align everything into columns and sections, making sure there’s no overflow. Add captions and legends to the visualizations, and check the color contrast with colleagues and friends. Ask for feedback and progress to the last step.
Step 5: Last touches
Time to check the final touches on your poster presentation design. Here’s a checklist to help finalize your research poster before sending it to printers or the virtual summit rep.
- Check the resolution of all visual elements in your poster design. Zoom to 100 or 200% to see if the images pixelate. Avoid this problem by using vector design elements and high-resolution images.
- Ensure that charts and graphs are easy to read and don’t look crowded.
- Analyze the visual hierarchy. Is there a visual flow through the title, introduction, data, and conclusion?
- Take a step back and check if it’s legible from a distance. Is there enough white space for the content to breathe?
- Does the design look inviting and interesting?
An often neglected topic arises when we need to print our designs for any exhibition purpose. Since A0 is a hard-to-manage format for most printers, these poster presentations result in heftier charges for the user. Instead, you can opt to work your design in two A1 sheets, which also becomes more manageable for transportation. Create seamless borders for the section on which the poster sheets should meet, or work with a white background.
Paper weight options should be over 200 gsm to avoid unwanted damage during the printing process due to heavy ink usage. If possible, laminate your print or stick it to photographic paper – this shall protect your work from spills.
Finally, always run a test print. Gray tints may not be printed as clearly as you see them on screen (this is due to the RGB to CMYK conversion process). Other differences can be appreciated when working with ink jet plotters vs. laser printers. Give yourself enough room to maneuver last-minute design changes.
Presenting a research poster is a big step in the poster presentation cycle. Your poster presentation might or might not be judged by faculty or peers. But knowing what judges look for will help you prepare for the design and oral presentation, regardless of whether you receive a grade for your work or if it’s business related. Likewise, the same principles apply when presenting at an in-person or virtual summit.
The opening statement
Part of presenting a research poster is welcoming the viewer to your small personal area in the sea of poster presentations. You’ll need an opening statement to pitch your research poster and get the viewers’ attention.
Draft a 2 to 3-sentence pitch that covers the most important points:
- What the research is
- Why was it conducted
- What the results say
From that opening statement, you’re ready to continue with the oral presentation for the benefit of your attendees.
The oral presentation
During the oral presentation, share the information on the poster while conversing with the interested public. Practice many times before the event. Structure the oral presentation as conversation points, and use the poster’s visual flow as support. Make eye contact with your audience as you speak, but don’t make them uncomfortable.
Pro Tip: In a conference or summit, if people show up to your poster area after you’ve started presenting it to another group, finish and then address the new visitors.
QA Sessions
When you’ve finished the oral presentation, offer the audience a chance to ask questions. You can tell them before starting the presentation that you’ll be holding a QA session at the end. Doing so will prevent interruptions as you’re speaking.
If presenting to one or two people, be flexible and answer questions as you review all the sections on your poster.
Supplemental Material
If your audience is interested in learning more, you can offer another content type, further imprinting the information in their minds. Some ideas include; printed copies of your research paper, links to a website, a digital experience of your poster, a thesis PDF, or data spreadsheets.
Your audience will want to contact you for further conversations; include contact details in your supplemental material. If you don’t offer anything else, at least have business cards.
Even though conferences have changed, the research poster’s importance hasn’t diminished. Now, instead of simply creating a printed poster presentation, you can also make it for digital platforms. The final output will depend on the conference and its requirements.
This guide covered all the essential information you need to know for creating impactful poster presentations, from design, structure and layout tips to oral presentation techniques to engage your audience better .
Before your next poster session, bookmark and review this guide to help you design a winning poster presentation every time.

Like this article? Please share
Cool Presentation Ideas, Design, Design Inspiration Filed under Design
Related Articles

Filed under Google Slides Tutorials • April 23rd, 2024
How to Align Objects in Google Slides
Optimize your layouts by learning how to align objects in Google Slides presentations. Step-by-step guide with screenshots.

Filed under Design • January 11th, 2024
How to Use Figma for Presentations
The powerful UI/UX prototyping software can also help us to craft high-end presentation slides. Learn how to use Figma as a presentation software here!

Filed under Design • December 28th, 2023
Multimedia Presentation: Insights & Techniques to Maximize Engagement
Harnessing the power of multimedia presentation is vital for speakers nowadays. Join us to discover how you can utilize these strategies in your work.
Leave a Reply
Want to create or adapt books like this? Learn more about how Pressbooks supports open publishing practices.
Poster Presentation
Characteristics of a poster presentation.
- Poster presenters should dress professionally and understand all parts of their poster.
- Most poster presentations take place in a large room with dozens to hundreds of individual poster presentations occurring simultaneously.
- A typical presentation lasts 5-15 minutes.
- Typical audience size for an individual poster presentation will be 1-5 people.
- It is acceptable for the audience to ask questions during a presentation.
- The presenter should use the poster’s figures and tables to communicate with the audience.
Excellent Presentations are Simple
The presenter is the scientist or engineer who conducted the research. The presenter is an expert in that particular field and should be confident (but not arrogant) when presenting the research to their audience. The presenter should understand everything that is in their poster (e.g., issue, topic, figures, tables, references). The presenter should relax, speak clearly, start with the introduction, move through the methods, results and end with the discussion section. The presenter should engage in conservation with the audience and answer their questions during the poster presentation. The presenter should not read word-for-word from a script, but rather they should follow a general progression through their poster ( Fig. 17 ) that allows for active and organic discussion between them and the audience.
Figure 17. Poster Presentation

Tips for Giving a Poster Presentation
- Practice your presentation several times before the poster event. Dress professionally. Your audience will be focused on your poster for 5-15 minutes so you do not have much time to capture their attention and tell your story. Engaging figures, maps, and graphs will help capture their attention.
- Focus most of your presentation on your figures and tables. Your audience will focus on figures, graphs, tables, and maps. They rarely read the poster text. If they read any text at all, it will likely be the abstract and figure captions so a presenter really should focus on figures and tables when they prepare for their poster presentation.
- Speak clearly and know your topic. Remember you are the expert, so you need to understand all parts of your poster.
- Presenters should start their presentation ( Fig. 17 ) by introducing themself and moving onto the Title and Introduction sections. Describe the issue and use figures to help explain the story. Use maps to show the study area, use photographs of the organism or pollutant or issue, use graphs and tables to show patterns (e.g., population increased over past 5 years) and focus on important points. Flow from one figure to the next, ending with the Discussion and Conclusion sections. The presenter should point to the poster when they are talking about a specific figure, and use words and their hands to help explain each part of the poster.
- Allow your audience to participate, allow them to ask questions throughout your presentation ( Fig. 18 ). Always be respectful of your audience. Always try to answer their questions. If you do not know the answer, the best thing to say is “I do not know the answer, but I can point to another study here in my references section where other scientists are working on this very question.” Engage your audience and show them where to find additional work (e.g., journal articles, names of scientists) about the topic.
- Avoid using words like “stuff” and “things” and other general phrases like “this work was great”. Give specific details because this demonstrates to the audience that you understand your topic. Use the vocabulary words that you learned and explain these to the audience. For example, rather than saying “This work was great for orangutans,” you could say, “This work was great because it was the first time that we observed orangutan feeding behavior in the wild and it allowed us to determine that female orangutans need 5,500 calories per day during their breeding season. Those females that obtained 5,500 calories per day were twice as likely to give birth.”
- Be prepared for a lively and dynamic event ( Fig. 19 ). Poster events typically consist of dozens or hundreds of individual poster presentations occurring simultaneously in the same room. These events are typically very loud and energetic. Food and beverages are typically provided at the event.
- Be flexible. The audience will walk around to view as many posters as possible, stopping occasionally to view a poster and talk to a poster presenter about their research. Some people may talk with the presenter for a few seconds, others may spend 15-20 minutes talking with a poster presenter. Presenter-audience interactions will be rather informal and dynamic.
- Read or download the poster guide and map prior to attending the poster event. A poster program guide and poster map will typically be published ahead of the event so that the audience knows where to find each poster and the presenter knows where to set up their poster.
- Wear comfortable shoes. Posters are typically displayed on an easel and the presenter stands by their poster during the entire event, which can several hours.
Figure 18. Two-Way Communication is Key to a Successful Poster Event

All scientific posters follow a similar organization in terms of parts (i.e., Abstract, Introduction, Materials & Methods, Results, Discussion, References) and layout (i.e., title and name at the top, 3-4 columns for content). However, each scientific poster can be unique in terms of its font, color scheme, types of figures (e.g., chart, diagram, graph, map, photograph) and use of tables. It is entirely up to the scientists to decide how they want to design their poster to best communicate their research with the audience. Gallery 1 shows eight different scientific posters that were presented at a scientific conference. As you look through Gallery 1 you can see that the posters are all similar in the way that they are organized but that each poster is unique in they way it is designed (e.g., color scheme, number and placement of figures, use of fonts). While each is different, they all succeed in their goal of visually communicating the importance of their scientific research to an audience ( Gallery 1) .
Figure 19. Poster Event

Gallery 1. Examples of Completed Scientific Posters
Scientific Posters: A Learner's Guide Copyright © 2020 by Ella Weaver; Kylienne A. Shaul; Henry Griffy; and Brian H. Lower is licensed under a Creative Commons Attribution-NonCommercial 4.0 International License , except where otherwise noted.
Share This Book

- Collections
- Research Help
- Teaching & Learning
- Library Home
How to Prepare for a Poster Session
- Introduction to Poster Sessions
- Components of a Poster Presentation
- Designing Your Poster
- Printing Your Poster
- Archiving Your Poster
- Additional Resources
Components of a Poster Session
Presentation.
Prior to the poster session, you should prepare and practice a 1-2 minute "elevator pitch" or "lightning talk" about your research project. In preparing for your presentation, think about how much information can reasonably be conveyed in 1-2 minutes. Since your poster already contains a lot of information, your presentation should aim to complement and highlight the information on the poster, not repeat it. Present information that provides context for the information on your poster, while following the organizational structure of the poster.
One simple approach is to think about a unique experience or insight that adds a human element to your research. What makes your project interesting? How did you become involved in this work to begin with? A brief anecdote may be useful, and can serve as a way to catch people's attention and get them interested in learning more about your research.
In preparing your presentation, it's important to think about your anticipated audience. Are you presenting at a conference likely to be attended by specialists in your field, or are you presenting at a multidisciplinary event that will be attended by people with different backgrounds and levels of expertise? In either case, a good rule of thumb is to minimize your use of jargon or overly technical language, and this is particularly important for events that will draw a more general audience. Try practicing your presentation for a friend who doesn't have any background in your area of research. If they find your presentation difficult to follow, this is a good indicator that you should work on simplifying your language to make the information more accessible.
Finally, think about what sorts of questions people may have for you. If you are able to practice in front of someone, encourage them to ask you questions about your research. And don't worry if you don't know the answer to someone's question. Thank them for your question, and offer to the follow up with them later after you've had some time to think it over.
While your presentation is arguably the most important element of a poster presentation, the poster itself is generally what catches people's attention. This portion of the guide discusses the role that your poster plays in presenting your research. For information about formatting and designing your poster, see the Designing Your Poster page .
The role of the poster is to provide a visual outline of your research project. It should not aim to represent the project in full detail. It may be helpful to think of your poster as a highlight reel of your research project. It is important to strike a balance between including enough information so that the poster is informative, while avoiding including too much information as this can make your poster difficult for people to take in, or create information overload. Aim to strike a balance between text and visuals. The question of what types of visuals are appropriate will depend on the details of your project, but some possibilities are data visualizations (e.g. charts or graphs) or photographs.
The best approach may be to think of your poster as a visual aid for your presentation. So in preparing your poster, consider what you can cover in your presentation, and how this might be enhanced by visual material that you can include on the poster. What might it be useful to refer to on your poster in the course of giving your presentation? Visuals are especially useful when they can convey information that is difficult to express with text alone.
The final component of a successful poster presentation is a handout. While handouts are generally not required, they can be beneficial for a number of reasons. First, they provide you with more space with which you can convey additional information, information that may be important to convey, but not quite important enough to include on your poster. Handouts also serve as a way to help attendees remember you (so be sure to include your name and contact information!).
In most cases you should limit your handout to a single sheet of paper which can contain information on both sides. On one side, consider including an image fo the poster. This will help attendees associate the handout with their interactions with you during the session. Color printing can be expensive, so it's alright to use a black and white image of the poster so long as it's clear and legible. You can always include a URL to a full color image of the poster online. In addition to supplementary information, you can use the handout to list URLs for your website, or any place online where people can learn more about your research.
- << Previous: Introduction to Poster Sessions
- Next: Designing Your Poster >>
- Last Updated: Feb 6, 2024 10:59 AM
- URL: https://libguides.wvu.edu/poster

An official website of the United States government
The .gov means it’s official. Federal government websites often end in .gov or .mil. Before sharing sensitive information, make sure you’re on a federal government site.
The site is secure. The https:// ensures that you are connecting to the official website and that any information you provide is encrypted and transmitted securely.
- Publications
- Account settings
Preview improvements coming to the PMC website in October 2024. Learn More or Try it out now .
- Advanced Search
- Journal List
- Health Serv Res
- v.42(1 Pt 1); 2007 Feb
Preparing and Presenting Effective Research Posters
Associated data.
APPENDIX A.2. Comparison of Research Papers, Presentations, and Posters—Contents.
Posters are a common way to present results of a statistical analysis, program evaluation, or other project at professional conferences. Often, researchers fail to recognize the unique nature of the format, which is a hybrid of a published paper and an oral presentation. This methods note demonstrates how to design research posters to convey study objectives, methods, findings, and implications effectively to varied professional audiences.
A review of existing literature on research communication and poster design is used to identify and demonstrate important considerations for poster content and layout. Guidelines on how to write about statistical methods, results, and statistical significance are illustrated with samples of ineffective writing annotated to point out weaknesses, accompanied by concrete examples and explanations of improved presentation. A comparison of the content and format of papers, speeches, and posters is also provided.
Each component of a research poster about a quantitative analysis should be adapted to the audience and format, with complex statistical results translated into simplified charts, tables, and bulleted text to convey findings as part of a clear, focused story line.
Conclusions
Effective research posters should be designed around two or three key findings with accompanying handouts and narrative description to supply additional technical detail and encourage dialog with poster viewers.
An assortment of posters is a common way to present research results to viewers at a professional conference. Too often, however, researchers treat posters as poor cousins to oral presentations or published papers, failing to recognize the opportunity to convey their findings while interacting with individual viewers. By neglecting to adapt detailed paragraphs and statistical tables into text bullets and charts, they make it harder for their audience to quickly grasp the key points of the poster. By simply posting pages from the paper, they risk having people merely skim their work while standing in the conference hall. By failing to devise narrative descriptions of their poster, they overlook the chance to learn from conversations with their audience.
Even researchers who adapt their paper into a well-designed poster often forget to address the range of substantive and statistical training of their viewers. This step is essential for those presenting to nonresearchers but also pertains when addressing interdisciplinary research audiences. Studies of policymakers ( DiFranza and the Staff of the Advocacy Institute 1996 ; Sorian and Baugh 2002 ) have demonstrated the importance of making it readily apparent how research findings apply to real-world issues rather than imposing on readers to translate statistical findings themselves.
This methods note is intended to help researchers avoid such pitfalls as they create posters for professional conferences. The first section describes objectives of research posters. The second shows how to describe statistical results to viewers with varied levels of statistical training, and the third provides guidelines on the contents and organization of the poster. Later sections address how to prepare a narrative and handouts to accompany a research poster. Because researchers often present the same results as published research papers, spoken conference presentations, and posters, Appendix A compares similarities and differences in the content, format, and audience interaction of these three modes of presenting research results. Although the focus of this note is on presentation of quantitative research results, many of the guidelines about how to prepare and present posters apply equally well to qualitative studies.
WHAT IS A RESEARCH POSTER?
Preparing a poster involves not only creating pages to be mounted in a conference hall, but also writing an associated narrative and handouts, and anticipating the questions you are likely to encounter during the session. Each of these elements should be adapted to the audience, which may include people with different levels of familiarity with your topic and methods ( Nelson et al. 2002 ; Beilenson 2004 ). For example, the annual meeting of the American Public Health Association draws academics who conduct complex statistical analyses along with practitioners, program planners, policymakers, and journalists who typically do not.
Posters are a hybrid form—more detailed than a speech but less than a paper, more interactive than either ( Appendix A ). In a speech, you (the presenter) determine the focus of the presentation, but in a poster session, the viewers drive that focus. Different people will ask about different facets of your research. Some might do policy work or research on a similar topic or with related data or methods. Others will have ideas about how to apply or extend your work, raising new questions or suggesting different contrasts, ways of classifying data, or presenting results. Beilenson (2004) describes the experience of giving a poster as a dialogue between you and your viewers.
By the end of an active poster session, you may have learned as much from your viewers as they have from you, especially if the topic, methods, or audience are new to you. For instance, at David Snowdon's first poster presentation on educational attainment and longevity using data from The Nun Study, another researcher returned several times to talk with Snowdon, eventually suggesting that he extend his research to focus on Alzheimer's disease, which led to an important new direction in his research ( Snowdon 2001 ). In addition, presenting a poster provides excellent practice in explaining quickly and clearly why your project is important and what your findings mean—a useful skill to apply when revising a speech or paper on the same topic.
WRITING FOR A VARIED PROFESSIONAL AUDIENCE
Audiences at professional conferences vary considerably in their substantive and methodological backgrounds. Some will be experts on your topic but not your methods, some will be experts on your methods but not your topic, and most will fall somewhere in between. In addition, advances in research methods imply that even researchers who received cutting-edge methodological training 10 or 20 years ago might not be conversant with the latest approaches. As you design your poster, provide enough background on both the topic and the methods to convey the purpose, findings, and implications of your research to the expected range of readers.
Telling a Simple, Clear Story
Write so your audience can understand why your work is of interest to them, providing them with a clear take-home message that they can grasp in the few minutes they will spend at your poster. Experts in communications and poster design recommend planning your poster around two to three key points that you want your audience to walk away with, then designing the title, charts, and text to emphasize those points ( Briscoe 1996 ; Nelson et al. 2002 ; Beilenson 2004 ). Start by introducing the two or three key questions you have decided will be the focus of your poster, and then provide a brief overview of data and methods before presenting the evidence to answer those questions. Close with a summary of your findings and their implications for research and policy.
A 2001 survey of government policymakers showed that they prefer summaries of research to be written so they can immediately see how the findings relate to issues currently facing their constituencies, without wading through a formal research paper ( Sorian and Baugh 2002 ). Complaints that surfaced about many research reports included that they were “too long, dense, or detailed,” or “too theoretical, technical, or jargony.” On average, respondents said they read only about a quarter of the research material they receive for detail, skim about half of it, and never get to the rest.
To ensure that your poster is one viewers will read, understand, and remember, present your analyses to match the issues and questions of concern to them, rather than making readers translate your statistical results to fit their interests ( DiFranza and the Staff of the Advocacy Institute 1996 ; Nelson et al. 2002 ). Often, their questions will affect how you code your data, specify your model, or design your intervention and evaluation, so plan ahead by familiarizing yourself with your audience's interests and likely applications of your study findings. In an academic journal article, you might report parameter estimates and standard errors for each independent variable in your regression model. In the poster version, emphasize findings for specific program design features, demographic, or geographic groups, using straightforward means of presenting effect size and statistical significance; see “Describing Numeric Patterns and Contrasts” and “Presenting Statistical Test Results” below.
The following sections offer guidelines on how to present statistical findings on posters, accompanied by examples of “poor” and “better” descriptions—samples of ineffective writing annotated to point out weaknesses, accompanied by concrete examples and explanations of improved presentation. These ideas are illustrated with results from a multilevel analysis of disenrollment from the State Children's Health Insurance Program (SCHIP; Phillips et al. 2004 ). I chose that paper to show how to prepare a poster about a sophisticated quantitative analysis of a topic of interest to HSR readers, and because I was a collaborator in that study, which was presented in the three formats compared here—as a paper, a speech, and a poster.
Explaining Statistical Methods
Beilenson (2004) and Briscoe (1996) suggest keeping your description of data and methods brief, providing enough information for viewers to follow the story line and evaluate your approach. Avoid cluttering the poster with too much technical detail or obscuring key findings with excessive jargon. For readers interested in additional methodological information, provide a handout and a citation to the pertinent research paper.
As you write about statistical methods or other technical issues, relate them to the specific concepts you study. Provide synonyms for technical and statistical terminology, remembering that many conferences of interest to policy researchers draw people from a range of disciplines. Even with a quantitatively sophisticated audience, don't assume that people will know the equivalent vocabulary used in other fields. A few years ago, the journal Medical Care published an article whose sole purpose was to compare statistical terminology across various disciplines involved in health services research so that people could understand one another ( Maciejewski et al. 2002 ). After you define the term you plan to use, mention the synonyms from the various fields represented in your audience.
Consider whether acronyms are necessary on your poster. Avoid them if they are not familiar to the field or would be used only once or twice on your poster. If you use acronyms, spell them out at first usage, even those that are common in health services research such as “HEDIS®”(Health Plan Employer Data and Information Set) or “HLM”(hierarchical linear model).
Poor: “We use logistic regression and a discrete-time hazards specification to assess relative hazards of SCHIP disenrollment, with plan level as our key independent variable.” Comment: Terms like “discrete-time hazards specification” may be confusing to readers without training in those methods, which are relatively new on the scene. Also the meaning of “SCHIP” or “plan level” may be unfamiliar to some readers unless defined earlier on the poster.
Better: “Chances of disenrollment from the State Children's Health Insurance Program (SCHIP) vary by amount of time enrolled, so we used hazards models (also known as event history analysis or survival analysis) to correct for those differences when estimating disenrollment patterns for SCHIP plans for different income levels.” Comment: This version clarifies the terms and concepts, naming the statistical method and its synonyms, and providing a sense of why this type of analysis is needed.
To explain a statistical method or assumption, paraphrase technical terms and illustrate how the analytic approach applies to your particular research question and data:
Poor : “The data structure can be formulated as a two-level hierarchical linear model, with families (the level-1 unit of analysis) nested within counties (the level-2 unit of analysis).” Comment: Although this description would be fine for readers used to working with this type of statistical model, those who aren't conversant with those methods may be confused by terminology such as “level-1” and “unit of analysis.”
Better: “The data have a hierarchical (or multilevel) structure, with families clustered within counties.” Comment: By replacing “nested” with the more familiar “clustered,” identifying the specific concepts for the two levels of analysis, and mentioning that “hierarchical” and “multilevel” refer to the same type of analytic structure, this description relates the generic class of statistical model to this particular study.
Presenting Results with Charts
Charts are often the preferred way to convey numeric patterns, quickly revealing the relative sizes of groups, comparative levels of some outcome, or directions of trends ( Briscoe 1996 ; Tufte 2001 ; Nelson et al. 2002 ). As Beilenson puts it, “let your figures do the talking,” reducing the need for long text descriptions or complex tables with lots of tiny numbers. For example, create a pie chart to present sample composition, use a simple bar chart to show how the dependent variable varies across subgroups, or use line charts or clustered bar charts to illustrate the net effects of nonlinear specifications or interactions among independent variables ( Miller 2005 ). Charts that include confidence intervals around point estimates are a quick and effective way to present effect size, direction, and statistical significance. For multivariate analyses, consider presenting only the results for the main variables of interest, listing the other variables in the model in a footnote and including complex statistical tables in a handout.
Provide each chart with a title (in large type) that explains the topic of that chart. A rhetorical question or summary of the main finding can be very effective. Accompany each chart with a few annotations that succinctly describe the patterns in that chart. Although each chart page should be self-explanatory, be judicious: Tufte (2001) cautions against encumbering your charts with too much “nondata ink”—excessive labeling or superfluous features such as arrows and labels on individual data points. Strive for a balance between guiding your readers through the findings and maintaining a clean, uncluttered poster. Use chart types that are familiar to your expected audience. Finally, remember that you can flesh out descriptions of charts and tables in your script rather than including all the details on the poster itself; see “Narrative to Accompany a Poster.”
Describing Numeric Patterns and Contrasts
As you describe patterns or numeric contrasts, whether from simple calculations or complex statistical models, explain both the direction and magnitude of the association. Incorporate the concepts under study and the units of measurement rather than simply reporting coefficients (β's) ( Friedman 1990 ; Miller 2005 ).
Poor: “Number of enrolled children in the family is correlated with disenrollment.” Comment: Neither the direction nor the size of the association is apparent.
Poor [version #2]: “The log-hazard of disenrollment for one-child families was 0.316.” Comment: Most readers find it easier to assess the size and direction from hazards ratios (a form of relative risk) instead of log-hazards (log-relative risks, the β's from a hazards model).
Better: “Families with only one child enrolled in the program were about 1.4 times as likely as larger families to disenroll.” Comment: This version explains the association between number of children and disenrollment without requiring viewers to exponentiate the log-hazard in their heads to assess the size and direction of that association. It also explicitly identifies the group against which one-child families are compared in the model.
Presenting Statistical Test Results
On your poster, use an approach to presenting statistical significance that keeps the focus on your results, not on the arithmetic needed to conduct inferential statistical tests. Replace standard errors or test statistics with confidence intervals, p- values, or symbols, or use formatting such as boldface, italics, or a contrasting color to denote statistically significant findings ( Davis 1997 ; Miller 2005 ). Include the detailed statistical results in handouts for later perusal.
To illustrate these recommendations, Figures 1 and and2 2 demonstrate how to divide results from a complex, multilevel model across several poster pages, using charts and bullets in lieu of the detailed statistical table from the scientific paper ( Table 1 ; Phillips et al. 2004 ). Following experts' advice to focus on one or two key points, these charts emphasize the findings from the final model (Model 5) rather than also discussing each of the fixed- and random-effects specifications from the paper.

Presenting Complex Statistical Results Graphically

Text Summary of Additional Statistical Results
Multilevel Discrete-Time Hazards Models of Disenrollment from SCHIP, New Jersey, January 1998–April 2000
Source : Phillips et al. (2004) .
SCHIP, State Children's Health Insurance Program; LRH, log relative-hazard; SE, standard error.
Figure 1 uses a chart (also from the paper) to present the net effects of a complicated set of interactions between two family-level traits (race and SCHIP plan) and a cross-level interaction between race of the family and county physician racial composition. The title is a rhetorical question that identifies the issue addressed in the chart, and the annotations explain the pattern. The chart version substantially reduces the amount of time viewers need to understand the main take-home point, averting the need to mentally sum and exponentiate several coefficients from the table.
Figure 2 uses bulleted text to summarize other key results from the model, translating log-relative hazards into hazards ratios and interpreting them with minimal reliance on jargon. The results for family race, SCHIP plan, and county physician racial composition are not repeated in Figure 2 , averting the common problem of interpreting main effect coefficients and interaction coefficients without reference to one another.
Alternatively, replace the text summary shown in Figure 2 with Table 2 —a simplified version of Table 1 which presents only the results for Model 5, replaces log-relative hazards with hazards ratios, reports associated confidence intervals in lieu of standard errors, and uses boldface to denote statistical significance. (On a color slide, use a contrasting color in lieu of bold.)
Relative Risks of SCHIP Disenrollment for Other * Family and County Characteristics, New Jersey, January 1998–April 2000
Statistically significant associations are shown in bold.
Based on hierarchical linear model controlling for months enrolled, months-squared, race, SCHIP plan, county physician racial composition, and all variables shown here. Scaled deviance =30,895. Random effects estimate for between-county variance =0.005 (standard error =0.006). SCHIP, State Children's Health Insurance Program; 95% CI, 95% confidence interval.
CONTENTS AND ORGANIZATION OF A POSTER
Research posters are organized like scientific papers, with separate pages devoted to the objectives and background, data and methods, results, and conclusions ( Briscoe 1996 ). Readers view the posters at their own pace and at close range; thus you can include more detail than in slides for a speech (see Appendix A for a detailed comparison of content and format of papers, speeches, and posters). Don't simply post pages from the scientific paper, which are far too text-heavy for a poster. Adapt them, replacing long paragraphs and complex tables with bulleted text, charts, and simple tables ( Briscoe 1996 ; Beilenson 2004 ). Fink (1995) provides useful guidelines for writing text bullets to convey research results. Use presentation software such as PowerPoint to create your pages or adapt them from related slides, facilitating good page layout with generous type size, bullets, and page titles. Such software also makes it easy to create matching handouts (see “Handouts”).
The “W's” (who, what, when, where, why) are an effective way to organize the elements of a poster.
- In the introductory section, describe what you are studying, why it is important, and how your analysis will add to the existing literature in the field.
- In the data and methods section of a statistical analysis, list when, where, who, and how the data were collected, how many cases were involved, and how the data were analyzed. For other types of interventions or program evaluations, list who, when, where, and how many, along with how the project was implemented and assessed.
- In the results section, present what you found.
- In the conclusion, return to what you found and how it can be used to inform programs or policies related to the issue.
Number and Layout of Pages
To determine how many pages you have to work with, find out the dimensions of your assigned space. A 4′ × 8′ bulletin board accommodates the equivalent of about twenty 8.5″ × 11″ pages, but be selective—no poster can capture the full detail of a large series of multivariate models. A trifold presentation board (3′ high by 4′ wide) will hold roughly a dozen pages, organized into three panels ( Appendix B ). Breaking the arrangement into vertical sections allows viewers to read each section standing in one place while following the conventions of reading left-to-right and top-to-bottom ( Briscoe 1996 ).
- At the top of the poster, put an informative title in a large, readable type size. On a 4′ × 8′ bulletin board, there should also be room for an institutional logo.

Suggested Layout for a 4′ × 8′ poster.
- In the left-hand panel, set the stage for the research question, conveying why the topic is of policy interest, summarizing major empirical or theoretical work on related topics, and stating your hypotheses or project aims, and explaining how your work fills in gaps in previous analyses.
- In the middle panel, briefly describe your data source, variables, and methods, then present results in tables or charts accompanied by text annotations. Diagrams, maps, and photographs are very effective for conveying issues difficult to capture succinctly in words ( Miller 2005 ), and to help readers envision the context. A schematic diagram of relationships among variables can be useful for illustrating causal order. Likewise, a diagram can be a succinct way to convey timing of different components of a longitudinal study or the nested structure of a multilevel dataset.
- In the right-hand panel, summarize your findings and relate them back to the research question or project aims, discuss strengths and limitations of your approach, identify research, practice, or policy implications, and suggest directions for future research.
Figure 3 (adapted from Beilenson 2004 ) shows a suggested layout for a 4′ × 8′ bulletin board, designed to be created using software such as Pagemaker that generates a single-sheet presentation; Appendix C shows a complete poster version of the Phillips et al. (2004) multilevel analysis of SCHIP disenrollment. If hardware or budget constraints preclude making a single-sheet poster, a similar configuration can be created using standard 8.5″ × 11″ pages in place of the individual tables, charts, or blocks of text shown in Figure 3 .
Find out well in advance how the posters are to be mounted so you can bring the appropriate supplies. If the room is set up for table-top presentations, tri-fold poster boards are essential because you won't have anything to attach a flat poster board or pages to. If you have been assigned a bulletin board, bring push-pins or a staple gun.
Regardless of whether you will be mounting your poster at the conference or ahead of time, plan how the pages are to be arranged. Experiment with different page arrangements on a table marked with the dimensions of your overall poster. Once you have a final layout, number the backs of the pages or draw a rough sketch to work from as you arrange the pages on the board. If you must pin pages to a bulletin board at the conference venue, allow ample time to make them level and evenly spaced.
Other Design Considerations
A few other issues to keep in mind as you design your poster. Write a short, specific title that fits in large type size on the title banner of your poster. The title will be potential readers' first glimpse of your poster, so make it inviting and easy to read from a distance—at least 40-point type, ideally larger. Beilenson (2004) advises embedding your key finding in the title so viewers don't have to dig through the abstract or concluding page to understand the purpose and conclusions of your work. A caution: If you report a numeric finding in your title, keep in mind that readers may latch onto it as a “factoid” to summarize your conclusions, so select and phrase it carefully ( McDonough 2000 ).
Use at least 14-point type for the body of the poster text. As Briscoe (1996) points out, “many in your audience have reached the bifocal age” and all of them will read your poster while standing, hence long paragraphs in small type will not be appreciated! Make judicious use of color. Use a clear, white, or pastel for the background, with black or another dark color for most text, and a bright, contrasting shade to emphasize key points or to identify statistically significant results ( Davis 1997 ).
NARRATIVE TO ACCOMPANY A POSTER
Prepare a brief oral synopsis of the purpose, findings, and implications of your work to say to interested parties as they pause to read your poster. Keep it short—a few sentences that highlight what you are studying, a couple of key findings, and why they are important. Design your overview as a “sound byte” that captures your main points in a succinct and compelling fashion ( Beilenson 2004 ). After hearing your introduction, listeners will either nod and move along or comment on some aspect of your work that intrigues them. You can then tailor additional discussion to individual listeners, adjusting the focus and amount of detail to suit their interests. Gesture at the relevant pages as you make each point, stating the purpose of each chart or table and explaining its layout before describing the numeric findings; see Miller (2005) for guidelines on how to explain tables and charts to a live audience. Briscoe (1996) points out that these mini-scripts are opportunities for you to fill in details of your story line, allowing you to keep the pages themselves simple and uncluttered.
Prepare short answers to likely questions about various aspects of your work, such as why it is important from a policy or research perspective, or descriptions of data, methods, and specific results. Think of these as little modules from an overall speech—concise descriptions of particular elements of your study that you can choose among in response to questions that arise. Beilenson (2004) also recommends developing a few questions to ask your viewers, inquiring about their reactions to your findings, ideas for additional questions, or names of others working on the topic.
Practice your poster presentation in front of a test audience acquainted with the interests and statistical proficiency of your expected viewers. Ideally, your critic should not be too familiar with your work: A fresh set of eyes and ears is more likely to identify potential points of confusion than someone who is jaded from working closely with the material while writing the paper or drafting the poster ( Beilenson 2004 ). Ask your reviewer to identify elements that are unclear, flag jargon to be paraphrased or defined, and recommend changes to improve clarity ( Miller 2005 ). Have them critique your oral presentation as well as the contents and layout of the poster.
Prepare handouts to distribute to interested viewers. These can be produced from slides created in presentation software, printed several to a page along with a cover page containing the abstract and your contact information. Or package an executive summary or abstract with a few key tables or charts. Handouts provide access to the more detailed literature review, data and methods, full set of results, and citations without requiring viewers to read all of that information from the poster ( Beilenson 2004 ; Miller 2005 ). Although you also can bring copies of the complete paper, it is easier on both you and your viewers if you collect business cards or addresses and mail the paper later.
The quality and effectiveness of research posters at professional conferences is often compromised by authors' failure to take into account the unique nature of such presentations. One common error is posting numerous statistical tables and long paragraphs from a research paper—an approach that overwhelms viewers with too much detail for this type of format and presumes familiarity with advanced statistical techniques. Following recommendations from the literature on research communication and poster design, this paper shows how to focus each poster on a few key points, using charts and text bullets to convey results as part of a clear, straightforward story line, and supplementing with handouts and an oral overview.
Another frequent mistake is treating posters as a one-way means of communication. Unlike published papers, poster sessions are live presentations; unlike speeches, they allow for extended conversation with viewers. This note explains how to create an oral synopsis of the project, short modular descriptions of poster elements, and questions to encourage dialog. By following these guidelines, researchers can substantially improve their conference posters as vehicles to disseminate findings to varied research and policy audiences.
CHECKLIST FOR PREPARING AND PRESENTING AN EFFECTIVE RESEARCH POSTERS
- Design poster to focus on two or three key points.
- Adapt materials to suit expected viewers' knowledge of your topic and methods.
- Design questions to meet their interests and expected applications of your work.
- Paraphrase descriptions of complex statistical methods.
- Spell out acronyms if used.
- Replace large detailed tables with charts or small, simplified tables.
- Accompany tables or charts with bulleted annotations of major findings.
- Describe direction and magnitude of associations.
- Use confidence intervals, p -values, symbols, or formatting to denote statistical significance.
Layout and Format
- Organize the poster into background, data and methods, results, and study implications.
- Divide the material into vertical sections on the poster.
- Use at least 14-point type in the body of your poster, at least 40-point for the title.
Narrative Description
- Rehearse a three to four sentence overview of your research objectives and main findings.
- Summary of key studies and gaps in existing literature
- Data and methods
- Each table, chart, or set of bulleted results
- Research, policy, and practice implications
- Solicit their input on your findings
- Develop additional questions for later analysis
- Identify other researchers in the field
- Prepare handouts to distribute to interested viewers.
- Print slides from presentation software, several to a page.
- Or package an executive summary or abstract with a few key tables or charts.
- Include an abstract and contact information.
Acknowledgments
I would like to thank Ellen Idler, Julie Phillips, Deborah Carr, Diane (Deedee) Davis, and two anonymous reviewers for helpful comments on earlier drafts of this work.
Supplementary Material
The following supplementary material for this article is available online:
APPENDIX A.1. Comparison of Research Papers, Presentations, and Posters—Materials and Audience Interaction.
Suggested Layout for a Tri-Fold Presentation Board.
Example Research Poster of Phillips et al. 2004 Study.
- Beilenson J. Developing Effective Poster Presentations. Gerontology News. 2004; 32 (9):6–9. [ Google Scholar ]
- Briscoe MH. Preparing Scientific Illustrations: A Guide to Better Posters, Presentations, and Publications. 2. New York: Springer-Verlag; 1996. [ Google Scholar ]
- Davis M. Scientific Papers and Presentations. New York: Academic Press; 1997. [ Google Scholar ]
- DiFranza JR. A Researcher's Guide to Effective Dissemination of Policy-Related Research. Princeton, NJ: The Robert Wood Johnson Foundation; 1996. the Staff of the Advocacy Institute, with Assistance from the Center for Strategic Communications. [ Google Scholar ]
- Fink A. How to Report on Surveys. Thousand Oaks, CA: Sage Publications; 1995. [ Google Scholar ]
- Friedman GD. Be Kind to Your Reader. American Journal of Epidemiology. 1990; 132 (4):591–3. [ PubMed ] [ Google Scholar ]
- Maciejewski ML, Diehr P, Smith MA, Hebert P. Common Methodological Terms in Health Services Research and Their Symptoms. Medical Care. 2002; 40 :477–84. [ PubMed ] [ Google Scholar ]
- McDonough J. Experiencing Politics: A Legislator's Stories of Government and Health Care. Berkeley: University of California Press; 2000. [ Google Scholar ]
- Miller JE. The Chicago Guide to Writing about Multivariate Analysis. Chicago Guides to Writing, Editing and Publishing. Chicago: University of Chicago Press; 2005. [ Google Scholar ]
- Nelson DE, Brownson RC, Remington PL, Parvanta C, editors. Communicating Public Health Information Effectively: A Guide for Practitioners. Washington, DC: American Public Health Association; 2002. [ Google Scholar ]
- Phillips JA, Miller JE, Cantor JC, Gaboda D. Context or Composition. What Explains Variation in SCHIP Disenrollment? Health Services Research. 2004; 39 (4, part I):865–8. [ PMC free article ] [ PubMed ] [ Google Scholar ]
- Snowdon D. Aging with Grace: What the Nun Study Teaches Us about Leading Longer, Healthier, and More Meaningful Lives. New York: Bantam Books; 2001. [ Google Scholar ]
- Sorian R, Baugh T. Power of Information Closing the Gap between Research and Policy. Health Affairs. 2002; 21 (2):264–73. [ PubMed ] [ Google Scholar ]
- Tufte ER. The Visual Display of Quantitative Information. 2. Cheshire, CT: Graphics Press; 2001. [ Google Scholar ]
Make a Great STEM Presentation
- Poster Making Resources
- Poster Presentation Resources
- Lightning Talk Resources
- Multimedia Presentation Resources
- Undergraduate Research Opportunities
- Citation Information
What is a poster presentation?
"A poster presentation is a way to communicate your research or your understanding of a topic in a concise and visually engaging format. A poster presentation usually includes two elements:
- a brief verbal explanation of the poster content or topic (often less than 5 minutes).
A poster will generally be placed alongside other students' posters on a wall or an online platform, where audience members can view it. In some poster presentations, there may also be opportunity to answer questions from the audience (typically academic staff, other students, or friends and family).
To be successful, make sure you develop your poster content carefully, design the poster to engage and inform your viewer, and present your ideas effectively." (~ Monash University )
SVC Guidelines for Poster Presentations
Svc poster guidelines and submission:.
- 36 inches by 24 inches
- 24 pt size or larger
- For descriptive title - 72 pt font size or larger
Poster presenters should refer to “How to make a better poster link” as a guideline
- Students, staff, faculty, family, and friends who may be unfamiliar with terminology and have no prior knowledge in the sciences.
Include the following required components:
- A descriptive title (72 pt font size or larger)
- Names of authors (students and faculty)
- Name of Institution for all authors (Skagit Valley College)
- Background/introduction information
- Figures/tables/images of results
- Figure legend included for each figure, table, image presented in poster. Figure legend should include a short description of results presented in figures/tables/image.
- Main conclusion of research
How to submit:
- Posters will be submitted through Canvas in STEM courses
- Deadline for poster submission TBD
- << Previous: Home
- Next: Poster Making Resources >>
- Last Updated: Apr 24, 2024 12:56 PM
- URL: https://subjectguides.library.skagit.edu/stempresentation

Poster Presentation
At most meetings or conferences, when you present a poster presentation, it means that you will display your poster and be available for viewers to ask questions about your research and how it is represented on your poster. Like an oral presentation delivered with a slideshow, there are many ways to design and present your research on a poster. There are also, however, a few important considerations and conventions to be familiar with.
https://www.youtube.com/watch?v=SATl29FeFw0&feature=youtu.be
Special Instructions for UURAF 2024 Poster Presentations
UURAF 2024 will be a hybrid event consisting of oral, poster, performance, film and exhibit presentations. UURAF is a public event. Do not share confidential information in your abstract or presentation.
For In-person Posters Only
- Create a poster presentation; print and trim final version to a size of 40" x 32" (102 cm x 81 cm); landscape or portrait orientation
- Prepare a short pitch discussing the poster presentation (less than 3 minutes is recommended)
- Share your work with visitors and evaluators
- In-person UURAF Presenter Guide
For Online Posters Only
- Submit presentation materials to online event site by April 8
- Create a poster presentation; save final version as PDF (less than 10MB)
- Create a video discussing their poster presentation (2 to 5 minutes long)
- Upload poster discussion video to YouTube as an unlisted video
- Enable the closed captioning feature to promote accessibility and inclusivity
- Add link for unlisted YouTube video and PDF of poster to the online UURAF event site by April 8
- Participate in asynchronous, online discussions with visitors and evaluators from April 11 - 12
- Virtual UURAF Presenter Guide
Presentation Tips:
- Tips and poster samples
- How to record a PowerPoint presentation
- How to add caption to YouTube videos
- Unlisted video setting
- Attend one of our workshops or peer advising for more assistance
- View example presentations from UURAF 2023
- Intro to UURAF presentation slides
- How to Prepare for an Academic Conference
- 15 Tips for Presenting at a Conference
- Practical Networking Tips
- Request assistance with poster printing fees. Requests are due by March 29 at 11:59 PM. Funding decisions will be made in early April
- Check out our Poster FAQ to learn more about poster presentations and how to prepare them
- Get help from an Undergraduate Research Peer Advisor

- Call us: (517) 884-4384
- Contact Information
- Privacy Statement
- Site Accessibility
- Call MSU: (517) 355-1855
- Visit: msu.edu
- MSU is an affirmative-action, equal-opportunity employer.
- Notice of Nondiscrimination
- Spartans Will.
- © Michigan State University
- Log In Username Enter your ACP Online username. Password Enter the password that accompanies your username. Remember me Forget your username or password ?
- Privacy Policy
- Career Connection
- Member Forums
© Copyright 2024 American College of Physicians, Inc. All Rights Reserved. 190 North Independence Mall West, Philadelphia, PA 19106-1572 800-ACP-1915 (800-227-1915) or 215-351-2600
If you are unable to login, please try clearing your cookies . We apologize for the inconvenience.
Preparing a Poster Presentation
Posters are a legitimate and popular presentation format for research and clinical vignettes. They efficiently communicate concepts and data to an audience using a combination of visuals and text. Most scientific meeting planners take advantage of the popularity and communication efficiency of poster presentations by scheduling more poster than oral presentations. Poster presentations allow the author to meet and speak informally with interested viewers, facilitating a greater exchange of ideas and networking opportunities than with oral presentations. Poster presentations often are the first opportunities for young investigators to present their work at important scientific meetings and preparatory for publication in a peer-reviewed journal.
Poster Production Timeline
In order to be successful, certain prerequisites must be met. First, you must have a desire to be scholastically effective and be willing to put the time into the design and production of the poster. Second, you need organizational skills. Like any other endeavor associated with deadlines, you must be able to deliver the product on time. Posters are associated with more deadlines than oral presentations, due to the necessary interaction with graphic artists, graphic production, and the needs of the meeting itself. Organizational skills are also needed to create a concise and logically structured graphic and text presentation of the research or vignette. In order to help you achieve these goals, this article addresses poster planning, production, and presentation. It may be helpful to create a poster production timeline .
- Determine if your poster will be judged at the scientific meeting. If so, ask for the judging criteria , which will be immensely helpful for you to plan and construct the poster.
- Know the rules . It is your responsibility to know the physical requirements for the poster including acceptable size and how it will be displayed. A 4' × 4' display area cannot accommodate a 6' × 6' poster and a 3' × 3' poster will look insignificant in an 8' × 8' display area. All scientific programs that sponsor a poster session will send you information on the display requirements at the time your poster is accepted for presentation. Review and follow the instructions precisely. However, be warned that not all scientific programs will automatically tell you how the poster will be displayed. Some programs provide a cork/tack-board system that allows you to display your poster by fastening it to a solid display board with stickpins. This gives you the option of displaying your poster as many individual parts (components of the poster, such as abstract, methods, graphics, conclusion, are fastened individually to the display board) or as one piece. Other programs "hang" their posters from a frame by large spring clips. This means that the poster must be created as a single unit and cannot be too heavy for the clips or too light such that it will curl upwards like a window shade. A few programs still use easels to display posters, mandating that the poster be constructed of or placed on a firm backing that can be supported in this way. The point is, find out how the poster will be displayed and engineer a poster that best meets the requirements.
- Determine exactly how the poster will be produced. Will you hire a graphic artist for partial or complete production? Does your institution provide graphic services to your department? Will you need to do this yourself? If payment is required, who will pay for the production? Regardless of who is doing the work and how it will be financed, only you can determine the individual tasks and set the deadlines. Make sure your deadlines include sufficient time to revise the poster if you find mistakes or otherwise need to make changes prior to the scientific meeting. Finally, if you are working with a graphic artist, make your timetable after consultation with him/her so it is realistic and he/she understands your time constraints.
- Compile a list of components that will appear on the poster. There are common elements to all posters, whether they are research presentations or clinical vignettes. At the top center, the poster should display the title, authors, and institutional affiliations. Any necessary acknowledgments can also be placed here. Many scientific programs will insist that the abstract be included on the poster and will specify its location (i.e., upper right corner).
Scientific posters should follow the IMRAD format (Introduction, Methods, Results, and Discussion) .
- The Introduction presents the background and the purpose of the research. The background information typically consists of a statement summarizing the current knowledge in an area, what knowledge is missing, and how this research project addresses the knowledge gap. A hypothesis can be included in the Introduction.
- The Methods section should specifically address the following areas: research design, research setting, number of patients enrolled in the study, and how they were selected. The Methods section should also include a description of the intervention (if appropriate), a description of the outcome variables and how they were measured, and the method of statistical analysis.
- The Results section includes the quantitative data. This section usually begins with a description of the subjects in the study and a description of those who were not included because they failed to meet the inclusion criteria or dropped out. Include the frequencies of the most important outcome variables. Consider comparisons of the outcome variables between various subgroups within the study (treated vs. untreated, young vs. old, male vs. female, and so forth). Numerical results should include standard deviations or 95% confidence limits and the level of statistical significance should be indicated.
- Finally, in the Discussion section, state concisely what can be concluded from the study and its implications. Make sure that the conclusions are supported by the data presented in the Results and do not present unsubstantiated personal opinion.
Clinical vignette posters generally have three components: Introduction, Case Description, and Discussion. A short Introduction typically describes the context of the case and explains its relevance and importance. When describing the case, follow the basic rules of medical communication by describing in sequence the history, physical examination, investigative studies, and patient's progress and outcome. The main purpose of the discussion is to review why decisions were made and to extract the lesson from the case. Be wary of boasting that your case is the "first" to describe a particular phenomenon, since even the most thorough searches often fail to reveal all instances of similar cases. Keep in mind that the best research and clinical vignette posters are those that make a small number of points (even just one) clearly and succinctly.
As you review your content, make decisions on what can be displayed pictorially. Posters that are mainly text discourage others from visiting and reviewing your work. Make your presentation as visual as possible; not only does it make your poster more appealing, but information can be transmitted more efficiently with a picture, figure, or graph. For example, information on patient demographics could be represented as a pie chart, frequencies of outcomes as bar graphs, and comparisons of means and statistical significance as tables. Clinical vignettes offer an excellent opportunity to display clinical photographs that illustrate important points of pattern recognition.
Finally, find out if you are required to be present during the poster session. Most scientific meetings schedule a period of time for the author to stand by the poster during the session. This enables you to answer questions about your work and, in some situations, is part of the judging process. Find out if and when this is scheduled.
A Few Tips on Poster Appearance:
Avoid clutter.
Limit your poster presentation to a few main ideas. It's better to present a few of your findings well than present all of your findings poorly. Arrange your poster components to read from left to right and top to bottom. Emphasize important points on the poster with lines, frames or boxes, and arrows.
Keep the lettering simple.
Use no more than three different font sizes; the largest for the poster title, second-largest for section titles, and smallest for text. For all lettering, use both upper- and lowercase letters. Words composed of all uppercase letters are difficult to read. The smallest font should be large enough so it is easily read from a distance of 3 to 5 feet (usually, 24-point font).
Keep the colors simple.
Too much color can be distracting, while too little color can be boring and lifeless. Use color mainly to highlight important elements.
You will need to decide how your poster will be constructed. Your budget and available graphic art resources will most likely influence this decision. At one end of the spectrum, you can inexpensively produce a poster with a graphics software package (such as PowerPoint) and a color printer. Your output will be limited to individual components that measure 8" × 11" to 11" × 17". These components will probably need to be mounted on a stiff backing, such as poster board or foam core, to effectively display them. At the other, more expensive end of the spectrum, you can work with the graphic arts department at your institution. They can use sophisticated software programs, such as Quark, to design and create a poster. The electronic version of the poster can be sent by e-mail to a printing or service bureau. Service bureaus produce a variety of visual products including posters, slides, signs, and limited print editions of books. They can print any size poster with all its component parts as a single unit usually within 24 to 48 hours. The cost of this service is difficult to estimate because it is dependent on a number of variables including poster size, use of color, resolution of the print (dpi, or dots per inch), whether it is laminated, or backed with foam core. A moderately priced poster may cost from $500 to $600. The staff in your graphic arts department can help you pick the options that are within your budget.
At the time of production, it is your responsibility to review the first draft, or copy, of the poster. This is your best chance to correct errors and make changes to improve the accuracy and visual attractiveness of the poster. Use the Poster Checklist to aid your review. In addition, have a colleague help you proofread. It's a good idea to have someone unfamiliar with the research or case help you because he or she will quickly identify areas that are confusing or ambiguous. It's a good idea to have someone who is expert in spelling and grammar review the poster as well. As mentioned previously, schedule the proofreading early enough in the process so that you have time to make any corrections or changes prior to the meeting.
As you prepare to travel to the scientific meeting, consider the following tips:
- Arrange for a proper carrying case for your poster. A worthy investment can prevent damage to your poster and your reputation.
- Don't check your poster as luggage. Carry the poster with you at all times. Better your clothes get lost than your poster.
- Come with some basic equipment. Although these items are typically provided at scientific meetings, you may not have quick access to them. Bring with you:
- Push pins, tacks, or stapler
- Know where and when to set up your poster. The room or area reserved for posters is usually noted in the meeting program. Arrive early to set up your poster. This will allow you to adapt to any surprises in the physical layout or unannounced changes in the method of displaying the poster. Additionally, it's easier to put up your poster when there are fewer people competing for space and equipment. Most scientific programs assign a unique identifying number to your poster that corresponds to location of the poster in the display area. Find out what your number is and place your poster in the corresponding spot.
- Know when to "stand-by" your poster. The time will be listed in the meeting program. Arrive on time and stay until the end of scheduled time. Don't wander off; you may miss the judges, your next fellowship director, or your next partner or employer.
- Know when to take your poster down. Meeting rooms turn-over fast. Have a clear understanding when the poster session is over and when the poster must come down. Failure to take the poster down at the appointed time can result in the hotel or convention staff (not so gently) removing it.
- Be prepared to promote yourself. Consider bringing handouts and business cards for those who visit your poster. Use this opportunity to "network" with other professionals who share similar academic interests.
This final section provides examples of what makes a poster effective. As you study the examples, note that they share similar characteristics:
- Organized and easy to follow the flow of information
- Easy to read, using large font size and are not overly dense with text
- Attractive, due to judicious use of colors, use of graphics, and arrangement
Listed below are a number of important poster characteristics and examples illustrating those characteristics:
- Use of a poignant attention getter
- Use of graphics to communicate data
- Well organized poster with easy to follow flow of information
- Overly dense presentation of content
Scientific Poster Tutorials

Ready to Order?
PosterNerd.com is easiest way to print your poster.
Print My Poster
Poster Sizing
It can be challenging to change the size of your poster once it is designed so starting out with the correct size will save you a few headaches.
Determining Poster Size
Answering these questions in order will help you figure out what size to make your poster:
- 1 Do my poster sections flow logically? The sections of your poster should be organized and follow the general structure of introduction → data → conclusion.
- 1 Does your event require a specific size poster? It’s best to first check if there a size requirement or set of guidelines given by your the event where you are presenting.
- 1 How large is your presentation space? Typically your poster will be attached to a presentation board and those come in various sizes. Before choosing your size, make sure you know if it will fit. You may want to make the width of your poster slightly smaller than the total space so you can stand to the side of it and not block anything.
- 1 Does your school or organization recommend a specific size? Occasionally, a school or organization will set guidelines for poster sizes. If this is the case, they may have a template you can start with.
If none of the above applies, we recommend a 48” x 36” poster. This is a standard size that fits most presentation spaces and is the most common size we see printed.
Document Setup
If you are using Powerpoint to make your poster, be mindful that there is a 56” limit on both the height and the width of a slide. However, any proportional size can be printed at the size you need. The easiest way to accomplish this is to just divide your width and height by 2. For example, if you want a 72” x 48” poster, set up your document at 36” x 24”.

As explained in Images, Charts, and Graphs , you should make sure all the elements of your poster look good when zoomed in 100%. If you plan on getting your poster printed at twice the size of the file, make sure you zoom to 200% when checking that images look crisp.
Questions, Comments, or Concerns
If you have any further questions or comments about our tutorials, we would love to help you out.
How-To Geek
How to make a poster using microsoft powerpoint.
Microsoft PowerPoint isn't just for presentations--you can make posters with it, as well. Here's how.
Quick Links
Define the poster dimensions, design your poster.
Microsoft PowerPoint isn't just for presentations---it also provides all of the creative tools you need to design a beautiful poster. Just set the dimensions, design the poster, and print it out. Here's how to make a poster using PowerPoint.
Posters come in all sizes, but the first thing you need to know is PowerPoint's slide limit is 56-inches x 56-inches, so you'll need to plan accordingly. It's also important to note that you want to set your poster dimensions before you start designing your poster. Otherwise, you might end up having to rework parts of your design due to the size change.
Related: How to Reduce the File Size of a PowerPoint Presentation
Here are some of the standard poster sizes to get you started:
- Small poster: 11" x 17"
- Medium poster: 18" x 24"
- Large posters: 24" x 36" or 27" x 39"
Once you've decided on your poster size, set the dimensions in PowerPoint. To do this, open PowerPoint and navigate to the "Design" tab.
In the "Customize" group, select "Slide Size."
Select "Custom Slide Size" from the dropdown menu.
The "Slide Size" window will appear. Input the width and height specifications to match your required size. Keep in mind that if your height is larger in size than your width, the orientation of the slide will automatically change to "Portrait."
When you're finished, select "OK."
Once selected, a new window will appear giving you two scaling options: Maximize or Ensure Fit. If your slide already has content on it, you'll want to select "Ensure Fit."
Your slide will now be resized.
Your poster design is going to depend completely on you. You'll want to pay attention to the background of the poster, text and image arrangement, font size and style, etc. Essentially, you should treat this part exactly as if you were just creating another slide for a presentation.
Because the design and process of this step is going to differ for everyone, we'd like to offer some of our previous guides to get you started in the design process:
- Insert a picture or other object.
- Use an image as a background.
- Insert an image inside text.
- Get a picture behind text.
- Make a border or frame.
Once your design is ready, all that's left to do is print it out and hang it up!
Related: How to Troubleshoot Printing Issues in Microsoft Word
Customer Reviews
Free research poster powerpoint templates.

About our free research poster templates
Easy to use and customize.
▪ Change colors with one click ▪ Most standard US and international poster sizes. ▪ Support for all PowerPoint versions ▪ Only basic PowerPoint skills required ▪ Fully customizable ▪ Instructions included with the poster templates. ▪ Online video tutorials ▪ Configured to print professionally ▪ Additional layouts included in each template
40 color schemes built-in to every research poster template
Five reasons to print your poster with us >, professionally designed research poster templates.
QUICK FIND POSTER TEMPLATES American standard poster sizes (inches) 30x40 | 36x48 | 36x56 | 36x60 | 36x72 | 36x96 | 42x60 | 42x72 | 42x90 | 44x44 | 48x48 | 48x72 | 48x96 | Trifold | Virtual International common poster sizes (centimeters) 91x122 | 70x100 | 100x140 | 100x100 | 100x200 | A0 | A1 | Virtual IMPORTANT Check the requirements of your conference before you download and work on a poster template. If you need further assistance, our phone support is available and free. We are here to provide the best service you can ask for.
Step-by-Step Tutorials
This series of short videos and animated tutorials will walk you through the research poster-making process, answering the most common questions along the way.
Need further poster template assistance? 510.649.3001
Free powerpoint poster templates for research poster presentations.

Poster template design: Aragon Standard poster sizes in inches (Height x Width) - Click on a size to download 36x48 | 36x56 | 36x60 | 36x72 | 36x96 | 42x60 | 42x72 | 42x90 | 44x44 | 30x40 | 48x48 | 48x72 | 48x96 | Trifold | Virtual - Standard Screen (4:3 Ratio) | Virtual - Wide Screen (16:9 Ratio) Standard poster sizes in centimeters (Height x Width) - Click on a size to download 122x91 | 100x70 | 140x100 | 100x100 | 200x100 | A0 | A1 ► View Samples ► Learn how to customize the template colors

Poster template design: Beaumont Standard poster sizes in inches (Height x Width) - Click on a size to download 36x48 | 36x56 | 36x60 | 36x72 | 36x96 | 42x60 | 42x72 | 42x90 | 44x44 | 30x40 | 48x48 | 48x72 | 48x96 | Trifold | Virtual - Standard Screen (4:3 Ratio) | Virtual - Wide Screen (16:9 Ratio) Standard poster sizes in centimeters (Height x Width) - Click on a size to download 122x91 | 100x70 | 140x100 | 100x100 | 200x100 | A0 | A1 ► View Samples ► Learn how to customize the template colors

Poster template design: Newfield Standard poster sizes in inches (Height x Width) - Click on a size to download 36x48 | 36x56 | 36x60 | 36x72 | 36x96 | 42x60 | 42x72 | 42x90 | 44x44 | 30x40 | 48x48 | 48x72 | 48x96 | Trifold | Virtual - Standard Screen (4:3 Ratio) | Virtual - Wide Screen (16:9 Ratio) Standard poster sizes in centimeters (Height x Width) - Click on a size to download 122x91 | 100x70 | 140x100 | 100x100 | 200x100 | A0 | A1 ► View Samples ► Learn how to customize the template colors
Poster template design: Winchester Standard poster sizes in inches (Height x Width) - Click on a size to download 36x48 | 36x56 | 36x60 | 36x72 | 36x96 | 42x60 | 42x72 | 42x90 | 44x44 | 30x40 | 48x48 | 48x72 | 48x96 | Trifold | Virtual - Standard Screen (4:3 Ratio) | Virtual - Wide Screen (16:9 Ratio) Standard poster sizes in centimeters (Height x Width) - Click on a size to download 122x91 | 100x70 | 140x100 | 100x100 | 200x100 | A0 | A1 ► View Samples ► Learn how to customize the template colors

Poster template design: Lockwood Standard poster sizes in inches (Height x Width) - Click on a size to download 36x48 | 36x56 | 36x60 | 36x72 | 36x96 | 42x60 | 42x72 | 42x90 | 44x44 | 30x40 | 48x48 | 48x72 | 48x96 | Trifold | Virtual - Standard Screen (4:3 Ratio) | Virtual - Wide Screen (16:9 Ratio) Standard poster sizes in centimeters (Height x Width) - Click on a size to download 122x91 | 100x70 | 140x100 | 100x100 | 200x100 | A0 | A1 ► View Samples ► Learn how to customize the template colors
Poster template design: Kensington Standard poster sizes in inches (Height x Width) - Click on a size to download 36x48 | 36x56 | 36x60 | 36x72 | 36x96 | 42x60 | 42x72 | 42x90 | 44x44 | 30x40 | 48x48 | 48x72 | 48x96 | Trifold | Virtual - Standard Screen (4:3 Ratio) | Virtual - Wide Screen (16:9 Ratio) Standard poster sizes in centimeters (Height x Width) - Click on a size to download 122x91 | 100x70 | 140x100 | 100x100 | 200x100 | A0 | A1 ► View Samples ► Learn how to customize the template colors

Poster template design: Stone A new, simplified concept for better poster design Standard poster sizes in inches (Height x Width) - Click on a size to download 36x48 | 36x56 | Trifold | Virtual - Standard Screen (4:3 Ratio) | Virtual - Wide Screen (16:9 Ratio) Standard poster sizes in centimeters (Height x Width) - Click on a size to download A0 ► View Samples ► Learn how to customize the template colors

Poster template design: Marquee Standard poster sizes in inches (Height x Width) - Click on a size to download 36x48 | 36x56 | 36x60 | 36x72 | 36x96 | 42x60 | 42x72 | 42x90 | 44x44 | 30x40 | 48x48 | 48x72 | 48x96 | Trifold | Virtual - Standard Screen (4:3 Ratio) | Virtual - Wide Screen (16:9 Ratio) Standard poster sizes in centimeters (Height x Width) - Click on a size to download 122x91 | 100x70 | 140x100 | 100x100 | 200x100 | A0 | A1 ► View Samples ► Learn how to customize the template colors
Poster template design: Winston Standard poster sizes in inches (Height x Width) - Click on a size to download 36x48 | 36x56 | Trifold | Virtual - Standard Screen (4:3 Ratio) | Virtual - Wide Screen (16:9 Ratio) Standard poster sizes in centimeters (Height x Width) - Click on a size to download A0 ► View Samples ► Learn how to customize the template colors

Poster template design: Chamberlain Standard poster sizes in inches (Height x Width) - Click on a size to download 36x48 | 36x56 | 36x60 | 36x72 | 36x96 | 42x60 | 42x72 | 42x90 | 44x44 | 30x40 | 48x48 | 48x72 | 48x96 | Trifold | Virtual - Standard Screen (4:3 Ratio) | Virtual - Wide Screen (16:9 Ratio) Standard poster sizes in centimeters (Height x Width) - Click on a size to download 122x91 | 100x70 | 140x100 | 100x100 | 200x100 | A0 | A1 ► View Samples ► Learn how to customize the template colors

Poster template design: Forrest Standard poster sizes in inches (Height x Width) - Click on a size to download 36x48 | 36x56 | 36x60 | 36x72 | 36x96 | 42x60 | 42x72 | 42x90 | 44x44 | 30x40 | 48x48 | 48x72 | 48x96 | Trifold | Virtual - Standard Screen (4:3 Ratio) | Virtual - Wide Screen (16:9 Ratio) Standard poster sizes in centimeters (Height x Width) - Click on a size to download 122x91 | 100x70 | 140x100 | 100x100 | 200x100 | A0 | A1 ► View Samples ► Learn how to customize the template colors

DIGITAL POSTER PRESENTATION HANDOUTS
Free with a printed poster order.
A feature-packed alternative to traditional paper poster handouts

Instant QR Code Generator
Add functionality to your poster! Share a link to a page, your email or additional info on the web. It's easy, free and further connects your audience!

Professional Trifold Poster Boards
Ready to use out of the box. Great solution for tabletop 36x48 Trifold poster presentations. Price includes printing, mounting and free Ground FedEx shipping.

Poster Font Size Checker
A convenient way to visualize what size the text will be on your printed poster. Wondering how big the fonts will be on your poster? Download and print this PDF on your desktop printer.

Quick access to ALT code symbols
Click here to choose from over 350 easy to copy and use ALT code symbols.

Fabric Research Posters
Say goodbye to poster tubes with a professional fabric poster you can pack in your luggage! With our crease-resistant EasyTravel™ fabric your presentation will look professional, sharp, and will pack nicely in your carry-on.

Simplify Your Group’s Poster-Ordering Process
Join our free service designed to help you coordinate your group’s poster orders, get discounted rates and customized special features not normally available for standard orders.
Links to university corporate identity (Logo) pages
List of corporate identity pages where you can download university logos to use with your poster presentation. Help your fellow researchers. Good quality logos for use in printed research posters are difficult to find online. If you have a link to the identity page of your university, email it to us and we will add it to our list for others to use.
UC Berkeley Texas A&M UCLA Columbia Medical Center Stanford University
Adelphi University Duke University UPENN Bradley University ENMU
UNC Chapel Hill Northwestern University Magnet recognition Seal Howard University University of Houston
Drexel University Carlow University UNLV UNR UFL
TUFTS George Mason U. St. Scholastica College Mount Royal University Penn State
Yale University University of Wisconsin SD School of Mines USC GATECH
STARTER POWERPOINT POSTER TEMPLATES
Standard size research poster templates in inches use these starter poster templates as a starting point for your own poster designs, thumbnails of posters are shown in proportion to each others’ sizes based on a 48 inch (height) x 96 inch (width) display area, 36” tall x 48” wide .
STARTER 36x48 POWERPOINT POSTER TEMPLATE The 36x48 scientific poster template size is one of the smaller sizes and also one of the most common. It is very suitable for scientific posters with low to moderate amount of text and graphics. The 36x48 research poster template can also be printed at the following sizes without distortion or any necessary adjustments: 36x48 (Standard), 42x56, 48x64, 30x40
Trifold (tabletop)
STARTER TRIFOLD POWERPOINT POSTER TEMPLATE These free PowerPoint poster templates are designed for a standard 3x4 foot poster presentation to be mounted on a standard Trifold poster board. This research poster template should be printed only at the following size: 36x48 (Standard Trifold) This poster template is for a standard Trifold board presentation. You can use it with poster boards available at office-supply stores or our professional ready-to-use Trifold poster presentation product. Are you looking for a larger MonsterBoard template? Use this PowerPoint MonsterBoard template.
36” Tall x 56” Wide
STARTER 36x56 POWERPOINT POSTER TEMPLATE This free PowerPoint poster template is designed for a standard 3x4.5 foot poster presentation. This PowerPoint research poster template is for a medium size poster. It is suitable for most poster presentations. It can accommodate moderate to large amounts of content. This scientific poster template can be printed at the following sizes: 36x56 (Standard), 42x65.3, 48x74.6
36” Tall x 60” Wide
STARTER 36x60 POWERPOINT POSTER TEMPLATE This free PowerPoint poster template is designed for a standard 3x5 foot poster presentation. This is also one of the standard sizes. It is used mostly when the height of the presentation board is only three feet and there is more content to present that can fit in a 48x36 poster. This scientific poster template can be printed at the following sizes: 36x60 (Standard), 42x70, 48x80
36” Tall x 72” Wide
STARTER 36x72 POWERPOINT POSTER TEMPLATE This free PowerPoint poster template is designed for a standard 3x6 foot poster presentation. The same as the above scientific poster template, only wider by a foot. Again, it depends on how much content you need to present. This scientific poster template can be printed at the following sizes: 36x72 (Standard), 42x84, 48x96
36” Tall x 96” Wide
STARTER 36x96 POWERPOINT POSTER TEMPLATE This free PowerPoint poster template is designed for a standard 3x8 foot poster presentation. It’s the widest one you can use on a three foot tall presentation board. It has five columns. This scientific poster template can be printed at the following sizes: 96x36 (Standard), 24x64
42” Tall x 60” Wide
STARTER 42x60 POWERPOINT POSTER TEMPLATE This free PowerPoint poster template is designed for a standard 3.5x5 foot poster presentation. This PowerPoint research poster template is suitable for most poster presentations. It can accommodate moderate to large amounts of content. This scientific poster template can be printed at the following sizes: 42x60 (Standard), 36x51.42, 48x68.57
42” Tall x 72” Wide
STARTER 42x72 POWERPOINT POSTER TEMPLATE This free PowerPoint poster template is designed for a standard 3.5x6 foot poster presentation. This PowerPoint research poster template is for a medium size poster. It is suitable for most poster presentations. It can accommodate moderate to large amounts of content. This scientific poster template can be printed at the following sizes: 42x72 (Standard), 36x61.70, 48x82.28
42” Tall x 90” Wide
STARTER 42x90 POWERPOINT POSTER TEMPLATE This free PowerPoint poster template is designed for a standard 3.5x7.5 foot poster presentation. This PowerPoint research poster template is for a large size poster. It is suitable for most poster presentations. It can accommodate moderate to large amounts of content. This scientific poster template can be printed at the following sizes: 42x90 (Standard), 36x77.14, 44x94.28
44” Tall x 44” Wide
STARTER 44x44 POWERPOINT POSTER TEMPLATE This free PowerPoint poster template is designed for a standard 3.7 x 3.7 foot poster presentation. This PowerPoint research poster template is for a medium size poster. It is suitable for many poster presentations. It can accommodate moderate amounts of content. This scientific poster template can be printed at the following sizes: 44x44 (Standard), 36x36, 42x42, 48x48
48” Tall x 72” Wide
STARTER 48x72 POWERPOINT POSTER TEMPLATE This free PowerPoint poster template is designed for a standard 4x6 foot poster presentation. This PowerPoint research poster template is for a medium/large size poster. It is suitable for most poster presentations. It can accommodate moderate to large amounts of content. This scientific poster template can be printed at the following sizes: 48x72 (Standard), 24x36, 42x63
48” Tall x 48” Wide
STARTER 48x72 POWERPOINT POSTER TEMPLATE This free PowerPoint poster template is designed for a standard 4x4 foot poster presentation. This scientific poster template is a good size for limited available spaces without compromising room for content. This research poster template can be printed at the following sizes: 48x48 (Standard), 36x36, 24x24, 42x42
48” Tall x 96” Wide
STARTER 48x96 POWERPOINT POSTER TEMPLATE This free PowerPoint poster template is designed for a standard 4x8 foot poster presentation. This poster template is for the largest size poster usually allowed in conferences. It can accommodate a lot of content. You can use this template if you also have a large number of photos, tables, charts, and text. This scientific poster template can be printed at the following sizes: 48x96 (Standard), 24x48, 42x84, 36x72
40” Tall x 30” Wide
STARTER 40x30 POWERPOINT POSTER TEMPLATE This free PowerPoint poster template is designed for a standard 40x30 inch poster presentation. This vertical poster template can accommodate a moderate amount of content. It can accommodate several photos, tables, charts, and a decent amount of text. This scientific poster template can be printed at the following sizes: 40x30 (Standard), 48x36, 56x42
Free PowerPoint poster templates in metric sizes (cm) for international poster conferences
Thumbnails of posters are shown in proportion to each others’ sizes based on a 200 cm (height) x 100 cm (width) display area, 91 wide x 122 tall.
STARTER 91cmX122cm POWERPOINT POSTER TEMPLATE This free PowerPoint poster template is designed for a standard metric 91 cm by 122 cm scientific poster presentation for international poster sessions. This PowerPoint poster template is essentially a vertical version of a standard 48x36 inch poster presentation. This scientific poster template can be printed at the following sizes: 91 cm x122 cm (Standard 36x48 inches), 76x102 cm
70 Wide x 100 Tall
STARTER 70cmX100cm POWERPOINT POSTER TEMPLATE This free PowerPoint poster template is designed for a standard metric 70 cm by 100 cm scientific poster presentation for international poster sessions. This PowerPoint poster template is for a small size poster poster presentation commonly used at international conferences. This scientific poster template can be printed at the following sizes: 70 cm x100 cm (Standard 27.5x39.37 inches), 100x143 cm
100 Wide x 140 Tall
STARTER 100cmX140cm POWERPOINT POSTER TEMPLATE This free PowerPoint poster template is designed for a standard metric 100 cm by 140 cm scientific poster presentation for international poster sessions. This PowerPoint poster template is for a small size poster poster presentation commonly used at international conferences. This scientific poster template can be printed at the following sizes: 100 cm x140 cm (Standard 39.37x55.12 inches)
1 Meter x 1 Meter
STARTER 100cmX100cm POWERPOINT POSTER TEMPLATE This free PowerPoint poster template is designed for a standard metric 1 meter by 1 meter scientific poster presentation for international or domestic poster sessions. This template is commonly required at the Keystone Symposia research poster conferences. This scientific poster template can be printed at the following size: 100 cm x 100 cm (Standard 39 x 39 inches). Any square size up to 121 x 121 cm
100 Wide x 200 Tall
STARTER 100cmX200cm POWERPOINT POSTER TEMPLATE This free PowerPoint poster template is designed for a standard metric 1 meter by 2 meter scientific poster presentation for international or domestic poster sessions. This scientific poster template can be printed at the following size: 100 cm x 200 cm (Standard 39 x 78 inches)
STARTER A0 POWERPOINT POSTER TEMPLATE This free PowerPoint poster template is designed for a standard metric A0 scientific poster presentation at a 841mm x 1189mm size for international or domestic poster sessions. This scientific poster template can be printed at the following size: 46.81 inches x 33.11 inches
STARTER A1 POWERPOINT POSTER TEMPLATE This free PowerPoint poster template is designed for a standard metric A1 scientific poster presentation at a 594mm x 841mm poster size for international or domestic poster sessions. This scientific poster template can be printed at the following size: 23.39 inches x 33.11 inches
VIRTUAL POSTER PRESENTATION
STARTER POSTER TEMPLATES These free PowerPoint poster templates are designed for screen presentations at virtual meetings Virtual - Standard Screen (4:3 Ratio) Virtual - Wide Screen (16:9 Ratio)

Virtual poster sessions for conferences and meetings of all sizes
If you are a meeting organizer we can help you set up a virtual poster session, free yourself from managing poster submissions and provide your meeting's attendees with a versatile presentation platform that will meet all your requirements.
Five good reasons to print your poster with PosterPresentations.com
Amazingly fast printing: Experience amazingly fast printing with us! If you place your poster order between Monday and Friday before 3pm Eastern time (noon Pacific time), we'll ship it out the same day. You can expect your delivery within one, two, or three business days. Plus, if you give us an additional two business days, we'll provide free shipping! Top-Quality Materials: We take pride in using the finest materials available in the industry. Our prints are produced on high-quality photographic papers, vinyls, and exquisite fabrics. In fact, we were the pioneers of fabric printing for research posters in the USA back in 2008. Reliable Customer Support: Rest assured that we don't simply print whatever you send us. We ensure that your files are optimized for the best possible printing results. If we notice any issues, we'll promptly inform you. Your presentation matters as much to us as it does to you. Competitive Pricing with No Surprises: As a professional, you'll find our prices to be competitive, and we never add unexpected last-minute fees. Furthermore, expedited printing is always included at no extra cost. For students, our prices are among the lowest nationwide. Group Discounts Available: Place a group order with us and not only will you enjoy free shipping, but also discounts that can beat most of our competitors. Feel free to reach out to us at 510.649.3001 for more information.
PosterPresentations.com 2117 Fourth Street STE C Berkeley California 94710 USA
Copyright © 2024
Poster Printing
Research paper posters
Fabric posters
Trifold poster boards
Rollup banners
Dry-erase whiteboards
PowerPoint poster templates
Poster-making tutorials
Google Slides support
Terms and Privacy
Poster design services
New Services
Virtual poster meetings
- Virtual poster handouts
IMAGES
VIDEO
COMMENTS
A scientific poster is a visual presentation that summarises your research findings and is typically displayed at conferences or academic events. Presenting one can be intimidating, but it's a valuable opportunity for feedback and confidence-building. Check out our top 9 top tips for successfully presenting your poster at a scientific conference.
The body of your poster should have a minimum 24 point font. Viewers should be able to read your smallest text from a few feet away. The title of your poster should have a 50+ font size, depending on the size of your poster and the length of the title. Do not use all uppercase letters for the title or body of the poster.
vii. Definition is used when a subject requires the understanding of terms, ideas, or phenomena, while Redefinition gives new understanding or new meaning to a topic. Sections to consider including in a poster. Depending on the event, sections may be predetermined, but here are examples of standard headers and the type of content for each:
Step 3: Write the content. Write or rewrite the content for the sections in your poster presentation. Use the text in your research paper as a base, but summarize it to be more succinct in what you share. Don't forget to write a catchy title that presents the problem and your findings in a clear way.
Poster presenters should dress professionally and understand all parts of their poster. Most poster presentations take place in a large room with dozens to hundreds of individual poster presentations occurring simultaneously. A typical presentation lasts 5-15 minutes. Typical audience size for an individual poster presentation will be 1-5 people.
A GUIDE TO AN EFFECTIVE POSTER PRESENTATION. Educati onal Service Division ASHP. 4500 East West Highway, Suite 900. Bethesda, Maryland 20814. Telephone: 301 664 8682. [email protected]. 2019 American Society of Health System Pharmacists, Inc. ASHP® is a service of the American Society of Health System Pharmacists Inc. - Registered in the U.S ...
Practice a 1- to 2-minute pitch until you feel comfortable. The poster and your pitch must be aimed at the audience that will be present. The clearer and more rational your poster layout, the easier it will then be for you to make a strong pitch. —Srinivas.
Stick to a color scheme. If you'd like to use a few different colors in your poster, stick to a color scheme that includes two or three shades. Then use them in a consistent pattern. For example, dark green for headings, light green for subheadings and yellow for section borders.
1.Poster navigation is explicit. (uses numbers or visual anchors) The study objectives are clearly stated and main points are labeled and easy to find. 1.5 inches of white space is around all poster edges. White space is organized and only 30-50% of the poster features text. 2.Images are properly edited, prepared, and inserted. Each image or data
Posters are a key component of communicating your science and an important element in a successful scientific career. Posters, while delivering the same high-quality science, offer a different medium from either oral presentations [] or published papers [], and should be treated accordingly.Posters should be considered a snapshot of your work intended to engage colleagues in a dialog about the ...
A. Poster Dimensions Requirements & Set-Up Procedures. 1. Poster size may be no more than 4 feet by 3 feet (i.e., length is no more than 4 feet. and the width is no more than 3 feet). Oversized posters will obscure an adjacent poster and will be rejected. Computer display equipment, sound or projection equipment, or freestanding displays are ...
Presentation. Prior to the poster session, you should prepare and practice a 1-2 minute "elevator pitch" or "lightning talk" about your research project. In preparing for your presentation, think about how much information can reasonably be conveyed in 1-2 minutes. Since your poster already contains a lot of information, your presentation ...
Conclusions. Effective research posters should be designed around two or three key findings with accompanying handouts and narrative description to supply additional technical detail and encourage dialog with poster viewers. Keywords: Communication, poster, conference presentation. An assortment of posters is a common way to present research ...
A poster presentation usually includes two elements: a poster; a brief verbal explanation of the poster content or topic (often less than 5 minutes). A poster will generally be placed alongside other students' posters on a wall or an online platform, where audience members can view it. In some poster presentations, there may also be opportunity ...
The most common poster size used for academic conferences is the A0 size, which measures 33.1 inches by 46.8 inches (or 841mm x 1189mm). However, depending on the conference location, different size standards may be used, such as US letter size, which measures 8.5 inches by 11 inches (or 216mm x 279mm).
For In-person Posters Only. Create a poster presentation; print and trim final version to a size of 40" x 32" (102 cm x 81 cm); landscape or portrait orientation. Prepare a short pitch discussing the poster presentation (less than 3 minutes is recommended) Share your work with visitors and evaluators. In-person UURAF Presenter Guide.
Be professional. Take your time to prepare presentation. Easy to understand tell a story. Explain the relevance of your research. Respect the "5-minute presentation". Practice. Be well-prepared. Check your audio and connection before your presentation.
Posters are a legitimate and popular presentation format for research and clinical vignettes. They efficiently communicate concepts and data to an audience using a combination of visuals and text. Most scientific meeting planners take advantage of the popularity and communication efficiency of poster presentations by scheduling more poster than oral presentations.
Scientist's guide to poster presentations. New York: Kluwer Academic/Plenum Pub. Nicol, A. A. M., & Pexman, P. M. (2003). ... longest length PowerPoint can get…otherwise you have to design proportionally. See the "Tips" section for details. Be sure the slide is oriented Landscape. Then, OK.
The easiest way to accomplish this is to just divide your width and height by 2. For example, if you want a 72" x 48" poster, set up your document at 36" x 24". As explained in Images, Charts, and Graphs, you should make sure all the elements of your poster look good when zoomed in 100%. If you plan on getting your poster printed at ...
Medium poster: 18" x 24". Large posters: 24" x 36" or 27" x 39". Once you've decided on your poster size, set the dimensions in PowerPoint. To do this, open PowerPoint and navigate to the "Design" tab. In the "Customize" group, select "Slide Size." Select "Custom Slide Size" from the dropdown menu.
Each conference publishes poster session guidelines indicating the space they are making available for poster presentations. You would need to follow their instructions, or you may have a poster that is too big or too small for the provided space. It is common for conferences in the United States to provide a 4x8 foot space (48x96 inches) to ...
01. Follow the guidelines provided by the conference organizers to choose the maximum allowable size for your poster. Use the drop-down menu for selection. If unsure of the conference's specified size, opt for the largest size you might consider printing. The representation of the space allowed will adjust accordingly in the dark box on the left.
This free PowerPoint poster template is designed for a standard 4x4 foot poster presentation. This scientific poster template is a good size for limited available spaces without compromising room for content. This research poster template can be printed at the following sizes: 48x48 (Standard), 36x36, 24x24, 42x42.